
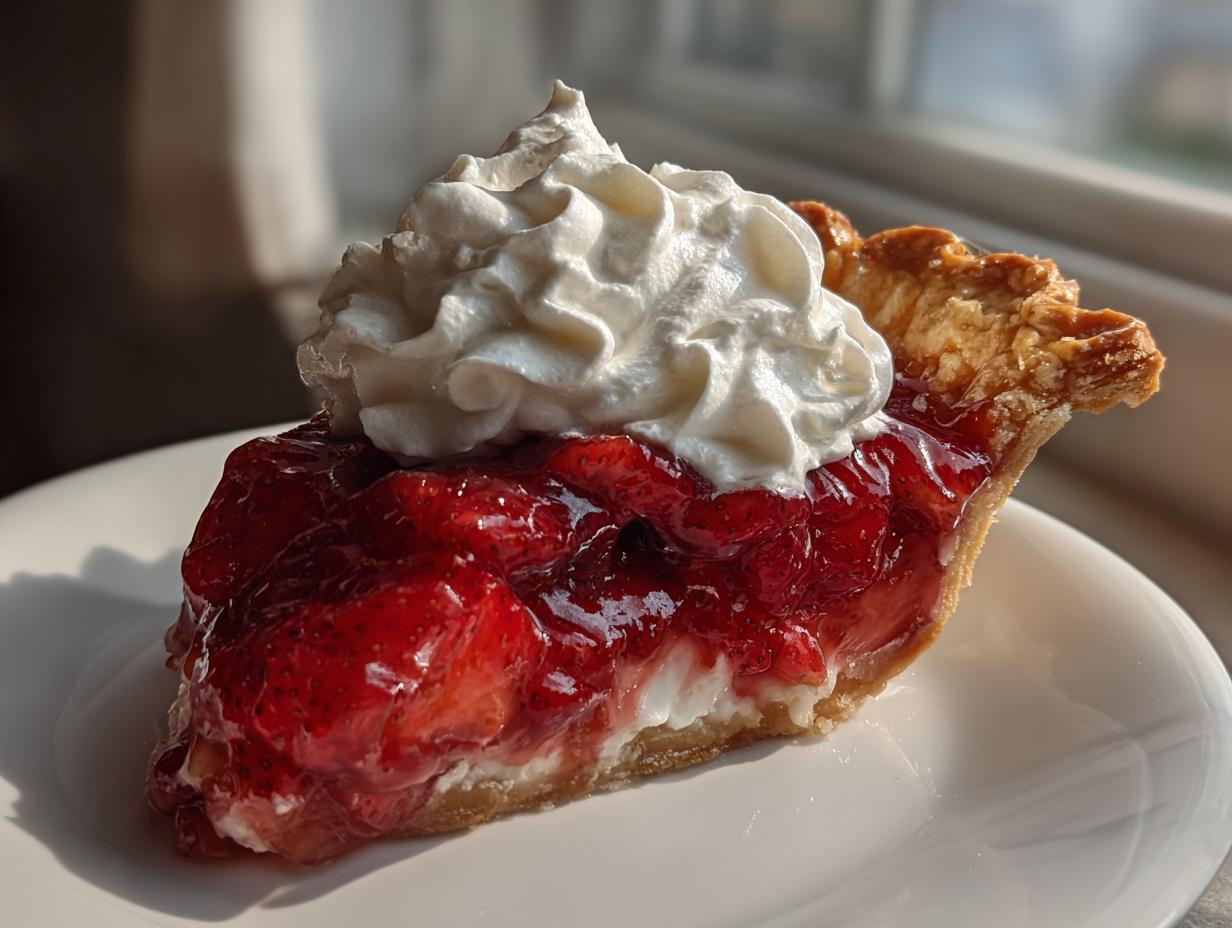
Oh, summer desserts! They are my absolute favorite, and nothing screams sunshine and backyard gatherings quite like a perfect, vibrant fruit pie. But let’s be honest, homemade strawberry pie can be notorious for turning into a soupy mess overnight, right? Ugh, I hate that! That’s why I poured my heart into developing this recipe, Ava Sinclair style—it’s designed to be seriously good food that’s genuinely doable, even when the kids are running wild.
Forget that shaky, watery filling you get with gelatin mixes! This is my ultimate recipe for a fresh strawberry pie, using a cooked, homemade glaze that sets up thick and glossy every single time. We’re talking about structure, incredible flavor, and berries that actually look like they were just picked. If you want a showstopper that won’t collapse when you slice it, you’ve come to the right place. Get ready to impress!
- Why This Fresh Strawberry Pie Recipe is Your New Summer Favorite
- Gathering Ingredients for Your Classic Strawberry Pie
- Step-by-Step Instructions for the Best Strawberry Pie
- Expert Tips for a Perfect Strawberry Glaze Pie
- Serving Suggestions for Your Fresh Strawberry Pie Recipe
- Storage and Reheating Instructions for Strawberry Pie
- Frequently Asked Questions About This Strawberry Pie
- Estimated Nutritional Data for This Fruit Pie Recipe
- Share Your Homemade Strawberry Pie Creations
Why This Fresh Strawberry Pie Recipe is Your New Summer Favorite
I needed a Fresh Strawberry Pie Recipe that truly honored the beautiful, plump berries we get in June, not drown them in something artificial. That’s exactly what this version delivers! Making this pie is surprisingly straightforward, which is why I’m calling it my new summer favorite. It’s one of those Easy Strawberry Pie options that looks incredibly fancy but comes together fast once the glaze is cooked.
You’re going to love that this method is all about showcasing the fruit, not hiding it. Here’s why this pie beats every other recipe you’ve tried:
- It uses a homemade, cooked glaze, meaning zero gloopy, artificial Jell-O textures—just pure, sweet fruit shine.
- The process is quick—the actual cooking goes faster than you can imagine, leaving plenty of time for chilling. Trust me, if you can whip up a quick fruit filling for my apple pie, you can master this glaze!
- It fits perfectly into my philosophy here: Simple ingredients result in seriously good food that tastes exactly like a classic should.
No Jello Strawberry Pie: The Secret to a Thick Glaze
So, the big difference? We skip the boxed setting agents entirely! Gelatin can sometimes give the filling a rubbery texture, and frankly, the flavor is just ‘meh.’ Instead, we use cornstarch mixed with sugar, water, and lemon juice. Cooking this mixture until it bubbles for a full minute ensures that the starch activates perfectly. This creates the most beautiful, glossy homemade strawberry glaze for pies.
Perfectly Ripe Berries in a Buttery Pie Crust
If you don’t use a spectacular crust, the whole thing falls flat, right? That’s why I insist on using a deeply golden, flaky, buttery pie crust here. It’s the perfect salty-rich counterpoint to the sweet glaze and berries. A crucial tip, my friends: your crust absolutely must be cooled completely before you even think about pouring the filling in. A warm crust means a soggy bottom, and nobody wants that tragedy!
Gathering Ingredients for Your Classic Strawberry Pie
Alright, time to get organized! If you want a show-stopping summer dessert, you need to start with the best building blocks. This whole Old Fashioned Strawberry Pie thing relies on having everything ready to go so we can focus on that perfect glaze. Don’t sweat the prep work; just follow this list exactly, and we’ll be golden.
Here’s what you’ll need to grab for this gorgeous dessert. Keep your eye on those fresh berries!
- 1 (9-inch) fully baked, cooled pie crust (I always suggest an all-butter option for the best flavor!)
- 6 cups fresh strawberries, hulled and halved
- 1 cup granulated sugar
- 1/4 cup cornstarch
- 1/2 cup water
- 1/4 cup lemon juice, fresh squeezed (seriously, use fresh! It brightens everything up.)
- 1 tablespoon butter
- 1 teaspoon vanilla extract
- For the topping: 1 cup heavy whipping cream
- 2 tablespoons powdered sugar (just for sweetening that cream!)
Notes on the Buttery Pie Crust
Since this recipe is all about the filling, we start with a fully prepared crust. If you’re swinging by the store for a ready-made one, please, please, please make sure it’s baked according to the package directions and, this is key, totally cooled down. Warm crust equals instant puddle disaster when you pour that beautiful, hot glaze over it. Zero exceptions on that cooling step!
If you prefer to make yours from scratch—and bless your heart if you do!—I have my favorite recipe for a flaky, buttery pie crust ready for you. Just make sure it is completely cooled, maybe even chilling it for 30 minutes after you pull it out of the oven, before we move on to the glaze assembly. We need structural integrity here, folks!
Step-by-Step Instructions for the Best Strawberry Pie
Okay, you’ve got your ingredients and your perfectly cooled shell waiting patiently. Now for the magic part where we create that unbelievably thick, jewel-toned filling! Pay close attention to the cooking times here, because that’s the difference between a stunning centerpiece and a sugary stream running across your plate. We are making sure this homemade glaze for pies sets up like a dream.
Making the Homemade Strawberry Glaze Pie Filling
First things first: grab your medium saucepan. No need for a fancy double boiler; a regular sturdy one works just fine. Toss in your granulated sugar and the cornstarch. You have to whisk these dry bits together first! If you dump the water in while they’re in clumps, you’ll be fishing out little white balls later, and we absolutely do not have time for that fuss.
Once that’s smooth, whisk in the water and the fresh lemon juice. Put this mixture over medium heat. Now, you need to stand right there and stir constantly—don’t walk away! Keep stirring until it gets thick, thick, *thick*, and starts bubbling up. The crucial bit: let it boil hard for a solid minute while you keep stirring. That minute is what tells the cornstarch, “Hey, do your job and get firm!” Take it off the heat right after that minute. Toss in that final tablespoon of butter and the vanilla. Stir until that butter melts right in. Now, let it hang out on the counter for about 15 minutes. It needs to cool just enough so it won’t totally cook your fresh berries, but it shouldn’t be cold either.
Assembling and Chilling Your Strawberry Pie
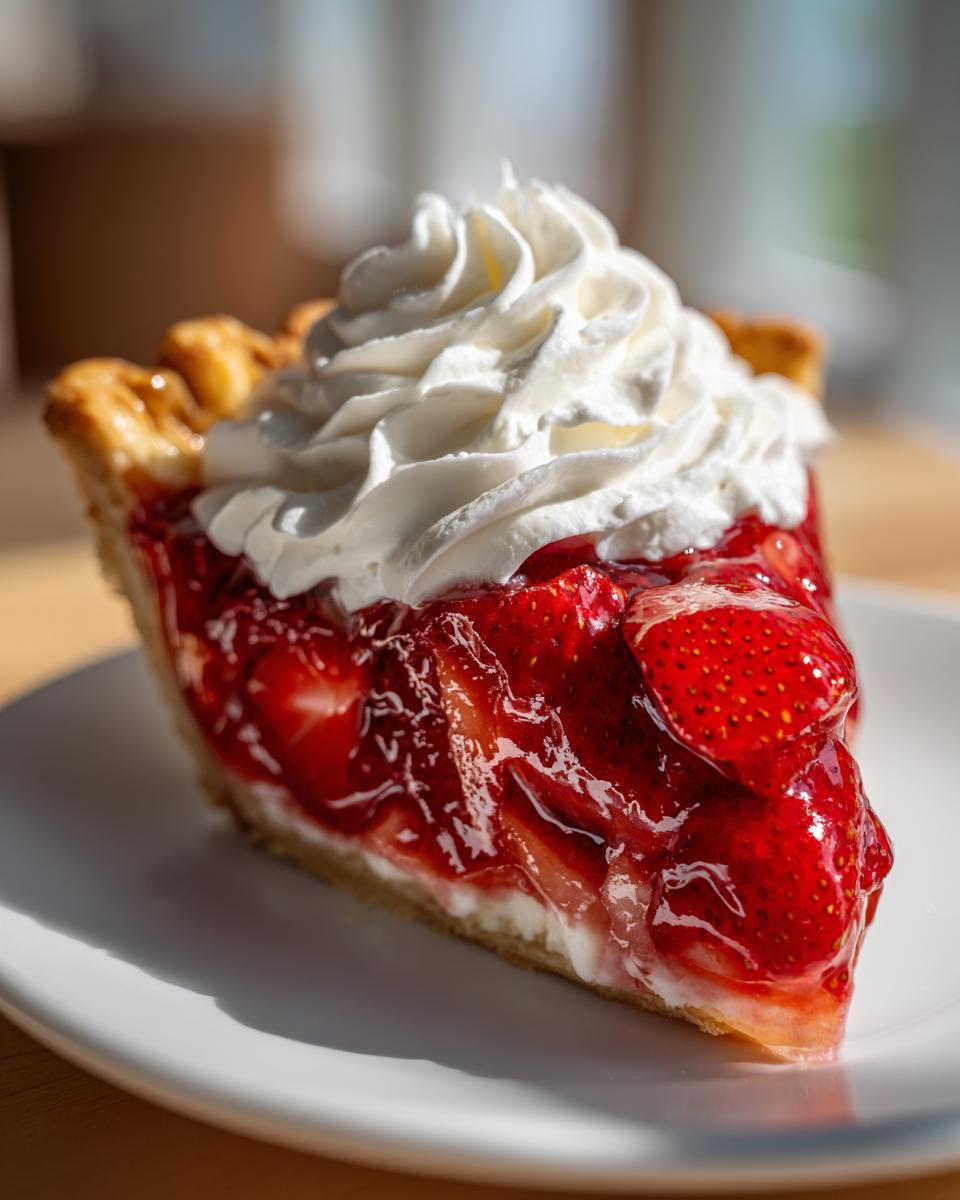
This is where things come together in one glorious bowl. Take your beautiful halved strawberries (6 cups!) and gently fold them into that slightly warm glaze. Use a rubber spatula and be gentle; we want them coated, not mushed! Spread that whole glorious mixture evenly into your cooled pie crust. It might look generous, but it will settle down nicely.
Now, here’s the final test of patience for this strawberry pie: it needs to chill. Seriously, put it in the fridge for at least three full hours. If you try to slice it sooner? Disaster! Those three hours let the cornstarch do its final setting magic. Once it’s wonderfully firm and jiggly in the best way possible, it’s ready for its creamy crown.
Expert Tips for a Perfect Strawberry Glaze Pie
We’ve mastered the best way to prevent that sad, runny pie scenario that plagues so many bakers. When I first started chasing that truly Old Fashioned Strawberry Pie flavor, I had at least three pies end up weeping all over my refrigerator shelf. It was heartbreaking! I realized the issue wasn’t the berries; it was the temperature gap when mixing the glaze and the fruit. This cooked cornstarch filling solves that, but here are a few extra tricks to make your Strawberry Glaze Pie shine like a ruby!
Choosing and Preparing Your Fresh Strawberries
You want berries that look vibrant and smell sweet, but don’t go for the softest ones in the basket. Soft berries break down too fast once they hit that warm glaze. Look for firm, deeply red fruit. I usually go for medium-sized berries—halving them gives you that perfect bite.
Here’s a procedural tip that really changed my game: try not to wash your strawberries until you’re ready to cut them. I know, I know, we usually wash everything first, but fresh fruit just absorbs water like a sponge. If they soak for an hour before you halve and mix them, that extra water seeps into the glaze and we’re back to soupy mess territory! Wash, hull, and halve them right before they go into that warm glaze mixture. If you ever get frustrated with fruit setting, remember how important it is to cook out that moisture—it’s the same principle I use when making my easy raspberry jam with no pectin!
Optional Cream Cheese Layer for Strawberry Cream Cheese Pie
If you want to take this pie from ‘classic summer treat’ to ‘decadent showstopper,’ you absolutely have to try adding a thin layer of cream cheese spread on the bottom of that baked crust before you pour in the strawberries. It adds such a lovely, tangy counterpoint!
To make this layer for your Strawberry Cream Cheese Pie variation, just take 8 ounces of cream cheese—make sure it’s completely soft, not even slightly firm—and beat it with about 1/4 cup of powdered sugar until it’s perfectly smooth. Spread that glorious blanket evenly across the bottom of your cooled crust. Then, you just pour the strawberry mixture right over the top as usual before churning it in the fridge. It adds a wonderful texture contrast, trust me!
Serving Suggestions for Your Fresh Strawberry Pie Recipe
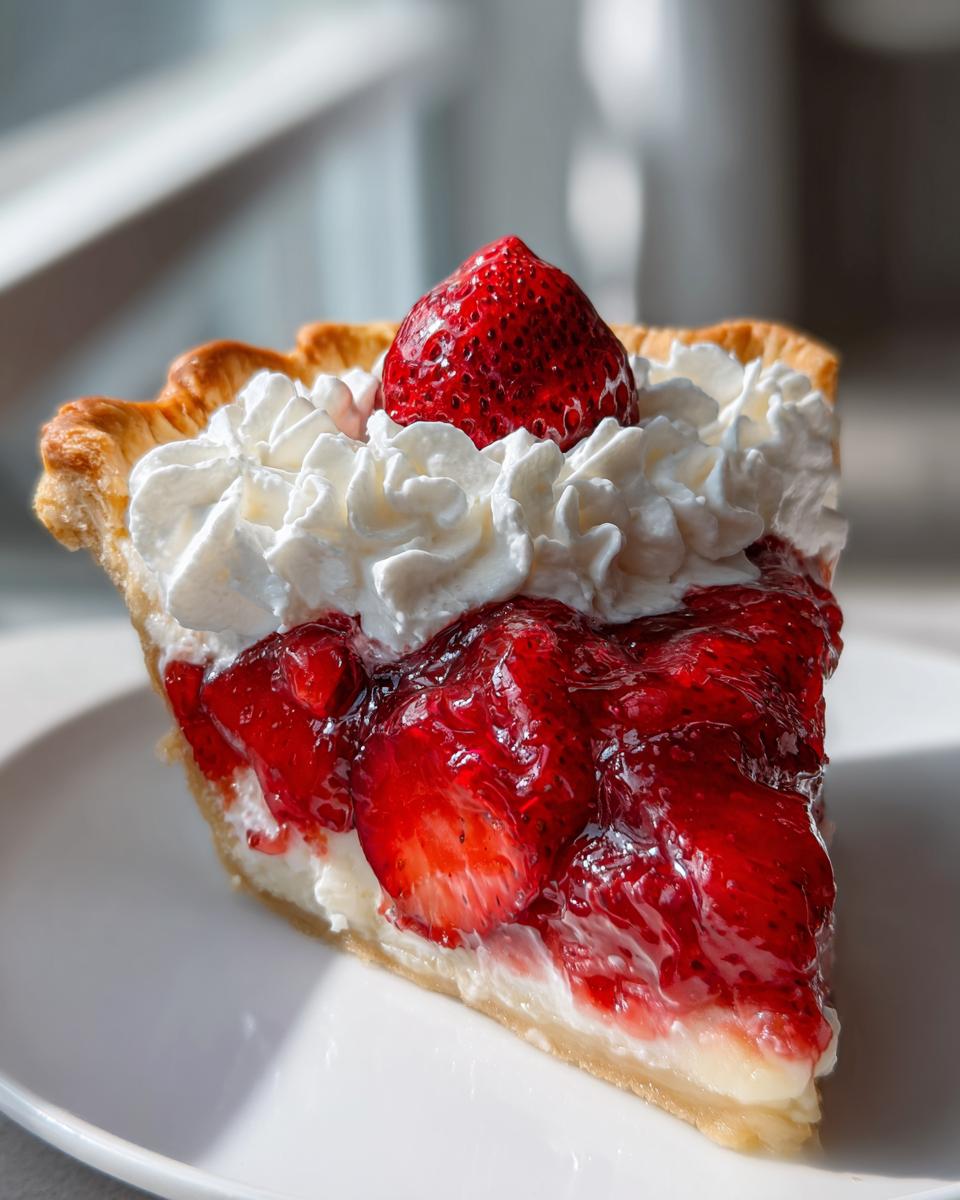
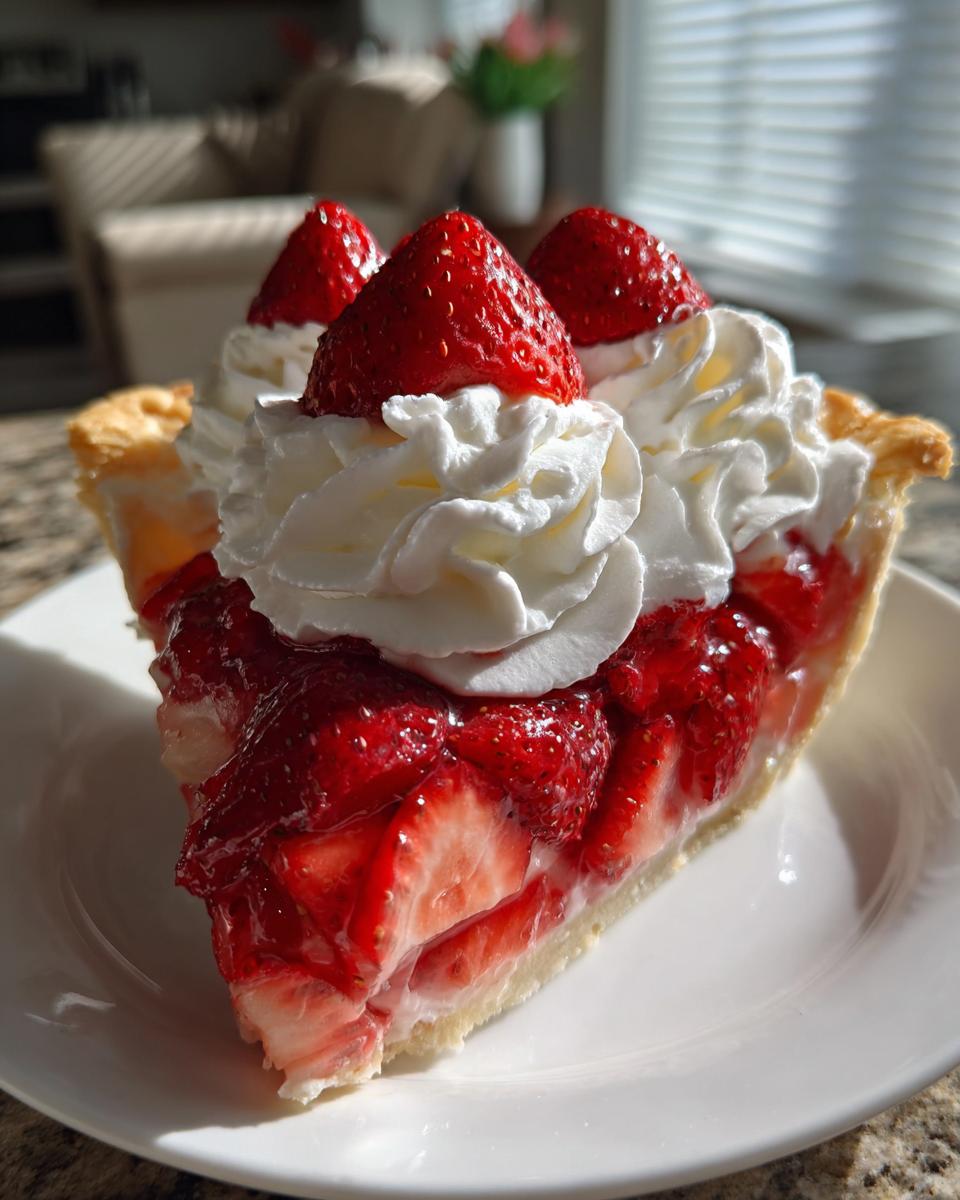
Now that your beautiful, firm strawberry pie is perfectly chilled and ready to go, let’s talk presentation! That homemade whipped cream we topped it with is essential, obviously, but sometimes you just want to kick things up a notch for a special gathering. Don’t be afraid to treat this pie like a canvas!
If you want a little textural crunch, a sprinkle of toasted, slivered almonds right around the edge looks incredibly fancy, or a light dusting of finely shaved dark chocolate contrasting with the bright red berries is just stunning. For an extra summery kiss, you can always zest a little orange right over the top before you serve the first slice. It really pops against the strawberries! If you happen to have extra berries, these pair wonderfully with my fluffy strawberry pancakes the next morning!

Storage and Reheating Instructions for Strawberry Pie
This is the part where I have to give you the tough love, guys. Because this strawberry pie is packed with so much fresh fruit, it’s not built for long-term storage like a dense apple pie or a pumpkin pie. We worked so hard to get that glaze firm, and we don’t want to undo all that work!
Here’s the deal: this pie is honestly best eaten the same day you make it. If you’re serving it for a big afternoon party, assemble it in the morning and serve it later that day. If you absolutely must make it ahead, cover it loosely with plastic wrap—don’t press it right onto the surface, or it’ll stick to the whipped cream—and pop it in the refrigerator immediately.
It will hold up decently for about 24 hours in the cold, maybe pushing 48 hours if your berries were extra perfect and firm, but after that, you risk the structure softening. The glaze starts to weep a little, and the crust will definitely get softer on the bottom. That’s just the nature of fresh fruit pies, unfortunately!
And please, don’t even think about reheating this! Putting it in the oven will turn that beautiful glaze into a soupy mess instantly, and it will melt your lovely whipped cream topping into oblivion. If it’s cold, just serve it cold straight from the fridge. That’s when the texture is exactly as we want it!
Frequently Asked Questions About This Strawberry Pie
I totally get it; when you dive into a new recipe, you always have a few nagging questions about substitutions or storage. Don’t you worry one bit! We tackle all the little hitches so you can focus on enjoying this amazing Easy Summer Dessert. Here are the most common things people ask me about this Fresh Strawberry Pie Recipe.
Can I make this strawberry pie ahead of time?
This is a good question for planning parties! Like I mentioned before, this pie is packed with fresh fruit, so it really prefers to be eaten on the day it’s made. If you have to make it ahead, assemble the entire thing—crust, glaze, berries, and whipped cream—and chill it immediately. It should hold up well for a full 24 hours in the fridge, but any longer and you risk that gorgeous crust getting a little soft on the bottom. It’s best enjoyed ASAP!
What if I only have frozen strawberries? Can I use those instead?
Oh, this is a tricky one! For this specific pie, I strongly recommend sticking to fresh berries. Frozen strawberries have a ton of extra water locked inside them. Even if you thaw them perfectly, that water leaches out during the mixing process, and it will absolutely thin out your beautiful cornstarch glaze, no matter how long you boil it. If you must use frozen, you’d have to thaw them completely, drain them *really* well (maybe even press them between paper towels), and use about 20% fewer berries overall. But trust me, it truly shines with fresh ones!
How can I absolutely prevent a soggy bottom crust?
We hate the dreaded soggy bottom! Since this filling is wet (even though it’s set up nicely), you need a barrier. If you’re using a store-bought crust, sometimes brushing the inside with a thin layer of melted white chocolate or even an egg white right after baking and letting that set helps seal it up before you add the filling. If you’re making your buttery pie crust from scratch, making sure you blind-bake it long enough for it to dry out completely is key. A thoroughly baked crust resists moisture much better than a pale one.
Is there a way to make this pie creamy without the optional cream cheese layer?
That cream cheese layer is tasty, but if you’re avoiding dairy or just want a cleaner fruit profile, you can definitely skip it! However, if you want *some* creamy element nestled under the berries that isn’t cream cheese, you can try a thin layer of vanilla pastry cream, or even just spread a quarter-cup of softened vanilla ice cream right over the bottom of the cooled crust before you add the glaze. Use that ice cream right before you chill the pie, okay? It adds a nice little buffer layer!
Estimated Nutritional Data for This Fruit Pie Recipe
Okay, sweet friends, wrapping up our creation process! Anytime you’re making something this delicious from scratch, the numbers can shift around based on the exact size of your strawberries or how much butter you used in that crust. So, remember, these values are just estimates based on the ingredients listed in this specific recipe. This isn’t nutrition science, just helpful guidance for when you’re making all these wonderful Easy Summer Desserts!
Here is the breakdown per slice (the recipe yields 8 servings):
- Calories: Around 350
- Fat: About 18g (much of that delicious fat is coming from that buttery crust we love so much!)
- Carbohydrates: Roughly 45g
- Protein: Approximately 4g
We’ve also got around 35g of sugar in there, mostly from the fruit and the granulated sugar that helps our glaze set up so beautifully. It’s an indulgence, sure, but when it tastes this good and you made it yourself? Totally worth it! Enjoy every bite!
Share Your Homemade Strawberry Pie Creations
That’s it! You’ve done it! You’ve conquered the potential runniness, tamed the berries, and created something truly special. Honestly, seeing that perfect, glossy strawberry pie sitting in your kitchen—fresh, vibrant, and ready for company—is the best feeling in the world, isn’t it?
Now, Ava in me comes out, wanting to hear all about it! If you made this Old Fashioned Strawberry Pie, I truly beg you to come back here and tell me how it went down. Did the glaze set perfectly for you? Did you go for the cream cheese layer? Don’t keep those victory moments to yourself!
Please take a moment to leave the recipe a quick star rating right down below. Those ratings help other busy home cooks like you decide if this recipe is worth their precious time. And if you snap a picture of your beautiful creation—maybe with a big dollop of whipped cream on top—I would absolutely love to see it! You can tag me on social media; seeing your baking success is the real reason I keep developing these recipes.
Thank you so much for trusting Completely Yummy with your summer baking adventure. If you ever want to know more about my journey reclaiming the kitchen or just want another seriously good, doable recipe, feel free to check out my About Page!
PrintThe Best Fresh Strawberry Pie with Homemade Glaze (No Jello)

Make this classic, old-fashioned fresh strawberry pie using a simple, cooked cornstarch glaze instead of gelatin. This recipe delivers a thick, glossy filling and a flaky crust, making it the perfect summer dessert.
- Prep Time: 25 min
- Cook Time: 10 min
- Total Time: 4 hours 35 min
- Yield: 8 servings 1x
- Category: Dessert
- Method: Chilling
- Cuisine: American
- Diet: Vegetarian
Ingredients
- 1 (9-inch) fully baked, cooled pie crust (all butter recommended)
- 6 cups fresh strawberries, hulled and halved
- 1 cup granulated sugar
- 1/4 cup cornstarch
- 1/2 cup water
- 1/4 cup lemon juice, fresh squeezed
- 1 tablespoon butter
- 1 teaspoon vanilla extract
- 1 cup heavy whipping cream
- 2 tablespoons powdered sugar (for topping)
Instructions
- Prepare your baked pie crust and let it cool completely on a wire rack.
- In a medium saucepan, whisk together the granulated sugar and cornstarch until combined.
- Whisk in the water and lemon juice until smooth.
- Cook the mixture over medium heat, stirring constantly, until it thickens significantly and begins to bubble. Let it boil for one minute, stirring well. This step is important for a firm glaze.
- Remove the saucepan from the heat. Stir in the butter and vanilla extract until the butter melts completely.
- Let the glaze cool for about 15 minutes. It should still be warm but not hot enough to cook the fresh berries.
- Gently fold the halved fresh strawberries into the slightly cooled glaze until they are evenly coated.
- Pour the strawberry mixture into the cooled pie crust. Spread the berries evenly.
- Chill the pie in the refrigerator for at least 3 hours, or until the filling is completely set.
- Just before serving, whip the heavy whipping cream with the powdered sugar until stiff peaks form. Spread or pipe the whipped cream over the top of the chilled pie.
- Slice and serve immediately for the best texture.
Notes
- Use ripe, firm strawberries for the best flavor and to prevent the pie from becoming too watery.
- If you prefer a cream cheese layer, spread 8 ounces of softened cream cheese mixed with 1/4 cup powdered sugar onto the bottom of the cooled crust before adding the strawberry filling.
- This pie is best eaten the day it is made, as the fresh fruit will begin to break down over time.
Nutrition
- Serving Size: 1 slice
- Calories: 350
- Sugar: 35g
- Sodium: 180mg
- Fat: 18g
- Saturated Fat: 10g
- Unsaturated Fat: 8g
- Trans Fat: 0g
- Carbohydrates: 45g
- Fiber: 2g
- Protein: 4g
- Cholesterol: 45mg