
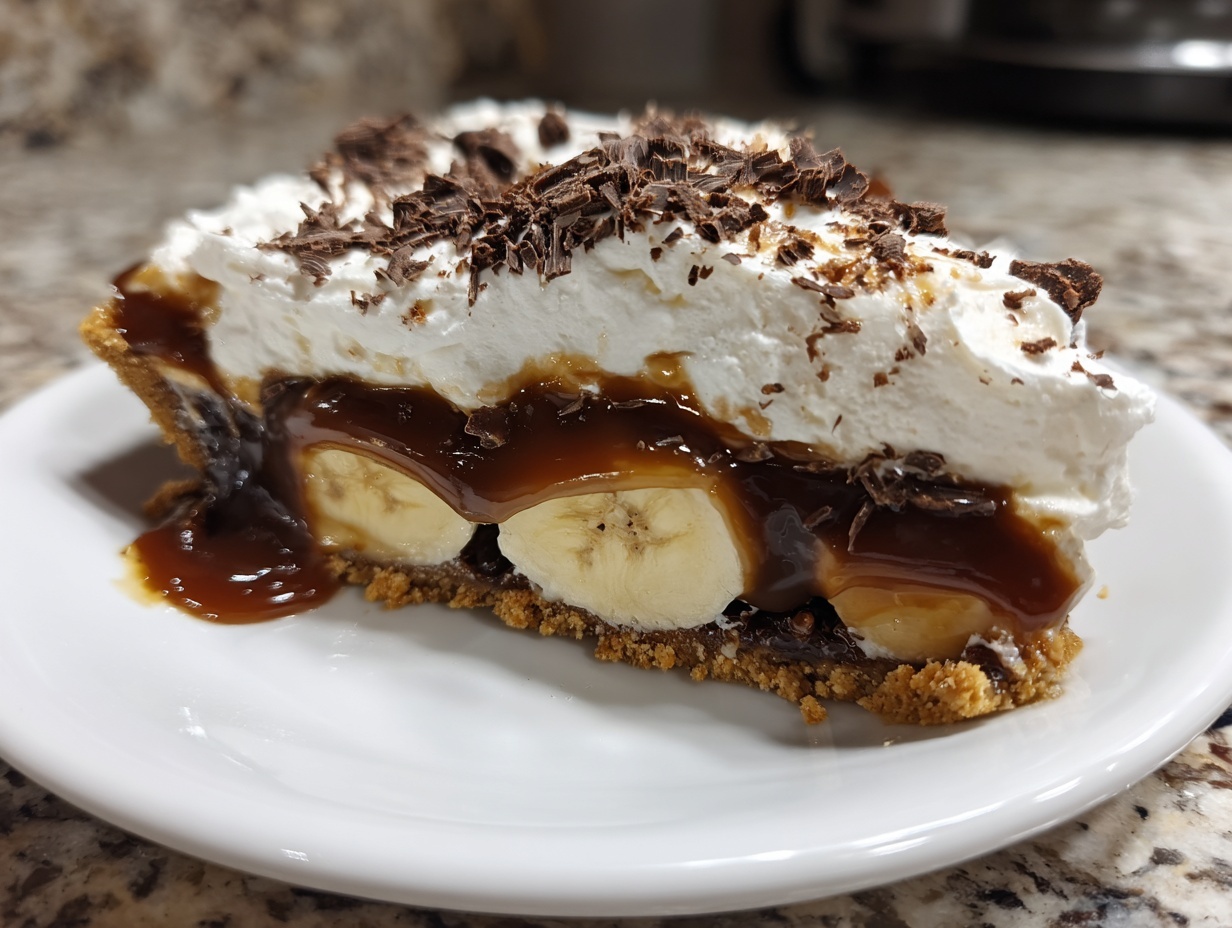
When life gets hectic and you suddenly crave something deeply satisfying but the thought of turning on the oven makes you sweat, you know you need a no-bake hero. That’s exactly how this recipe for the banoffee pie came to be in my kitchen! I was tired of sacrificing amazing flavor just because I didn’t have an extra hour to bake. This is, hands down, the easiest and most delicious no-bake version of this classic english dessert you will ever meet. It layers everything we love—buttery crust, rich caramel, sweet bananas, and fluffy clouds of cream—with minimal fuss. It’s the kind of simple dessert that actually tastes fancy, and I promise it will become your go-to for impromptu gatherings. If you are looking for amazing delicious dessert recipes that require zero oven time, you have found it right here!
- Why This No Bake Banoffee Pie Recipe Works (E-E-A-T Focus)
- Gathering Ingredients for Your Banoffee Pie
- Step-by-Step Instructions for the No Bake Banoffee Pie
- Tips for the Best Banoffee Pie Success
- Make Ahead Dessert and Storage for Your Banoffee Pie
- Serving Suggestions for This Caramel Banana Dessert
- Frequently Asked Questions About Banoffee Pie
- Nutritional Estimates for This Indulgent Sweet Treat
- Share Your Perfect Banoffee Pie Experience
Why This No Bake Banoffee Pie Recipe Works (E-E-A-T Focus)
Listen, I know there are a million ways to make a dessert, but this particular banoffee pie holds a special spot because it delivers on its promise: maximum indulgence with minimum effort. This recipe respects the heart of the original classic english dessert—that gorgeous marriage of banana, toffee, and cream—but we ditch anything fussy. Honestly, the genius here is that we’re relying on quality ingredients and chilling time instead of complicated baking techniques. That’s how we keep things reliable every time you make it, whether you’re new to baking or a seasoned pro.
It’s all about setting you up for success, especially if you’re stressed or short on time. You get that deep, satisfying flavor without ever having to worry about oven temperatures or sinking crusts. It’s the kind of recipe I share when friends ask me for easy weeknight dinners desserts that look like you worked for hours!
Key Features of Our Easy Banoffee Pie
- No-bake convenience—seriously, no oven needed!
- Rich homemade caramel made simply on the stovetop.
- Perfectly balanced fresh banana layers.
- Fluffy, stable whipped cream topping that holds its shape.
Gathering Ingredients for Your Banoffee Pie
Okay, now for the fun part: gathering our supplies! Because this is an easy banoffee pie, you won’t need to run to specialty stores. Everything here is pretty standard for a delicious banoffee pie recipe. But here’s where we earn our bragging rights—it’s all about the preparation, not the buying. Getting these details right makes the difference between just an okay pie and truly amazing, restaurant-quality layers. If you want to save time on the toffee part, I have a great tutorial for making easy homemade caramel recipe, but sticking to the condensed milk method here is super simple too!
For the Buttery Biscuit Crust
You need 300 grams of crushed chocolate chip biscuits—I love the extra chocolate crunch these give! Then, you’ll mix that with 150 grams of salted butter, making sure it’s completely melted before you combine them. That’s it for the base!
For the Homemade Caramel Banana Dessert Filling
This is the heart of our toffee pie! You’ll need two cans (395g each) of caramel condensed milk, which is essentially dulce de leche already done for you. We doctor it up with 100 grams of golden syrup—don’t skip this, or use tightly packed light brown sugar if you need to trade it out—plus 50 grams of salted butter and just half a teaspoon of salt to keep those flavors balanced.
For the Whipped Cream Topping and Garnish
For that beautiful, fluffy cloud on top, grab 300 milliliters of heavy cream. We flavor that with one teaspoon of vanilla essence and one tablespoon of icing sugar for a stable, sweet whipped cream topping. And of course, you must have a dark chocolate block ready for shaving right before serving. Don’t use cocoa powder; shavings are key!
Step-by-Step Instructions for the No Bake Banoffee Pie
This is the part where all that ingredient prep pays off! Because this is a treasure of no oven recipes, we replace baking time with chilling time, which is much better for relaxing, right? This whole process is just a beautiful series of easy layering. Honestly, if you used store-bought dulce de leche for the toffee—which is a totally smart shortcut for a quick dessert—you could probably have this pie assembled in under 20 minutes!
Creating the Graham Cracker Crust Pie Base
First things first: the crust needs to set. In a bowl, combine your 300g of crushed biscuits with the 150g of melted butter. Mix it until it looks like wet sand. Now, take a 9-inch pie dish, and press that mixture *firmly* into the bottom and slightly up the sides. Get right into those corners! You want this base sturdy enough to hold everything up. Once it’s packed down tight, pop it into the refrigerator. It needs a solid chill time—about 20 to 30 minutes—while you work on the luxurious filling.
Making the Rich Toffee Filling
Time to cook our magic sauce! In a small saucepan, throw in those two cans of caramel condensed milk, your golden syrup (or brown sugar), the extra 50g of butter, and that little pinch of salt. Put this over medium heat. Here’s the key: stir constantly! You only want to heat it gently until everything’s melted and smooth, which should take about five to seven minutes. Do *not* let this boil rapidly; we’re just thickening it slightly so it pours nicely. Once it’s glossy and combined, take it off the heat immediately.
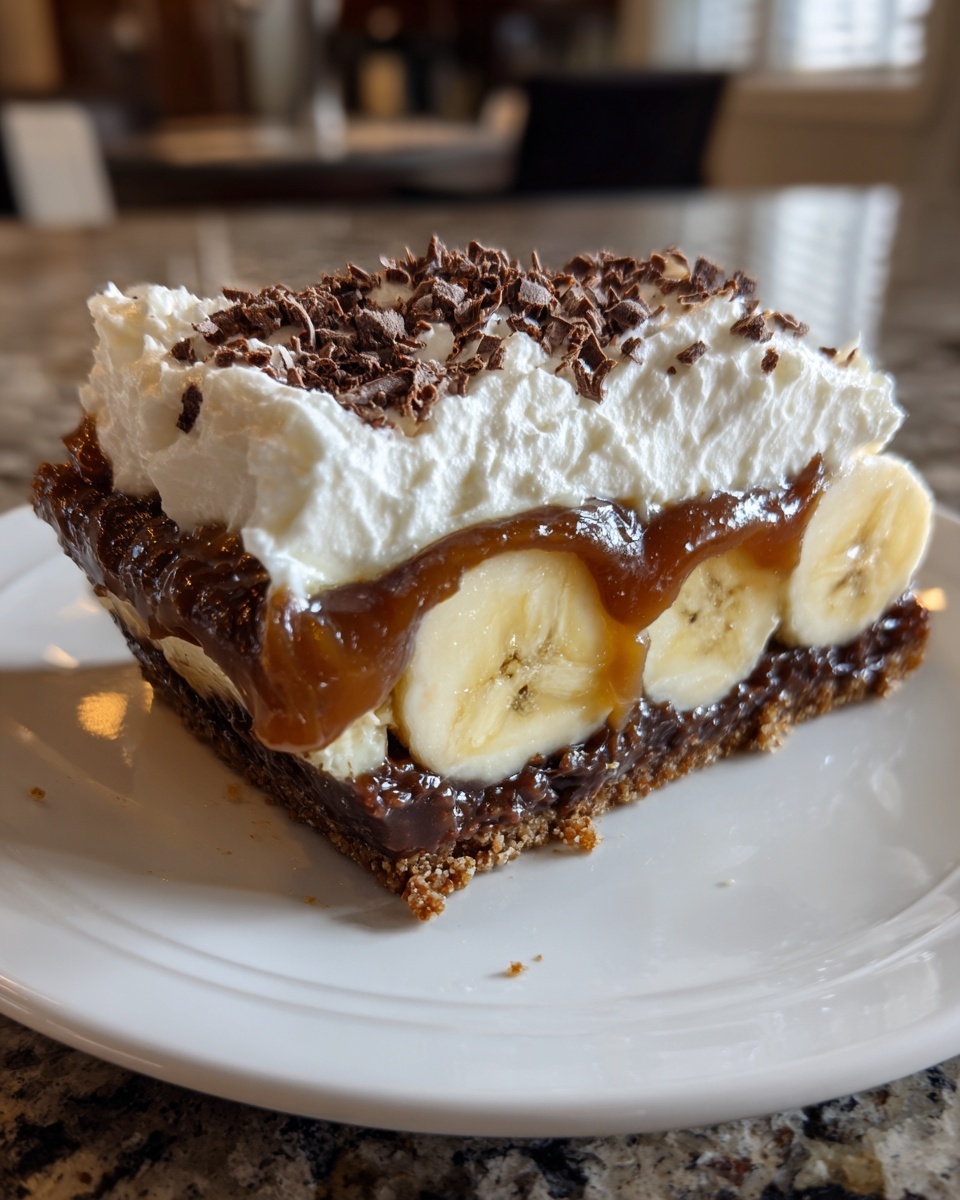
Assembling the Layer Dessert
Once the crust is chilled, pour that warm toffee mixture right over it. Spread it out evenly. Now, you have to be patient here! Let it cool on the counter for a bit, maybe 15 minutes, and then stick the whole thing back in the fridge for at least an hour until the toffee has firmed up completely. While that’s setting, whip up your cream topping—heavy cream, vanilla essence, and icing sugar whipped until you get soft or medium peaks. When the toffee is set, arrange your 3 sliced bananas systematically over that layer. Finally, spread or pipe that glorious homemade whipped cream topping right over the bananas.
Finishing Touches on Your Banoffee Pie
The pie needs one last chill—maybe another hour—to let all those layers truly settle together into one perfect structure. Right before you bring it out to the table? That’s when you grate a generous amount of dark chocolate right over the top! This ensures the chocolate is crisp and fresh. Slice it up, make sure everyone gets a bit of every layer, and serve it cold. Trust me, the wait is worth it!
Tips for the Best Banoffee Pie Success
You’ve done the hard part, but just a couple of little nudges can take this from good to undeniably the best banoffee pie ever. My biggest tip for the toffee layer? Don’t rush the stirring! If you heat it too fast, it can get grainy, and we want smooth, velvety texture for this caramel banana dessert.
Also, slice those bananas just before you layer them on top of the toffee. Bananas tend to brown quickly once exposed to air, and nobody wants a brown layer peeking through their beautiful white whipped cream topping. If you are worried, a quick brush of lemon juice works wonders, though I prefer speed here! I always make sure to have my maple brown sugar cookies recipe ingredients handy for other baking, but for this pie, we keep it simple.
For parties or when you have way more guests than you planned for, this makes incredible banoffee pie cups. Just assemble it all in lovely little jars or ramekins. It looks elegant, and everyone can grab their own without needing a pie server. Easy, right?
Make Ahead Dessert and Storage for Your Banoffee Pie
One of the best secrets about this amazing banoffee pie is that it is truly a dream make ahead dessert. Seriously, this recipe is a lifesaver when you’re entertaining! The layers actually meld together and deepen in flavor if you let them chill for a while. I usually aim to assemble the entire thing—crust, toffee, bananas, and cream—the morning before I plan to serve it. That gives it a good 8 to 12 hours in the fridge to really set up beautifully.
You can store the finished pie, covered tightly with plastic wrap (make sure the wrap isn’t sticking to the whipped cream surface!), in your refrigerator for up to two days. That gorgeous whipped cream topping holds up really well because it has icing sugar mixed in, which helps stabilize it.
Now, about reheating? Don’t even try it! This dessert is meant to be served cold straight from the fridge. Warming it up will turn your lovely firm toffee layer into a runny mess, and the bananas will get mushy. If you have leftovers, just keep them cool and enjoy them cold!
If you’re planning way ahead, you can make the crust and the toffee filling the day before, store them separately in sealed containers, chill them, and then assemble everything, including the bananas and cream, an hour or two before you plan to serve. I love recipes like these Christmas cookie bars that let you do all the heavy lifting early!
Serving Suggestions for This Caramel Banana Dessert
This caramel banana dessert is so rich and satisfying, you don’t need much to go with it! If you serve it after a big dinner, sometimes just a tiny splash of something can cleanse the palate. I absolutely love pairing a slice with a strong, black coffee—the bitterness cuts right through the sweet caramel perfectly.
If you want an alcoholic pairing, a small glass of dark rum or a sweet digestif works beautifully. For a lighter touch, especially after a heavy meal, skip the drinks and just serve the pie alongside a small bowl of fresh raspberries or tart blackberries. That tiny burst of acidity is just what you need before diving into that creamy base. You can also check out my recipe for apple cider moscow mule if you want a nearby seasonal drink option, though I think the coffee is the real winner here!
It’s lovely on its own, really, but fruit and coffee are my secrets to keeping this no bake banoffee pie from feeling too heavy!
Frequently Asked Questions About Banoffee Pie
I always get so many questions after people try this recipe for the first time—it’s just so satisfying! People often wonder how to tweak it or if they can skip certain steps. Don’t worry, I’ve gathered the most common inquiries right here to smooth out any bumps for you.
Can I make a vegan banoffee pie?
That is such a great question! While this specific recipe uses butter and dairy cream, you absolutely can pivot this into a vegan banoffee pie. For the base, find a vegan-friendly biscuit—like plain shortbread or maybe even a good quality vegan chocolate wafer—and use vegan butter or coconut oil to bind it. The biggest swap is the top layer: use a chilled, full-fat can of coconut milk or coconut cream instead of heavy cream. Make sure you scoop only the solidified cream off the top after it’s been chilled overnight (do not shake the can!). Whip that coconut cream with a little maple syrup or icing sugar to replace the dairy whipped cream topping. It works beautifully!
What is the best type of biscuit for a graham cracker crust pie?
In the UK, where this absolutely divine british desserts staple comes from, the standard choice is usually digestive biscuits. They give a slightly wheaty, less sweet base. However, since I use chocolate chip biscuits in my official recipe for that extra layer of indulgence, that’s my top recommendation! If you only have graham crackers on hand, go for it—that is the classic American swap and it works wonderfully well for structure. Just crush them finely and make sure your butter is fully covering all those crumbs so they stick together perfectly when chilled.
It really comes down to what you like best, but any buttery cookie that crumbles well is going to make a fantastic crust!
I’m always experimenting, so if you try a different biscuit, let me know how those banana oatmeal cookies recipe inspired swaps turn out!
Nutritional Estimates for This Indulgent Sweet Treat
Now, I have to give you a little disclaimer right off the bat, because that’s just good practice. This banoffee pie is absolutely one of my favorite desserts—it’s on the indulgent side, which is why we normally only make it for special occasions or when we desperately need a win! The nutritional information I’m giving you here is just an estimate based on the ingredients listed in the recipe.
Different brands of condensed milk or the type of biscuit crumbs you use can change these numbers up, so view this as a guideline rather than gospel. If you need specific counts for health tracking, I always recommend plugging the exact brands you used into an online calculator. But for a general idea of what you’re diving into with one slice of this creamy, heavenly treat, here are the rough numbers:
- Calories: Around 550 per slice
- Fat: About 35 grams
- Carbohydrates: Roughly 58 grams
- Protein: About 6 grams
It’s definitely a rich dessert, packed with satisfying fat and sugar—totally worth it, in my book! If you are looking for ways to make your mornings lighter, you should check out my favorite quick-healthy-breakfast recipes. But when it comes to this layer dessert, we lean into the decadence!
Share Your Perfect Banoffee Pie Experience
Well, that’s it! We’ve successfully navigated turning simple ingredients into what I truly believe is the absolute best banoffee pie out there. Seriously, I want to know how it went for you! Did the caramel set up beautifully? Did the kitchen fill with that sweet, buttery aroma?
I put everything I know into making sure this easy banoffee pie is foolproof, but your experience is what matters most to me. Whether you tried making the banoffee pie cups for a party or just devoured the whole thing yourself (no judgment here!), please let me know in the comments below. Five stars is always appreciated if it earned that ranking on your dessert table!
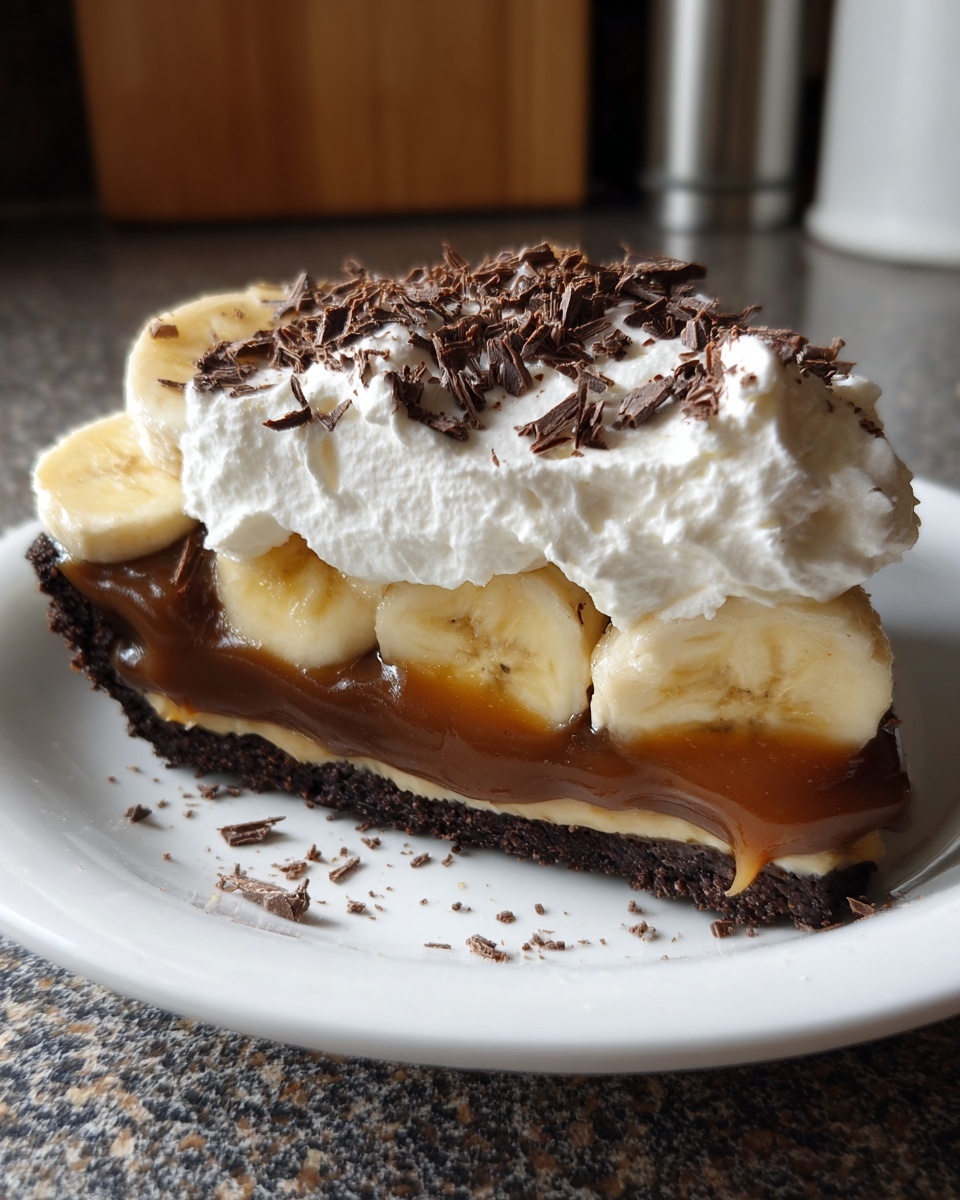
We are building a kitchen community here, and seeing your successes makes my day. If you took a picture of your stunning finished pie—especially those gorgeous chocolate shavings contrasting with the white cream—please tag me on social media! I love seeing my recipes come to life in your homes. If you want to see how other people made theirs, you can always check out some inspiration from sites like House of Nash Eats, too.
Don’t be shy! If you had any little hiccups or want to share a substitution you loved, drop a line in the comments section or reach out to me directly if you have questions via my contact page. Happy serving, and I hope this indulgent sweet treat brings a little joy to your day!
PrintThe Best No-Bake Banoffee Pie Recipe

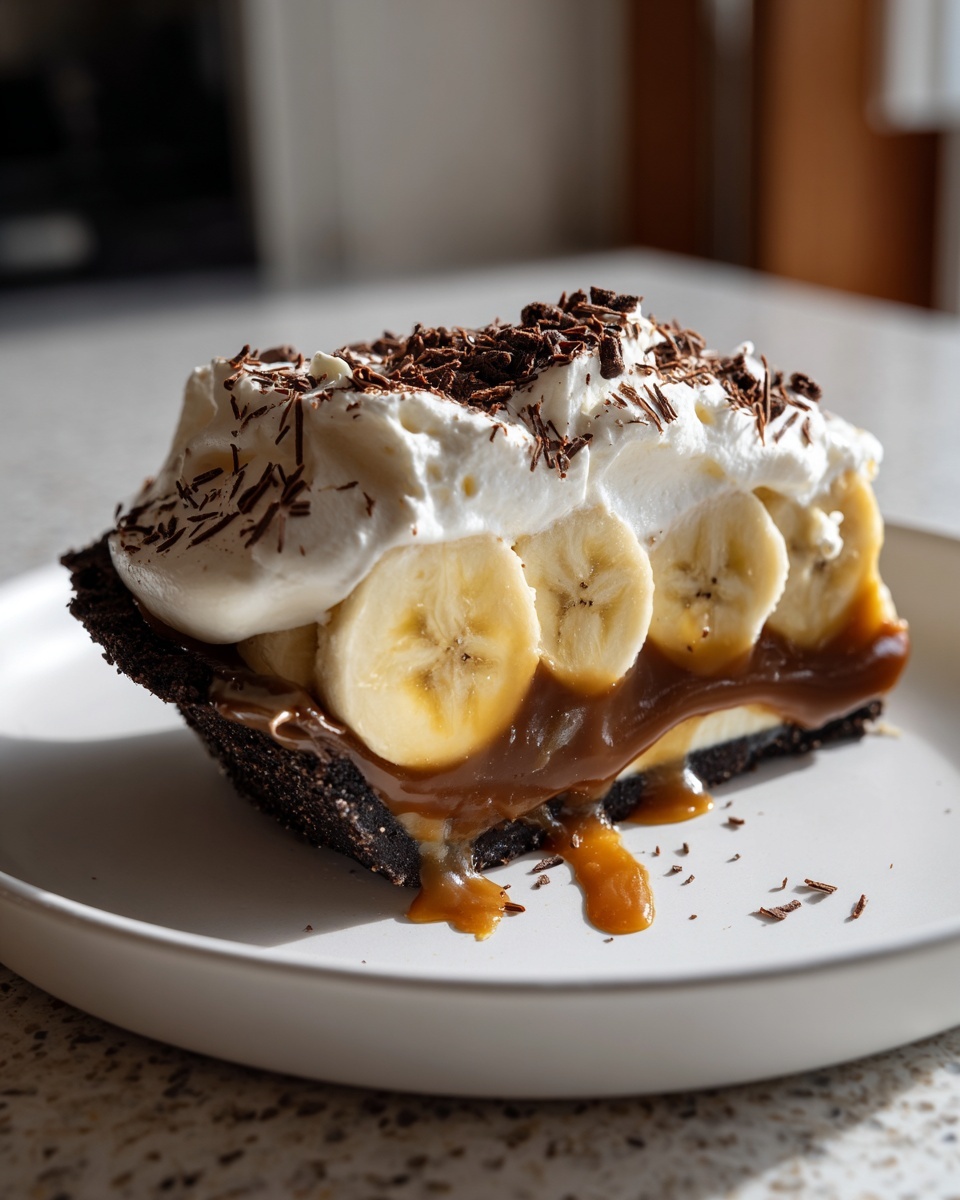
You can make this classic English dessert with layers of buttery crust, sweet toffee, fresh bananas, and whipped cream without turning on your oven. This is an easy make-ahead dessert perfect for any gathering.
- Prep Time: 30 min
- Cook Time: 10 min
- Total Time: 40 min plus 2 hours chill time
- Yield: 8 servings 1x
- Category: Dessert
- Method: No Bake
- Cuisine: British
- Diet: Vegetarian
Ingredients
- 300g crushed chocolate chip biscuits
- 150g salted butter, melted
- 2 cans (395g each) caramel condensed milk (dulce de leche)
- 100g golden syrup or packed brown sugar
- 50g salted butter
- 1/2 teaspoon salt
- 3 large bananas, sliced
- 300ml heavy cream
- 1 teaspoon vanilla essence
- 1 tablespoon icing sugar
- Dark chocolate block for shavings
Instructions
- Prepare the crust: Combine the crushed biscuits and 150g melted butter in a bowl. Press this mixture firmly into the bottom and up the sides of a 9-inch pie dish. Place the crust in the refrigerator to chill while you prepare the filling.
- Make the toffee filling: In a small saucepan, combine the two cans of caramel condensed milk, golden syrup (or brown sugar), 50g salted butter, and 1/2 teaspoon salt. Heat over medium heat, stirring constantly until the butter melts and the mixture is smooth and slightly thickened, about 5 to 7 minutes. Do not boil rapidly.
- Pour the warm toffee filling over the chilled biscuit crust. Spread it evenly. Let the filling cool slightly at room temperature, then refrigerate for at least 1 hour until the toffee is set.
- Prepare the topping: In a separate bowl, whip the heavy cream with the vanilla essence and icing sugar until soft or medium peaks form.
- Assemble the pie: Arrange the sliced bananas over the set toffee layer.
- Spread or pipe the whipped cream topping over the bananas.
- Chill the finished pie for at least 1 hour before serving.
- Before serving, grate dark chocolate shavings over the top of the whipped cream. Slice and serve this indulgent sweet treat.
Notes
- For a quicker toffee, you can use store-bought dulce de leche instead of making it from scratch with condensed milk.
- If you want individual servings, make this recipe in small jars or ramekins to create banoffee pie cups.
- This is a great make-ahead dessert; assemble completely and keep chilled for up to 24 hours before serving.
Nutrition
- Serving Size: 1 slice
- Calories: 550
- Sugar: 55
- Sodium: 350
- Fat: 35
- Saturated Fat: 20
- Unsaturated Fat: 15
- Trans Fat: 0.5
- Carbohydrates: 58
- Fiber: 2
- Protein: 6
- Cholesterol: 100