
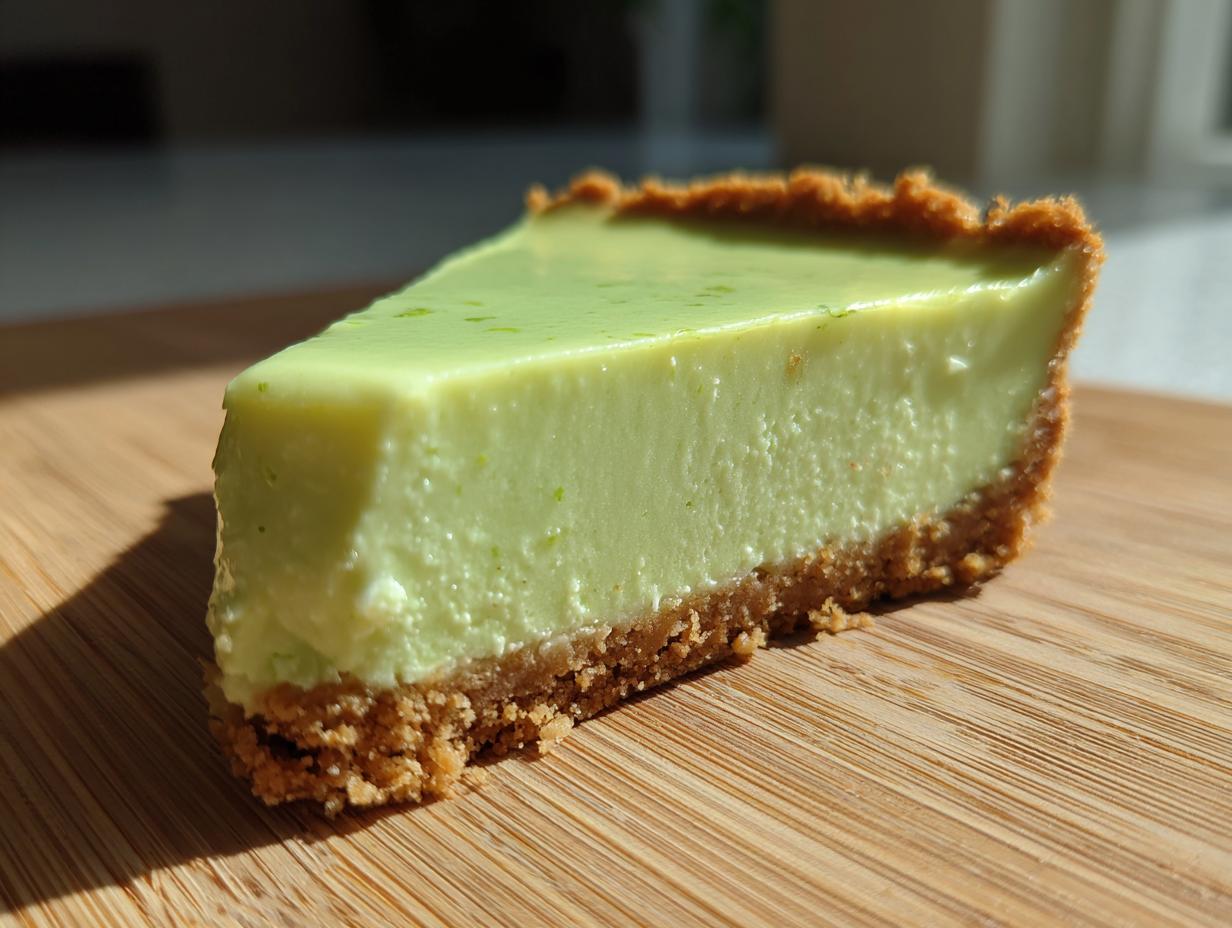
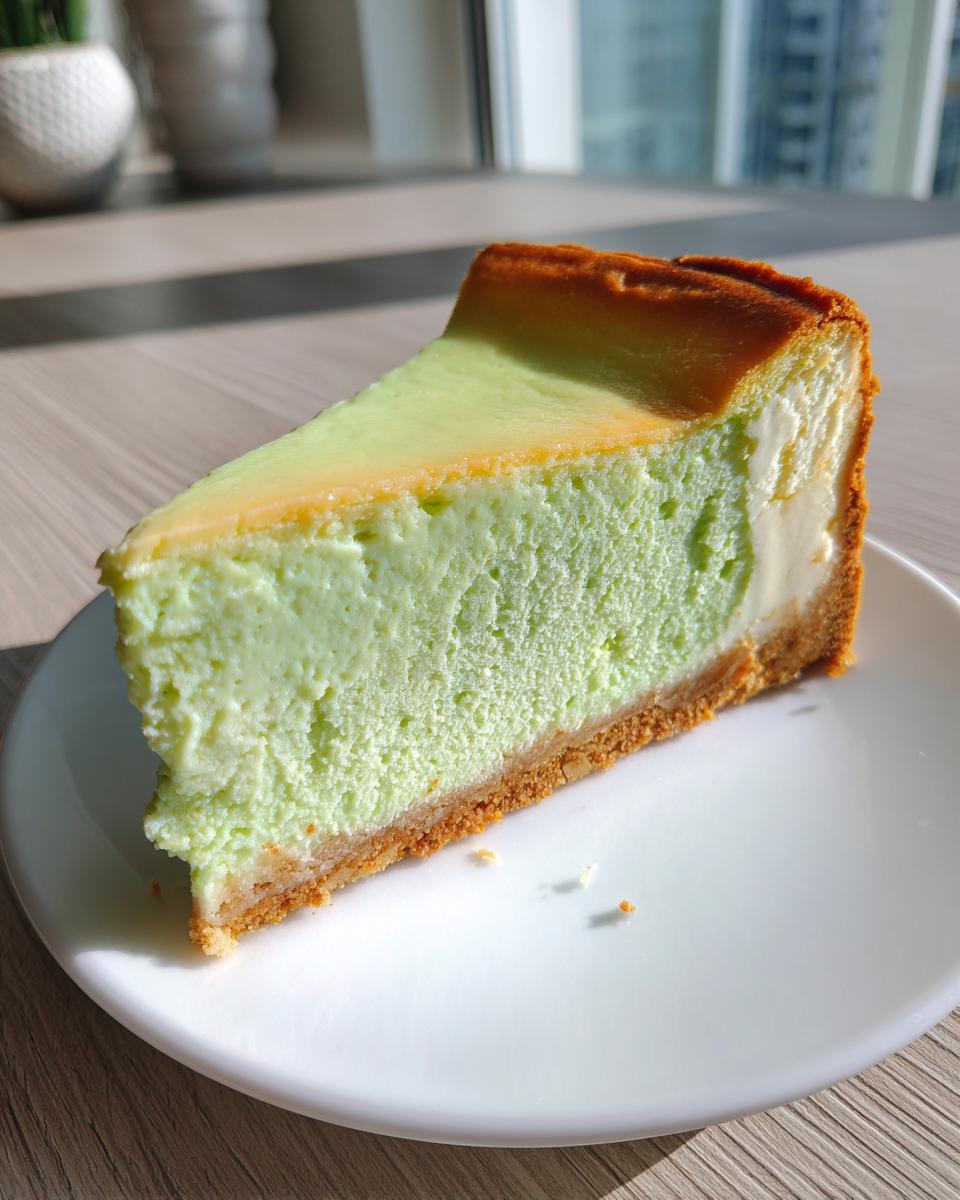
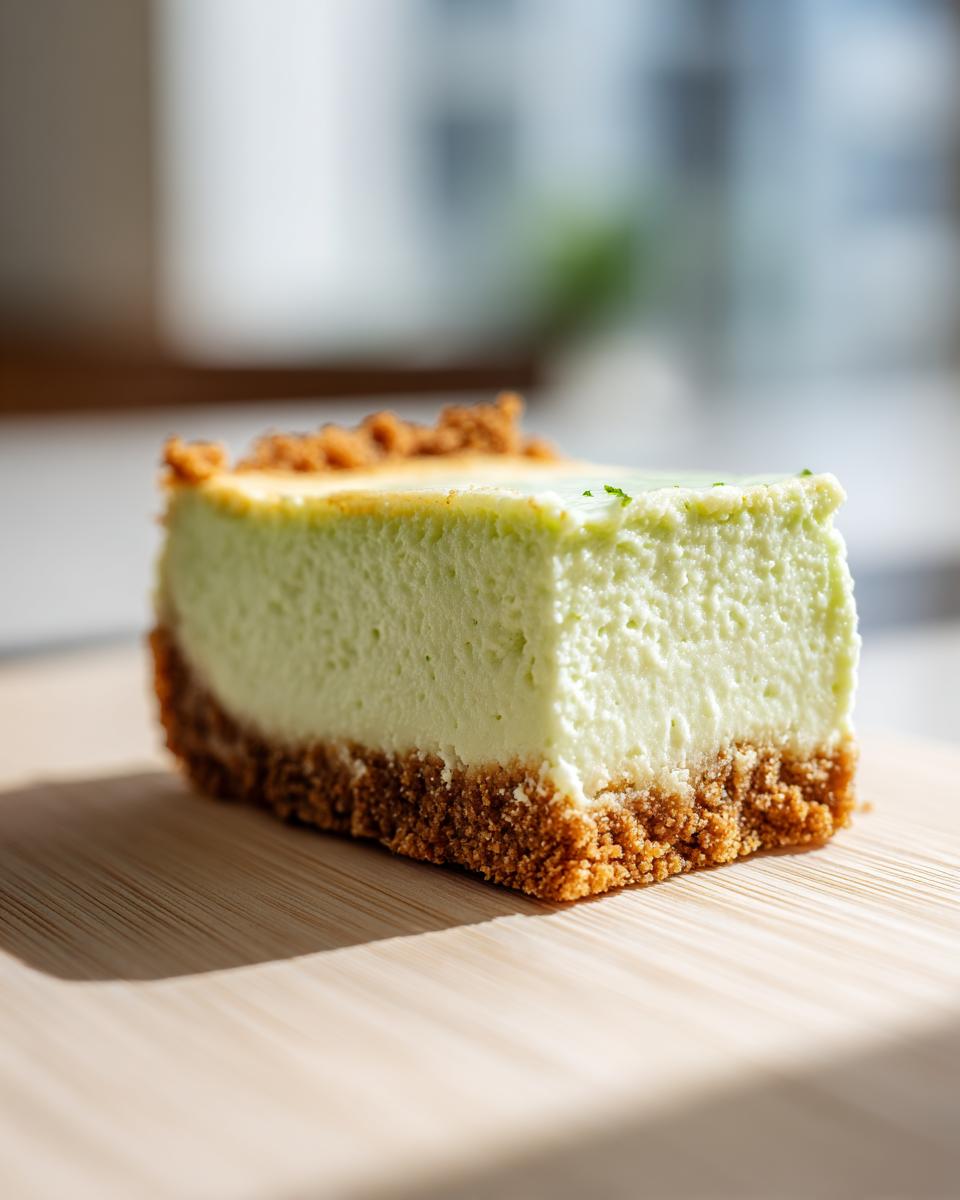
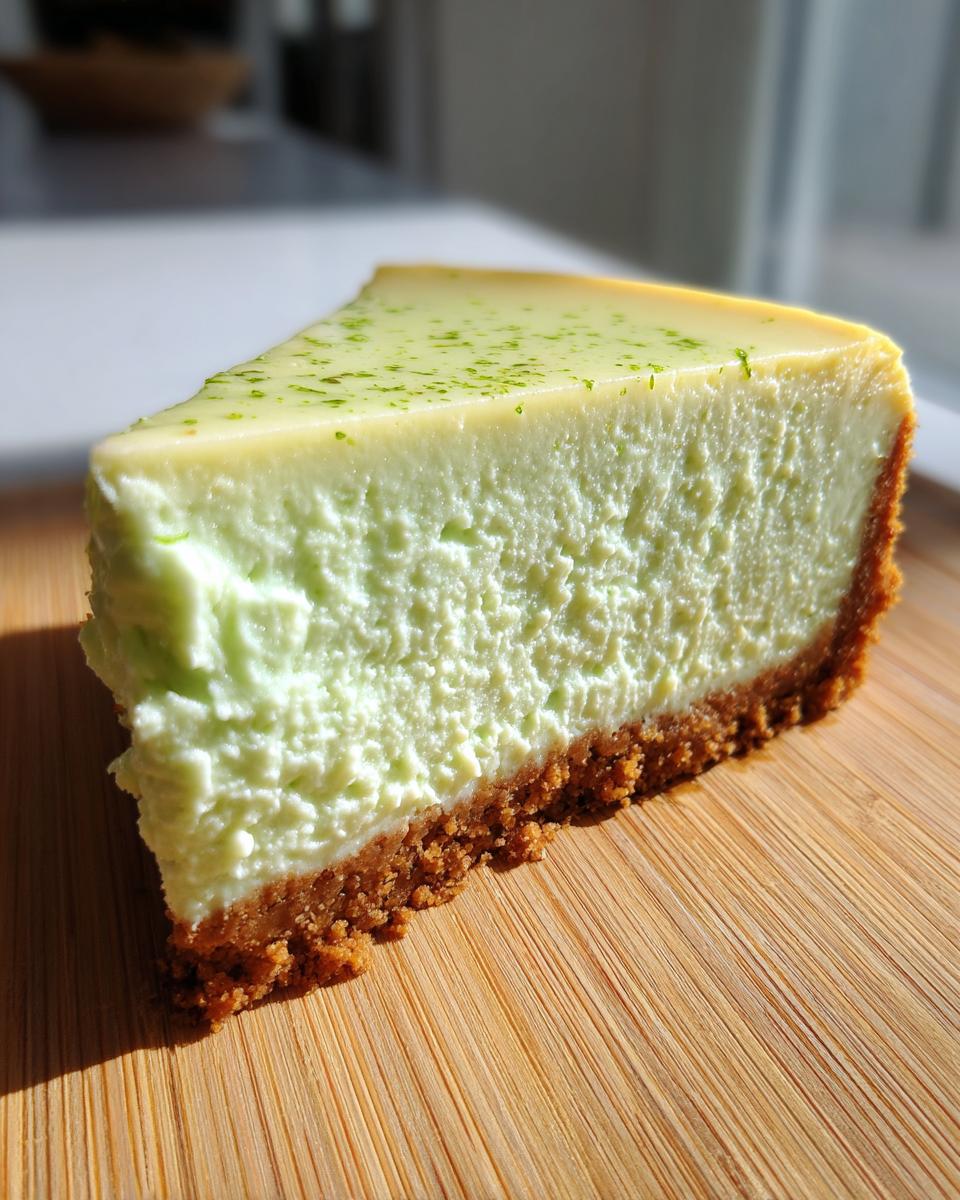
You know, sometimes you just need a dessert that screams sunshine, but you want it to be as rich and perfect as something from a fancy bakery. That’s exactly why I landed on this, my ultimate creamy, baked key lime cheesecake recipe. I’m Ava Sinclair, and when I started Completely Yummy, my goal was never about making things complicated; it was about making those amazing, complex flavors genuinely doable for folks like us who juggle busy lives. Trust me, we’re tackling the cracking issue head-on so you get that flawless, velvety top every single time. This citrus beauty balances tartness and richness better than anything else!
- Why This Creamy Key Lime Cheesecake Recipe Works for You
- Ingredients for the Ultimate Creamy Key Lime Cheesecake
- How to Prepare The Ultimate Creamy Baked Key Lime Cheesecake
- Tips for the Best Key Lime Cheesecake Success
- Variations: No Bake Key Lime Cheesecake and Mini Key Lime Cheesecakes
- Serving Suggestions for Your Tangy Dessert
- Storage and Make Ahead Desserts Tips for Key Lime Cheesecake
- Frequently Asked Questions About Key Lime Cheesecake Recipe
- Nutritional Snapshot of This Zesty Lime Cheesecake
- Nutritional Snapshot of This Zesty Lime Cheesecake
Why This Creamy Key Lime Cheesecake Recipe Works for You
When I started working on this dessert, I wanted more than just a slice of pie; I wanted that luxurious, thick texture you usually only find in famous cheesecake restaurants. This recipe is my answer to making that high-end experience accessible for a Tuesday night treat! It’s a straightforward path to a truly rich and velvety cheesecake.
- It delivers that intense, tangy dessert punch you expect from real key lime goodness.
- The slow-cooling method means you probably won’t see those dreaded cracks ruining your beautiful top.
- It’s perfect for making ahead, which is a lifesaver when you’re hosting!
Achieving the Perfect Rich and Velvety Cheesecake Texture
The secret to that smooth, luxurious mouthfeel is all in the prep work before the oven gets involved. You absolutely must make sure your cream cheese, eggs, and sour cream are fully at room temperature. Seriously, pull them out early! When these ingredients are cool, they incorporate so much more smoothly. Plus, I insist on mixing slow and steady—we want creamy, not airy. If you want to compare techniques for real texture perfection, check out how I handle my ultimate foolproof New York cheesecake recipe; the principles for texture are the same!
The Balance: Sweetness Meets Zesty Lime Cheesecake Flavor
You need the brightness of citrus to cut through all that richness, right? That’s why this recipe calls for both juice AND zest. The zest is where all the incredible oils are, giving you that powerful, aromatic pop. You get the sweet counterpoint from the sugar, but the combination of fresh lime juice and zest ensures this turns out as a truly zesty lime cheesecake that sings on your palate. Don’t even think about skimping on that zest!
Ingredients for the Ultimate Creamy Key Lime Cheesecake
Listing out ingredients can feel like homework, but for the key lime cheesecake, every component plays a vital role in keeping it perfectly smooth and tasting tropical. Remember, getting this part right means half the battle is won! Make sure you look closely at the temperature requirements—it’s not suggestion, it’s law for a creamy result!
Crust Components: The Graham Cracker Crust Dessert Base
This is the foundation, so we need it sturdy! Make sure you press this tightly into the pan so it doesn’t crumble when you serve those gorgeous slices later on.
- 1 1/2 cups graham cracker crumbs
- 1/4 cup granulated sugar (yes, for the crust too!)
- 6 tablespoons unsalted butter, melted
Filling Components for Rich Key Lime Cheesecake
Here is where the magic happens. Again, I’m begging you, let that cream cheese, sour cream, and eggs sit out! Cold ingredients = lumpy batter, and we are not making lumpy rich key lime cheesecake.
- 3 (8 ounce) packages cream cheese, softened to room temperature
- 1 1/2 cups granulated sugar (for the filling)
- 1/4 cup all-purpose flour
- 1 teaspoon vanilla extract
- 4 large eggs, all at room temperature
- 1/2 cup sour cream, room temperature
- 1/2 cup fresh key lime juice (I needed about 10 to 12 limes for this!)
- 1 tablespoon key lime zest
- Optional topping: Whipped cream and extra lime zest
How to Prepare The Ultimate Creamy Baked Key Lime Cheesecake
Okay, let’s get this gorgeous key lime cheesecake into the oven! Even though this recipe is straightforward, the timing and patience during cooling are what separate a good cheesecake from a *wow* cheesecake. That rich, buttery foundation needs our attention first. We are going to treat our batter gently to get that restaurant-quality texture!
Baking the Graham Cracker Crust Dessert
First things first: preheat work! Set your oven to 350°F (175°C) and grease that 9-inch springform pan—you want a clean release later. Mix up your graham crumbs, that little bit of crust sugar, and the melted butter until it looks like wet sand. Press it in really firmly on the bottom! Then, bake that crust for just 10 minutes. Once it comes out, let it cool down a touch while you whip up the filling. While that’s happening, drop your oven temperature way down to 325°F (160°C). If you want to see my standard technique for a flaky base for comparison, check out how I make flaky, buttery pie crust; the principle of pressing firmly still applies here!
Mixing the Zesty Key Lime Cheesecake Filling
Grab that electric mixer for the cream cheese. Beat it until it’s totally smooth—no lumps allowed, scrape the bowl often! Then, slowly add in the main sugar and the flour until they just disappear. Now, this is important for that melt-in-your-mouth feel: add your room-temperature eggs one by one. Mix *only* until they are incorporated after each addition. Seriously, stop mixing! After the eggs, gently fold in the sour cream, the key lime juice, and that bright zest until you just have a uniform color. We are aiming for that creamy key lime cheesecake here, not meringue!
Baking and Cooling Steps for a Crack-Free Key Lime Cheesecake
Pour that lovely batter over your cooled crust and set the whole thing on a baking sheet—that catches any accidental drips. Bake it at 325°F (160°C) for 50 to 60 minutes. You want the edges to look set, but that center should still have a little shimmy, like Jell-O. Here’s the pro move: turn the oven OFF, prop the door open just an inch, and let it chill out in there for a full hour. This slow transition prevents cracks! After that hour, take it out, let it hit room temperature, and then wrap it up tight. It needs a minimum of 6 hours in the fridge, but overnight is truly when the best flavor develops.
Tips for the Best Key Lime Cheesecake Success
Listen, nobody wants to put in all that work just to have a cracked or grainy cheesecake, right? That’s why I always stick to a few non-negotiables when making this easy cheesecake recipe. If you follow these few simple tricks, you’ll nail that perfect texture that people chase after!
Ingredient Temperature Check for Creamy Key Lime Cheesecake
I can’t stress this enough: Room temperature is your best friend. I know you’re probably busy, but if you throw cold cream cheese into the mixer, you’re basically guaranteeing an uneven, slightly lumpy final product. Let everything sit out for at least an hour. Those soft dairy elements fold together beautifully, which is the first step to that fantastic creamy texture.
Achieving Cheesecake Factory Copycat Texture
Have you ever noticed how those professional cheesecakes feel incredibly dense but still smooth? That’s because they don’t whip air into the batter! When you’re mixing, especially after you add the eggs, keep your mixer on low speed. If you whip it fast, you incorporate too much air, and that air expands in the oven, only to collapse and crack when it cools. Slow and steady wins the race for that perfect, rich bite.

If you ever need a super simple, cheesy side to go with something else, try my easy homemade cheese sauce recipe—it’s way less fussy than baking, but still gets the job done!
Variations: No Bake Key Lime Cheesecake and Mini Key Lime Cheesecakes
Okay, I know sometimes the oven just isn’t an option, or maybe you’re craving something incredibly refreshing for a summer BBQ and don’t want the commitment of a long bake and cool-down. That’s totally fine! We absolutely need an easy key lime cheesecake option in our back pocket, and I have thoughts on that.
If you absolutely need a lighter, no-fuss version, you can certainly pivot. While this baked recipe is my go-to for that ultra-creamy texture, you can definitely achieve a fantastic no-bake treat for those hot days. Or, if you just want cute individual servings, making mini key lime cheesecakes is easy peasy!
Making an Easy Key Lime Cheesecake Without Baking
For a no bake key lime cheesecake approach, you usually rely on refrigeration power instead of oven power. The main trick is getting the filling to set up firmly enough to slice. Generally, this means swapping a couple of those big ingredients around. You’d typically use chilled cream cheese, a little powdered sugar, and lots of that key lime juice, but instead of eggs, we need a stabilizer. Some folks use gelatin, but honestly, I find the easiest method involves slightly more sweetened condensed milk mixed with rich cream filling—it chills beautifully when mixed right. It’s definitely a lighter, fluffier texture than the baked version, but wow, is it bright and satisfying!
If you want to see a great example of a super light, no-bake version that’s perfect for summer, you should check out what my friend over at Baking Taste has put together for their no bake key lime cheesecake. It’s a great option when you’re short on time!
And speaking of time savers—if you have muffin tins, you have mini key lime cheesecakes! Just use the baked crust recipe, press it into paper-lined muffin cups, bake for about 20 minutes (so much faster!), and then pour in the filling. They chill up fast too, making them perfect for kids or portion control!
If you need another simple, no-bake treat to impress people without turning on the stove, my recipe for cream cheese mints is legendary in my house!
Serving Suggestions for Your Tangy Dessert
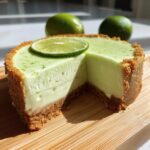
We’ve done all the hard work creating this gorgeous key lime cheesecake; now we need to make it look as good as it tastes! The recipe already calls for a bit of simple whipped cream and a dusting of fresh lime zest, and that’s often all you need for a stunning presentation. If you’re serving this up as part of your favorite summer cheesecake recipes, you know you need that pop of bright green on top!
If you want to get fancy, a thin drizzle of homemade salted caramel works surprisingly well against the tartness—don’t knock it ’til you try it! Or, if you’re pairing it with something savory first, like my easy homemade corn tortillas, keep the topping simple so the lime flavor shines through!
Storage and Make Ahead Desserts Tips for Key Lime Cheesecake
This is the part I love most about this incredible key lime cheesecake: it is the ultimate make ahead dessert. Seriously, you can’t rush perfection, and cheesecake is one of those rare treats that actually tastes *better* the next day once all those beautiful lime, vanilla, and cream cheese flavors have really married together in the cold!
Once you’ve gone through the entire cooling ritual—that hour in the warm oven, chilling on the counter, and finally getting it into the fridge—it needs a minimum of six hours to set up properly. And by properly, I mean solid enough to slice without looking like you wrestled a giant lime blob onto the plate. I always push for overnight chilling if I can swing it. It just firms up so perfectly!
When it comes to storing leftovers (if you even get any leftovers!), just make sure it’s tightly covered in the springform pan or carefully transferred to an airtight container. It stays wonderfully fresh in the refrigerator for about four to five days. If you happen to make a batch of my salted caramel fudge too, hide the cheesecake first, trust me!
Frequently Asked Questions About Key Lime Cheesecake Recipe
I totally get it—when you put in the effort for a show-stopping key lime cheesecake, you want all the details ironed out! I’ve gathered the questions I get asked the most about getting that perfect, creamy key lime cheesecake texture and the best way to handle the citrus punch this recipe offers.
Can I use bottled key lime juice instead of fresh for this key lime cheesecake?
Okay, so this is the eternal debate, isn’t it? Fresh is always, *always* better, especially when you want that vibrant, zesty lime cheesecake flavor. Bottled juice works in a pinch if you can’t find a huge haul of fresh ones—it helps keep this an easy cheesecake recipe when you’re short on time. However, the bottled stuff can sometimes taste a little metallic or dulled compared to the brightness you get from squeezing them yourself. If you use bottled, maybe add an extra half teaspoon of zest to boost that fresh aroma back in!
How do I prevent my baked cheesecake from cracking?
This is the million-dollar question, and honestly, it all comes down to temperature management, not just at the start (though room temp ingredients help!), but primarily at the end. You MUST avoid rapid temperature changes! Remember the slow cool-down? First, turn the oven off and let it hang out in the residual heat with the door propped for an hour. Then, let it come to true room temperature on the counter before it even sees the fridge. Rushing it makes the structure tense up, and *snap*—you get a crack. Don’t skip that oven nap!
How long does this creamy key lime cheesecake last in the refrigerator?
Because this is such a rich and slightly acidic dessert, it actually holds up beautifully! Once it’s fully chilled (and remember, that’s at least six hours, but overnight is my preference), your creamy key lime cheesecake will stay perfectly delicious in an airtight container in the fridge for about four to five days. That makes it such a great choice for a make ahead dessert for parties! If you ever make a big batch and have leftovers you just can’t get to, I’ve heard whispers of people freezing slices, but honestly, I haven’t tried it myself. If you’re looking for some easy soup recipes to pair with leftovers, check out my easy chicken tortilla soup for a perfect contrast!
For more details on getting that restaurant-quality slice, I highly recommend checking out the methods listed over at Recipe Horizon if you want to compare notes on that perfect texture!
Nutritional Snapshot of This Zesty Lime Cheesecake
Now, I’m not one to count every single crumb, but when you’re making a decadent treat like this, it’s good to have a rough idea! This is based on 10 generous slices, so keep that in mind when you’re serving up this amazing zesty lime cheesecake.
- Serving Size: 1 slice
- Calories: Approximately 450
- Sugar: Around 35g
- Fat: Near 30g
- Protein: About 7g
These numbers are just estimates, of course! They depend on exact ingredient brands and how much whipped cream you pile on top. Mostly, just enjoy the sunshine in a slice!
PrintThe Ultimate Creamy Baked Key Lime Cheesecake with Perfect Graham Cracker Crust
You can make this rich, tangy Key Lime Cheesecake at home. This recipe delivers a smooth, velvety texture and a buttery graham cracker crust, balancing sweet and tart flavors perfectly.
- Prep Time: 25 min
- Cook Time: 60 min
- Total Time: 7 hours 25 min
- Yield: 10 servings 1x
- Category: Dessert
- Method: Baking
- Cuisine: American
- Diet: Vegetarian
Ingredients
- 1 1/2 cups graham cracker crumbs
- 1/4 cup granulated sugar (for crust)
- 6 tablespoons unsalted butter, melted
- 3 (8 ounce) packages cream cheese, softened
- 1 1/2 cups granulated sugar (for filling)
- 1/4 cup all-purpose flour
- 1 teaspoon vanilla extract
- 4 large eggs, room temperature
- 1/2 cup sour cream, room temperature
- 1/2 cup fresh key lime juice (about 10–12 limes)
- 1 tablespoon key lime zest
- Optional topping: Whipped cream and extra lime zest
Instructions
- Prepare the crust: Preheat your oven to 350°F (175°C). Lightly grease a 9-inch springform pan.
- Mix the graham cracker crumbs, 1/4 cup sugar, and melted butter until combined. Press the mixture firmly into the bottom of the prepared springform pan.
- Bake the crust for 10 minutes. Remove from the oven and let it cool while you prepare the filling. Reduce the oven temperature to 325°F (160°C).
- Prepare the filling: In a large bowl, beat the softened cream cheese with an electric mixer until smooth. Scrape down the sides of the bowl.
- Gradually beat in the 1 1/2 cups sugar and flour until just combined. Mix in the vanilla extract.
- Add the eggs one at a time, mixing on low speed after each addition until just incorporated. Do not overmix.
- Gently stir in the sour cream, key lime juice, and key lime zest until the batter is uniform and creamy.
- Pour the filling over the cooled crust.
- Bake: Place the springform pan on a baking sheet. Bake at 325°F (160°C) for 50 to 60 minutes. The edges should look set, but the center 2 inches should still jiggle slightly when gently nudged.
- Cool the cheesecake: Turn off the oven, prop the door open slightly (about 1 inch), and let the cheesecake cool inside the oven for 1 hour. This prevents cracking.
- Remove the cheesecake from the oven and let it cool completely on a wire rack.
- Chill: Once cool, cover the pan loosely with plastic wrap and refrigerate for at least 6 hours, or preferably overnight, before serving.
- Serve the **creamy key lime cheesecake** topped with whipped cream and extra lime zest.
Notes
- For a crack-free top, bring all dairy ingredients (cream cheese, sour cream, eggs) to room temperature before starting.
- If you prefer individual portions, use a muffin tin lined with paper liners to make **mini key lime cheesecakes**. Bake time will be reduced to about 20 minutes.
- If you want a **Cheesecake Factory copycat** texture, ensure you mix the batter slowly and avoid incorporating excess air.
Nutrition
- Serving Size: 1 slice
- Calories: 450
- Sugar: 35g
- Sodium: 300mg
- Fat: 30g
- Saturated Fat: 18g
- Unsaturated Fat: 12g
- Trans Fat: 0.5g
- Carbohydrates: 40g
- Fiber: 1g
- Protein: 7g
- Cholesterol: 110mg