
If you’ve ever stared longingly at a bakery case, convinced that the perfect, towering slice of cheesecake took skills you just don’t possess, I’m here to tell you to stop right there! Seriously, put down the store-bought imitation. I spent too many years wishing I could recreate that rich, dense texture without the dreaded surface cracks showing up. That’s why I worked so hard to develop what I truly believe is the Ultimate Foolproof New York Cheesecake Recipe.
I built this blog because life gets busy, you know? We want those comforting, high-quality foods from childhood, but we don’t always have the time for fussy techniques. This recipe cuts through the noise. It’s designed specifically for that classic, thick, creamy finish—the one that screams authentic New York Cheesecake—while making sure you get that perfect, smooth top, every single time. Get ready to reclaim your kitchen; this beauty is totally doable.
You can check out some of my other simple crowd-pleasers here, like my other favorite dessert recipes, but trust me, this cheesecake is the main event!
- Why This Is the Ultimate Foolproof New York Cheesecake Recipe
- Gathering Ingredients for Your New York Cheesecake
- Step-by-Step Instructions for the Best Cheesecake Ever
- Tips for the Creamiest Cheesecake from Scratch
- Serving Suggestions for Your Classic Cheesecake
- Storage and Chilling for the Perfect new york cheesecake
- Frequently Asked Questions About Making new york cheesecake
- Estimated Nutritional Information for Your new york cheesecake
- Share Your Experience Making This Classic Cheesecake
Why This Is the Ultimate Foolproof New York Cheesecake Recipe
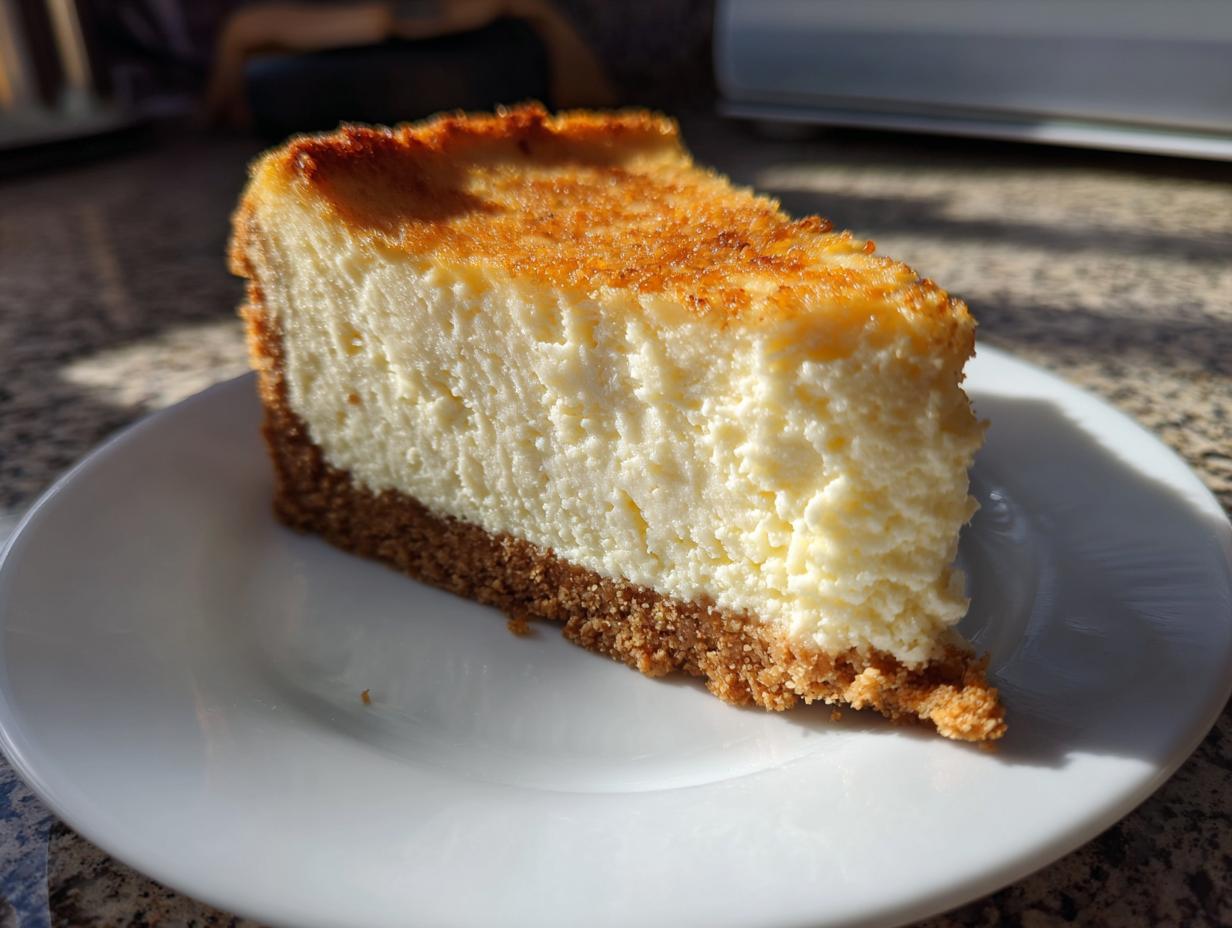
The reason this New York Cheesecake Recipe is my absolute go-to—and the reason I call it foolproof—is because we are tackling the two biggest fears of cheesecake making head-on: texture and cracking. We aren’t aiming for fluffy; we are aiming for the true, rich, Dense Cheesecake experience folks travel to NYC for. It’s all about respecting the process and making sure the ingredients cooperate.
I’ve included the specific ratio of cream cheese to eggs and sour cream that gives you that luxurious, weighty mouthfeel that makes a classic Rich Cream Cheese Dessert so unforgettable. Pair that density with our incredible cooling method, and you’ve got a winner.
Achieving That Signature Dense Cheesecake Texture
Listen, if your cream cheese comes straight from the fridge, we’re already in trouble. Cold cream cheese means lumps in your batter. And when you have lumps, you have to spend extra time mixing to smooth them out. Guess what mixing adds? Air! Air expands during baking, then it contracts when cooling, and boom—you get a crack.
Making sure your cream cheese and sour cream are perfectly room temperature means you can mix gently, keeping all that lovely density locked in. It’s about being patient before you even turn on the mixer!
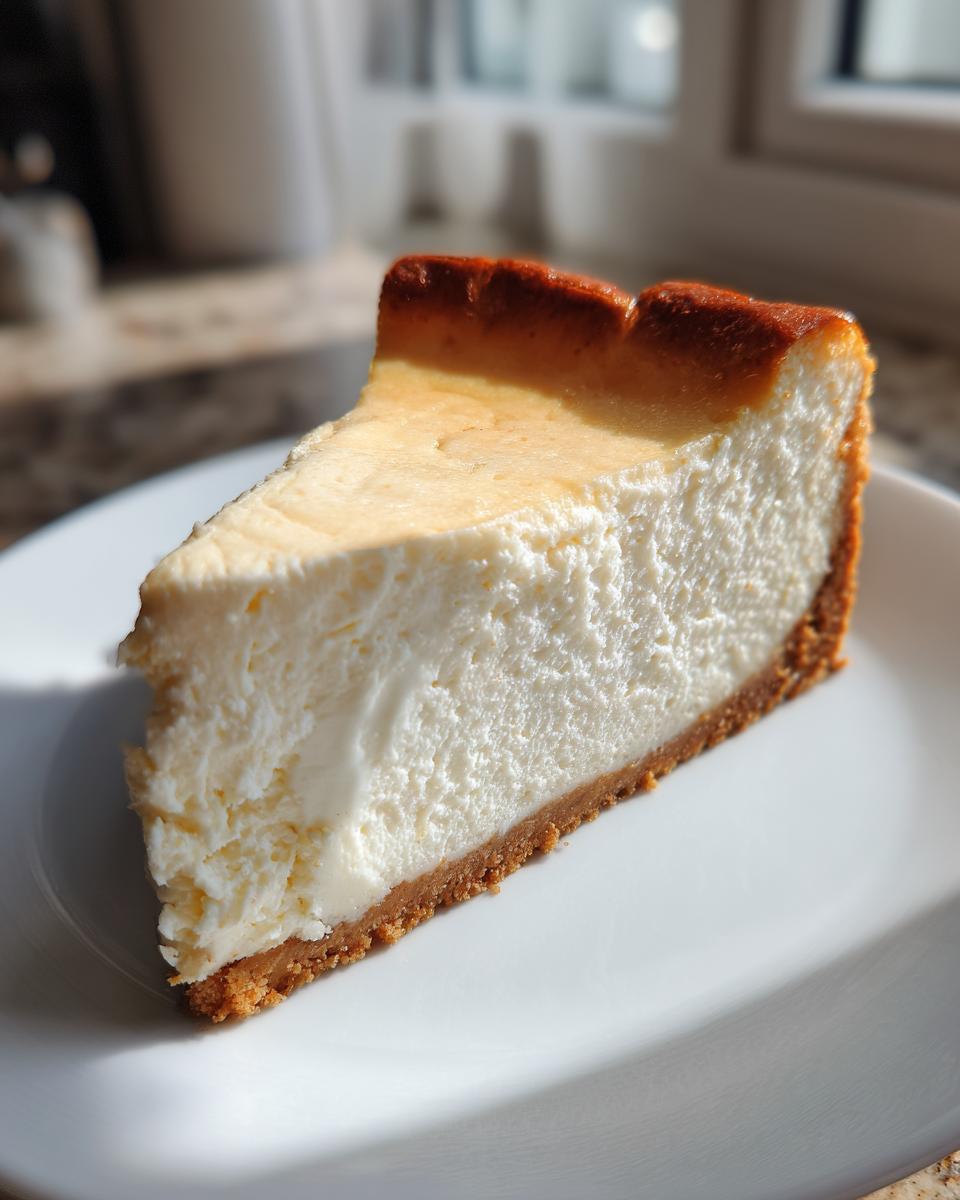
The Secret to a No Crack Cheesecake Finish
This is where we earn the ‘foolproof’ title. We use two layers of defense against surface devastation. First, the water bath. Wrapping that springform pan up like a tiny armored vehicle and putting it into a tub of hot water shields the sides from fierce oven heat, ensuring even baking across the whole disk. That’s step one for a beautiful No Crack Cheesecake.
But the real magic? The slow exit. Turning the oven off and letting the cheesecake sit inside with the door cracked open for a full hour lets the temperature drop gently. You simply can’t rush cooling a cheesecake, or it’ll throw a fit! If you need more simple tricks for better baking results in general, check out my tips on easy baking.
Gathering Ingredients for Your New York Cheesecake
Okay, now that we know *why* this recipe works, let’s talk about what you need. For the Ultimate Foolproof New York Cheesecake Recipe, everything has to be just right. Seriously, I can’t stress enough that the temperature of your dairy ingredients is part of what makes this a truly Rich Cream Cheese Dessert and not just another lumpy mess.
I’ve listed everything here. Make sure you have your 9-inch springform pan ready before you start mixing!
For the Classic Graham Cracker Crust
- 1 1/2 cups graham cracker crumbs
- 1/4 cup granulated sugar
- 6 tablespoons unsalted butter, melted
For the Creamy Cheesecake Filling
Remember, these need to be at room temperature—no cheating! This is the magic that keeps your filling velvety smooth.
- 4 (8 ounce) packages full-fat cream cheese, softened to room temperature
- 1 1/2 cups granulated sugar
- 1/4 cup all-purpose flour
- 1 teaspoon vanilla extract
- 1/4 teaspoon salt
- 1 cup sour cream, room temperature
- 4 large eggs, room temperature
Don’t forget to check out my recipe for easy homemade cheese sauce if you need to use up some extra cream cheese, though honestly, you won’t have any left after this cheesecake!
Step-by-Step Instructions for the Best Cheesecake Ever
Alright, this is the moment of truth for your Homemade Cheesecake! Follow these steps precisely, and I promise you’ll nail that bakery-style finish. We’re building this Classic Cheesecake layer by layer, focusing on keeping things smooth and avoiding air pockets at all costs. If you love making pie crusts, this first step will feel familiar, though we bake it shorter for the flaky buttery pie crust.
Preparing and Baking the Graham Cracker Crust
First thing, get your oven preheated to 350 degrees F (175 degrees C). You need heavy-duty foil, and I mean heavy-duty, because it’s going to be sitting in water! Wrap the entire outside of your 9-inch springform pan very securely—we don’t want any sneaky water leaks ruining our crust.
Mix those graham cracker crumbs, the quarter cup of sugar, and the 6 tablespoons of melted butter right in a bowl. Press that crumb mixture firmly into the bottom of your wrapped pan and bring it about one inch up the sides. Pop it in the oven for exactly 10 minutes to set. Once that’s done, take it out and immediately drop that oven temp down to 325 degrees F (160 degrees C). We’re setting the stage for the filling!
Mixing the Tangy Cheesecake Filling
This is where technique matters more than speed. Take your softened cream cheese and beat it by itself until it is 100% smooth. Seriously, no lumps allowed! Scrape the bowl down—we’re being tidy.
Now, slowly beat in the 1 1/2 cups of sugar, the flour, vanilla, and salt until it just barely comes together. Next, stir in the room temperature sour cream until it blends in. And here’s the rule for the eggs: add them ONE at a time. Mix only until you see the yolk disappear, then stop and scrape. Do NOT overmix after the eggs go in, or you’ll welcome air bubbles into your easy moist chocolate muffins recipe equivalent!
The Water Bath and Baking Technique for new york cheesecake
Pour that beautiful, smooth filling over your cooled crust. Time for the water bath! Set your foil-wrapped springform pan inside a large roasting pan. Carefully pour hot water into the roasting pan until it comes about halfway up the sides of your cheesecake pan. This steam environment is key to getting that classic, rich texture.
Bake this for about 60 to 75 minutes. You’re looking for the edges to be set firm, but if you gently nudge the pan, the very center two inches should still have a little wobble, almost like Jell-O. If it looks completely solid, it’s already over-baking!
The Slow Cooling Method for new york cheesecake
This is the single most important step for the Best Cheesecake Ever, so don’t sneak it out early if you want that smooth top! Turn the oven OFF. Don’t touch the temperature dial, just turn the heat off. Now, prop the oven door open slightly—a wooden spoon handle works perfectly for this.
Let that beautiful Baked Cheesecake Recipe sit in the cooling oven for a full hour. It’s a forced cool-down that stops the panic-shrinkage that causes cracks. After the hour, take it out, remove the foil and the water bath, and let it cool completely on a wire rack on the counter before it ever sees the fridge. For more baking inspiration, you should check out this guide on making a classic New York Cheesecake.
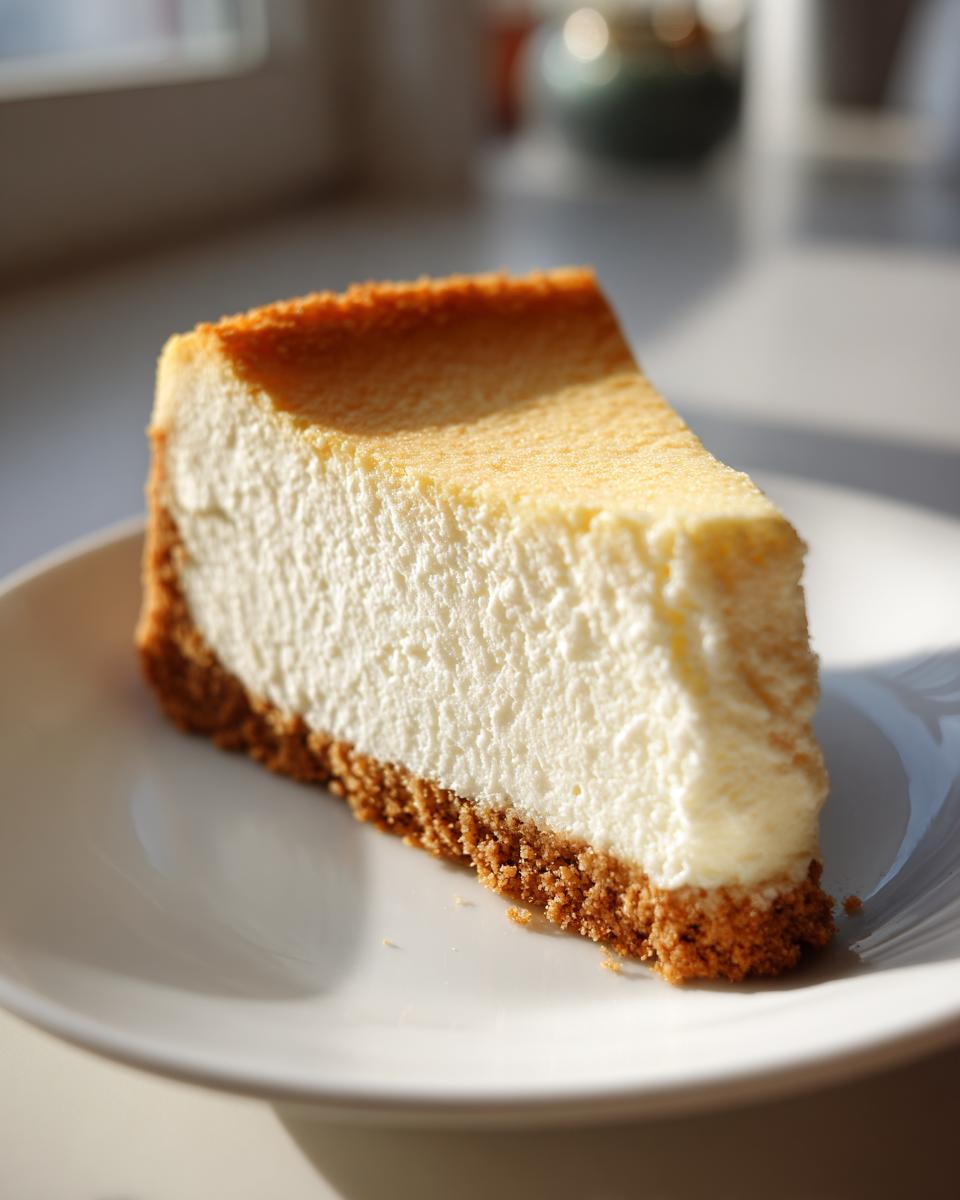
Tips for the Creamiest Cheesecake from Scratch
If you want that Velvety Smooth Cheesecake everyone raves about—that slice that holds its shape perfectly but melts in your mouth—you need to know the rules. Making a New York Cheesecake is really about managing temperature and minimizing air. I’ve learned these little tricks the hard way, usually after scraping a cracked top into the trash! Following these Easy Cheesecake Tips will save you so much heartbreak.
If you need some easy savory inspiration while you wait for this beauty to chill, check out my go-to chicken and dumpling recipe—it comes together way faster!
Room Temperature Ingredients: Non-Negotiable for new york cheesecake
I really mean it when I say this is non-negotiable. If your cream cheese or sour cream is even slightly cold, it won’t blend beautifully. Cold cheese leads to lumps, right? To get rid of those lumps, we tend to overmix the batter, and overmixing brings in air. Air is the sworn enemy of a smooth, dense cheesecake! It’s the number one reason for those tiny fissures that turn into huge cracks.
Handling the Batter: Minimize Air Incorporation
When you start mixing, keep the speed on low to medium-low. You should absolutely use the paddle attachment if you have a stand mixer, NOT the whisk! We are combining things, not whipping air into them. Once those eggs are in, mix only until you see the last streak of yellow disappear.
Resist the urge to keep beating it because it looks a little thick. That thickness is what gives you that desirable Tall Cheesecake structure. Trust the timing and trust the ingredients; they know what to do if you just let them work gently. If you want comparisons on great textures, you might enjoy seeing the creaminess achieved in this recipe I found from a great resource online.
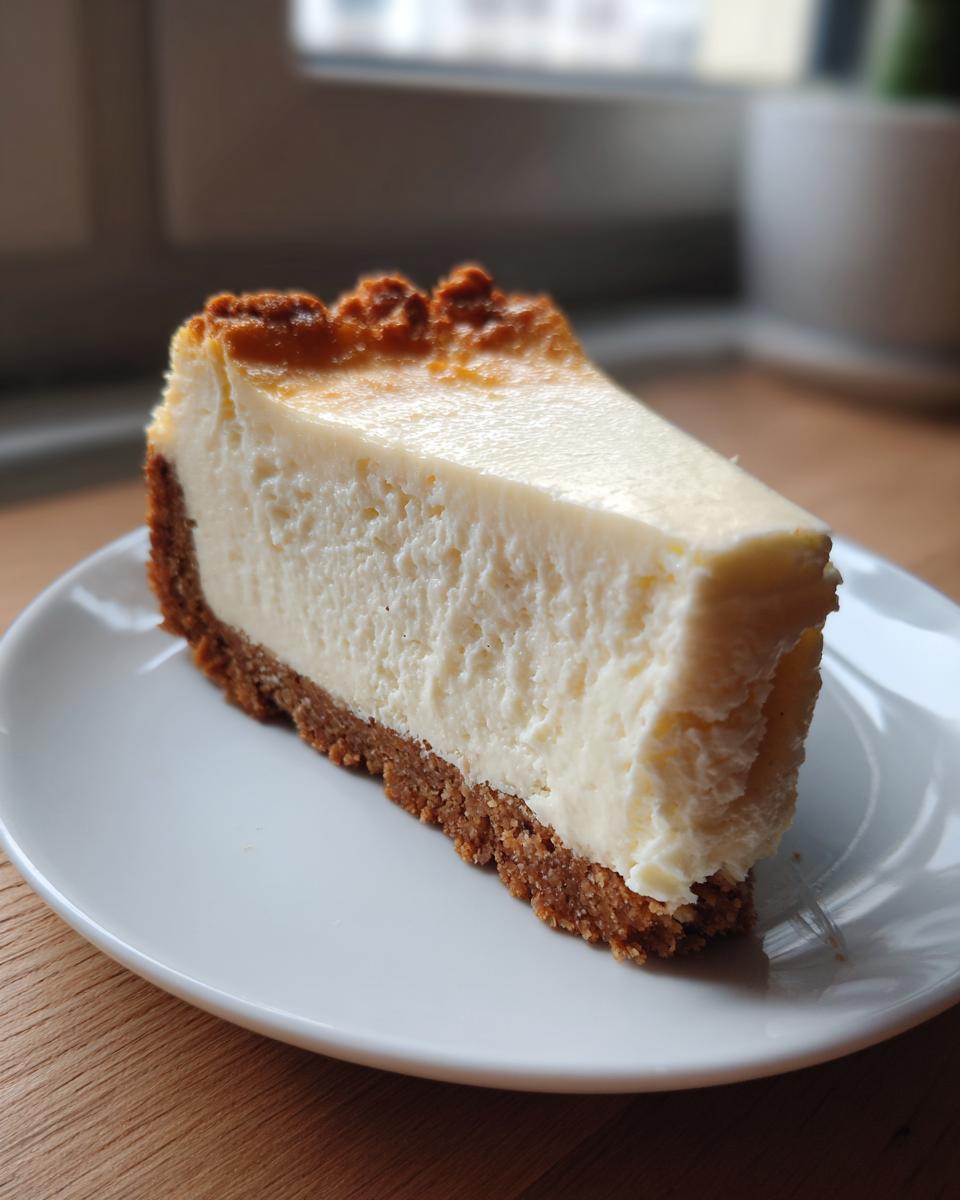
Serving Suggestions for Your Classic Cheesecake
Now that you’ve managed the bake—and you deserve a pat on the back for that perfect top—it’s time to think about presentation! This fantastic New York Cheesecake is so rich on its own, it really doesn’t need much fuss, which makes it perfect for big parties where you need easy serving options. It tastes amazing simply plain, but to really take it over the top for your next event, think about these additions.
If you’re looking for quick ways to dress up this stunner, try a tart topping to cut through that incredible richness. A homemade sour cherry or raspberry sauce is amazing. You can find a great template for a simple drizzle in my balsamic glaze recipe that you can adapt with fruit juice instead of vinegar!
For something super simple that still looks fancy, shaved dark chocolate or a few fresh berries scattered around the plate are always winners. If you need some other ideas for incredible Dessert Recipes for Parties, have a look here, but honestly, this cheesecake stands tall on its own!

If you want inspiration on classic pairings, I loved some of the topping ideas I saw when researching the baking process for NY style delights online.
Storage and Chilling for the Perfect new york cheesecake
Okay, listen up, this is non-negotiable when making the Best Cheesecake Ever. You absolutely cannot cut into this masterpiece right away. Think of it like letting a really good wine breathe, only this needs time in a cold, dark place to realize its full, creamy potential.
We need a minimum of six hours of chilling time before you even *think* about slicing. Honestly? Overnight is where it truly shines. That extended chill time allows the texture to firm up just right, making it that dense, melt-in-your-mouth experience we’re aiming for. If you try to cut it early, it’ll just smear everywhere—and we want tall, professional slices!
Once it’s chilled and you’re ready to serve, here’s the secret trick for getting those gorgeous, clean-edge slices: use a hot knife. Get yourself a tall glass of very hot water. Dip your sharp slicing knife right into the hot water for a few seconds, then quickly wipe it completely dry with a towel.
Slice through one piece, and then wipe the knife clean and reheat it *before* you make the next cut. It sounds fussy, I know, but the heat melts the creamy fat just enough to glide right through without dragging the sides. It keeps those edges looking sharp. If you want to make some holiday treats ahead of time, these chilling tips also work perfectly if you check out my recipe for easy Christmas jams.
For any leftovers—and you probably won’t have many—just cover the springform pan loosely with plastic wrap or foil and keep it in the fridge. It stays wonderfully fresh for about four or five days!
Frequently Asked Questions About Making new york cheesecake
It’s totally normal to have questions when you’re tackling something as iconic as this dessert. Look, everyone fears they’ll mess up that precious top layer, but that’s why I’m here! We’ve laid out the techniques for a beautiful finish, but let’s tackle a few other things that pop up when you’re making this Classic Cheesecake from scratch.
If you want to know more about my simple baking mission and philosophy, you can always check out my About Page, but for now, let’s focus on curing those cheesecake blues!
Can I skip the water bath when making this new york cheesecake recipe?
Oh, I wish I could tell you yes, but if you want that super Creamy Cheesecake texture that defines this recipe, you absolutely cannot skip the water bath. Think of the water bath as a giant, gentle steam humidifier for your oven. It keeps the temperature around the cake incredibly consistent and moist, so the heavy cream cheese filling bakes evenly from the edges to the center.
If you skip it, the outer edges cook way faster than the center, and that temperature difference is what causes the dreaded cracks. It’s the secret weapon for a rich, dense, moist result, so please, wrap that pan well and embrace the bath!
What is the best way to get a clean slice of homemade cheesecake?
This is the moment of triumph after all that chilling, and you don’t want to ruin a perfect top with a messy cut! The trick I mentioned earlier is gold for getting those perfect bakery-style slices of New York Cheesecake.
Start by getting a tall glass of very hot—almost boiling—water ready on your counter. Take a long, thin knife (the longer the better for hitting the center), dip it into the hot water for about 10 seconds, and then wipe the blade completely dry with a clean kitchen towel. Press straight down firmly through the cheesecake, don’t saw it! Wipe the knife clean and reheat it *every single time* before cutting the next slice. It’s an extra minute of work, but the clean edges are worth every second.
Why is my cheesecake filling still jiggly after baking?
Guess what? That’s exactly what we want! When the recipe calls for a slight jiggle in the center two inches, it means you haven’t overbaked it. If it comes out looking completely firm like a baked block of clay, you baked it too long, and it’s going to be dry and likely crack. That slight wobble is residual heat working its magic.
Remember the slow cooling process inside the turned-off oven? That’s when the cheesecake finishes baking and sets up properly. If it’s jiggly like thin pudding, it needs a bit more time in the low heat environment. But if it’s just that gentle movement, take it out—it’ll firm up beautifully as it cools down on the rack and then chills!
Estimated Nutritional Information for Your new york cheesecake
Okay, so we know this absolutely decadent New York Cheesecake isn’t exactly health food, right? It’s a showstopper for holidays and special parties, and that’s okay! We made it because it tastes incredible, not because we’re counting macros every day.
But because I believe in giving you the full picture, here are the estimated numbers based on the ingredients we used in the recipe. If you feel like you need a little fuel after all that baking, make sure you check out my ideas for quick, healthy breakfast options to balance things out!
Please remember, since we are working with full-fat cream cheese and standard sugars, these figures are all estimates. If you swap out the brand of cream cheese or use a different sweetener, these numbers will shift a bit. Treat this as a general guide!
- Serving Size: 1 slice
- Calories: 450
- Fat: 30g
- Saturated Fat: 18g (yep, it’s rich!)
- Trans Fat: 0g
- Cholesterol: 150mg
- Carbohydrates: 40g
- Sugar: 35g
- Protein: 8g
It might look like a lot of sugar, but trust me, every single gram of that is worth it when you get that perfect, tangy bite. Enjoy the indulgence!
Share Your Experience Making This Classic Cheesecake
Whew! You did it. You navigated the water bath, you respected the slow cool-down, and now you have the Best Cheesecake Ever sitting in your fridge, ready for its big debut. That is serious kitchen accomplishment, my friend!
Now I need to hear all about it! Did the texture come out exactly how you hoped? Did you try a topping other than the simple dusting I sometimes default to? Please, jump down to the comments below and give this Classic Cheesecake recipe a star rating so others know what a showstopper it truly is.
And because I know you’ll want to bake this again for the next party or holiday, don’t forget to save this post! Pin it or bookmark it right now so you never lose track of this foolproof method. If you ever have specific questions—maybe about substitutions or presentation ideas—feel free to reach out to me directly through the contact page. Happy baking!
PrintThe Ultimate Foolproof New York Cheesecake Recipe

Make the best New York Cheesecake ever with this recipe. You achieve a rich, dense, and creamy texture with a classic graham cracker crust. We focus on simple steps for a no-crack finish.
- Prep Time: 25 min
- Cook Time: 75 min
- Total Time: 9 hours 40 min
- Yield: 12 servings 1x
- Category: Dessert
- Method: Baking
- Cuisine: American
- Diet: Vegetarian
Ingredients
- 1 1/2 cups graham cracker crumbs
- 1/4 cup granulated sugar (for crust)
- 6 tablespoons unsalted butter, melted
- 4 (8 ounce) packages full-fat cream cheese, softened to room temperature
- 1 1/2 cups granulated sugar (for filling)
- 1/4 cup all-purpose flour
- 1 teaspoon vanilla extract
- 1/4 teaspoon salt
- 1 cup sour cream, room temperature
- 4 large eggs, room temperature
Instructions
- Prepare the crust: Preheat your oven to 350 degrees F (175 degrees C). Wrap the outside of a 9-inch springform pan tightly in heavy-duty aluminum foil.
- Combine graham cracker crumbs, 1/4 cup sugar, and melted butter in a bowl. Press the mixture firmly into the bottom and about 1 inch up the sides of the prepared springform pan.
- Bake the crust for 10 minutes. Remove from the oven and let it cool while you prepare the filling. Reduce the oven temperature to 325 degrees F (160 degrees C).
- Prepare the water bath: Place the foil-wrapped springform pan inside a larger roasting pan.
- Make the filling: Beat the softened cream cheese in a large bowl with an electric mixer until completely smooth. Scrape down the sides.
- Gradually beat in the 1 1/2 cups sugar, flour, vanilla extract, and salt until just combined. Do not overmix.
- Beat in the sour cream until smooth. Add the eggs one at a time, mixing only until each egg is incorporated. Overmixing adds air, which causes cracks.
- Pour the cream cheese filling over the cooled crust in the springform pan.
- Carefully pour hot water into the roasting pan until the water reaches about halfway up the sides of the springform pan. This water bath helps prevent cracking.
- Bake for 60 to 75 minutes. The edges should look set, but the center 2 inches should still have a slight jiggle when gently nudged.
- Turn off the oven. Prop the oven door open slightly (use a wooden spoon handle). Let the cheesecake cool inside the oven for 1 hour. This slow cooling prevents cracking.
- Remove the cheesecake from the water bath and foil. Let it cool completely on a wire rack at room temperature.
- Chill: Cover the cheesecake loosely with plastic wrap and refrigerate for at least 6 hours, or preferably overnight, before serving.
Notes
- Use room temperature ingredients for the filling; this prevents lumps and overmixing.
- Do not skip the water bath; it creates steam for a creamy texture.
- Cooling slowly in the turned-off oven is the best tip for a no-crack cheesecake.
Nutrition
- Serving Size: 1 slice
- Calories: 450
- Sugar: 35
- Sodium: 300
- Fat: 30
- Saturated Fat: 18
- Unsaturated Fat: 12
- Trans Fat: 0
- Carbohydrates: 40
- Fiber: 1
- Protein: 8
- Cholesterol: 150