
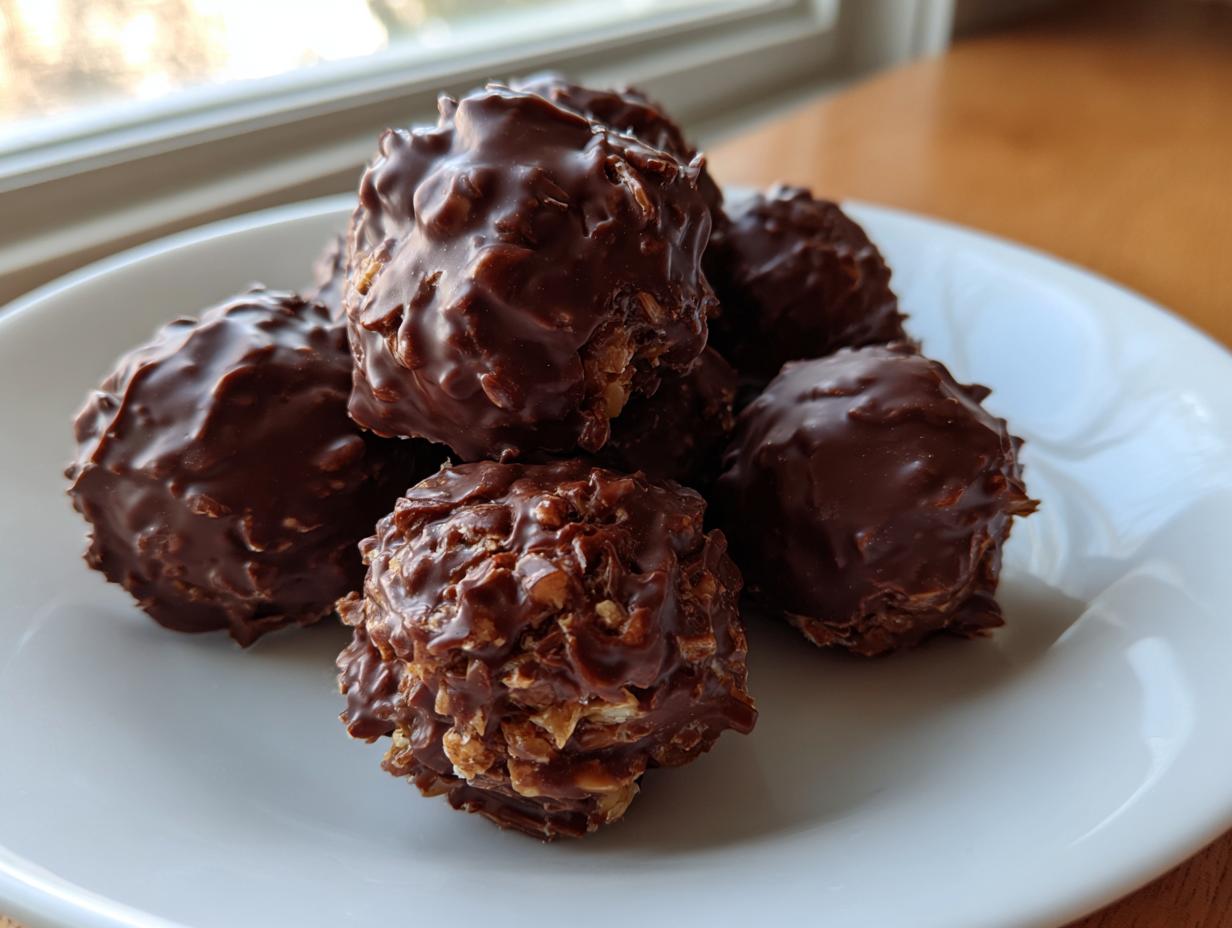
Oh, goodness, do I ever understand those moments when a craving hits—a serious, immediate need for something sweet, chocolatey, and crunchy—but the thought of turning on the oven makes you sigh deeply? I live that life, you know? Balancing deadlines and wanting real, home-cooked comfort means we need solutions that are lightning-fast. That’s precisely how these glorious **chocolate rice krispie balls** came to be, and they are absolutely central to my mission here at Completely Yummy. They skip the oven entirely, they come together faster than you can decide on takeout, and the marriage of creamy peanut butter with rich, melted chocolate simply can’t be beaten. Trust me, this is the shortcut your busy weeknight deserves.
If you’re looking for recipes that work during real life—the kind my family actually eats when we don’t have hours to spare—this is it. The combination here is pure magic, resulting in these perfectly portioned, utterly satisfying bites. You’re going to love making these. I made sure this recipe honors the need for something genuinely good without demanding all afternoon! If you also love that salty-sweet crunch, you absolutely have to check out my peanut butter pretzel bark recipe next week; it has a similar vibe!
- Why These Chocolate Rice Krispie Balls Are Your New Go-To No Bake Chocolate Rice Krispie Treats
- Gathering Ingredients for Your Peanut Butter Rice Krispie Balls Recipe
- Step-by-Step Guide to Making **Chocolate Rice Krispie Balls**
- Tips for Success with Your **Easy Chocolate Rice Cereal Balls**
- Storage and Making Ahead for Simple Candy Balls Recipe
- Variations on Holiday Rice Krispie Candy
- Serving Suggestions for **Bite Sized Rice Krispie Desserts**
- Frequently Asked Questions About No Oven Desserts
- Estimated Nutritional Snapshot for Chocolate Rice Krispie Balls
Why These Chocolate Rice Krispie Balls Are Your New Go-To No Bake Chocolate Rice Krispie Treats
Honestly, finding truly simple sweets that don’t require turning on the stove or oven is like finding gold. That’s exactly what we’ve done here with these No Bake Chocolate Rice Krispie Treats. They are my fail-safe choice when the sweet tooth strikes, providing that classic, satisfying crunch without any fuss. Because we’re relying on chilling time instead of baking time, these are your ultimate Quick Dessert Bites for when you need something fast.
The beauty of these is that they feel impressive but require almost zero brainpower. Forget about juggling oven temperatures! We’re just mixing, rolling, and chilling. This recipe is built for the busy person who still wants desserts that taste like they took hours to make.
Simple Candy Balls Recipe: Ready in Minutes
This truly is a Simple Candy Balls Recipe. Your active time here is probably under twenty minutes, tops! The peanut butter base comes together in the time it takes you to measure out the cereal. If company shows up unexpectedly, or if you realize you forgot dessert for the potluck tomorrow morning, these are heroes. Seriously, you measure dry things, melt wet things, mix, and roll. That’s it!
Perfect for Kid Friendly Chocolate Snacks
My youngest, Liam, absolutely insists on helping with these, and I let him because it’s just that easy! Rolling the chilled balls in the melted chocolate is messy, yes, but it’s the best kind of mess. They are totally foolproof for little hands learning to help in the kitchen. Anytime I need Kid Friendly Chocolate Snacks that I know will disappear immediately, I make a batch of these. Just last month, we made them right before the soccer game, and they were completely gone before we even got to the carpool line!
If you enjoyed how fast this made life easier, you should see how quickly my avalanche cookies come together—they have a similar no-bake, speedy vibe!
Gathering Ingredients for Your Peanut Butter Rice Krispie Balls Recipe
Okay, let’s talk about what you need to grab from the pantry for these incredible chocolate rice krispie balls. Because this is a no-bake recipe, the quality of your binder ingredients really matters, since there’s no oven heat to smooth out any quirks. We need that classic combo: peanut butter, sugar, butter, vanilla, and of course, the Rice Krispies cereal. Then we move onto the chocolate coating, which is the grand finale!
I’ve listed everything precisely below. Don’t panic if your list looks long; most of it is just the cereal and the chocolate chips. Remember, simple recipes mean every ingredient gets a chance to shine, so try to stick to the measurements!
- 1 cup creamy peanut butter
- 1 cup granulated sugar
- 1/2 cup (1 stick) unsalted butter
- 1 teaspoon vanilla extract
- 4 cups Rice Krispies cereal
- 12 ounces semi-sweet chocolate chips
- 1 tablespoon vegetable shortening or coconut oil (for melting chocolate)
Ingredient Clarity and Preparation Notes
This is where we build trust in the reliability of the recipe, right? You absolutely must use creamy, smooth peanut butter here. If you throw in crunchy peanut butter, your balls won’t hold their shape when you try to roll them, and you’ll end up with crumbly messes. Also, for the chocolate coating, that tiny bit of shortening (or coconut oil if you have it handy) isn’t just for show!
It’s essential because it thins the chocolate just enough so that when you dip your chilled balls, the coating is smooth and shiny, not thick and clumpy. It helps everything set up beautifully without seizing. See? Little details make the biggest difference in great homemade treats!
Step-by-Step Guide to Making **Chocolate Rice Krispie Balls**
Making these fantastic chocolate rice krispie balls is super straightforward, but timing is everything, especially when you need that perfect no-bake texture. I walk you through this whole process step-by-step below. Don’t worry about rushing; the chilling stages are your friends here. We want that creamy peanut butter base layer to set up just right before we dip—that’s the real secret to keeping them perfectly formed!
We’re skipping the oven entirely, which is wonderful on a hot day! Just grab your saucepan, your mixing bowl, and let’s get rolling. I just made a fresh batch last night, and the smell of the warm peanut butter mixture on the stove was totally nostalgic. If you love these kinds of easy chocolate bakes, you have to try my easy chocolate chip scone recipe—it almost feels this fast!
Creating the Peanut Butter Base Mixture
First thing: line a baking sheet with parchment paper—don’t skip this, or you’ll lose half your treats to sticking! Set that aside. Now, grab a medium saucepan over medium heat. You’re going to combine your peanut butter, sugar, and butter. Stir this constantly until everything melts down into one smooth, glossy mixture. Listen carefully: you absolutely must keep stirring and make sure it never boils. If it boils, the texture of your center mix gets weird and grainy later. We want smooth, not bubbly!
Forming and Chilling the **Crunchy Chocolate Balls**
Once that base is smooth, pull it off the heat and stir in your vanilla. Immediately pour in those four cups of Rice Krispies cereal. Mix this gently—you don’t want to crush the cereal too much; we need that crunch! Drop rounded tablespoons onto that lined sheet and gently press them into little balls. They don’t need to be perfect spheres yet because they are soft. Pop this sheet right into the fridge while you deal with the chocolate. This chilling time is crucial to making perfect Crunchy Chocolate Balls.
Achieving the Perfect **Chocolate Coated Krispie Bites**
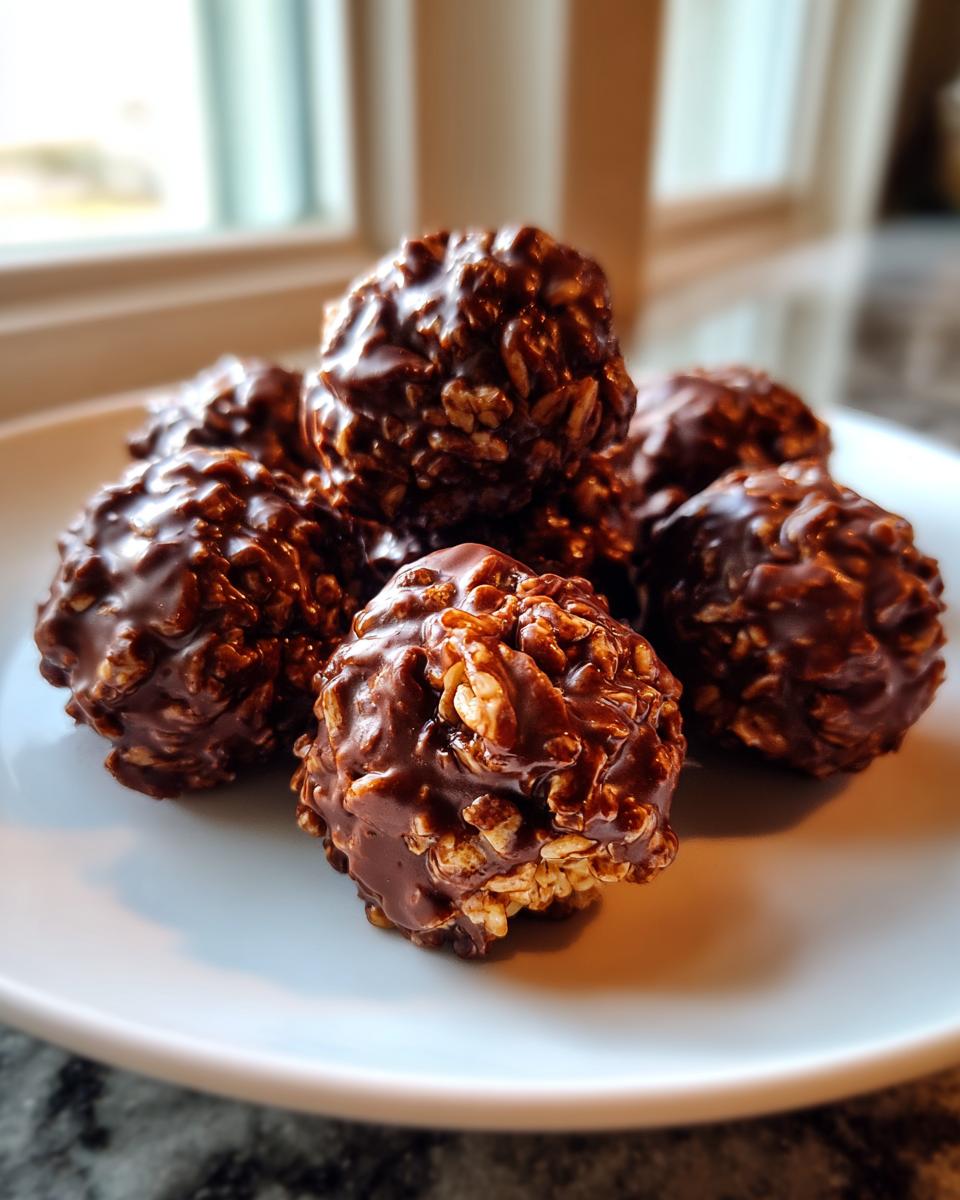
Time for the chocolate shell! Put your semi-sweet chips and that tablespoon of shortening (that’s our secret weapon for smooth dipping!) into a microwave-safe bowl. Microwave in short 30-second bursts, stirring well between each one. Scrape down the sides until it’s silky smooth—no lumps allowed! Now, take your chilled balls and dip them right into that melted chocolate bath, making sure they get totally coated. If dipping feels fussy, just drop them back on the sheet and drizzle heavily instead. Sprinkle on some sea salt or festive things right away because the chocolate sets fast. Back to the fridge they go until firm!
Tips for Success with Your **Easy Chocolate Rice Cereal Balls**
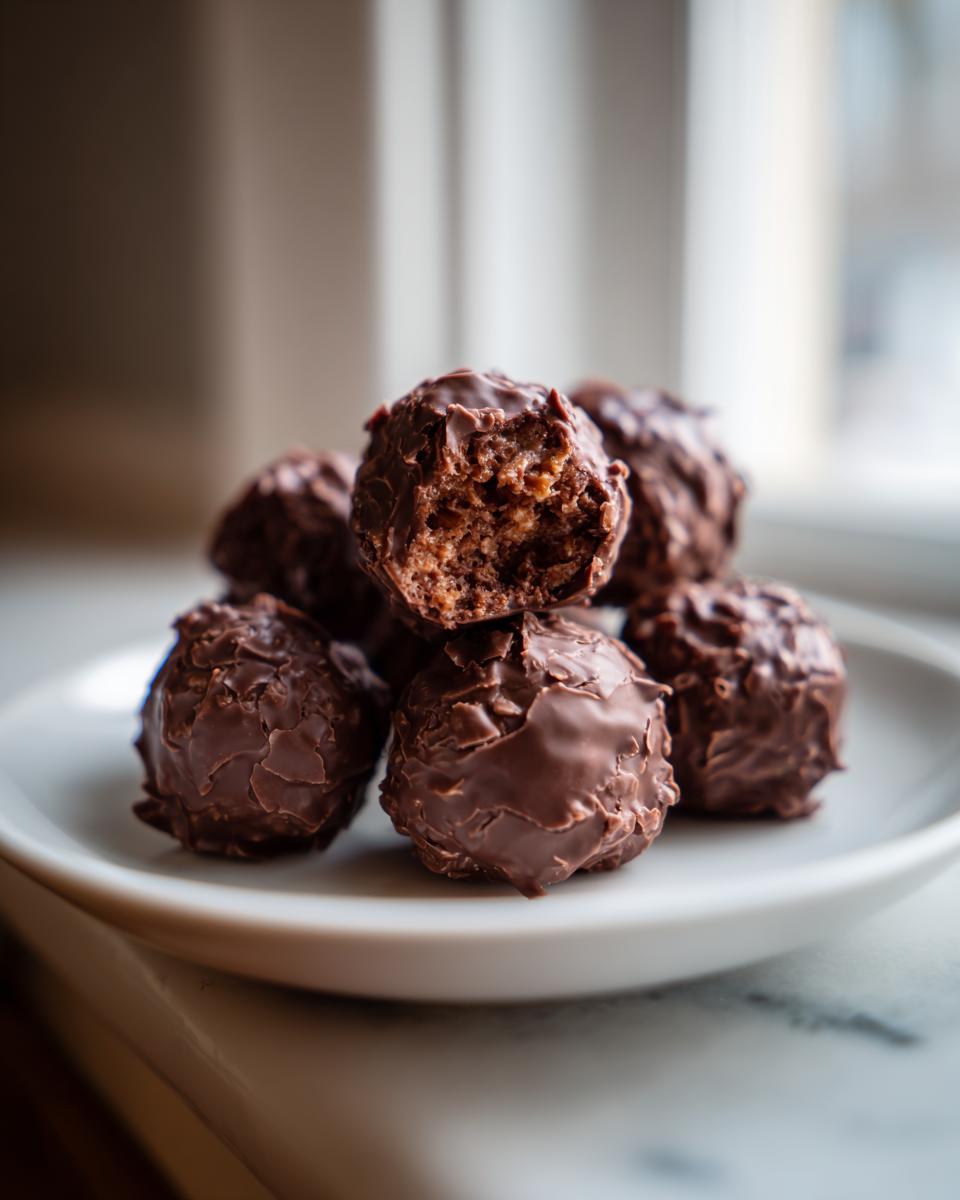
You’ve got your base mixed and your chocolate melted—fantastic! Now, let’s make sure these Easy Chocolate Rice Cereal Balls set up exactly right. Remember, since we aren’t baking, the consistency of that initial peanut butter mixture dictates everything. It’s easy to rescue them if things go a little sideways, but knowing the fixes ahead of time is everything when you’re aiming for that perfect, yielding center covered in a crisp shell.
I test tons of these quick dessert bites, and I promise, these little tweaks will save any batch from turning into a sticky mess on your counter. It just takes a moment of paying attention! If you happen to love quick sweets like this, you should see how moist my easy moist chocolate muffins recipe turns out—no dry crumbs there!
Troubleshooting Common Issues with **Chocolate Rice Krispie Balls**
If you find that your peanut butter base mixture seems way too stiff when you go to fold in the Rice Krispies—like it’s just crumbling instead of coating—don’t panic! Grab a teaspoon of warm water or milk and stir it in gently. Sometimes the peanut butter firms up faster than you expect. If your balls are too soft when you try to roll or dip them, they just need more chill time. Pop that tray back into the fridge for another twenty minutes. Patience makes perfect chocolate rice krispie balls, I always say!
Storage and Making Ahead for Simple Candy Balls Recipe
One of the best things about these **chocolate rice krispie balls** is that they are totally built for make-ahead maneuvering! Since they have that firm chocolate shell, they actually hold up wonderfully. You’ll want to keep these in an airtight container, layered appropriately if you’re making a lot, and definitely in the refrigerator. When chilled, that peanut butter core stays nice and firm.
They last great for about a week in the fridge, but here’s the real secret: they freeze beautifully! Toss them in a freezer-safe bag or container, throw a layer of parchment between them if you’re stacking, and they keep perfectly for up to two months. They taste just as delicious straight from the freezer, though I sometimes let them sit on the counter for five minutes before digging in. This makes them the perfect **Simple Candy Balls Recipe** for holiday cookie trays when you need to tackle your sweets prep weeks in advance. It takes the pressure right off!
If you’re prepping for a big event, these are a lifesaver. You can finish the whole batch two days ahead and just keep them cool. Speaking of make-ahead goodies, you simply have to try my fudgy salted caramel swirl brownies next—they are amazing the day after you bake them!
Variations on Holiday Rice Krispie Candy
While the classic chocolate and peanut butter combination is just perfection, that doesn’t mean we can’t shake things up a little when making these Holiday Rice Krispie Candy treats! This base is really flexible, which is why I love it so much for seasonal baking platters. You can totally customize the flavor profile depending on who you’re serving or what holiday you’re celebrating. Think about adding a little peppermint extract when you stir in the vanilla for a wintery twist, or maybe using white chocolate for the coating instead of semi-sweet!
These little additions mean you can make one batch of the core mixture and get totally different results. It’s a cook’s secret weapon for variety without doubling the work. Speaking of variety, if you’re looking for another festive, easy recipe, you need to try my easy crockpot cranberry strawberry jam; it’s amazing on scones!
Swapping Peanut Butter for Different Flavors
The recipe notes mention this, and I fully support changing up that binding agent! If you have a peanut allergy in the crowd, or if you just want something different, you can absolutely sub in almond butter or, better yet, sunflower seed butter. Just make sure whatever you use is creamy! The texture relies on that smooth consistency to hold everything together before we roll them.
Serving Suggestions for **Bite Sized Rice Krispie Desserts**
These little **bite sized Rice Krispie desserts** are so delightful because they are already perfectly portioned! For parties, I always arrange them on a tiered serving tray so they look more impressive than just being dumped on a plate. I usually add a little sprinkle of flaky sea salt right after dipping them in the chocolate—it just makes that chocolate flavor *pop*!
If you’re packaging them for gifting, just place three or four into a small cellophane bag and tie it with a cute ribbon. They travel incredibly well, which is essential for holiday candy exchanges! For something a bit fancier, try setting them next to my easy chewy holiday treats on your dessert platter; the textures play off each other so nicely!
Frequently Asked Questions About No Oven Desserts
I know you’re going to love these, but sometimes little questions pop up when you’re whipping up something new! Since these fall squarely in the realm of **No Oven Desserts**, people often ask about binding and longevity. I’ve pulled together the most common things I hear about these delicious **chocolate rice krispie balls** so you can bake with confidence!
If you’re looking for other sweet things you can skip the heat on, make sure to check out my recipe for no-bake banoffee pie—it is shockingly easy!
Can I make **chocolate rice krispie balls** without peanut butter?
That’s a tricky one! Peanut butter acts as a major binder along with the sugar and butter when we melt them down. If you have an allergy, you could try swapping it out for a dense alternative like sunflower seed butter. If you skip the nut butter entirely, you’ll need to use marshmallow fluff instead, but you’ll need to adjust your sugar and cook time slightly to keep that gooey factor strong!
How long do these **No Oven Desserts** last?
Because these are no-bake and are stored in the fridge, they hold up really well! If you keep them in an airtight container in the refrigerator, they stay fantastic for a full week. They are such a wonderful make-ahead treat for parties because they actually get better as the moisture settles in slightly. They’re great for whipping up early!
Estimated Nutritional Snapshot for Chocolate Rice Krispie Balls
Now, I always say that when you’re making something this delightful, you shouldn’t sweat the health facts too much, right? But for those of you who like to keep track, here is the ballpark estimate for these rich, **chocolate rice krispie balls**. This data is based on the recipe using semi-sweet chips and creamy peanut butter, but remember, if you swap brands or use dark chocolate, these numbers (especially the sugar and fat) will shift a little bit.
- Serving Size: 1 ball
- Calories: 180
- Sugar: 15g
- Fat: 11g (Saturated Fat: 5g)
- Carbohydrates: 19g
- Protein: 4g
Keep in mind these are estimates, dear cooks! If you used a low-sugar peanut butter, the sugar count will drop. But honestly, when they taste this good, they are worth every single little measurement. If you want to try making something savory next that has great measured details, you should try my easy homemade teriyaki sauce recipe!
PrintNo-Bake Chocolate Peanut Butter Rice Krispie Balls

Make these simple, no-bake chocolate peanut butter Rice Krispie balls. They combine creamy peanut butter, crispy cereal, and a rich chocolate coating for a quick dessert perfect for any occasion.
- Prep Time: 20 min
- Cook Time: 5 min
- Total Time: 25 min
- Yield: 24 servings 1x
- Category: Dessert
- Method: No Bake
- Cuisine: American
- Diet: Vegetarian
Ingredients
- 1 cup creamy peanut butter
- 1 cup granulated sugar
- 1/2 cup (1 stick) unsalted butter
- 1 teaspoon vanilla extract
- 4 cups Rice Krispies cereal
- 12 ounces semi-sweet chocolate chips
- 1 tablespoon vegetable shortening or coconut oil (for melting chocolate)
Instructions
- Line a baking sheet with parchment paper. Set aside.
- In a medium saucepan over medium heat, combine the peanut butter, sugar, and butter. Stir constantly until the mixture is melted and smooth. Do not let it boil.
- Remove the saucepan from the heat. Stir in the vanilla extract.
- Pour the Rice Krispies cereal into the peanut butter mixture. Stir gently until the cereal is evenly coated.
- Drop rounded tablespoons of the mixture onto the prepared baking sheet. Press lightly to form balls.
- Place the baking sheet in the refrigerator while you melt the chocolate.
- In a microwave-safe bowl, combine the chocolate chips and shortening (or coconut oil). Microwave in 30-second intervals, stirring well after each interval, until the chocolate is completely smooth.
- Dip each chilled ball into the melted chocolate, ensuring it is fully coated. Alternatively, you can drizzle the chocolate over the balls.
- Return the coated balls to the parchment-lined sheet. If desired, sprinkle with sea salt or festive sprinkles immediately.
- Refrigerate the chocolate rice krispie balls for at least 30 minutes, or until the chocolate coating is firm.
- Store the finished chocolate rice krispie balls in an airtight container.
Notes
- For an extra festive look, use holiday sprinkles on the wet chocolate coating.
- If you prefer a different flavor, substitute peanut butter with almond butter for a variation on these peanut butter balls with Rice Krispies.
- These no-bake treats freeze well for later enjoyment.
Nutrition
- Serving Size: 1 ball
- Calories: 180
- Sugar: 15
- Sodium: 85
- Fat: 11
- Saturated Fat: 5
- Unsaturated Fat: 6
- Trans Fat: 0
- Carbohydrates: 19
- Fiber: 1
- Protein: 4
- Cholesterol: 10