
Oh, the sad, flat pancake masquerading as a Yorkshire pudding. I know that heartbreak better than anyone! It’s the ultimate letdown when you’re aiming for that towering, crispy British classic to soak up all that glorious gravy. Trust me, I spent ages trying every trick out there before I finally cracked the code. This isn’t just another recipe; this is the foolproof method that guarantees that impossible combination: shatteringly crisp outside and completely airy, fluffy inside. As I built this blog to bring real home cooking back to busy lives, conquering the Yorkshire pudding was non-negotiable. Get ready, because your roast dinners are about to get a serious elevation!
- Why This Is the Best Yorkshire Pudding Recipe You Will Ever Need
- Ingredients for Foolproof Yorkshire Puddings
- How to Make Yorkshire Puddings: The Step-by-Step Guide
- Yorkshire Pudding Tips and Tricks for a Perfect Rise
- Serving Suggestions for Your Traditional British Side Dish
- Variations: Gluten Free Yorkshire Pudding and Individual Yorkshire Puddings
- Storage & Reheating Instructions for Yorkshire Puddings
- Frequently Asked Questions About Making Yorkshire Puddings
- Estimated Nutritional Data for Homemade British Comfort Food
- Share Your Golden Brown Puddings
- Estimated Nutritional Data for Homemade British Comfort Food
- Share Your Golden Brown Puddings
Why This Is the Best Yorkshire Pudding Recipe You Will Ever Need
I’m not one for hyperbole, but honestly, this is the Best Yorkshire Pudding recipe you’ll ever bake. Why? Because it strips away all the fuss and focuses only on what matters: the rise! I remember countless Sunday dinners where my puddings looked more like flat little pancakes. It was infuriating! I’d tried resting the batter, adding soda water, whispering sweet nothings to the tin—nothing worked consistently.
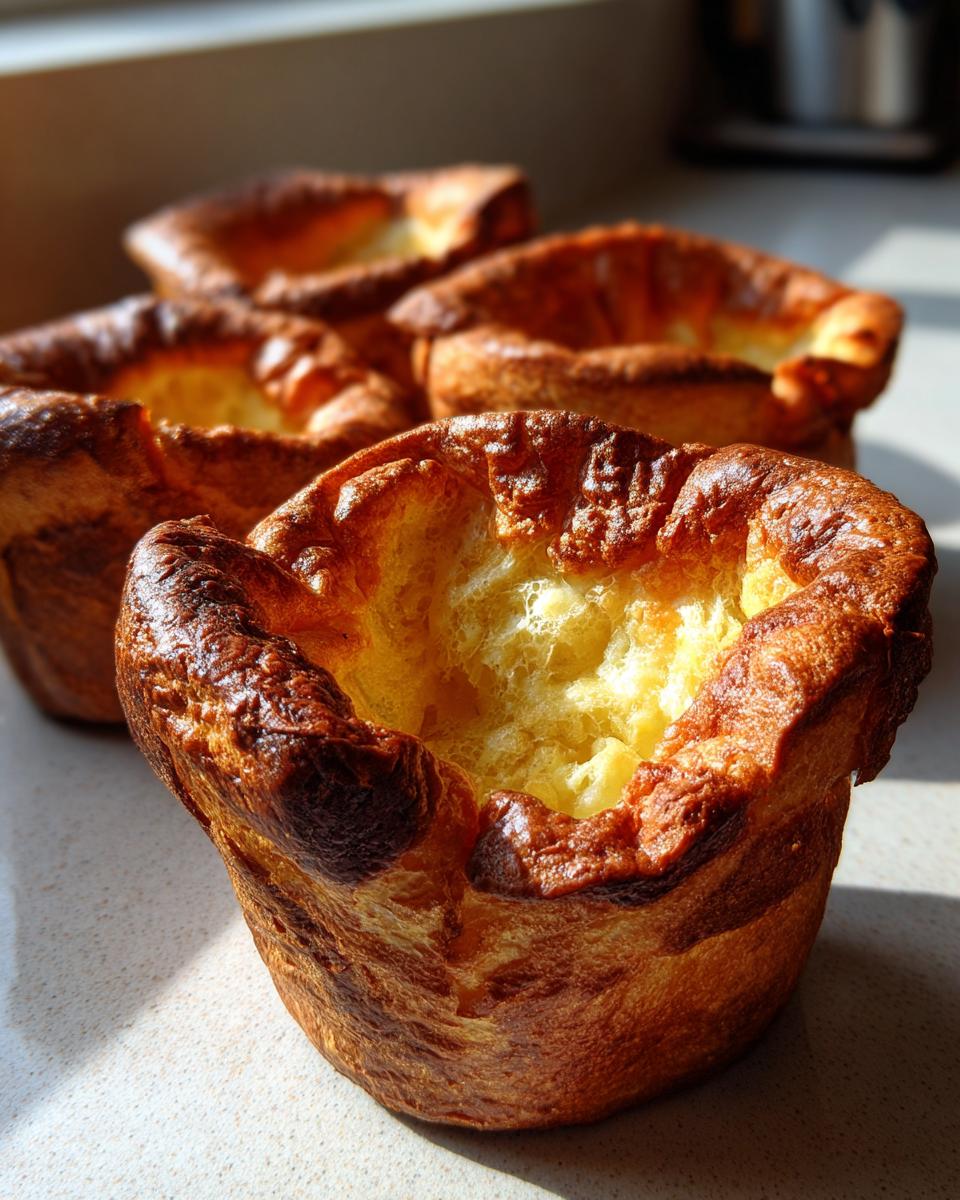
What changed everything was understanding that intense, scorching heat is non-negotiable. This Foolproof Yorkshire Puddings method works by hitting that extremely hot fat just right, creating instant steam power. It’s simple, uses pantry staples, and delivers that lofty, crisp-edged result every single time. Once you master this, you won’t need to look anywhere else, and you can get back to focusing on those easy weeknight dinners on the days you don’t feel like roasting!
Ingredients for Foolproof Yorkshire Puddings
The real beauty of a truly great Yorkshire Pudding Recipe is that it relies on the absolute basics. I’m talking about stuff you probably have in your pantry right now. There’s no need to go hunting down fancy flours or exotic oils. In fact, I love knowing that these delicious, towering, Golden Brown Puddings can be made for pennies! The secret isn’t expensive ingredients; it’s how we treat the few we use.
This list is short, sweet, and designed to be reliable. We’re making 12 individual puddings, which is perfect for a family roast. See? Even making something this impressive can be surprisingly cost-effective—and you can check out how truly cheap these can be over at Skint Chef if you’re interested in extreme budgeting! Yorkshire pudding doesn’t have to break the bank.
- 1 cup all-purpose flour
- 1 cup whole milk
- 2 large eggs
- 1/2 teaspoon salt
- 1/2 cup beef dripping or vegetable oil (this is for the tin, not the batter!)
How to Make Yorkshire Puddings: The Step-by-Step Guide
This is where the magic happens, and honestly, How to make Yorkshire Puddings successfully comes down to timing and temperature. We are going to use the simplest Easy Yorkshire Pudding Batter you can imagine, but the technique is everything. Follow these steps exactly, and you’ll ditch flat puddings forever. If you’re looking for the perfect accompaniment to a hearty meal like my classic Shepherd’s Pie, this is it!
Preparing the Tin and Fat for Maximum Heat
Listen up, because this step creates those incredible Crispy Yorkshire Puddings. Preheat your oven to a roaring 450°F (230°C). While that’s heating up, put about a tablespoon of beef dripping or vegetable oil into each cup of your 12-cup muffin tin. Now, you need to put that tin into the hot oven for a good ten minutes. I mean it—ten minutes! When you pull the tin out to pour the batter, that fat needs to be shimmering, barely holding back smoke. If it’s not piping hot, the batter won’t instantly flash-fry and puff up. This is the biggest secret, so don’t rush it!
Creating the Easy Yorkshire Pudding Batter
While the fat is getting weapon-hot, we make the batter. Whisk your flour and salt together first—getting the dry stuff mixed prevents lumps later. Then, make a little well in the middle and drop in your two eggs. Start whisking the eggs gently, slowly pulling in the flour from the sides. Next, pour in the milk in a slow, steady stream while you keep whisking consistently. We’re looking for something thin, almost like watery cream. If it seems thick, add a tiny splash more milk. My personal tip? Make the batter about 30 minutes ahead and just let it sit on the counter (or pop it in the fridge if you’re busy). That resting time does wonders for the final texture.
Baking for Fluffy Yorkshire Puddings
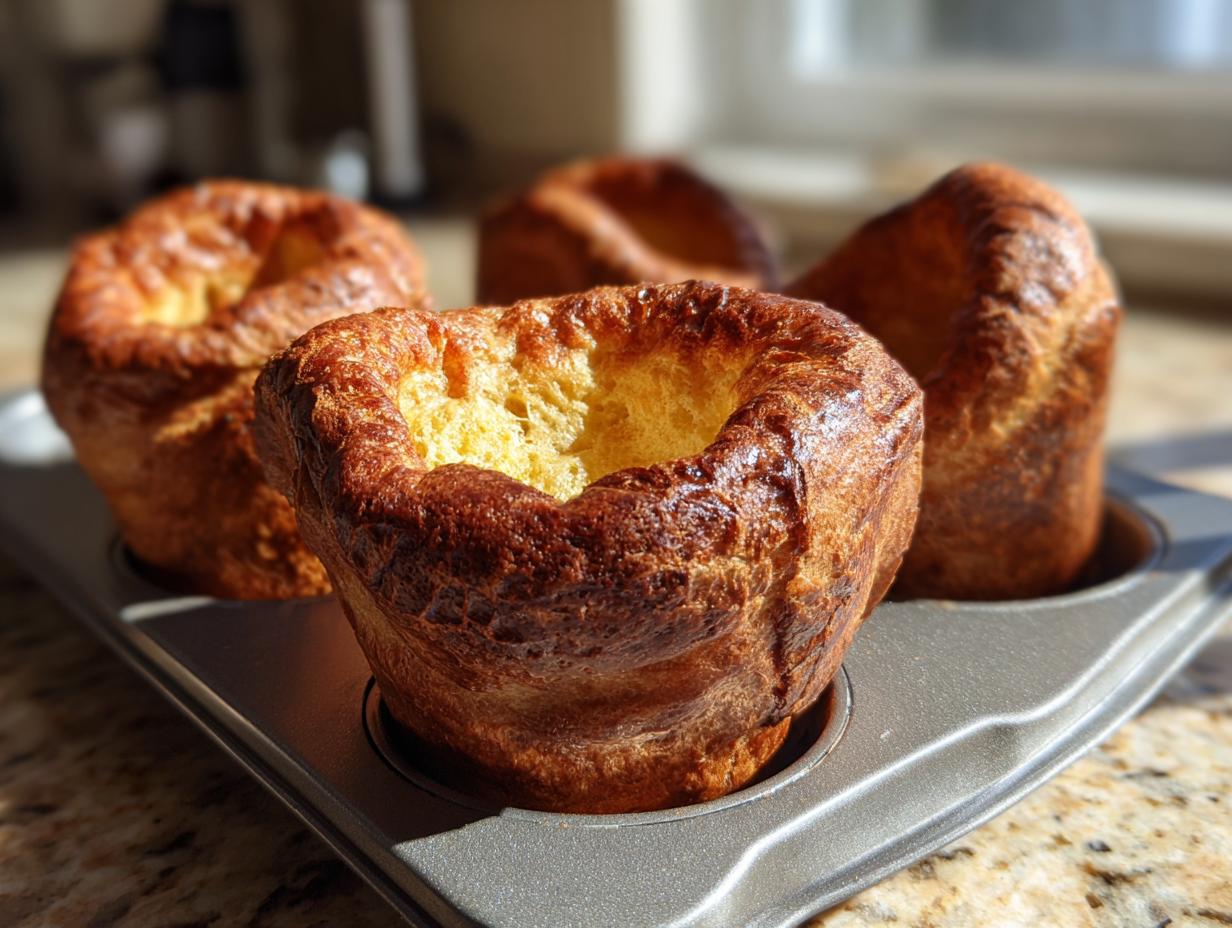
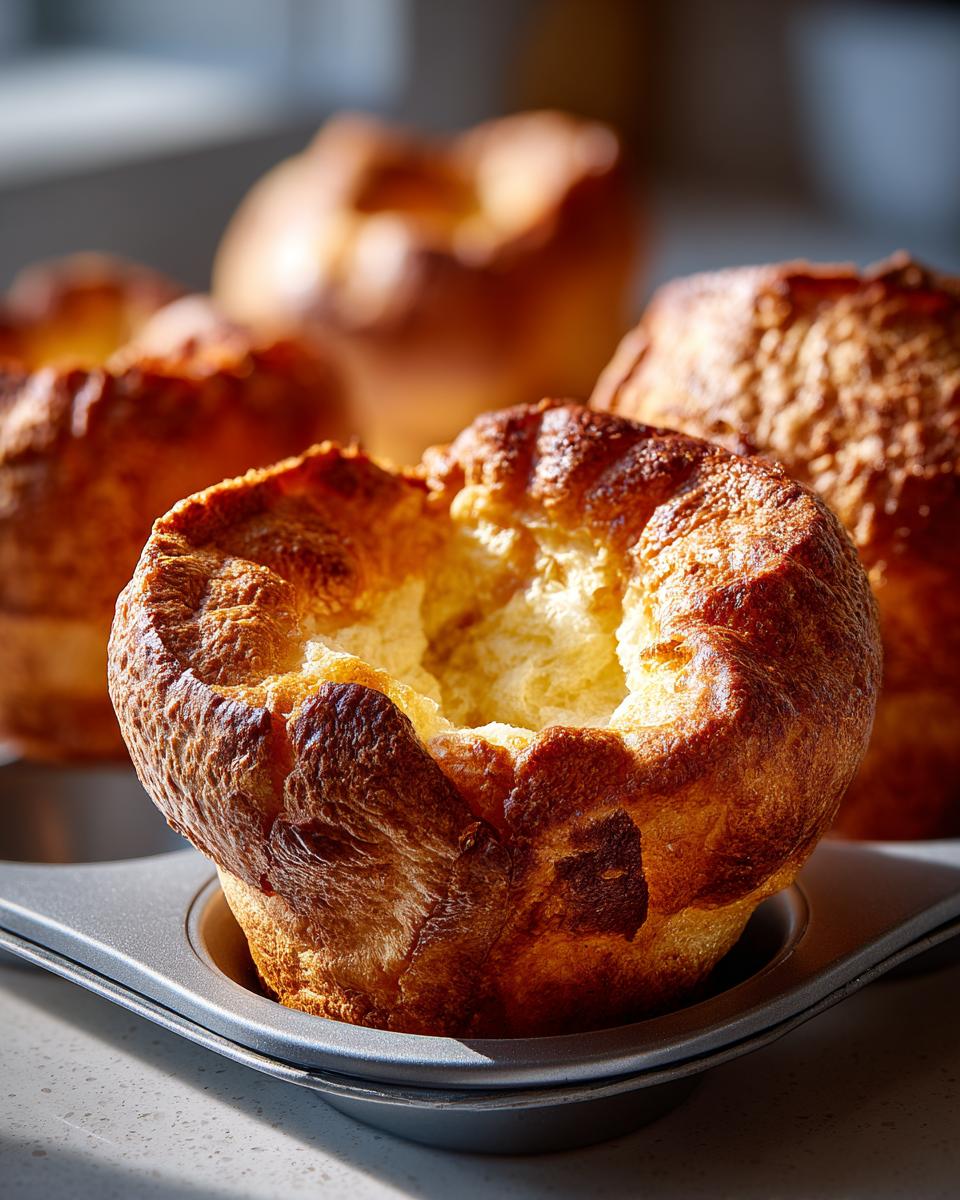
Oven mitts on! Work fast now. Pull that smoking hot tin out and pour the batter immediately, filling each cup only about one-third full. Get it back in the oven right away. And here is the second non-negotiable rule for getting those tall, Fluffy Yorkshire Puddings: Do NOT open the oven door for at least the first 20 minutes. Seriously. Resist the urge! Opening the door lets the heat escape, and that steam—which is what inflates your puddings—will collapse instantly. Bake them for 20 to 25 minutes until they are beautifully puffed, golden brown, and look incredibly crisp. Once they’re done, get them out and serve them straight onto your plate begging for gravy!
Yorkshire Pudding Tips and Tricks for a Perfect Rise
If you’ve followed my steps above, you are already miles ahead toward achieving legendary status in the kitchen! But let’s talk brass tacks, because these Yorkshire Pudding Tips and Tricks are what separates a good pudding from a mind-blowing one. The entire success of these light beauties rests on one thing: steam. That thin batter, when it hits fat hotter than the surface of the sun, creates instantaneous steam inside that forces the pudding up like a balloon. That’s the science!
I can’t stress this enough: the fat in the tin must be smoking hot. If it’s just warm, you get a greasy mess, not a puffy cloud. Also, remember that resting period for the batter? That lets the flour absorb the liquid fully, making the structure stronger before it even hits the heat. I share more about my journey to mastering these classic recipes over on my About Page. For a different perspective on conquering the rise, check out the great tips from Honey & Juniper too, they really know their stuff!
Serving Suggestions for Your Traditional British Side Dish
Now that you have miraculously managed to create tall, golden clouds of deliciousness, the real fun begins: eating them! A proper Yorkshire pudding is not just a side dish; it’s the foundation upon which a legendary roast dinner is built. If you’re making these authentically, you simply must pair them with roast beef. Nothing else compares to that combination, trust me.
You need gravy. Lots of rich, thick gravy to fill that beautiful, crispy middle. Think deeply caramelized onion gravy, or a classic beef jus seasoned perfectly. While you can certainly serve these with roasted chicken or even my easy weeknight chili if you’re feeling bold, their soul belongs firmly in the Sunday Roast category. They soak up all those savory pan drippings intended for the meats and potatoes, making them the most requested Traditional British Side Dish at our table. Don’t let them sit around—serve them hot right out of the oven!
Variations: Gluten Free Yorkshire Pudding and Individual Yorkshire Puddings
The beauty of a simple batter like this is how adaptable it is, even though I preach sticking to the original! It’s great because this recipe naturally creates gorgeous Individual Yorkshire Puddings if you use a standard muffin tin, just like I described in the steps. No extra work required there—instant party food!
Now, I know not everyone can handle traditional wheat flour, or maybe you just want to mix things up a bit. If you are looking to try a Gluten Free Yorkshire Pudding, my main advice is to stick very closely to your chosen gluten-free flour blend. Gluten is what gives structure, and without it, achieving that massive rise can be tricky. You might find your puddings are slightly less lofty, but they will still be delicious and crisp!
If you want to go down that route, I highly recommend checking out recipes specifically designed for it, because the flour ratios are super important. My friend over at The Scatty Mum has a fantastic guide on making gluten-free versions that keeps the flavor punch you expect. Just remember: no matter the flour, the fat has to be smoking hot—that’s the universal law of the perfect puff!
Storage & Reheating Instructions for Yorkshire Puddings
Believe it or not, leftover Yorkshire puddings are a thing, though they usually vanish faster than you can say “Sunday roast.” If you happen to have a few stragglers hiding at the bottom of the tin, don’t fret about tossing them! You can store cooled Yorkshire puddings in an airtight container. If you plan on eating them within the day, leaving them on the counter is fine, but for longevity, pop them in the fridge. They’ll keep okay for about two or three days tucked away in there.
Now, here’s the crucial part: reheating. You absolutely cannot, under any circumstances, try to revive a sad, floppy pudding in the microwave. That just guarantees a hard, chewy disappointment—and we don’t do disappointing around here! To bring back that ideal crispy outside and soft interior, you need dry, fierce heat.
To revive your puddings, spread them out on a baking sheet. Put them back into a hot oven—say, around 400°F (200°C)—for about five to seven minutes. Keep an eye on them! You are literally waiting for the fat coating them to crisp back up and for them to reacquire that golden-brown color. When they come out, they should be almost as perfect as when they first came out of the oven. This little step shows you that even leftovers can be made special, which is what this whole blog is about!
Frequently Asked Questions About Making Yorkshire Puddings
Why did my yorkshire pudding collapse?
Ah, the dreaded flop! Nine times out of ten, your yorkshire pudding collapses because *you opened the oven door* too early. Seriously, it’s the number one rookie mistake we all make. When you open that door before the structure has fully set—usually before the 20-minute mark—that rush of cool air causes the expanding steam inside to deflate instantly. The other reason could be that your fat wasn’t hot enough when you poured the batter in. If it’s not crackling, it won’t puff!
Can I use different fat or oil?
You certainly can, but let me tell you Ava’s preference. Traditionally, beef dripping is the gold standard for flavor and high smoke point. That’s what gives you that authentic, rich taste. However, vegetable oil works beautifully and is what I often default to if I’m not already roasting beef, because it also hits that high smoke point needed for the initial blast of heat. Sunflower oil is also a good, neutral choice. Just avoid butter or olive oil; they burn too easily at the required temperature.
Can I use cold batter?
This is a great question that separates the casual baker from the perfectionist! While I mentioned letting the batter rest on the counter for 30 minutes for optimal results, I’ve baked with cold batter straight from the fridge, and it still comes out great, provided that fat is absolutely screaming hot. The *only* exception is if the batter is sitting for more than four hours; then it really benefits from that resting time to hydrate the flour evenly. But for a quick Sunday roast prep, cold batter is usually fine!
What is the difference between Yorkshire pudding and popovers?
It’s all about heritage, honestly! Functionally, they are almost the same—a simple batter made with flour, eggs, and milk, cooked in extremely hot fat to create an airy shell. Popovers are the American cousins of the Yorkshire pudding. The main differences usually lie in the fat used (popovers often use melted butter instead of dripping) and their intended use. Popovers are often served sweet or plain, whereas our classic British version is savory and is the indispensable partner for roast beef and gravy. Both are amazing, but one is tied firmly to the Sunday Roast tradition, making our Puffy Popovers distinctly British!
If you want to check out the American standard, Serious Eats has a brilliant breakdown of the popover technique. If you have questions about anything else, feel free to reach out through my contact page!
Estimated Nutritional Data for Homemade British Comfort Food
Since we are all about transparency here at Completely Yummy, I wanted to give you a general idea of what’s in one of these delicious treats. Remember, these are estimates, as things like how much fat is actually absorbed into the pudding can change the final count!
Based on making 12 individual portions from the recipe provided, here is the rough nutritional breakdown for one stunning, crisp pudding:
- Serving Size: 1 pudding
- Calories: 120
- Fat: 7g
- Carbohydrates: 11g
- Protein: 4g
See? It’s surprisingly light for such a comforting and hearty side dish! This information just confirms that making this delicious Homemade British Comfort Food is a perfectly reasonable indulgence. If you’re looking to keep things light, check out some of my quick and healthy breakfast ideas for other days of the week!
Share Your Golden Brown Puddings
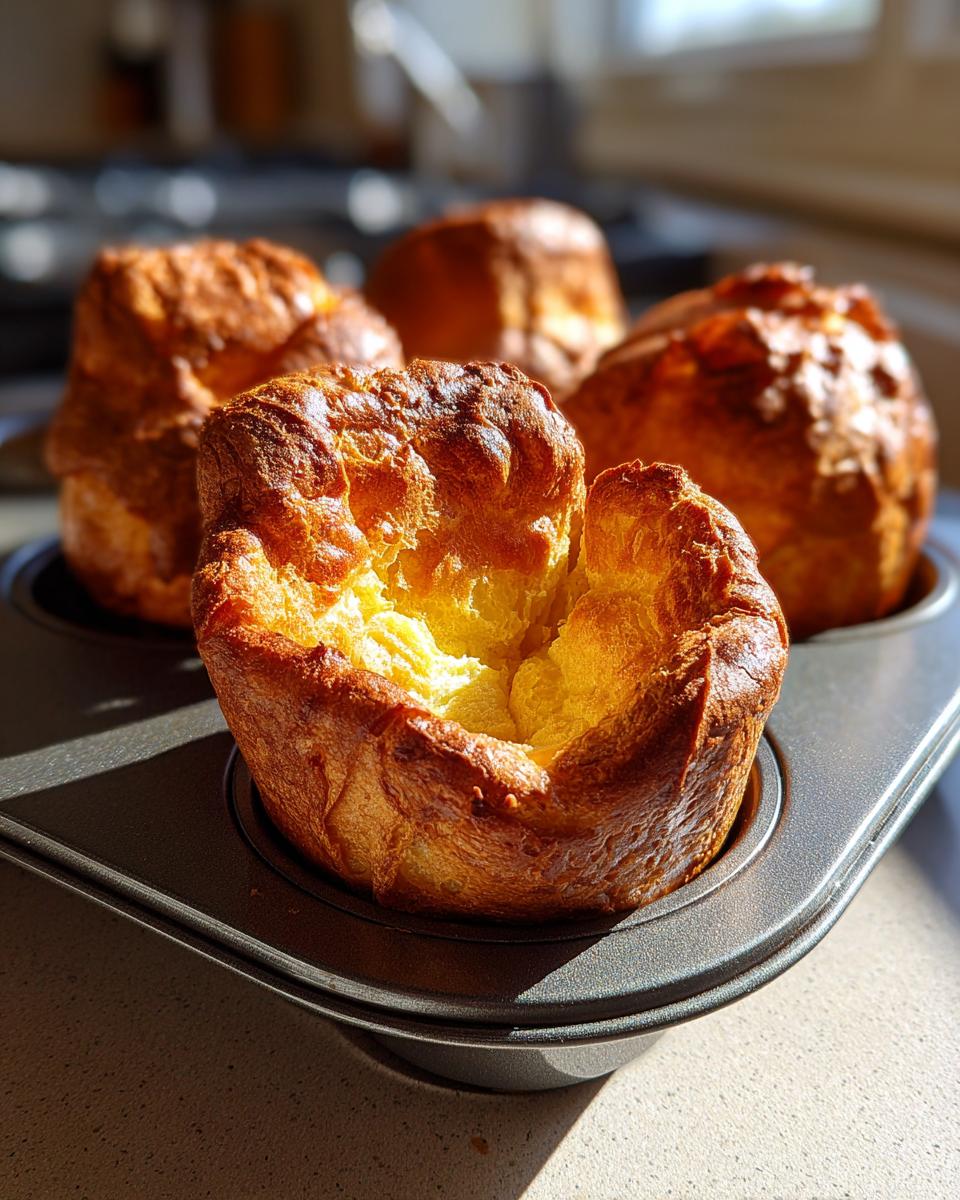
Okay, I have shared all my secrets that guarantee you perfectly puffed, glorious, Golden Brown Puddings. Now it’s your turn! I absolutely love hearing from you, and nothing makes me happier than seeing photos of your successful Sunday roasts.
Did you nail that incredible rise? Did you use beef dripping or oil? Leave a comment below, rate the recipe so other home cooks can see how foolproof it really is, and maybe even share a picture of your giant puddings soaking up gravy. Your success is what makes this whole mission worthwhile. Happy Cooking, and don’t forget to find more cozy inspiration in my delicious dessert recipes!
Estimated Nutritional Data for Homemade British Comfort Food
Since we are all about transparency here at Completely Yummy, I wanted to give you a general idea of what’s in one of these delicious treats. Remember, these are estimates, as things like how much fat is actually absorbed into the pudding can change the final count!
Based on making 12 individual portions from the recipe provided, here is the rough nutritional breakdown for one stunning, crisp pudding:
- Serving Size: 1 pudding
- Calories: 120
- Fat: 7g
- Carbohydrates: 11g
- Protein: 4g
See? It’s surprisingly light for such a comforting and hearty side dish! This information just confirms that making this delicious Homemade British Comfort Food is a perfectly reasonable indulgence. If you’re looking to keep things light, check out some of my quick and healthy breakfast ideas for other days of the week!
Share Your Golden Brown Puddings
Okay, I have shared all my secrets that guarantee you perfectly puffed, glorious, Golden Brown Puddings. Now it’s your turn! I absolutely love hearing from you, and nothing makes me happier than seeing photos of your successful Sunday roasts.
Did you nail that incredible rise? Did you use beef dripping or oil? Leave a comment below, rate the recipe so other home cooks can see how foolproof it really is, and maybe even share a picture of your giant puddings soaking up gravy. Your success is what makes this whole mission worthwhile. Happy Cooking, and don’t forget to find more cozy inspiration in my delicious dessert recipes!
PrintThe Perfect Foolproof Yorkshire Pudding: Crispy Outside, Fluffy Inside

Make light, airy, and perfectly crisp Yorkshire puddings every time. This simple recipe uses basic ingredients to achieve the classic tall, golden rise you need for your Sunday roast.
- Prep Time: 10 min
- Cook Time: 25 min
- Total Time: 35 min
- Yield: 12 individual puddings 1x
- Category: Side Dish
- Method: Baking
- Cuisine: British
- Diet: Vegetarian
Ingredients
- 1 cup all-purpose flour
- 1 cup whole milk
- 2 large eggs
- 1/2 teaspoon salt
- 1/2 cup beef dripping or vegetable oil (for the tin)
Instructions
- Place 1 tablespoon of beef dripping or oil into each cup of a 12-cup muffin tin.
- Preheat your oven to 450°F (230°C). Place the tin with the fat into the hot oven for at least 10 minutes while you make the batter. The fat must be smoking hot.
- While the fat heats, whisk the flour and salt together in a large bowl.
- Make a well in the center and crack the eggs into it. Begin whisking the eggs, gradually incorporating the flour from the sides.
- Slowly pour in the milk while continuously whisking until you have a smooth, thin batter, similar to thin cream. Do not overmix.
- Carefully remove the hot tin from the oven. Work quickly to pour the batter evenly into the hot fat, filling each cup about one-third full.
- Immediately return the tin to the oven. Do not open the oven door for the first 20 minutes of cooking.
- Bake for 20 to 25 minutes, or until the puddings are well-risen, deep golden brown, and crisp.
- Serve immediately with your roast dinner and gravy.
Notes
- For the best rise, the batter should rest in the refrigerator for at least 30 minutes, or up to 4 hours, before baking.
- The key to a tall pudding is extremely hot fat. If the fat is not smoking when you pour the batter in, the puddings will not puff correctly.
- Use individual muffin tins for perfect individual Yorkshire puddings, or a larger tin for a large pudding (adjust baking time slightly).
Nutrition
- Serving Size: 1 pudding
- Calories: 120
- Sugar: 1
- Sodium: 150
- Fat: 7
- Saturated Fat: 2
- Unsaturated Fat: 5
- Trans Fat: 0
- Carbohydrates: 11
- Fiber: 0
- Protein: 4
- Cholesterol: 55