
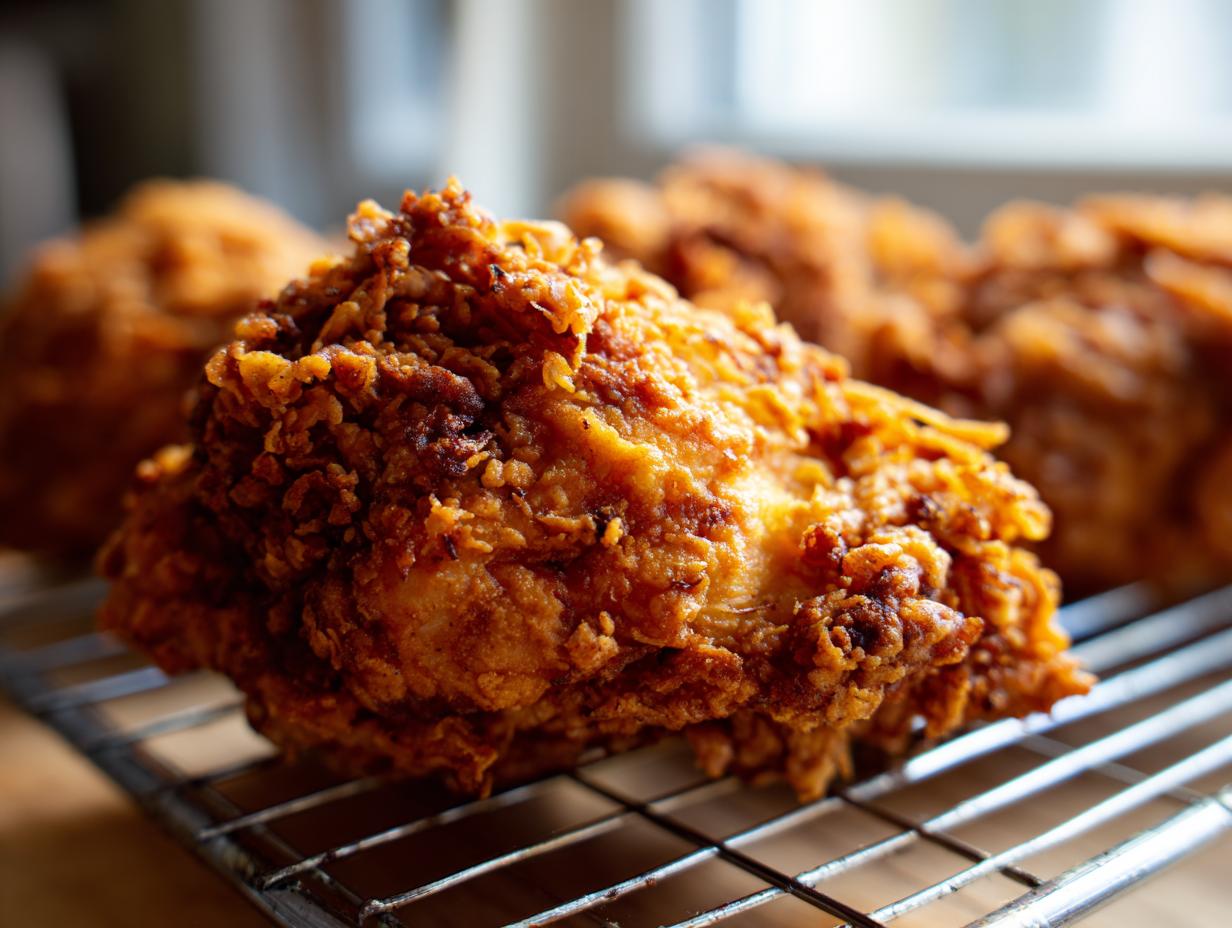
If you’ve ever taken a bite of truly perfect fried chicken—that shatteringly crisp, craggy crust giving way to meat so juicy it practically melts—you know the magic I’m talking about. Seriously, nothing beats it! For years, I chased that elusive texture, trying every trick out there. That’s why I developed this recipe for Ultra-Crispy Buttermilk Southern Fried Chicken. It’s my mission here at Completely Yummy to take those beloved, traditional flavors and turn them into something genuinely doable, even when life gets hectic. Forget complicated steps; this foolproof recipe uses a simple buttermilk brine to guarantee amazing flavor and tenderness every single time. Get ready; this is the best homemade fried chicken you’ll ever make!
- Why This Buttermilk Southern Fried Chicken Recipe Delivers (E-E-A-T Focus)
- Ingredients for the Best Homemade Fried Chicken
- How To Make Fried Chicken: Step-by-Step Instructions
- Tips for Success with Your Fried Chicken
- Ingredient Notes and Substitutions for Classic Fried Chicken
- Serving Suggestions for Your Savory Chicken Dinner Ideas
- Storage and Reheating Instructions for Crunchy Chicken
- Frequently Asked Questions About Making Fried Chicken
- Estimated Nutritional Information for Fried Chicken
Why This Buttermilk Southern Fried Chicken Recipe Delivers (E-E-A-T Focus)
I get it. You see a recipe for fried chicken and think, “Too much trouble, it’ll end up dry.” Trust me, that anxiety is exactly why I spent so many weekends testing and tweaking this recipe until it was absolutely foolproof. My dedication here at Completely Yummy is making sure you get perfection without the frustration. The secret to that unbelievably juicy and crispy chicken is all about moisture management, starting way before the oil even heats up.
The buttermilk soak isn’t just for tang; it tenderizes the meat beautifully, ensuring you get that succulent interior that makes this Southern Fried Chicken legendary. Every measurement, every temperature, has been logged and repeated to confirm the results. This isn’t guesswork; this is proven comfort food magic, ready for your table.
Achieving the Signature Crunchy Chicken Coating
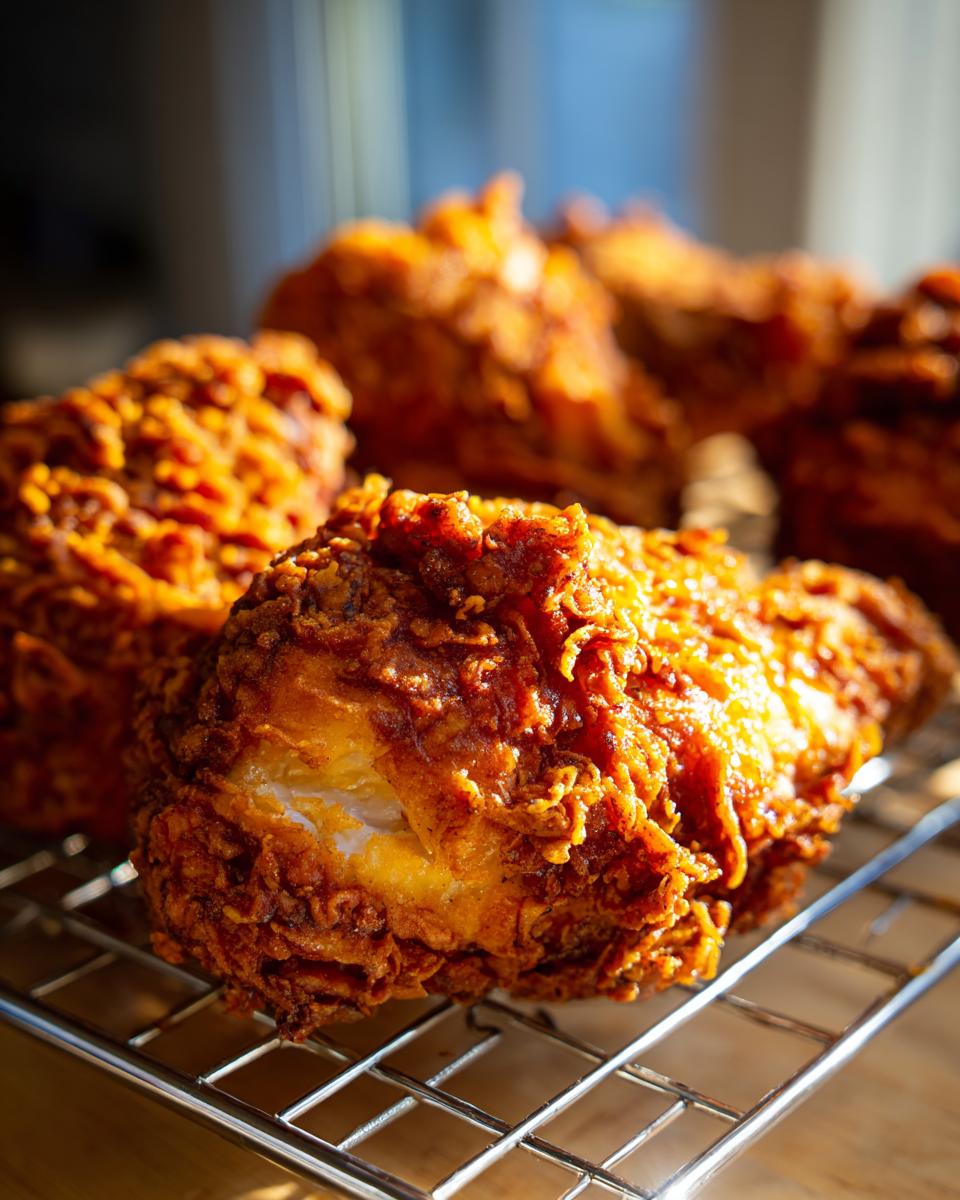
If the brine is the secret to the inside, the dredge is the secret to the outside armor! We add a little cornstarch to our flour mix, which is essential. Cornstarch helps draw out just enough surface moisture from the chicken skin during frying to create those beautiful, craggy peaks we all look for in authentic fried chicken. Don’t skip the pressing step either!
For the absolute best, most crackly crunchy chicken coating, perform the double dip. Flour, buttermilk bath (quick!), and back into the flour. Press hard! That extra layer is what gives you that wonderful texture when it comes out deep golden brown.
Ingredients for the Best Homemade Fried Chicken
Okay, let’s get organized! A fantastic fried chicken starts with great ingredients, and luckily, most of this stuff is probably already in your pantry. I’ve kept this simple so it’s an easy dinner recipe any night you crave it, but the quantities are spot on for achieving that perfect juicy and crispy chicken texture. Precision matters here, especially with the salt!
Here’s what you need for four generous servings of Southern Fried Chicken:
- 3 lbs bone-in, skin-on chicken pieces (I always lean toward thighs and drumsticks for max flavor, but use what you love!)
- 4 cups buttermilk (Get the full-fat kind, trust me)
- 2 tablespoons kosher salt (Yes, that much! It seasons the meat deep down.)
- 1 tablespoon black pepper
- 1 teaspoon cayenne pepper (Just enough for a tiny kick, not a fire alarm.)
- 4 cups all-purpose flour
- 1/2 cup cornstarch (This is one of our secrets for crunch!)
- 2 tablespoons paprika (For that beautiful color)
- 1 tablespoon garlic powder
- 1 tablespoon onion powder
- Vegetable oil or shortening, for frying (You need enough for about 2-3 inches depth in your pot.)
How To Make Fried Chicken: Step-by-Step Instructions
Alright, this is where the magic happens! While the ingredients list might look long, the actual assembly of this fried chicken is straightforward. Just stick to the order, and you’ll have poultry that is perfectly golden brown chicken when it hits the plate. Remember, speed comes after preparation. We need to respect the process if we want that impossibly tender result.
If you’re looking for a great side to pair with this fantastic meat, check out my recipe for easy chili—it’s perfect for topping leftover pieces or just having on the side!
The Essential Buttermilk Brined Chicken Soak
This is the first non-negotiable step for juicy and crispy chicken. Take your chicken pieces and get them cozy in a big bowl. Pour that whole four cups of buttermilk right over the top. You need everything submerged, so use a slightly deeper container if necessary! Now, sprinkle in your salt, the pepper, and the cayenne. I like to give that a good stir with a wooden spoon—make sure everything is swimming happily.
Cover this whole operation up tightly and move it to the fridge. You absolutely must let this sit for a minimum of four hours. Honestly, I highly recommend letting it sit overnight. That long soak is what breaks down the fibers and ensures your buttermilk brined chicken stays incredibly moist no matter what happens in that hot oil later on.
Preparing the Crispy Fried Chicken Recipe Dredge
While that chicken is chilling out and getting happy in the fridge, let’s get your dry mix ready. Grab a wide, shallow dish—something you can easily dredge in. Whisk together all the flour, our secret weapon the cornstarch, the paprika, the garlic powder, and the onion powder. Whisk it really well. You want those seasonings evenly distributed throughout that flour pile. This creates the ultimate crunchy chicken coating.
When you take the chicken out of the fridge later, you won’t rinse it off! Just grab a piece, let the extra buttermilk drip off for just a second, and then press it firmly into that flour mix. Press hard! If you want that craggy, super-crispy look, do the double dip: flour, quick slosh back into the buttermilk, and then *back* into the flour one more time, pressing hard so you build up those amazing flakes.
Frying for Perfectly Golden Brown Chicken
Time to heat the oil! Get 2 to 3 inches of your vegetable oil or shortening warming up in a heavy skillet. We are aiming for a steady 325 degrees Fahrenheit. You absolutely need a thermometer here; trust me, eyeball testing leads to sad, greasy *fried chicken*. If the oil is too cool, the bird gets greasy. Too hot, and the outside burns while the inside is still thinking about cooking.
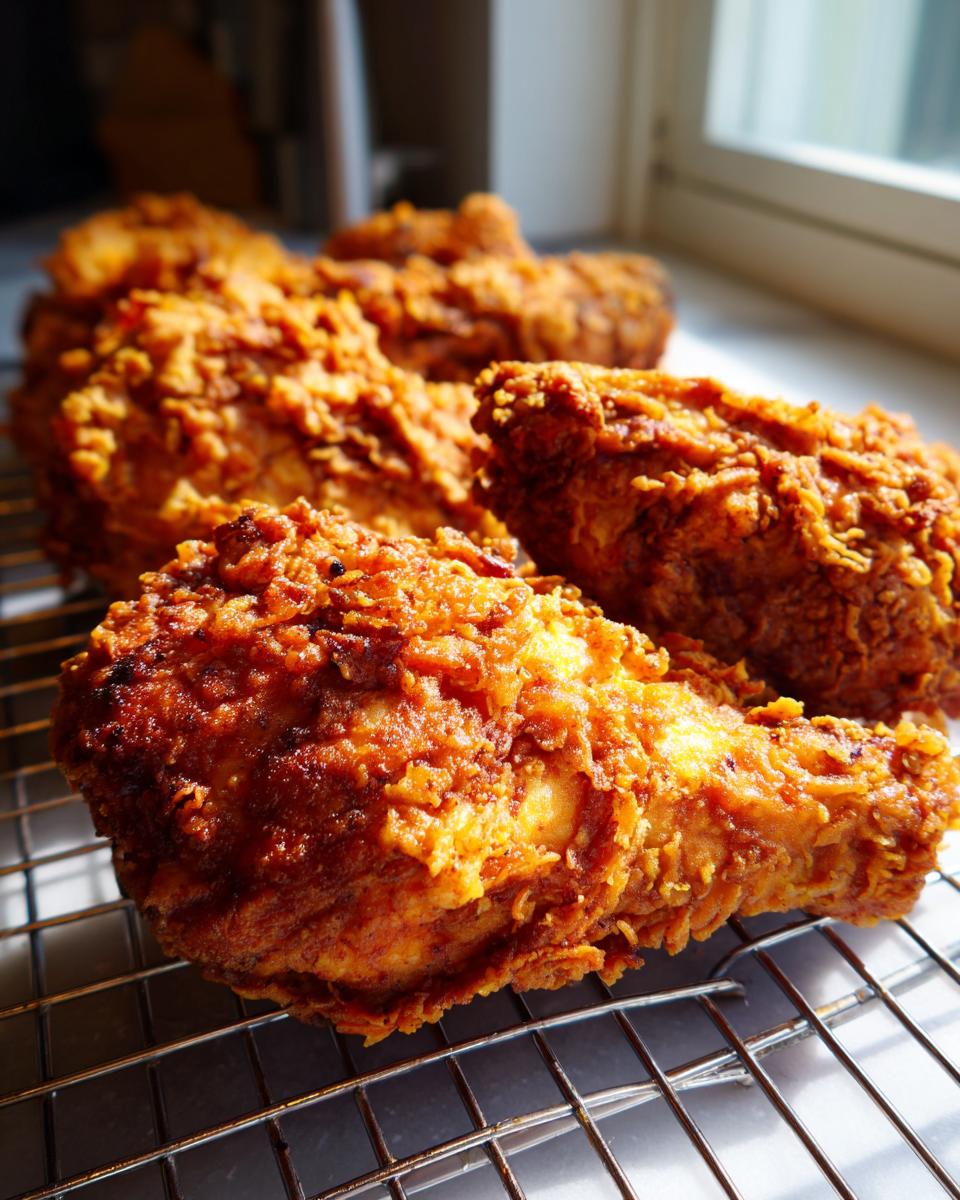
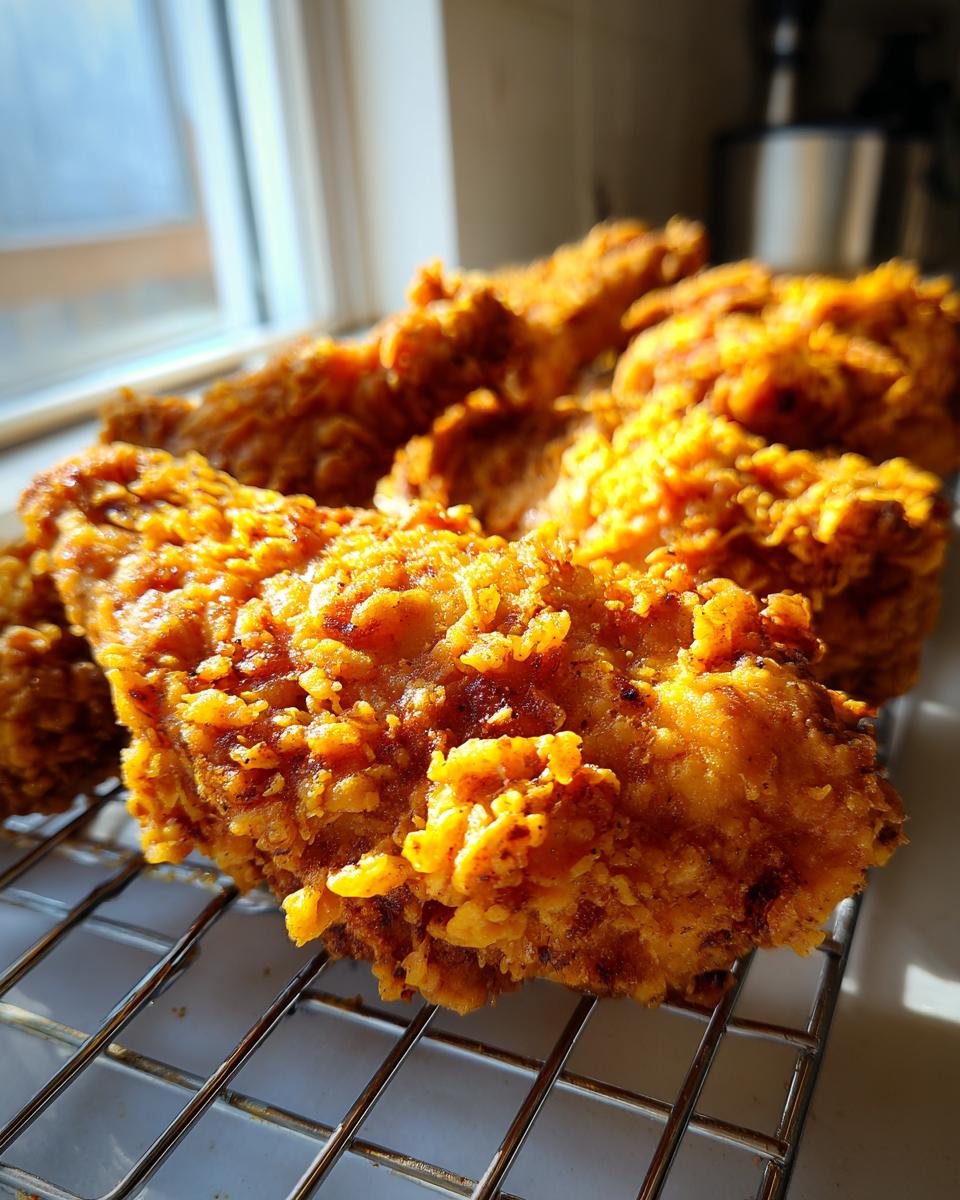
Carefully place your dredged pieces into the hot oil. Do not, I repeat, DO NOT crowd the pan! We need space for the heat to circulate. This is all about patience. Fry those pieces for about 6 to 8 minutes on each side until they look deeply golden brown chicken and register 165°F inside. Once they’re done, pull them out immediately and put them on a wire rack set over a baking sheet. That rack is important—it lets air hit the bottom so your fried chicken doesn’t steam itself soggy!
Tips for Success with Your Fried Chicken
Even with the best recipe, little details can make or break your fried chicken experience. Since I’ve made mountains of this stuff, I’ve learned a few tricks straight from my testing lab to ensure you always get that perfect crunch and never end up with soggy bottoms!
My biggest tip, which I tried to stress earlier, is letting the dredged chicken rest. I know you want that chicken in the hot oil ASAP, but pause! Let those floured pieces sit on the wire rack for about 15 minutes before they hit the deep fryer. This might seem counterintuitive when you’re waiting for that juicy and crispy chicken texture, but trust me here. This resting time allows the flour coating to truly adhere to the moist surface of the buttermilk brine. It locks in the structure so when it hits the oil, you get that incredible, craggy, non-fall-off crust. It’s worth the wait!
Another huge factor in success is maintaining your oil temperature. You can learn more about achieving that perfect crust over at Lucille’s site; they have great advice on crispy coatings right here. But the main takeaway is this: always monitor that temperature! If you see the chicken bubbling too violently, it’s too hot and you risk burning the outside. If the bubbles look lazy, it’s too cool, and your beautiful poultry will turn into an oil sponge. Between 300°F and 335°F is the sweet spot to get that golden brown chicken without sacrificing the inside.
Finally, when draining, always use a wire rack, never paper towels piled on a plate. Paper towels trap the steam rising off the hot chicken, and steam is the direct enemy of crispiness! Letting air circulate completely underneath is the final, little step that guarantees every piece of your Southern Fried Chicken stays crunchy until it’s gobbled up.
Ingredient Notes and Substitutions for Classic Fried Chicken
Part of how I simplify cooking here at Completely Yummy is making sure you don’t have to run out chasing obscure items. Most of the magic in this fried chicken recipe comes from technique, but let’s talk about a couple of ingredient swaps you might wonder about, especially if you’re planning for a massive easy chicken dinner.
First up: Chicken parts! I always list bone-in, skin-on pieces—thighs and legs are my absolute favorite because they stay juicy forever. If you only have chicken breasts, that’s fine! They cook much faster, so keep that internal thermometer handy and yank them out the second they hit 165°F. If you don’t pull them fast enough, you’ll end up with dry chicken, which defeats the whole purpose of our beautiful brine.
Now, about that buttermilk. If you are totally out, you can make a quick substitute! Just take regular milk and stir in one tablespoon of white vinegar or lemon juice for every cup of milk you use. Let it sit on the counter for about five minutes until it starts looking slightly curdled. It acts almost exactly the same way in tenderizing the meat for your buttermilk brined chicken.

One common question I get is, “Can I use this recipe for Country Fried Chicken?” Ah, that’s a great pivot! Yes, you absolutely can nail that crispy texture using this same dredge and brine method. However, remember that Country Fried Chicken (or Chicken Fried Chicken/Steak in some areas) demands a rich white gravy smothered all over it, which is a separate adventure. If you’re heading down that route, you’ll need to prep your gravy while the chicken is frying. If gravy sounds too complicated for tonight, stick with this classic version or maybe try out my marinade for pork chops next time you’re looking for something new!
Serving Suggestions for Your Savory Chicken Dinner Ideas
You’ve done the work! You’ve mastered the brine, nailed the double-dip, and pulled that unbelievably juicy and crispy chicken out of the hot oil. Now what? A masterpiece like this fried chicken deserves the best supporting players on the plate. We’re aiming for pure, unadulterated comfort food perfection here, so keep things simple and classic!
When I serve up this Southern Fried Chicken, I always think about texture contrast. You have the heavy, savory crunch of the chicken, so you need something bright and creamy to balance it out. My go-to side that always appears on the table is creamy, buttery mashed potatoes. They are the perfect blank canvas for soaking up any residual seasonings or, let’s be honest, any gravy you might decide to whip up!
But you can’t have mashed potatoes without biscuits! Fluffy, warm buttermilk biscuits are non-negotiable. They are fantastic for picking up pieces of chicken or just sliding around in the leftover oil (don’t judge!). If you aren’t keen on baking biscuits, a nice baker’s dozen from your local shop works in a pinch for an easy fried chicken dinner.
For greens, keep it zingy. Creamy coleslaw provides that cool, tangy crunch that cuts through the richness perfectly. Or, if you want something warm, a simple side of green beans seasoned lightly with garlic and a little bacon fat—that’s pure Southern gold right there. If you’re looking for another hearty, totally comforting idea that shares that homey vibe, you absolutely have to check out my recipe for classic shepherd’s pie sometime soon. No matter what you pair it with, this savory chicken dinner will be a hit!
Storage and Reheating Instructions for Crunchy Chicken
Listen, this **fried chicken** is so good that there’s rarely any left over. But if you’re lucky enough to have some crispy bits tomorrow, you need to treat them right! We worked so hard to get that perfect crunchy chicken coating, and we aren’t going to let a soggy reheat ruin it, right?
The best way to store any leftovers—whether it’s a drumstick or a piece of chicken breast—is to let it cool completely first. If you cover it while it’s still warm, all that residual steam gets trapped, and you are guaranteed to lose your crispiness. Once it’s totally cool, get those pieces into an airtight container. You can store it in the fridge for about three to four days. Honestly, the quality starts to drop off after day four, so try to plan accordingly!
Now, for the crucial part: reheating! We are banning the microwave from this operation. The microwave is the fastest way to turn that beautiful, textured crust into sad, rubbery armor. Nope. We are sticking to methods that bring back the crunch.
The Oven Method for Crispy Results
If you’re reheating a bunch of pieces, the oven is your best friend. Preheat your oven to a good medium-high heat, around 375°F. Make sure you set a wire rack on top of a baking sheet—just like when you drained the chicken originally! This allows air to circulate underneath, which is key for keeping the bottom from getting soft.
Lay your cold, leftover chicken right on that wire rack. Pop it into the oven for about 10 to 15 minutes. Start checking around the 10-minute mark. You’re looking for the coating to feel dry and firm again, and the meat should be heated through to 165°F. That simple step brings back most of that original, glorious texture!
Quick Reheating with an Air Fryer
If you have an air fryer, this is arguably the absolute best way to revive your crispy fried chicken recipe leftovers. It’s fast, and it gets super crunchy. Set your air fryer to about 350°F.
Place the chicken pieces in a single layer in the basket—no overlapping! You might need to do this in batches. Air fry them for about 5 to 7 minutes. Shake the basket halfway through. This method really concentrates the heat and blasts away any moisture, leaving you with **juicy and crispy chicken** almost like it just came out of the fryer! It’s genius for a quick lunch.
Frequently Asked Questions About Making Fried Chicken
I know sometimes after testing out a big recipe like this fried chicken, you might still have a few lingering questions. That’s totally normal! I’ve tried to make this recipe as straightforward as possible, but I’ve gathered the most common things people ask me when they want to master **how to make fried chicken** perfectly every time.
Can I use chicken breasts instead of thighs and drumsticks?
Yes, you absolutely can! Chicken breasts are a leaner cut, so they cook faster than bone-in pieces. If you’re using raw, boneless chicken breasts, I recommend slicing them either in half horizontally or into cutlets so they are of a uniform thickness. This is crucial if you want an even cook. Because they are leaner, they won’t stay as juicy as the thighs, but our buttermilk brine will still help tremendously! Keep a close eye on the internal temperature; they are done as soon as they hit 165°F.
What is the best oil for deep fried chicken?
When you are doing proper deep fried chicken, you want an oil with a high smoke point that is flavor-neutral, so it doesn’t compete with all those lovely spices in your dredge. In the recipe, I listed vegetable oil or shortening. Shortening gives you that wonderfully classic, old-fashioned flavor and crust that Southerners love! If you don’t want to use shortening, peanut oil is fantastic because it has a very high smoke point and a slight, almost undetectable nutty note. Canola oil is also a great, budget-friendly option that works well!
How do I prevent the coating from falling off during frying?
This is the eternal struggle! If your coating isn’t sticking, it usually boils down to one of two things we discussed in the instructions—or maybe both! First, make sure you are pressing that **crunchy chicken coating** into the flour really, really firmly. Don’t just lightly dust it; press it into the flour mixture to create a thick, almost shaggy crust.
Second, and maybe most important for this crispy fried chicken recipe, is letting the dredged chicken rest on that wire rack for at least 15 minutes before frying. This sets the coating. If you drop it straight from the flour into the oil, the excess surface moisture hits the hot fat, and the coating slides right off! Give it that 15-minute set time, and you’ll see a vast improvement for your easy fried chicken dinner!
Is there a way to make this less messy?
Oh, darling, fried chicken can be messy, but let’s simplify the clean-up! When you are done frying, don’t dump the oil down the sink, obviously! Let the oil cool completely overnight, then strain it through cheesecloth or a coffee filter into a sturdy container with a lid, like an old plastic milk jug or a large mason jar. You can reuse that oil for your next batch! For the splatter, I always place a lid or a splatter screen—the mesh kind—over my pot for the first minute or two of frying, but only briefly! You need the steam to escape so your crust stays crunchy. If you want to read a bit more about general kitchen organization and simplifying cooking, I put together a little page about my philosophy over here at my About Page!
Estimated Nutritional Information for Fried Chicken
Now, listen up, because this part is important when we talk about enjoying incredible comfort food. We all know that magnificent, juicy, crispy fried chicken isn’t exactly a salad! This is a treat, and the numbers reflect that glorious deliciousness. The nutritional breakdown I have here is just an estimate based on the USDA averages for the ingredients I listed and the serving size breakdown.
When you’re whipping up this amazing fried chicken, remember these numbers account for one typical piece, assuming you stick to the recipe proportions. If you eat three extra pieces, well, the numbers go up, but trust me, you won’t regret it!
Here are the estimates for one serving of this Southern Fried Chicken:
- Serving Size: 1 piece
- Calories: 450
- Fat: 28g (Note that this includes the oil absorbed during frying—that’s where the crunch comes from!)
- Protein: 30g
- Carbohydrates: 15g
- Sugar: 1g (Mostly natural sugars from the spices, not added sugar in the coating itself.)
- Sodium: 650mg (This is due to the salt we use in the brine, which is key for flavor penetration!)
These are approximate figures, of course. If you decide to swap out chicken thighs for breasts, or if you use a different type of frying oil, the final tally will shift a bit. But for the purposes of planning your amazing easy fried chicken dinner, these numbers give you a great ballpark idea of what you’re enjoying!
PrintUltra-Crispy Buttermilk Southern Fried Chicken

Make the best homemade fried chicken with this foolproof recipe. We use a buttermilk brine and a seasoned dredge to achieve a juicy interior and an ultra-crispy, golden-brown crust.
- Prep Time: 20 min
- Cook Time: 35 min
- Total Time: 3 hours 55 min
- Yield: 4 servings 1x
- Category: Dinner
- Method: Deep Frying
- Cuisine: Southern American
- Diet: None
Ingredients
- 3 lbs bone-in, skin-on chicken pieces (thighs, drumsticks)
- 4 cups buttermilk
- 2 tablespoons kosher salt
- 1 tablespoon black pepper
- 1 teaspoon cayenne pepper
- 4 cups all-purpose flour
- 1/2 cup cornstarch
- 2 tablespoons paprika
- 1 tablespoon garlic powder
- 1 tablespoon onion powder
- Vegetable oil or shortening, for frying
Instructions
- Place the chicken pieces in a large bowl. Pour the buttermilk over the chicken, ensuring all pieces are submerged. Add the 2 tablespoons of salt, 1 tablespoon of pepper, and cayenne pepper to the buttermilk. Cover and refrigerate for at least 4 hours, or preferably overnight. This is key for juicy and crispy chicken.
- In a separate shallow dish, whisk together the flour, cornstarch, paprika, garlic powder, and onion powder. This is your crunchy chicken coating dredge.
- Remove the chicken from the buttermilk, letting excess drip off, but do not rinse.
- Dredge each piece of chicken thoroughly in the flour mixture, pressing the flour onto the chicken to create a thick, craggy coating. For extra crispiness, you can perform a double dip: dip the floured chicken back into the remaining buttermilk for a few seconds, then back into the flour mixture, pressing again.
- Heat 2-3 inches of oil in a large, heavy-bottomed skillet or Dutch oven to 325 degrees Fahrenheit. Use a thermometer to monitor the temperature.
- Carefully place the chicken pieces into the hot oil, ensuring you do not overcrowd the pan. Work in batches.
- Fry the chicken for about 6-8 minutes per side, turning occasionally, until it reaches an internal temperature of 165 degrees Fahrenheit and the crust is deep golden brown. Adjust heat as necessary to maintain oil temperature.
- Remove the fried chicken from the oil and place it on a wire rack set over a baking sheet to drain excess oil. This keeps the bottom from getting soggy.
- Serve your classic fried chicken immediately as a savory chicken dinner idea or comfort food chicken recipe.
Notes
- For the crispiest results, let the dredged chicken rest on the wire rack for 15 minutes before frying. This allows the coating to adhere better.
- If you are making Chicken Fried Chicken instead, you will need to prepare a white gravy separately to smother the finished product.
- Maintain your oil temperature between 300°F and 335°F for the best results. If the oil is too cool, the chicken absorbs too much grease; if too hot, the outside burns before the inside cooks.
Nutrition
- Serving Size: 1 piece
- Calories: 450
- Sugar: 1
- Sodium: 650
- Fat: 28
- Saturated Fat: 8
- Unsaturated Fat: 20
- Trans Fat: 0
- Carbohydrates: 15
- Fiber: 0
- Protein: 30
- Cholesterol: 110