
If you think broccoli is boring, I’m about to change your whole world, promise! I know how busy life gets—those deadlines pile up, and suddenly, Tuesday night dinner needs to be ready in a flash. That’s why I spent weeks figuring out the absolute best way to elevate this simple green into something truly crave-worthy. Forget mushy steamed veggies; we’re talking about smashed broccoli that comes out shatteringly crisp!
This recipe, Crispy Parmesan Smashed Broccoli with Garlic Butter, is my go-to technique for delivering that gorgeous tender-crisp texture we all love, but faster than you can believe. It pairs perfectly with almost anything, giving you back precious time without sacrificing an ounce of flavor. Get ready for the easiest, yummiest veggie side you’ve ever made.
- Why This Smashed Broccoli Recipe Is Your New Favorite Easy Side Dish
- Gathering Ingredients for Crispy Parmesan Smashed Broccoli
- How to Make Smashed Broccoli: Step-by-Step Instructions
- Expert Tips for the Best Smashed Broccoli Recipe Results
- Ingredient Notes and Substitutions for Parmesan Broccoli
- Serving Suggestions for Your Smashed Broccoli
- Storage and Reheating Instructions for Leftover Smashed Broccoli
- Frequently Asked Questions About This Quick Vegetable Recipe
- Share Your Experience Making This Smashed Broccoli
Why This Smashed Broccoli Recipe Is Your New Favorite Easy Side Dish
For me, the best recipes solve a problem, and my biggest problem is time! This smashed broccoli recipe proves you don’t need hours to make something absolutely incredible. It’s my answer for a genuinely satisfying quick vegetable recipe.
- It hits that perfect texture: shatteringly crisp on the outside, tender inside.
- Honestly, it’s a true 30 minute side dish breakthrough.
- The garlic butter and Parmesan combo is basically foolproof flavor.
- It’s a fantastic, lighter low carb side dish option for any dinner!
Gathering Ingredients for Crispy Parmesan Smashed Broccoli
I always say that the foundation of any great side dish starts with quality produce. Don’t grab those sad little bags of pre-cut florets for this one! You want one large, firm head of fresh broccoli. That density is what lets us smash it without it disintegrating into mush. Trust me, the reward is worth it.
For the flavor profile, since this is all about that savory crust, we keep the seasoning simple but potent. You’ll need:
- 1 large head of broccoli (about 1.5 lbs)
- 3 tablespoons olive oil
- 2 tablespoons unsalted butter (the real stuff!)
- 2 cloves garlic, minced finely
- 1/2 teaspoon garlic powder
- 1/4 teaspoon salt
- 1/4 teaspoon black pepper
- 1/2 cup grated Parmesan cheese (use the finely grated kind for the best coating!)
That’s it! Maybe ten things total, including the salt and pepper. This lean ingredient list lets the garlic butter and that crisp Parmesan shine through on every single bite. It’s comfort food disguised as a vegetable!
How to Make Smashed Broccoli: Step-by-Step Instructions
Okay, this is where the magic happens! Getting the right texture for our smashed broccoli is all about that quick pre-cook, followed by carefully flattening the pieces. Remember, we’re aiming for that perfect tender crisp broccoli finish, not soup!
Preparing the Broccoli: Blanching and Smashing
First things first: get that oven heating up to 425°F and line a baking sheet—you’ll need parchment paper, trust me, clean-up is half the battle!
Cut your head of broccoli into medium florets. Bring a big pot of salted water to a boil. We’re only blanching for about three minutes until they just start to turn bright green. Immediately plunge them into ice water to stop the cooking right away. This sets the color and the internal structure.
Here’s the ultra-important part: Dry them! Really dry them. Use paper towels or a clean kitchen towel to blot every single bit of moisture. If they’re wet, you get steamed mush, not crispy broccoli. Once dry, lay them on the sheet and use the bottom of a heavy glass or a meat mallet to gently flatten them. Don’t pulverize them; we just want to increase the surface area so the seasoning can cling on tight when we roast them. Check out this great tip on how to make smashed broccoli for extra visuals!
Creating the Garlic Butter Coating for Smashed Broccoli
While you’re warming up that oven, let’s whip up the flavor base. This is what makes our garlic butter broccoli smell incredible as it cooks.
In a little saucepan, gently melt your two tablespoons of butter. Add your minced garlic and cook it low and slow for just 30 seconds—you want fragrant garlic, not burnt, bitter garlic! Take it off the heat immediately and whisk in the olive oil, garlic powder, salt, and pepper. It should look glossy and ready to bathe those flattened florets.
Brush this mixture generously all over the smashed pieces on your baking sheet. They should look well-coated and shiny.
Roasting to Achieve Tender Crisp Broccoli Perfection
Now, into the oven they go for about 15 minutes. This initial roast starts developing that wonderfully roasted flavor. Once the timer goes off, pull them out. You’ll notice they are starting to get tender.
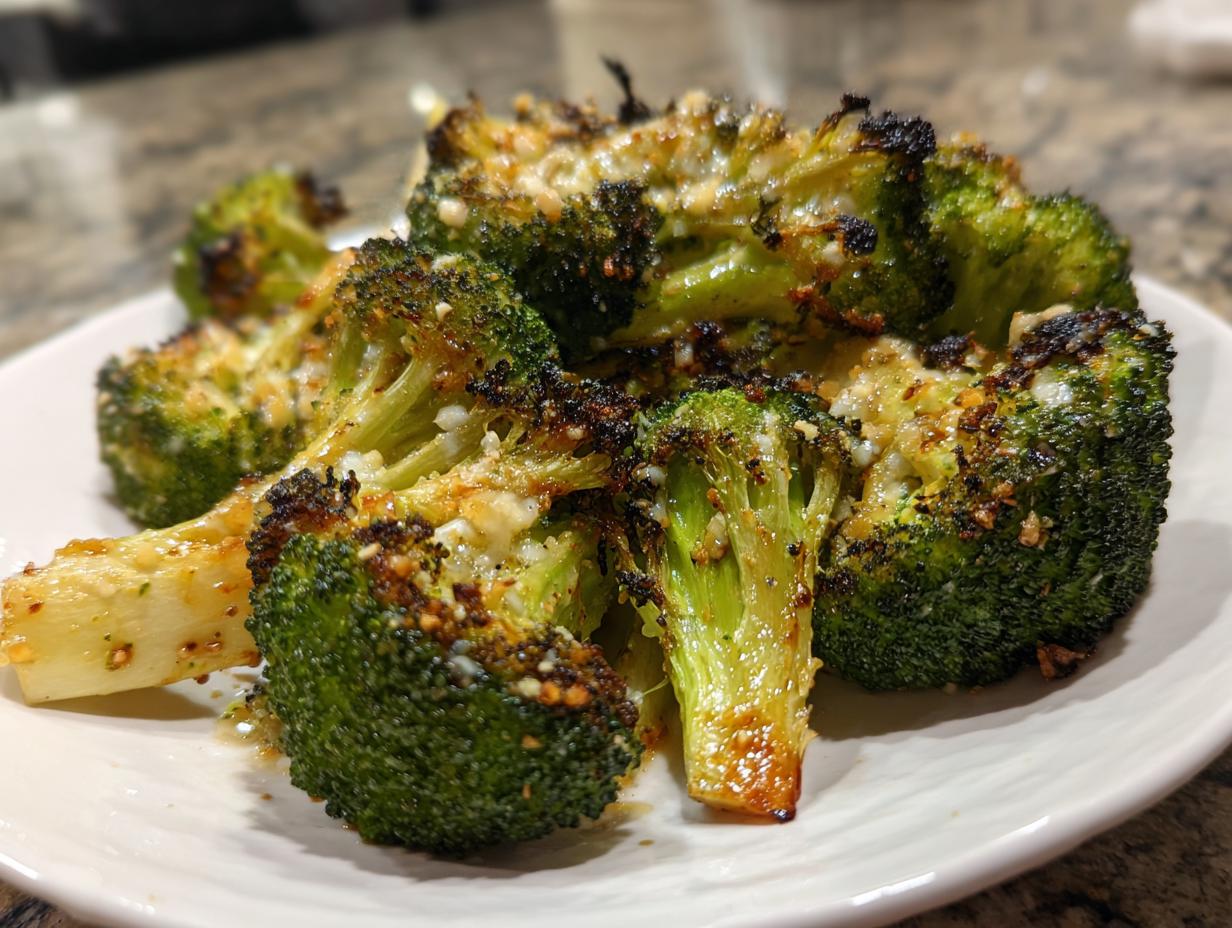
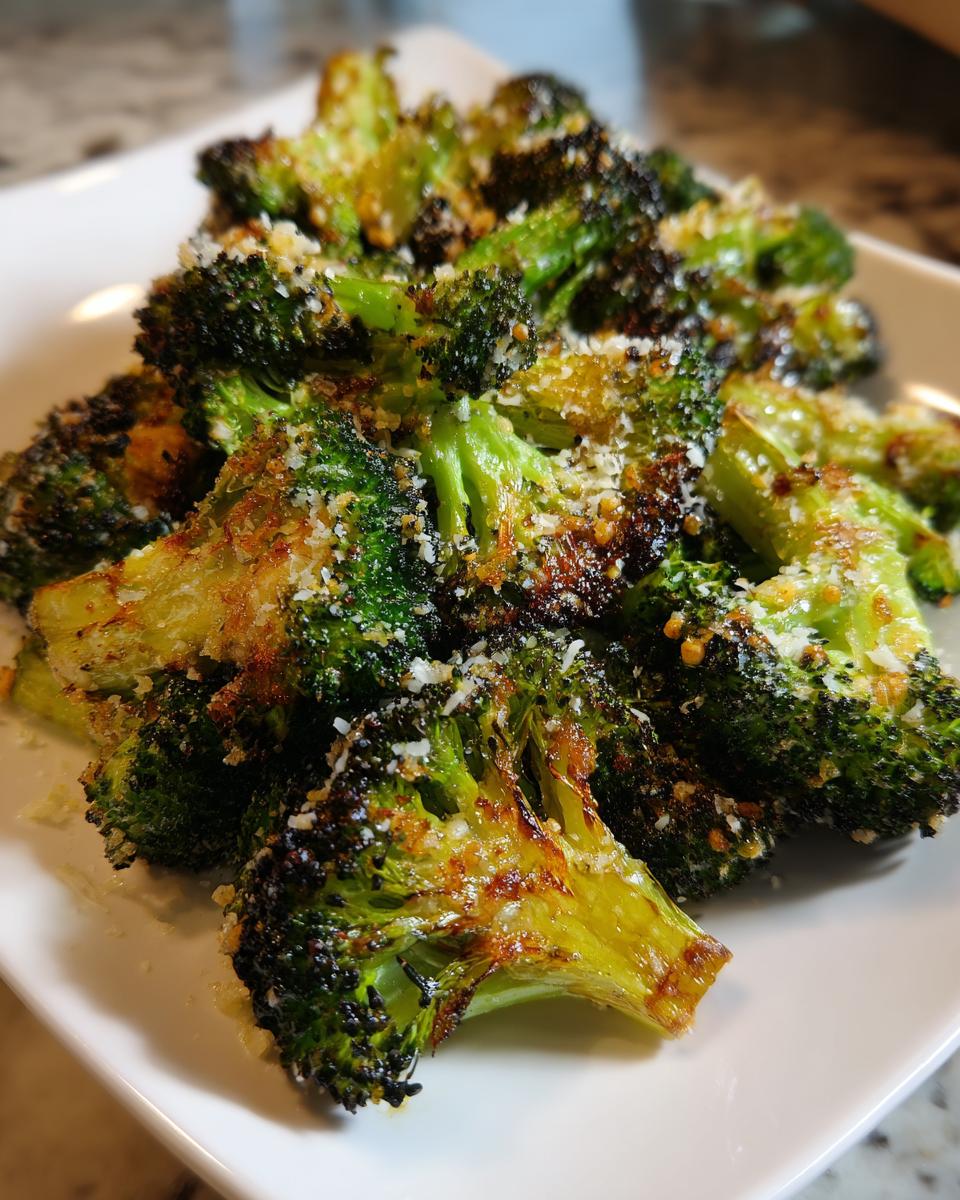
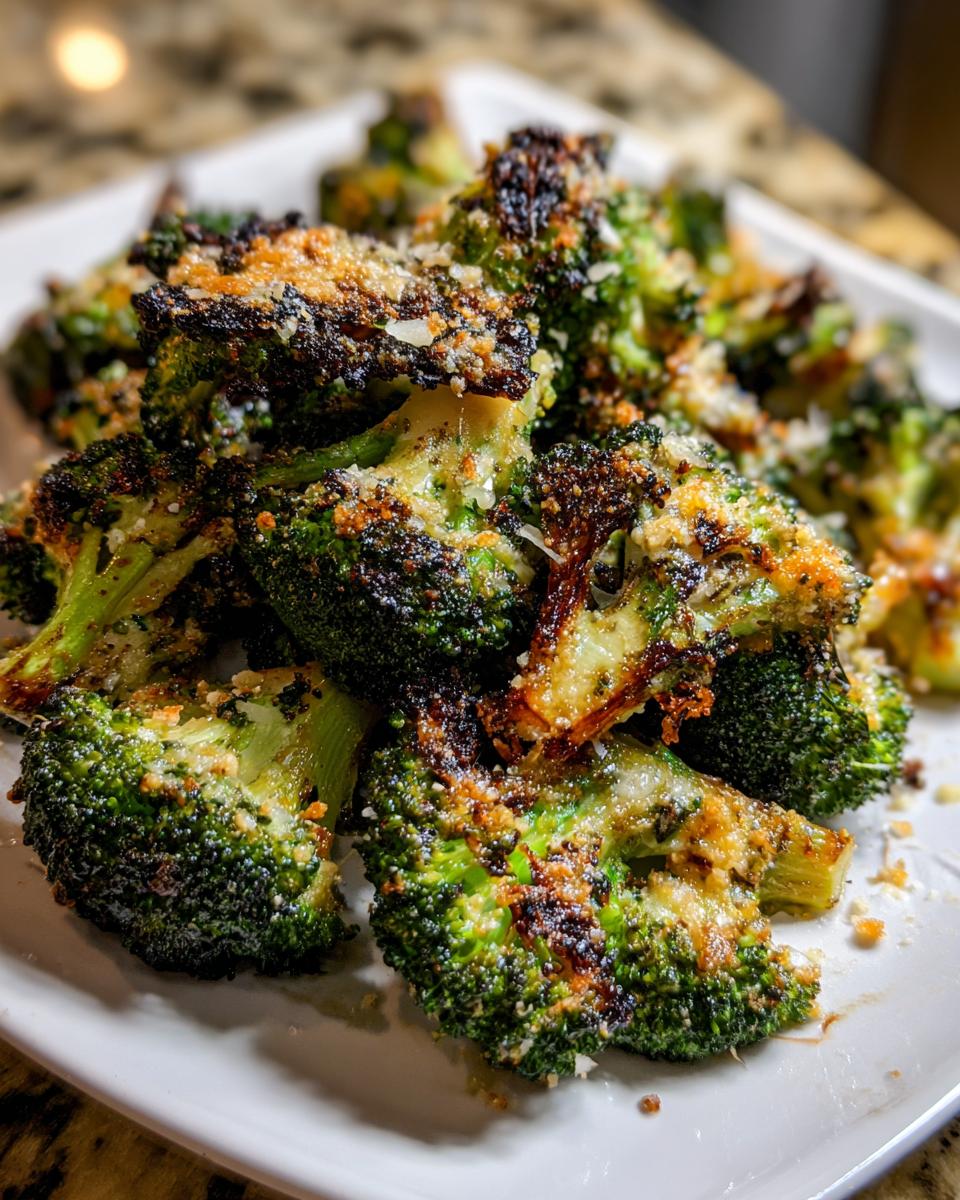
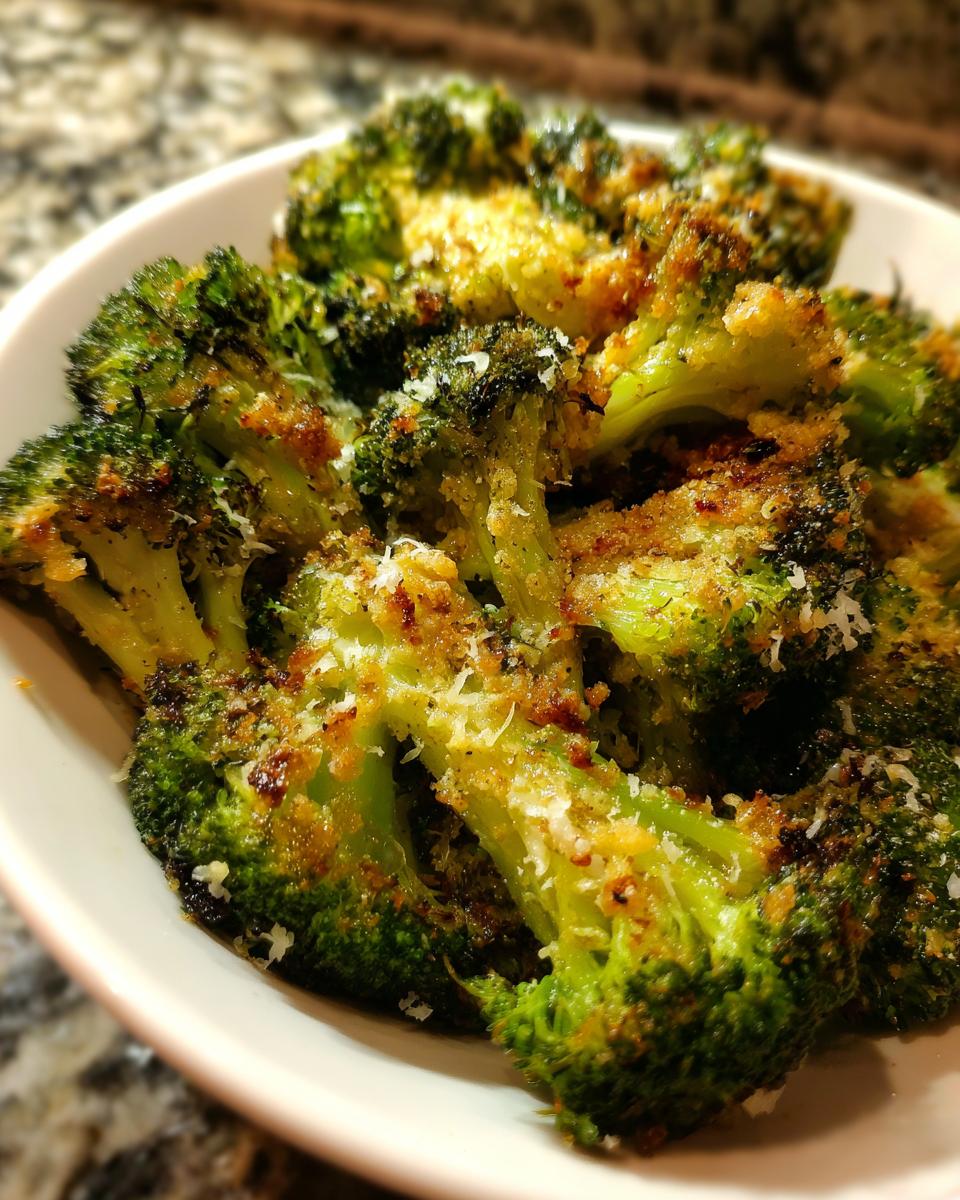
This is where the cheese comes in! Sprinkle that half-cup of grated Parmesan all over everything. Back into the 425°F oven they go for just another 5 to 8 minutes. Watch them closely here! You’re looking for the edges to get mahogany brown and the cheese to form those irresistible little golden, crispy nuggets. That’s how you know you have achieved true tender crisp broccoli success!
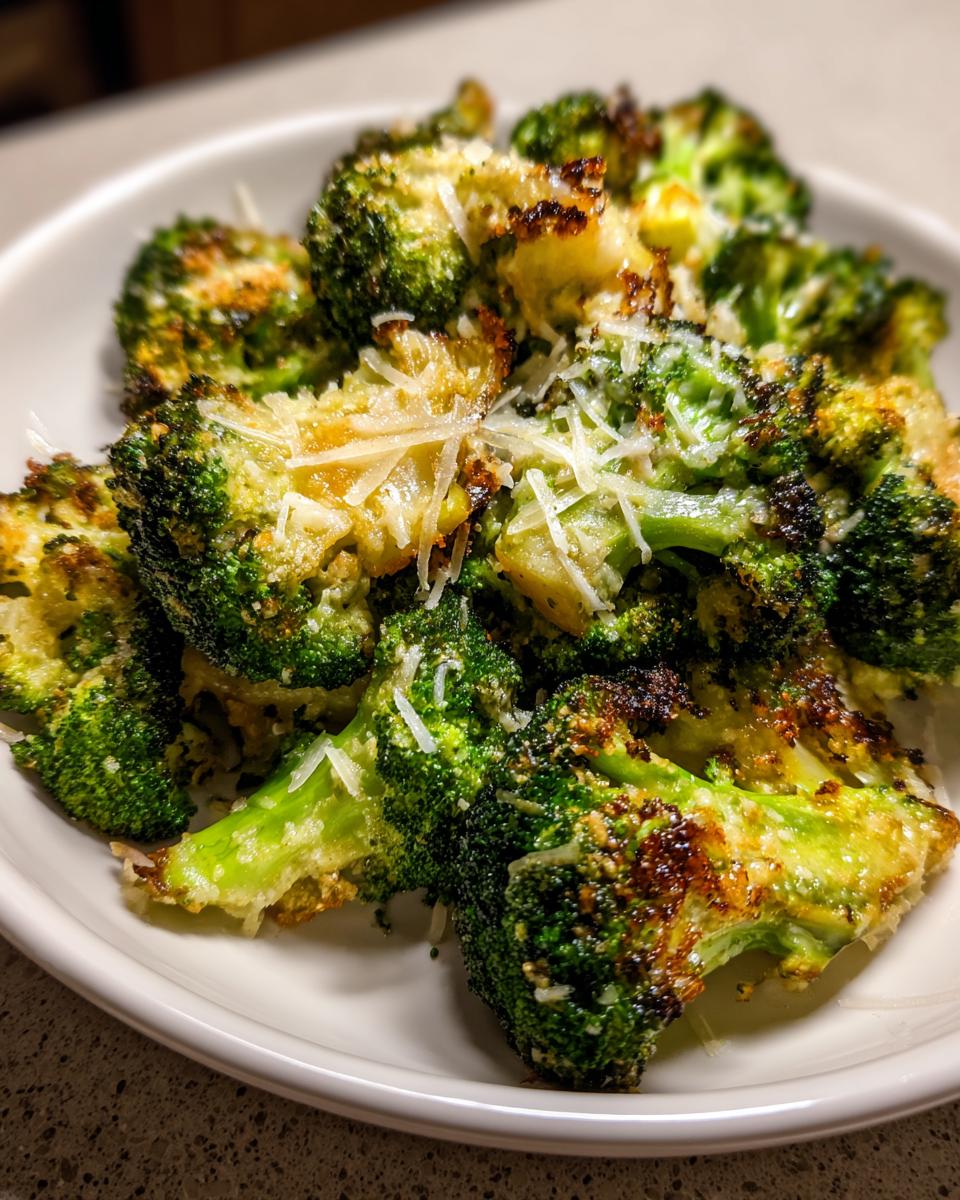
Expert Tips for the Best Smashed Broccoli Recipe Results
Now that you know the basic steps for making this smashed broccoli, I want to share a few things I learned through trial and error so you get that perfect result on your first try. Remember, even though this is an low carb side dish, we don’t want to sacrifice texture!
The absolute biggest pitfall I see people run into during oven roasted broccoli recipes is crowding the pan. If you pile those florets on top of each other, the trapped steam turns into a sauna, and you get soggy broccoli. You need space! If you’re making a double batch, use two separate baking sheets. It’s worth the extra dishwashing, trust me.
Another pro tip involves the cheese application. You saw in the recipe that we add the Parmesan for the last few minutes of roasting. If you add it at the beginning, it tends to burn before the broccoli is perfectly cooked through. Waiting ensures you get that gorgeous, slightly browned, nutty crust without any bitter spots.
Also, when you are smashing them, be gentle but firm. You want to flatten them enough to expose a lot of surface area, but don’t beat them until they become broccoli paste. We want edges that can get super crispy! If you want another amazing roasted veggie idea, check out this inspiring take on crispy smashed broccoli.
Finally, for the best flavor and highest smoke point, I always stick to olive oil for the main fat carrier, reserving the butter just for the flavor infusion step at the end of the stove prep. It helps keep everything tasting clean and delicious!
Ingredient Notes and Substitutions for Parmesan Broccoli
Since this recipe relies so heavily on the cheese for that lovely salty crust—making it a true Parmesan broccoli experience—I get a lot of questions about what happens if you swap it out or if you can’t use the traditional stuff. Good news: this recipe is incredibly flexible!
Parmesan is key here because it’s a hard, low-moisture cheese that crisps up beautifully in that last blast of heat. It melts, but it also browns and develops those incredible nutty, savory notes we love. If you buy the wedge and grate it yourself? Chef’s kiss! It melts much better than the pre-grated stuff that often contains anti-caking agents.
But what if you have a dairy issue or just ran out? Don’t panic! For a dairy-free version, you can absolutely use nutritional yeast. Mix about 1/2 cup of nutritional yeast in with the garlic butter mix before tossing the broccoli. It won’t give you the same crispy melt factor, but it provides that cheesy, umami depth we’re aiming for. You might want to add an extra drizzle of olive oil at the cheese stage to help it adhere, though.
If you just don’t have Parmesan on hand but want to stick with dairy, Pecorino Romano is a wonderful substitute, though be warned—it’s saltier, so you might want to cut back on the added salt in the garlic butter. Either way, the flavor profile of this smashed broccoli remains deeply satisfying!
Serving Suggestions for Your Smashed Broccoli
This is easily my favorite part—figuring out what incredible thing to put next to this crispy delight! Since our smashed broccoli is so rich with garlic butter and Parmesan, it’s such a versatile veggie side for dinner. It elevates even the simplest weeknight staple.
Because the flavors are bold and savory, they stand up really well to big main courses. If I’m having a simple easy chicken taco night, a side of this broccoli brings a much-needed roasted texture instead of something soft.
Here are a few go-to pairings that I think you are just going to adore:
- Simple Proteins: Anything baked or grilled works like a charm. Think quick baked salmon, simple grilled chicken breasts, or even pork chops. The garlic butter naturally complements those savory meats.
- Starchy Companions: If you’re serving this alongside something that needs a bit of sauce absorption, I always recommend creamy polenta or maybe a really good fluffy couscous. The broccoli edges dip perfectly!
- As a Standalone Snack: Honestly, sometimes I make a massive sheet pan and just eat it while I’m working. It’s so much better than potato chips, and that’s saying something! If you want true crispiness, I sometimes bake these pieces just a little longer until they are almost like little broccoli-Parmesan crisps.
It’s proof that a great side dish doesn’t have to be complicated; it just has to deliver on flavor and texture. This one always steals the show!
Storage and Reheating Instructions for Leftover Smashed Broccoli
Even though this smashed broccoli is usually devoured the minute it comes out of the oven, sometimes you get lucky and have a little bit leftover. That’s fantastic—it means you’ve got a delicious, low carb side dish ready for lunch the next day!
But here’s the thing about crispy things: they don’t exactly love the refrigerator. Once that lovely garlic butter broccoli cools down and sits in a container, it’s going to lose some of that amazing shatter. Don’t toss them out! We just need to wake them back up gently.
Store any leftovers in a shallow, airtight container. I try not to stack them too high; if they’re packed tight, they steam themselves in their own little container.
Reviving the Crisp Factor
Microwaving is honestly cheating here. It warms the broccoli up, sure, but it turns that beautiful crisp edge into something rubbery. We need dry heat to bring back the crunch!
The absolute best way to revive this is using your oven or, even better, your air fryer. If you’re using an oven, spread the cold broccoli single-layer back onto a parchment-lined baking sheet. Heat it to about 350°F and let it roast for about 5 to 7 minutes. You’re just drying it out and reheating the cheese crust.
If you have an air fryer—and honestly, if you don’t yet, you should look into one because they are miracle workers for leftovers—toss them in for about 3 minutes at 375°F. Shake the basket once halfway through. It re-crisps them faster than you can set the table. It brings back that fantastic tender crisp broccoli feeling, almost like they were freshly made!
You can enjoy these reheated bits sprinkled over a salad or just eat them straight out of the air fryer basket—I won’t judge if you make a whole meal out of the leftovers!
Frequently Asked Questions About This Quick Vegetable Recipe
I know you might have a few lingering thoughts when you look at a recipe this fun! People often ask me about adapting the prep time or checking if they can speed things up even more. When you’re looking for an easy side dish, details matter!
Here are the most common questions I get about turning simple broccoli into this must-have side dish. Hopefully, this clears up any last-minute doubts so you can get smashing!
Can I skip blanching when making smashed broccoli?
You technically *can*, but please don’t if you want that lovely tender crisp broccoli texture we’re aiming for! Blanching for those three minutes is essential because it gives the interior of the floret a head start. If you skip it and go straight to smashing and roasting, the outside edges will burn trying to cook the dense, raw center. You’ll end up with charred, tough broccoli instead of that perfect contrast.
Is this recipe suitable for meal prepping?
It’s a fantastic low carb side dish to plan ahead for, but you have to manage your expectations about texture! Like any crispy food, the moment it cools and sits in the fridge, the moisture from the broccoli will start to soften that beautiful crust we worked so hard to create. If I meal prep this, I only go as far as the end of Step 5 (tossing it in the garlic butter). Then, I store it raw, and only smash and roast/air fry the portions I plan to eat that day. That ensures maximum crispiness every time!
I always advise eating this fresh, but if you must save it, make sure you reheat it using dry heat—oven or air fryer only! We want to avoid the microwave at all costs to keep those edges crunchy.
Share Your Experience Making This Smashed Broccoli
We did it! You now have the secret to turning humble broccoli into one of the most exciting, crave-worthy side dishes on your table. Seriously, I want to know how this works in your kitchen. Transforming a veggie that everyone already knows into something totally new is one of the best feelings, right? It proves that you don’t have to spend hours making dinner feel special.
If you tried this recipe for our smashed broccoli, please drop a rating below! Five stars if your family absolutely devoured those crispy edges—which I bet they did!
And if you share a picture over on social media, tag me! I absolutely love seeing your creations and how you styled this Completely Yummy dish next to your main courses. Knowing that you’re reclaiming time in your busy week while still serving seriously delicious food is what this whole project is about for me. Happy cooking, and I hope you enjoy this fantastic garlic butter broccoli!
PrintCrispy Parmesan Smashed Broccoli with Garlic Butter

Make this simple smashed broccoli recipe for a flavorful, crispy side dish. We blanch the broccoli, smash the florets, and roast them with garlic butter and Parmesan cheese for a tender-crisp texture.
- Prep Time: 10 min
- Cook Time: 23 min
- Total Time: 33 min
- Yield: 4 servings 1x
- Category: Side Dish
- Method: Oven Roasting
- Cuisine: American
- Diet: Low Fat
Ingredients
- 1 large head of broccoli (about 1.5 lbs)
- 3 tablespoons olive oil
- 2 tablespoons unsalted butter
- 2 cloves garlic, minced
- 1/2 teaspoon garlic powder
- 1/4 teaspoon salt
- 1/4 teaspoon black pepper
- 1/2 cup grated Parmesan cheese
Instructions
- Preheat your oven to 425 degrees Fahrenheit. Line a baking sheet with parchment paper.
- Cut the broccoli into medium florets. Bring a large pot of salted water to a boil. Add the broccoli and cook for 3 minutes until slightly tender. Drain the broccoli immediately and rinse with cold water to stop the cooking process. Pat the florets very dry with paper towels.
- Place the dried broccoli florets on the prepared baking sheet. Use the bottom of a heavy glass or a meat mallet to gently smash each floret until it is flattened but still holds together.
- In a small saucepan, melt the butter over low heat. Stir in the minced garlic and cook for 30 seconds until fragrant. Remove from heat and stir in the olive oil, garlic powder, salt, and pepper.
- Brush the garlic butter mixture evenly over the smashed broccoli florets.
- Roast for 15 minutes.
- Remove the sheet from the oven. Sprinkle the grated Parmesan cheese over the broccoli. Return to the oven and roast for another 5 to 8 minutes, or until the edges are crispy and the cheese is golden brown.
- Serve immediately as an easy side dish.
Notes
- Drying the broccoli well after blanching is key to achieving maximum crispiness when roasting.
- You can substitute the fresh minced garlic with 1/2 teaspoon of garlic salt if you prefer a simpler seasoning.
- This recipe works well as a low carb side dish for any main course.
Nutrition
- Serving Size: 1 serving
- Calories: 180
- Sugar: 3
- Sodium: 250
- Fat: 14
- Saturated Fat: 5
- Unsaturated Fat: 9
- Trans Fat: 0
- Carbohydrates: 9
- Fiber: 4
- Protein: 7
- Cholesterol: 15