
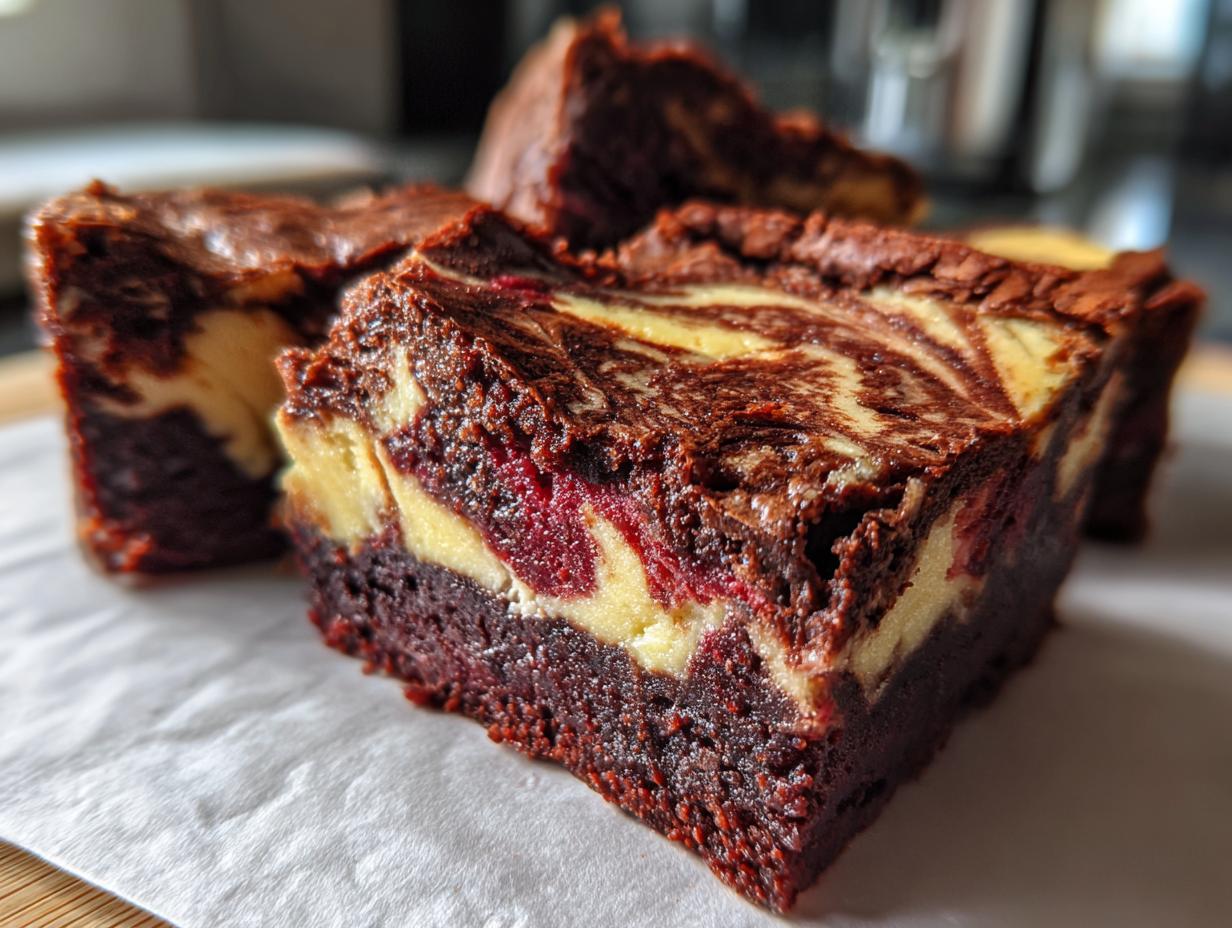
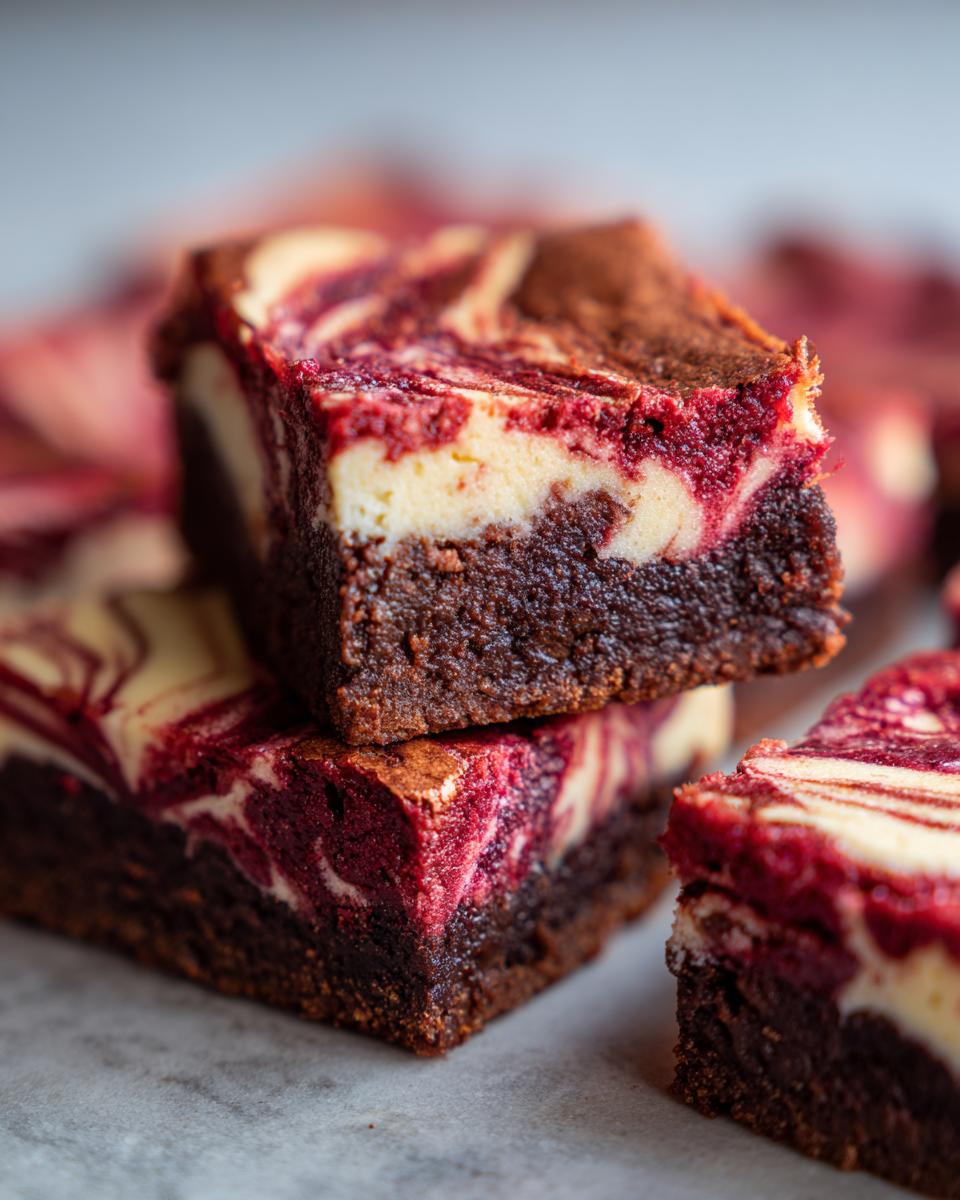
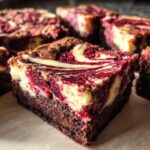
If you’ve been searching for that one dessert that screams ‘indulgence’ but doesn’t require you to spend the entire day in the kitchen, stop scrolling right now. We’ve got the absolute perfect showstopper for you: red velvet cheesecake brownies! This isn’t just a recipe; it’s two of the best things in life—fudgy, rich red velvet layered with a tangy, creamy cheesecake swirl—all baked into one magnificent bar.
When I started Completely Yummy, my whole mission, driven by my own hectic schedule, was to make sure that incredible, homemade flavors were genuinely doable for the modern cook. And these brownies? They nail that perfectly. They look like they took hours of fancy work, but trust me, they come together surprisingly fast. They are rich, they are decadent, and they are ready without stress. You’re going to adore how easy it is to get that picture-perfect swirl. Head over to my main collection of delicious dessert recipes if you want even more ideas after you make these!
- Why This is the Ultimate Red Velvet Cheesecake Brownies Recipe
- Gather Your Ingredients for Red Velvet Cheesecake Brownies
- How to Prepare Your Red Velvet Cheesecake Brownies
- Expert Tips for Perfect Red Velvet Cheesecake Brownies
- Storage and Reheating Instructions for Dessert Bars with Cream Cheese Layer
- Frequently Asked Questions About Red Velvet Cheesecake Brownies
- Serving Suggestions for Your Rich Cocoa Brownies Recipe
- Nutritional Estimates for Velvety Dessert Squares
- Share Your Experience Baking Red Velvet Cheesecake Brownies
Why This is the Ultimate Red Velvet Cheesecake Brownies Recipe
I know there are a million brownie recipes out there, but these red velvet cheesecake brownies are special. Seriously, they check every box if you’re aiming for a showstopper that tastes amazing but doesn’t demand hours of your evening.
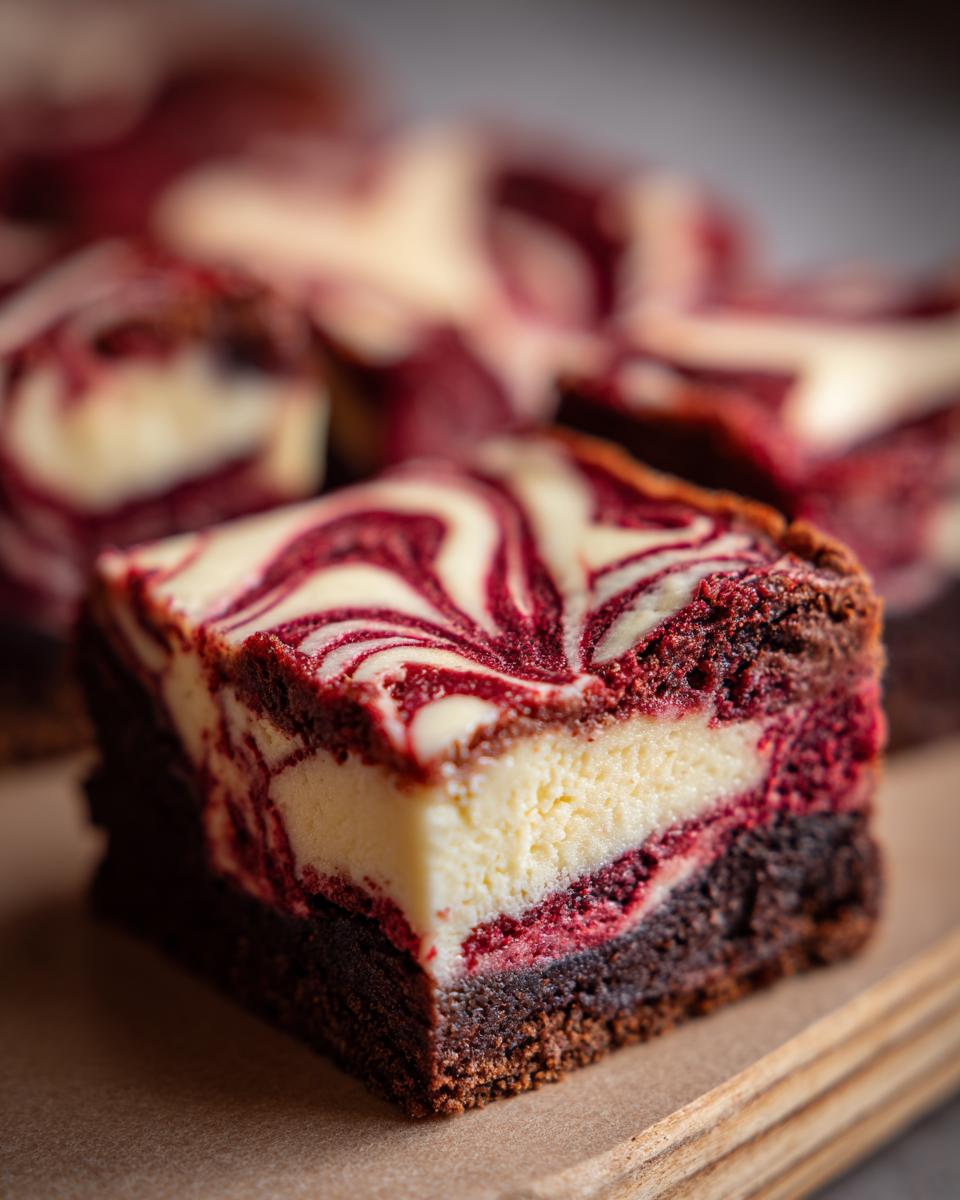
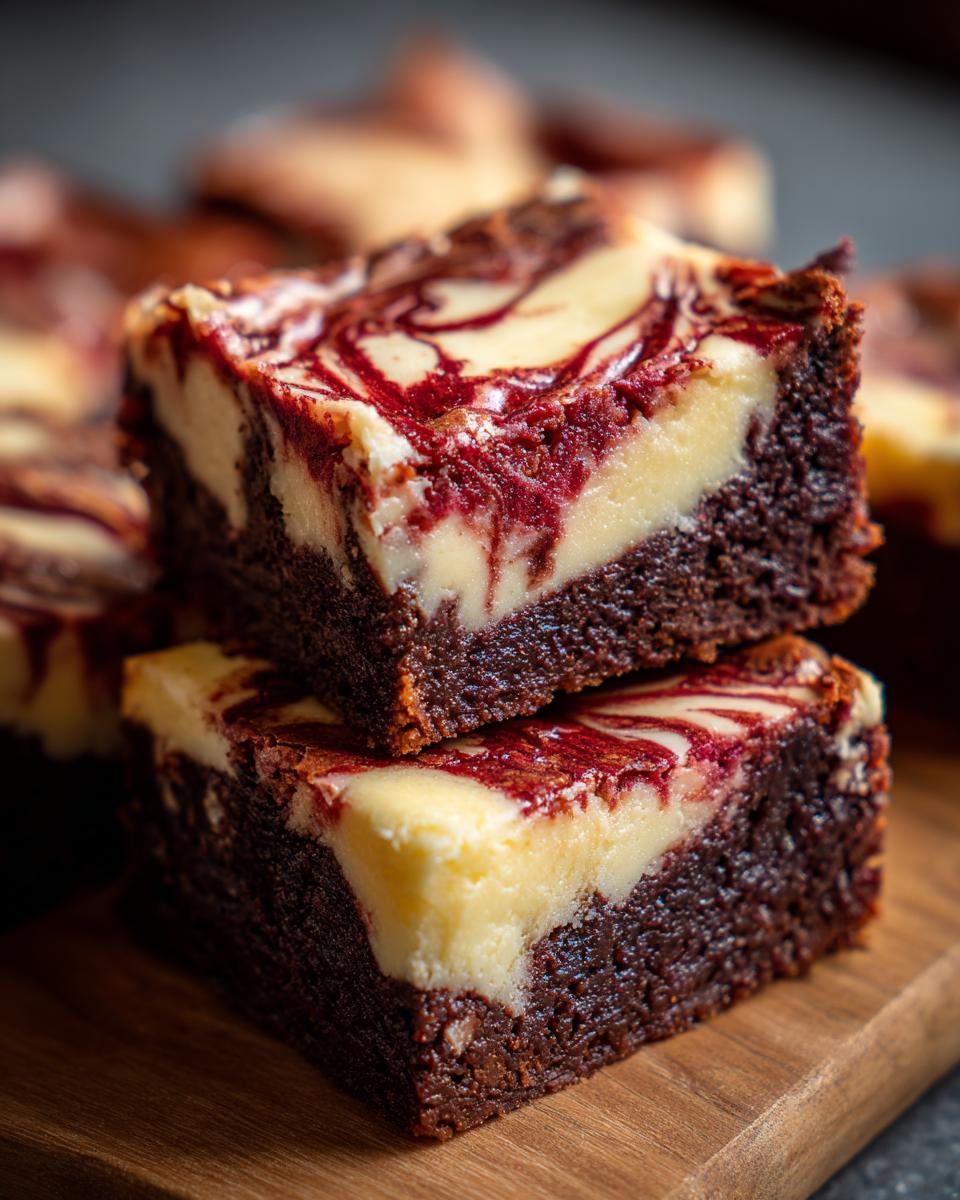
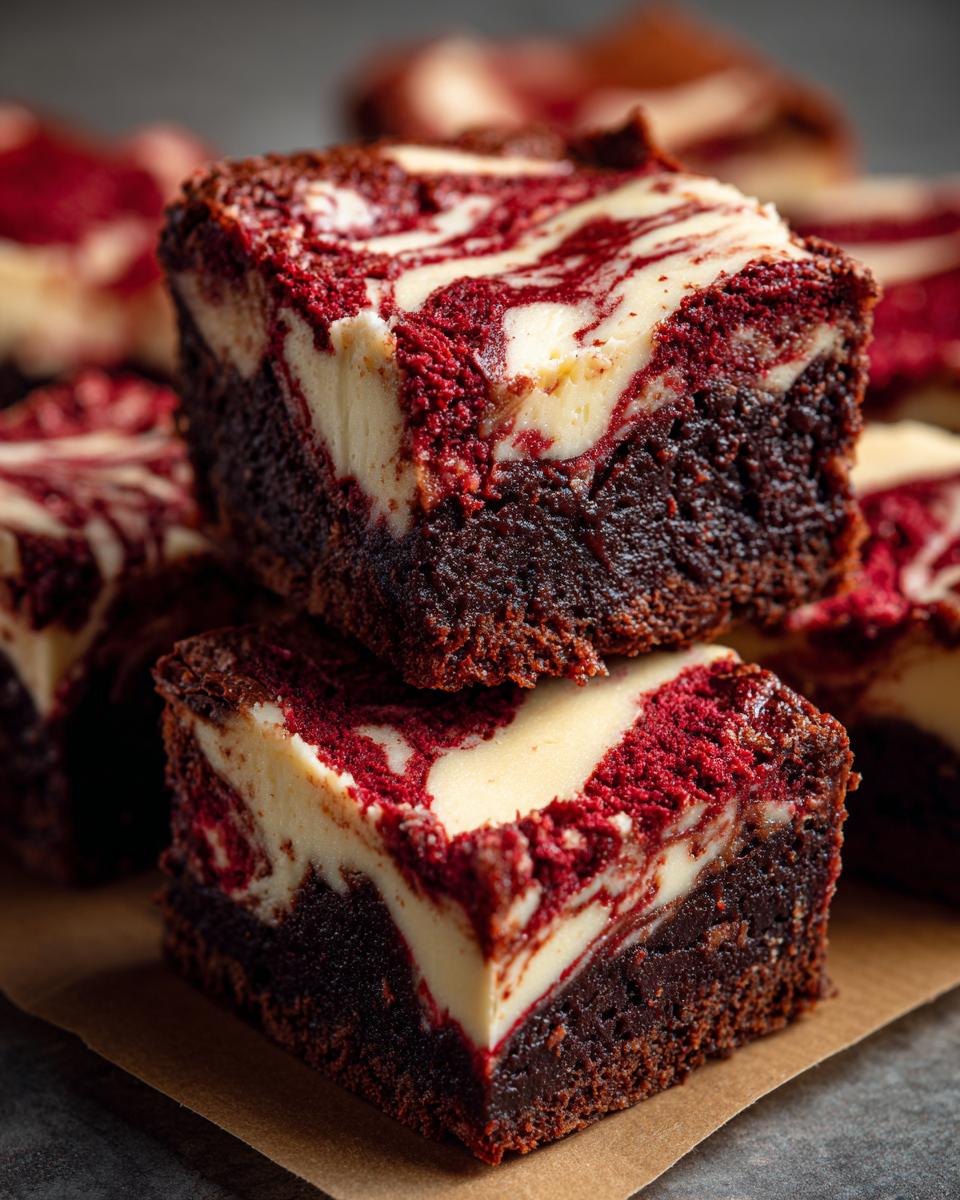
- They are genuinely one of the most visually stunning baked goods you can make at home! The color contrast is just gorgeous.
Perfect Texture Contrast in Every Bite
The magic happens because you’re getting two incredible textures competing for attention. You have that deep, dense, fudgy brownie base—rich with cocoa—which is immediately cut by that cool, slightly tangy slice of creamy sweetness from the cheesecake layer. It’s pure indulgence.
Simple Steps for an Easy Swirled Brownie Recipe
Even though they look complicated, I promise they aren’t! We use simple drop-and-swirl techniques. No fancy piping bags needed here. If you can manage to mix two bowls and drag a knife across the top, you’ve mastered the art of this recipe. It’s all about simple execution yielding gourmet results!
Gather Your Ingredients for Red Velvet Cheesecake Brownies
Okay, let’s get set up! To make these showstopping red velvet cheesecake brownies, you need two sets of ingredients—one for the fudgy batter and one for that glorious, tangy swirl. I’ve made sure we aren’t hunting down anything exotic here; this is about building flavor with what you usually have on hand.
We start with the base, but remember my golden rule for the cheesecake layer: everything must be room temperature! That’s key for zero lumps. If you need other easy red velvet fixes, check out my thoughts on red velvet cake mix cookies while you gather these.
For the Fudgy Red Velvet Brownie Base
- 1/2 cup unsalted butter, melted
- 1 cup granulated sugar
- 2 large eggs, room temperature
- 1 1/2 teaspoons red food coloring (use the good gel kind!)
- 2 teaspoons vanilla extract
- 1/2 teaspoon salt
- 3/4 cup all-purpose flour
- 3 Tablespoons Dutch process cocoa powder
For the Cream Cheese Swirl Layer
- 8 ounces cream cheese, softened (seriously, softened!)
- 1 large egg, room temperature
- 1/3 cup granulated sugar (for the cheesecake layer)
How to Prepare Your Red Velvet Cheesecake Brownies
Alright, here is where the magic really happens! Don’t let the gorgeous look of these red velvet cheesecake brownies intimidate you. We’re taking this process step-by-step, and it is much simpler than you think. We want those distinct layers that make this a true marbled brownie baking guide favorite.
Prepping the Pan and Brownie Batter
First things first, get your oven warming up to 350°F (175°C). Get a 9×9 inch pan lined with parchment paper, making sure you leave a nice bit of overhang on the sides—that’s our handle for lifting it out later! For the batter, whisk your melted butter and sugar together first. Then, beat in those 2 eggs one by one until they are just happy. Now, add that bright red coloring and vanilla. Once that’s mixed, slowly add your sifted dry ingredients—flour, cocoa, and salt. Mix only until you see no more dry streaks. Seriously, stop mixing immediately after that! Overmixing is the enemy of a fudgy brownie, so be gentle!
Making the Cream Cheese Swirl and Marbling
While the brownie batter is in the pan, whip up your cheesecake layer until it’s totally smooth—remember, softened cream cheese and room temperature egg! Once smooth, drop rounded spoons full of this mixture right over the top of the red velvet batter across the entire pan. This is the fun part! Take a butter knife or a skewer and gently run it through the layers. Make big S-shapes or figure-eights. You want ribbons, not mud! Don’t run the knife over the same spot twice, or you’ll lose that beautiful marbling we worked so hard for.
Baking and Cooling for Perfect Red Velvet Cheesecake Brownies
Pop it in the oven for about 30 to 35 minutes. You’re looking for a toothpick inserted near the center to come out with moist crumbs attached—not wet batter, but definitely not totally dry either. Once they seem set, take them out! Now, this step is crucial for clean cuts if these are headed to a big gathering: let them cool completely on the rack. If you can manage it, chilling them for a couple of hours makes slicing into perfect squares much easier. If you need tips on other dips, check out my thoughts on making easy homemade caramel to drizzle over these!
Expert Tips for Perfect Red Velvet Cheesecake Brownies
Even with a straightforward recipe like this, a couple of little tricks I learned the hard way can turn a good batch of red velvet cheesecake brownies into true showstopping dessert recipes. Getting that signature color and that unbelievably creamy swirl takes just a tiny bit more attention to detail, but it makes all the difference in the final result.
Achieving the Deepest Red Velvet Color
If you want that gorgeous, vibrant red, please ditch the standard liquid food coloring drops! I learned that liquid colors dilute the batter just a touch and often result in a more muted pinkish-brown. You absolutely need a high-quality gel food coloring for this. The gel is super concentrated, so you use less, which means you get that incredibly deep, gorgeous red without throwing off the fat-to-flour ratio in your fudgy base. It’s truly worth the extra minute to grab the gel kind!
The Secret to Smooth Cheesecake Layer
Listen, I learned this the hard way after having to fish out pea-sized lumps of cheese from a gorgeous swirl! The secret to that silky, smooth top layer is simple: room temperature is non-negotiable for both the cream cheese *and* that extra egg. Cold cream cheese won’t blend smoothly with sugars, and cold eggs shock the mixture. Make sure they’ve been resting on the counter for at least an hour before you even think about turning on the mixer. This guarantees you get that beautiful, lump-free cream cheese layer we are looking for.
If this intense flavor has you craving more, you might want to check out my recipe for moist red velvet poke cake for another way to use that stunning red hue!
Storage and Reheating Instructions for Dessert Bars with Cream Cheese Layer
You’re making these red velvet cheesecake brownies because they are spectacular, right? Well, we want them to stay that way! Since these are rich dessert bars with cream cheese layer, storage is key. Once they are completely cool—and I mean stone cold—you need to wrap them tightly in plastic wrap, or place them in an airtight container. They do fantastic sitting on the counter for a day or two, but if you want them firm for clean cutting, chilling them is definitely the way to go. I rarely reheat them because they are just divine chilled, but if you must, microwave a single square for about 10 seconds before serving.
Frequently Asked Questions About Red Velvet Cheesecake Brownies
I get so many messages about these brownies—they are just so popular! I want to make sure you have all the final answers you need before you start baking these incredible red velvet cheesecake brownies. Here are the things folks ask me most often about this particular cheesecake brownie recipe.
Can I make these Red Velvet Dessert Ideas ahead of time?
Oh yes, absolutely! In fact, I kind of encourage it! These bars taste even better the next day, after they’ve had a chance to fully set up and let those rich cocoa flavors meld with the tangy cream cheese. They keep beautifully covered tightly on the counter for two days, or you can refrigerate them if you won’t eat them all right away. They are fantastic for party prep!
What is the best way to cut clean squares from these brownies?
This is the number one question for any layered bar, and the answer is always chill time! If you try to cut them warm or even just room temperature, you end up with a gooey mess, which, while delicious, doesn’t look professional. Wait until they are completely cool, then wrap the whole pan tightly and stick them in the fridge for at least two hours. A hot, sharp knife helps too, but chilling is the real secret!
Can I substitute the cocoa powder in this Cheesecake Brownie Recipe?
If you can, stick with the Dutch process cocoa powder I call for! It’s much lower in acid than regular, natural cocoa powder. Since we are using vinegar (a key red velvet ingredient) which reacts with baking soda, using low-acid cocoa helps us control the reactions and keeps the color deeper. Using standard cocoa might make your brownies a little too brown and won’t give you the best flavor contrast against that creamy cheesecake.
If you’re looking for an even fancier version of this dessert, you might want to check out my recipe for the ultimate red velvet cheesecake for a full cake experience!
Serving Suggestions for Your Rich Cocoa Brownies Recipe
Once you’ve finally managed to slice these incredibly rich decadent chocolate cheesecake bars—and believe me, waiting is the hardest part—you need a great way to serve them up! They honestly don’t need much dressing up because they are perfect on their own, but a little something extra never hurts, right?
I love serving these slightly chilled, maybe with a little dusting of powdered sugar just before walking them to the table. If you want to go all out, a tiny dollop of my homemade vanilla buttercream frosting on the side is totally decadent. Or, you could drizzle just a touch of melted chocolate over the top. You can find my favorite recipe for creamy vanilla buttercream frosting if you need topping inspiration!
Nutritional Estimates for Velvety Dessert Squares
I always get asked about the numbers, and I want to be totally upfront—these are estimates based on standard measuring for these incredibly decadent homemade red velvet treats. Any time you’re stacking up fudge, cream cheese, and sugar, you know it’s going to be a treat! But hey, you deserve it!
Keep in mind that enjoying these velvety dessert squares is all about balance. Here’s a breakdown per square, based on the 16 servings we get:
- Serving Size: 1 square
- Calories: 280
- Sugar: 25g
- Sodium: 180mg
- Fat: 16g
- Protein: 4g
This is pure indulgence, my friends, so factor that into your week, but never feel guilty enjoying this rich cocoa brownie perfection!
Share Your Experience Baking Red Velvet Cheesecake Brownies
Now that you’ve seen how simple it is to create these showstopping red velvet cheesecake brownies, I absolutely need to hear about it! I put my heart into developing recipes that are genuinely doable, and knowing they work for *you* in your kitchen is the best feeling. When you give these a try, please hop down to the comments below.
I would be thrilled if you could leave a rating—five stars are always wonderful, but honest feedback helps me keep improving everything I share here at Completely Yummy! Did the swirl turn out perfectly for you? Did you add any fun toppings?
Don’t be shy! If you managed to snap a picture of your beautiful marbled bars, tag me on social media—I love seeing your creations! And if any questions popped up while you were mixing or baking, drop them in the comments section. I try my best to answer every single one. If you need to reach out directly for a private question, you can always use my handy contact page too. Happy baking!
PrintUltimate Fudgy Red Velvet Cheesecake Brownies: Perfect Swirl Technique and Rich Flavor
Make these rich, fudgy red velvet cheesecake brownies that combine a dense, cocoa-rich base with a creamy, tangy cheesecake swirl. This recipe delivers a visually stunning dessert that is genuinely doable for any home cook.
- Prep Time: 15 min
- Cook Time: 35 min
- Total Time: 50 min
- Yield: 16 servings 1x
- Category: Dessert Bars
- Method: Baking
- Cuisine: American
- Diet: Vegetarian
Ingredients
- 1/2 cup unsalted butter, melted
- 1 cup granulated sugar
- 2 large eggs, room temperature
- 1 1/2 teaspoons red food coloring
- 2 teaspoons vanilla extract
- 1/2 teaspoon salt
- 3/4 cup all-purpose flour
- 3 Tablespoons Dutch process cocoa powder
- 8 ounces cream cheese, softened
- 1 large egg, room temperature (for cheesecake layer)
- 1/3 cup granulated sugar (for cheesecake layer)
Instructions
- Preheat your oven to 350°F (175°C). Line a 9×9 inch baking pan with parchment paper, leaving an overhang for easy removal.
- Prepare the brownie batter: In a medium bowl, whisk together the melted butter and 1 cup of sugar until combined.
- Beat in the 2 room temperature eggs one at a time, mixing well after each addition. Stir in the red food coloring and vanilla extract until the color is uniform.
- In a separate small bowl, whisk together the flour, cocoa powder, and salt. Gradually add the dry ingredients to the wet ingredients, mixing only until just combined. Do not overmix. Spread the red velvet batter evenly into the prepared pan.
- Prepare the cream cheese swirl: In a separate bowl, beat the softened cream cheese until smooth. Add the remaining 1/3 cup sugar and the extra egg. Beat until the mixture is smooth and creamy.
- Drop spoonfuls of the cream cheese mixture over the brownie batter in the pan.
- Create the swirl: Use a butter knife or a skewer to gently cut through the layers in an S-shape or figure-eight pattern to marble the cheesecake into the red velvet batter. Do not over-swirl; you want distinct ribbons of color and texture.
- Bake for 30 to 35 minutes, or until a toothpick inserted near the center comes out with moist crumbs attached, but not wet batter. The cheesecake layer should look set.
- Cool the brownies completely in the pan on a wire rack before lifting them out using the parchment overhang.
- Cut into 16 squares. Serve these decadent chocolate cheesecake bars once fully cooled for the best texture.
Notes
- For the most vibrant red velvet color, use a high-quality gel-based red food coloring instead of liquid drops.
- Ensure your cream cheese and egg for the cheesecake layer are at room temperature to prevent lumps in your swirl.
- To achieve bakery-style results, chill the brownies for at least two hours before slicing. This makes cutting clean squares easier.
Nutrition
- Serving Size: 1 square
- Calories: 280
- Sugar: 25g
- Sodium: 180mg
- Fat: 16g
- Saturated Fat: 9g
- Unsaturated Fat: 7g
- Trans Fat: 0.5g
- Carbohydrates: 31g
- Fiber: 1g
- Protein: 4g
- Cholesterol: 65mg