
Oh, are you tired of the eternal breakfast struggle? You know the one: you crave those savory, perfectly crispy breakfast potatoes, but what you usually end up with is a pan full of oily, steamy disappointment. It’s a classic home cooking letdown! I used to think it was just part of the deal—you sacrifice texture for speed, especially when weekday mornings hit. Not anymore! That’s why I developed this oven-roasted method. It takes the guesswork out of cooking and honors my food philosophy: Simple Recipes, Seriously Good Food. If you’re looking to pair these with faster morning meals, check out my tips for quick, healthy breakfasts too. Trust me, reclaiming that golden, crunchy texture doesn’t need complicated steps; it just needs the right technique to make your morning side dish genuinely special.
- Why You Will Make These Crispy Breakfast Potatoes Every Time
- The Ingredients for Perfectly Seasoned Breakfast Potatoes
- How to Make Crispy Oven Roasted Breakfast Potatoes
- Expert Tips for Truly Flavorful Morning Potatoes
- Skillet Breakfast Potatoes: An Alternative Method
- Variations for Your Homemade Breakfast Potatoes
- Storing and Reheating Your Perfect Breakfast Potatoes
- Frequently Asked Questions About Breakfast Potatoes
- Estimated Nutrition for These Simple Breakfast Potatoes
Why You Will Make These Crispy Breakfast Potatoes Every Time
When I started working on this recipe, my only goal was to banish soggy potatoes from my weekend brunch forever. I wanted a side dish that didn’t require constant monitoring but still delivered that satisfying crunch. These oven-roasted ones do exactly that, easily!
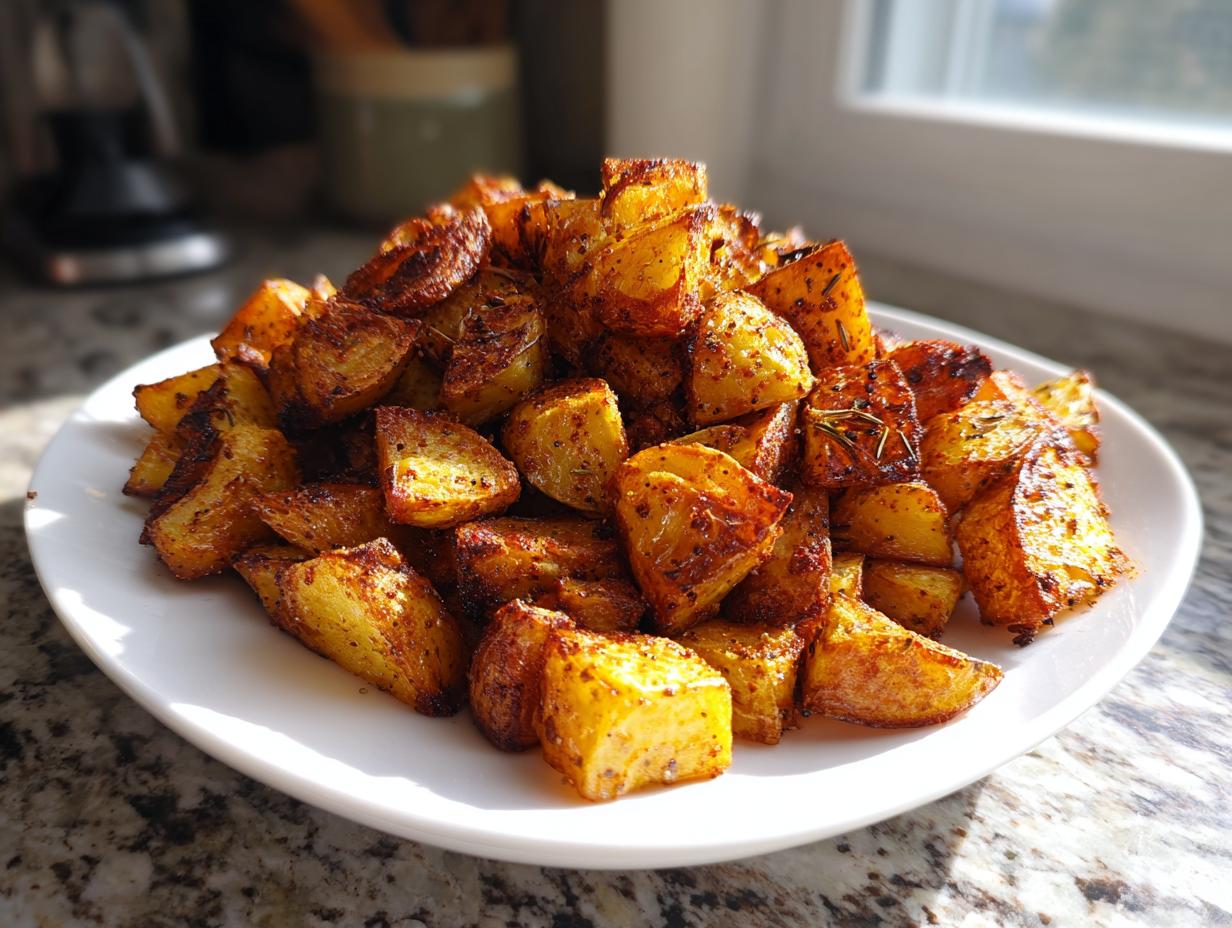
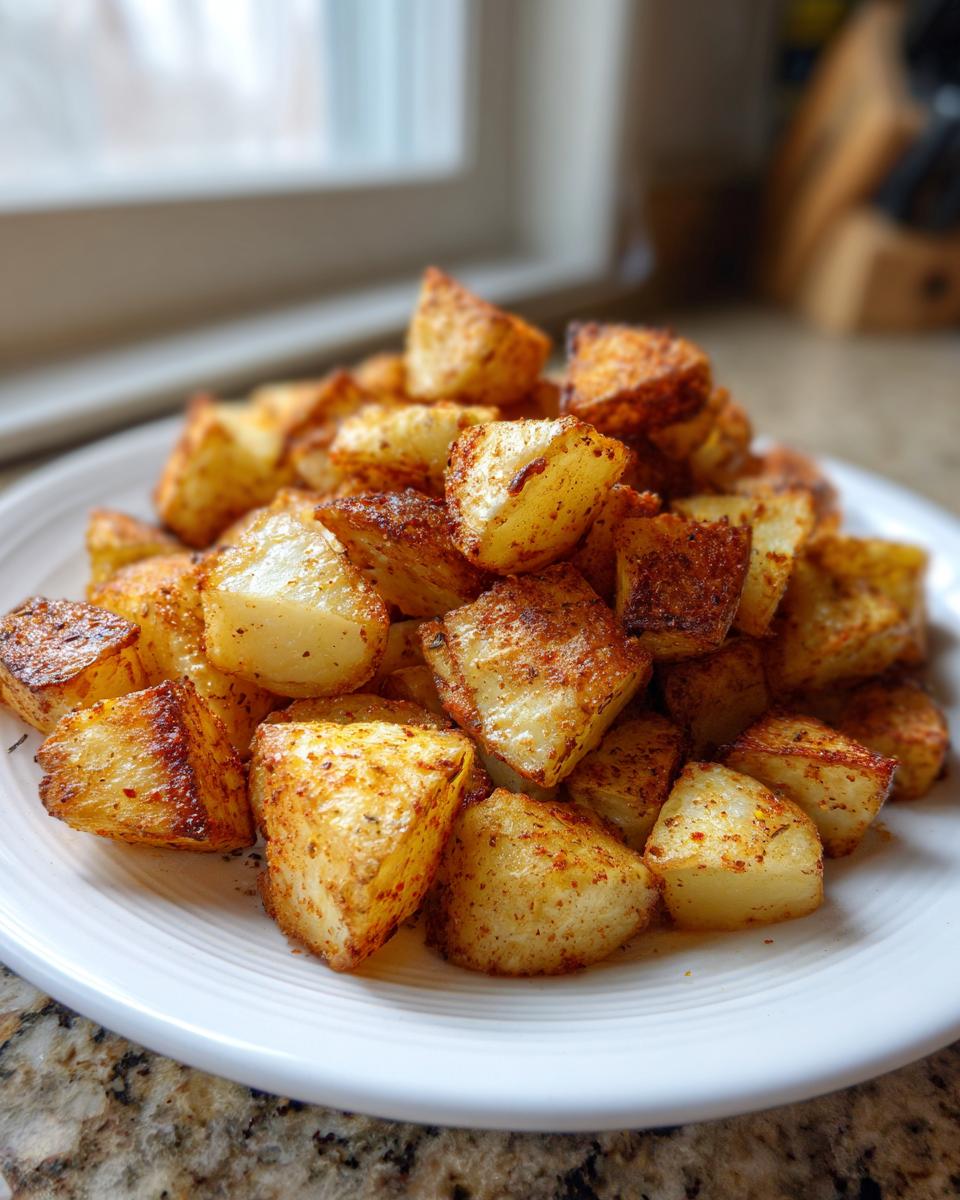
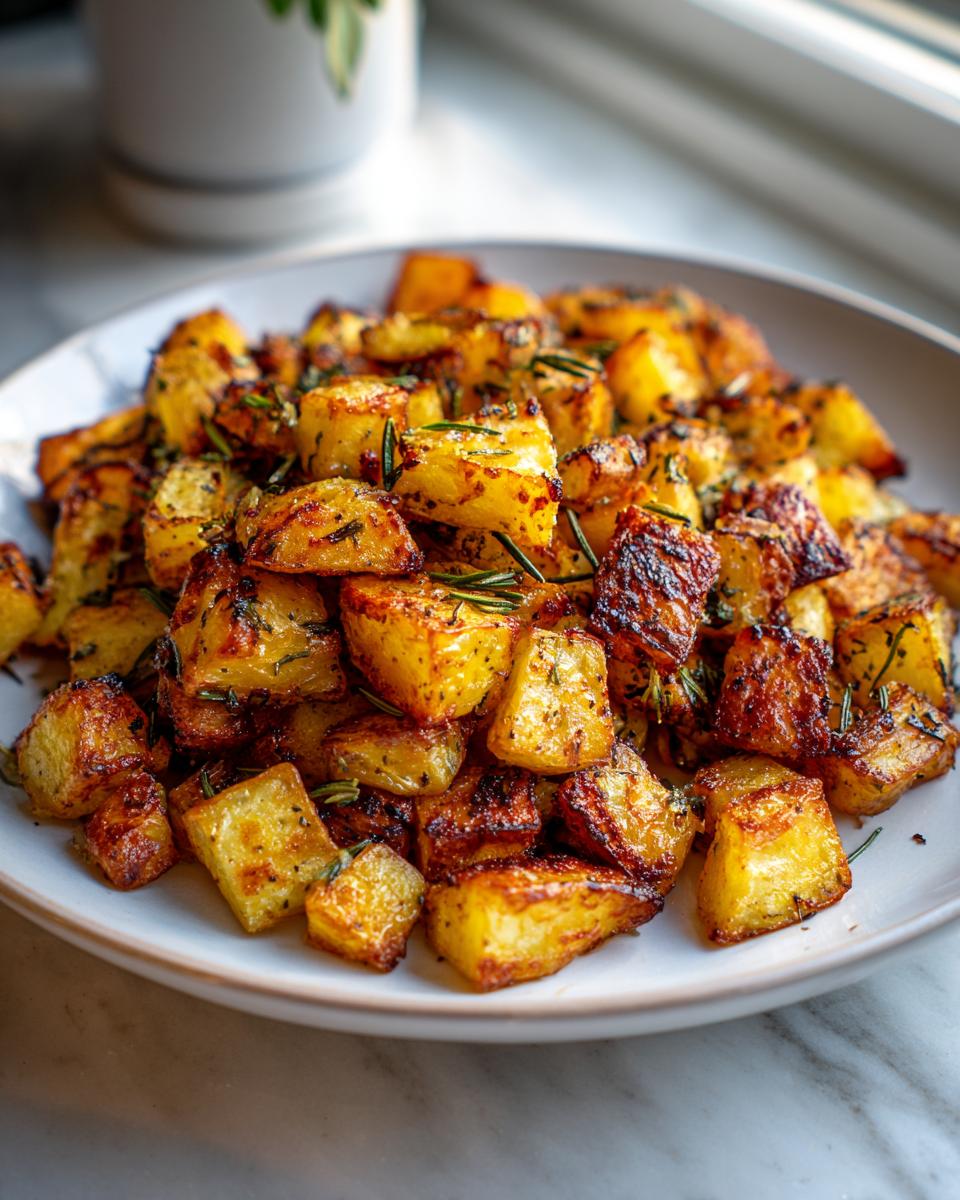
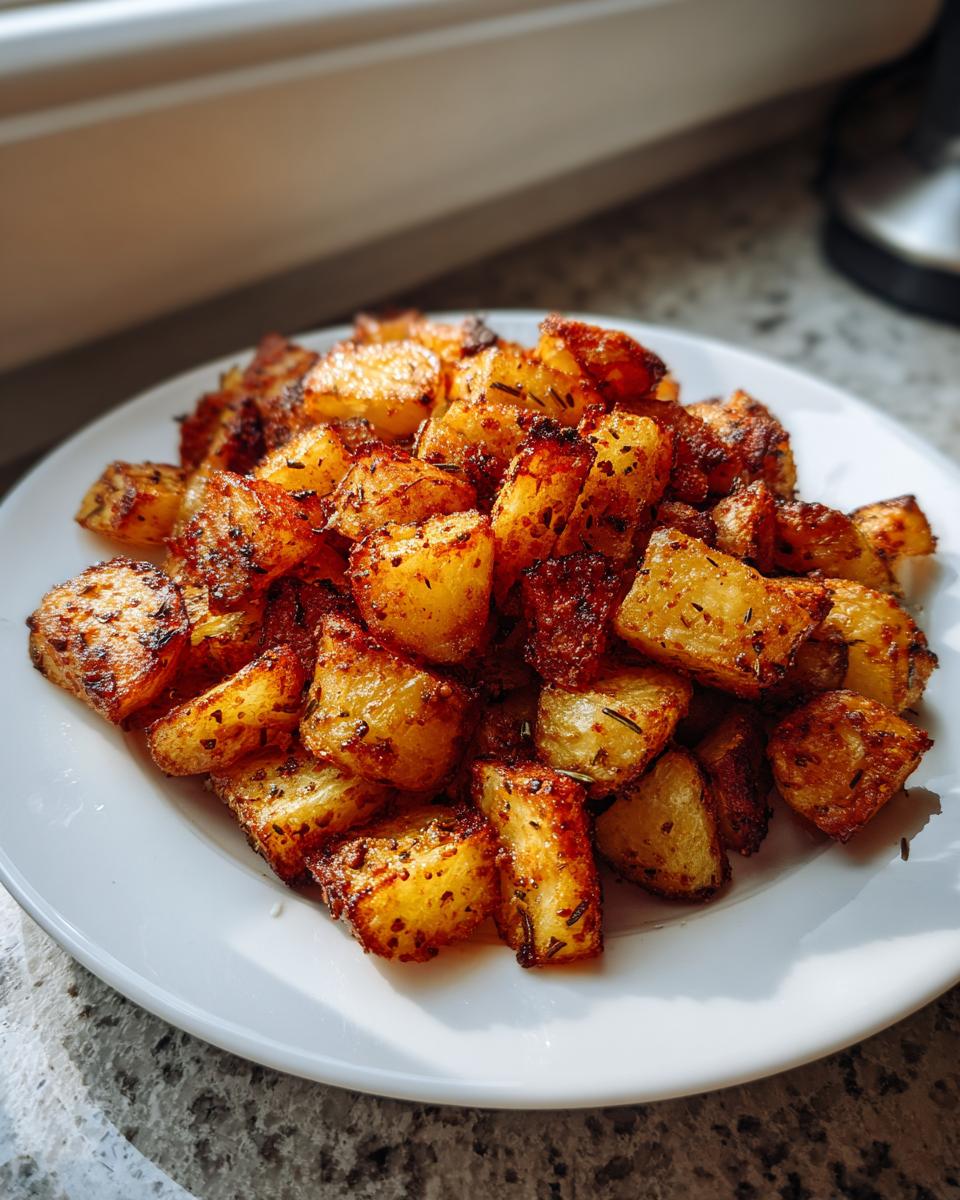
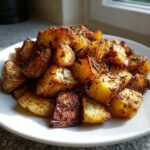
- Unbeatable Texture: Seriously, these are the definition of crispy breakfast potatoes. They are shatteringly crisp on the outside thanks to a little trick we do before seasoning, but still beautifully fluffy and tender inside.
- Zero Fuss Cooking: Once they are seasoned and on the sheet pan, you just let the oven do the work. This makes them the perfect quick breakfast side dish when you’re juggling eggs and coffee.
- Incredibly Flavorful: We aren’t skimping on the taste here. The simple mix of paprika, garlic, and rosemary creates a savory, deeply satisfying profile that goes well with everything.
- Meal Prep MVP: These hold up so well! You can roast a huge batch on Sunday, and they reheat beautifully, meaning you have a delicious side ready for busy weekdays too.
The Ingredients for Perfectly Seasoned Breakfast Potatoes
The magic of getting those golden brown potatoes that everyone raves about starts right here with the ingredients. Honestly, you don’t need anything fancy; a well-stocked pantry is all you require to nail this side dish. I always grab Yukon Golds for this recipe. They strike the perfect balance—they get wonderfully creamy on the inside while still achieving that gorgeous crisp exterior we are aiming for.
For the oil, you absolutely need something sturdy for high heat. I recommend either avocado oil or a good quality olive oil. You’ll need about 3 tablespoons to coat everything properly without drowning the potatoes. If the oil isn’t hot enough, they steam, not roast, and that’s how we end up with sad, soggy sides!
Then comes the seasoning—keep it simple but potent. We’re using smoked paprika for color and depth, alongside everyday heroes like garlic powder, onion powder, salt, and pepper. Don’t forget the dried rosemary; it brings that authentic, savory aroma that screams weekend brunch!
- 2 lbs Yukon Gold potatoes, scrubbed and diced into 1-inch pieces
- 3 tablespoons avocado oil or olive oil
- 1 teaspoon smoked paprika
- 1 teaspoon garlic powder
- 1/2 teaspoon onion powder
- 1/2 teaspoon dried rosemary
- 1/2 teaspoon salt
- 1/4 teaspoon black pepper
How to Make Crispy Oven Roasted Breakfast Potatoes
This is where we turn those humble diced potatoes into the absolute stars of your breakfast spread. We’re using the oven because it gives us hands-off time, which is gold for a busy morning. Remember, the process needs high heat and space to work its magic. If you want that truly amazing, crunchy exterior that people rave about, you have to follow these steps closely. If you’re looking for more recipes like this that maximize your oven time, I have some fantastic easy weeknight dinners you might want to try later in the week!
Prepping and Seasoning Your Breakfast Potatoes
First things first: crank that oven up to 425 degrees Fahrenheit. Line a big baking sheet with parchment paper. That’s my non-negotiable step for easy cleanup! Now, for the secret weapon that gets you those golden brown potatoes: if you have 15 minutes to spare, soak your diced potatoes in cold water, drain them, and then pat them *bone dry* with paper towels. Seriously, moisture is the enemy of crispiness! Toss them with your oil until every piece is glistening. Then, mix your spices—paprika, garlic, rosemary, all of it—and toss until the potatoes are completely coated in that tasty rub. Knowing how to get them perfectly dry is the key to success, just like those folks over at breakfast potatoes experts suggest!
The Roasting Technique for Best Breakfast Potatoes
The next move dictates success: spread your seasoned potatoes onto that prepared baking sheet. They must be in a single layer. I cannot stress this enough! If they are too crowded, they steam and get soggy. If you must, grab a second pan. Roast them for 20 minutes undisturbed. This allows that first side to brown nicely. After 20 minutes, pull them out—carefully!—and give them a good flip with your spatula. Back in they go for another 15 to 20 minutes until they are perfectly done. This two-stage roasting is essential for amazing oven roasted potatoes breakfast results. If you need more foolproof tips on getting that perfect snap, check out this amazing guide on how to make crispy potatoes!
Expert Tips for Truly Flavorful Morning Potatoes
Even though this recipe is simple, there are a few small tweaks you can make that really push these potatoes into “best ever” territory. It’s all about managing the environment in that hot oven. The most common mistake people make is thinking you can load up the pan. Nope! If your potatoes are piled up even slightly, they trap steam and you lose all that glorious crispiness we worked so hard to achieve earlier. I always use two lighter-colored pans if I notice my potatoes overlapping at all.
When it comes to seasoning, don’t be shy about the herbs! We used rosemary, but if you love that savory punch, try substituting or adding thyme. Fresh herbs are amazing, but if you use them, make sure they go in during the last 10 minutes of baking. Toss them in with the oil so they don’t burn before the potatoes are done.
Also, oil choice matters immensely for flavor. While avocado is great for its neutral high-heat tolerance, if you want a richer taste, toss the potatoes in melted butter during the last 15 minutes instead of oil. That butter will brown beautifully and give you amazing, fully developed flavor for your garlic herb breakfast potatoes. Speaking of homemade goodness, when you’re done with breakfast, you absolutely must check out my favorite recipe for homemade granola recipe—it’s seriously addictive!
And finally, a super quick pro-tip: don’t reheat these in the microwave! To keep that crunchy exterior, pop your leftovers onto a clean, dry baking sheet and reheat at 375 degrees F for about 8 minutes. They’ll crisp right back up, good as new.
Skillet Breakfast Potatoes: An Alternative Method
I know what you’re thinking. What if I don’t have the oven space, or maybe I just want my breakfast potatoes *faster*? That’s totally fair! When you need a quick breakfast side dish and the oven is full of casserole, you move to the stovetop. This adaptation works beautifully, especially if you use a great cast iron pan—they retain heat like a dream.
The key difference here when making skillet breakfast potatoes is that you have to be more involved. You can’t just set it and forget it like the oven method. We are still aiming for golden brown perfection, but we need to help the crust form on the bottom before we risk tossing them and messing up that beautiful sear.
Start by heating about 3 tablespoons of that same avocado oil in a large, heavy-bottomed skillet—cast iron is my absolute favorite for this. Get that heat up to medium-high. Once the oil is shimmering, add your seasoned potatoes. Don’t crowd them! If you dump too many in, the temperature dramatically drops, and bam, you’re back to steaming city. If you’re trying to cook for a crowd, honestly, stick to the oven or cook in batches unless you have two giant skillets.
Now, here’s the trick: leave them alone for a solid 5 to 7 minutes. Resist the urge to peek or stir! You want that bottom layer to develop a deep, delicious crust. After that initial rest, give them a good stir or flip. Continue cooking this way, stirring every 5 minutes or so, until they are tender throughout and deeply browned on many sides. If you’re making these on a busy morning, remember these simple instructions can still get you those amazing results you see online, like over at this quick recipe. It’s just a slightly more hands-on process!
Variations for Your Homemade Breakfast Potatoes
Listen, while I stand by that simple garlic and herb seasoning, breakfast potatoes are just begging to be personalized! Once you’ve nailed the technique for crispy potatoes—you know, the soaking and the high-heat roasting—it’s time to start playing around. This is where you can really make them your own signature side dish, whether you’re cooking for a crowd or just feeding yourself on a quiet morning.
If you want to bulk these up a bit to make them feel heartier, adding vegetables works perfectly, just remember the rules of space! Onions and bell peppers are fantastic additions. Dice them up about the same size as your potatoes, or slightly smaller, and toss them in when you add your seasoning mix. They’ll soften up nicely alongside the roasting potatoes.
Want to spice things up? Swap out the smoked paprika for chipotle powder for a smoky kick! Or, if you like heat, a little pinch of cayenne pepper works wonders. I’ve also experimented with mixing in turmeric. It adds this beautiful, vibrant yellow color—kind of like they’ve been sitting in butter forever—and it’s a great way to lean into the fresh tomato salsa you might be serving them with.
Now, about making them feel like lighter, healthy breakfast potatoes—it’s all about the oil management. If you are really counting fat, you can usually drop the oil down to 2 tablespoons for this entire 2 lb batch, as long as you ensure that every single potato piece is thinly coated. The parchment paper helps a ton here, preventing sticking even with less fat.
Or, if you want to go the other direction and make them truly decadent for a weekend brunch spread? Go for the cheesy topping! About five minutes before they are fully done roasting, pull the pan out, sprinkle them liberally with some sharp cheddar or Monterey Jack, and pop them back in until the cheese is melted and bubbly. That turns it from a side dish into a major event!
Storing and Reheating Your Perfect Breakfast Potatoes
One of the best things about roasting a big batch of these fluffy-on-the-inside, crunchy-on-the-outside breakfast potatoes is knowing you have leftovers ready to go. I usually make mine twice the amount specified because I love having them for quick lunches or quick additions to weekday scrambled eggs. They are stellar for meal prep!
Storage is super straightforward. Let them cool down completely first—warm potatoes create condensation in containers, and that moisture means sogginess when we reheat them later. Once they are totally cool, pop them into any airtight container. I just use my standard Pyrex bowls. They stay perfectly tasty in the fridge for about three to four days. Seriously, they last that long, which is fantastic for grabbing a savory side dish quickly.
Now, reheating is where you have to be careful. If you toss these in the microwave? Forget it. You are immediately reversing all that hard work we did getting them crispy! The microwave will steam them right back into mushy territory. If you want them to taste almost brand new, you need dry heat to wake up that crust.
I highly recommend throwing them back onto a clean baking sheet. Set your oven or air fryer to about 375 degrees Fahrenheit. About 8 to 10 minutes is usually all it takes for them to get piping hot and reclaim that glorious golden crispness we love. If you’re using an air fryer, even less time—maybe 5 minutes, shaking halfway through. Honestly, doing this simple reheat step is totally worth the extra minute or two; it keeps the integrity of the homemade breakfast potatoes intact.

If you’ve run out of good dinner ideas to go along with your leftovers, I have a fantastic recipe for easy chili recipe that pairs wonderfully with a side of reheated potatoes!
Frequently Asked Questions About Breakfast Potatoes
Okay, I know that even with the best instructions, sometimes little questions pop up when you’re standing there with a bag of potatoes, wondering if you’re doing it right. That’s totally normal! Getting that perfect texture is what most people struggle with, so let’s tackle the big ones right here.
What is the secret to making breakfast potatoes crispy?
This is the million-dollar question, and I’m happy to share my trick! The absolute key to getting those beautifully crunchy, golden brown potatoes without them turning into mush is starch management and heat. If you follow my advice from earlier, you’ll know the first step is soaking those diced potatoes in cold water for about 15 minutes. This washes off the excess surface starch. Then, and this is critical, you must pat them until they are completely, utterly dry. Any moisture turns to steam in the oven, which means sogginess! Follow that up by cutting them evenly and ensuring they aren’t touching on the baking sheet—that high heat needs to hit every surface directly. If you master those three things, you’ll get the crunch you crave every time. For another perspective on that crunch factor, take a look at the great tips provided here on crispy potatoes.
Can I use Russet potatoes instead of Yukon Golds for these breakfast potatoes?
You sure can! Yukon Golds are my preference because they have a slightly lower starch content and a nice waxy skin, which helps them hold their shape perfectly while the inside gets creamy. Russets, however, are much starchier. If you use a Russet, they will absolutely crisp up beautifully, sometimes even a bit faster than the Yukon Golds!
But here’s the warning: Russets tend to fall apart more easily once they get cooked through. So, if you use them, be extra gentle when you flip them halfway through the roasting time. If you are planning on making a big batch for meal prep, Yukon Golds usually hold up slightly better over several days, but Russets work great if you need them immediately for your simple potato side.
For anyone curious about my journey in simplifying recipes for modern life, you can always learn more about why I started Completely Yummy over on my About Page!
Estimated Nutrition for These Simple Breakfast Potatoes
Now, I’m not a nutritionist—I’m just a home cook dedicated to making seriously good food that fits real life! The best part about keeping these breakfast potatoes simple is that the nutrition stays quite straightforward. Below is the breakdown based on my calculations for the recipe provided, assuming it yields four servings as noted.
Remember, these figures are just estimates. If you load them up with butter during reheating or use extra oil just because they smell so good, those numbers will shift a bit. But for a savory, satisfying side dish, they hold up well!
- Serving Size: 1 serving
- Calories: 250
- Sugar: 1g
- Sodium: 350mg
- Fat: 10g
- Saturated Fat: 1.5g
- Unsaturated Fat: 8.5g
- Trans Fat: 0g
- Carbohydrates: 38g
- Fiber: 4g
- Protein: 4g
- Cholesterol: 0mg
See? Pretty reasonable for something that tastes so decadent! These nutritionals confirm they are a great addition to any morning feast, whether you’re keeping it light or preparing for a big weekend brunch.
PrintPerfectly Crispy Breakfast Potatoes: Simple Oven Roasted Recipe
You need breakfast potatoes that are golden brown and perfectly crispy every time. This simple oven-roasted recipe delivers tender interiors and crunchy exteriors using basic seasonings. It is the best breakfast potato recipe for a quick, flavorful side dish for your weekend brunch or weekday meal prep.
- Prep Time: 15 min
- Cook Time: 40 min
- Total Time: 55 min
- Yield: 4 servings 1x
- Category: Side Dish
- Method: Oven Roasting
- Cuisine: American
- Diet: Gluten Free
Ingredients
- 2 lbs Yukon Gold potatoes, scrubbed and diced into 1-inch pieces
- 3 tablespoons avocado oil or olive oil
- 1 teaspoon smoked paprika
- 1 teaspoon garlic powder
- 1/2 teaspoon onion powder
- 1/2 teaspoon dried rosemary
- 1/2 teaspoon salt
- 1/4 teaspoon black pepper
Instructions
- Preheat your oven to 425 degrees Fahrenheit. Line a large baking sheet with parchment paper for easy cleanup.
- Place the diced potatoes in a large bowl. If you want extra crispy breakfast potatoes, soak them in cold water for 15 minutes, then drain thoroughly and pat them completely dry with paper towels. This step removes excess starch.
- Drizzle the potatoes with the avocado oil. Toss them well to coat every piece evenly.
- In a small bowl, mix together the smoked paprika, garlic powder, onion powder, rosemary, salt, and pepper. Sprinkle this seasoning mix over the oiled potatoes and toss again until the potatoes are fully coated.
- Spread the seasoned potatoes in a single layer on the prepared baking sheet. Do not overcrowd the pan; use two sheets if necessary to ensure they roast instead of steam.
- Roast for 20 minutes. Remove the pan from the oven and use a spatula to flip the potatoes.
- Return the pan to the oven and roast for another 15 to 20 minutes, or until the breakfast potatoes are golden brown and crispy on the outside and tender inside.
- Serve immediately as a quick breakfast side dish alongside eggs or sausage.
Notes
- For the crispiest result, ensure your potatoes are completely dry before adding oil and seasoning. Moisture prevents browning.
- If you prefer skillet breakfast potatoes, cook them in a large cast iron skillet over medium-high heat, stirring only every 5-7 minutes to allow a crust to form on the bottom.
- These oven roasted potatoes are excellent for meal prep. Store cooled leftovers in an airtight container in the refrigerator for up to 4 days.
Nutrition
- Serving Size: 1 serving
- Calories: 250
- Sugar: 1
- Sodium: 350
- Fat: 10
- Saturated Fat: 1.5
- Unsaturated Fat: 8.5
- Trans Fat: 0
- Carbohydrates: 38
- Fiber: 4
- Protein: 4
- Cholesterol: 0