
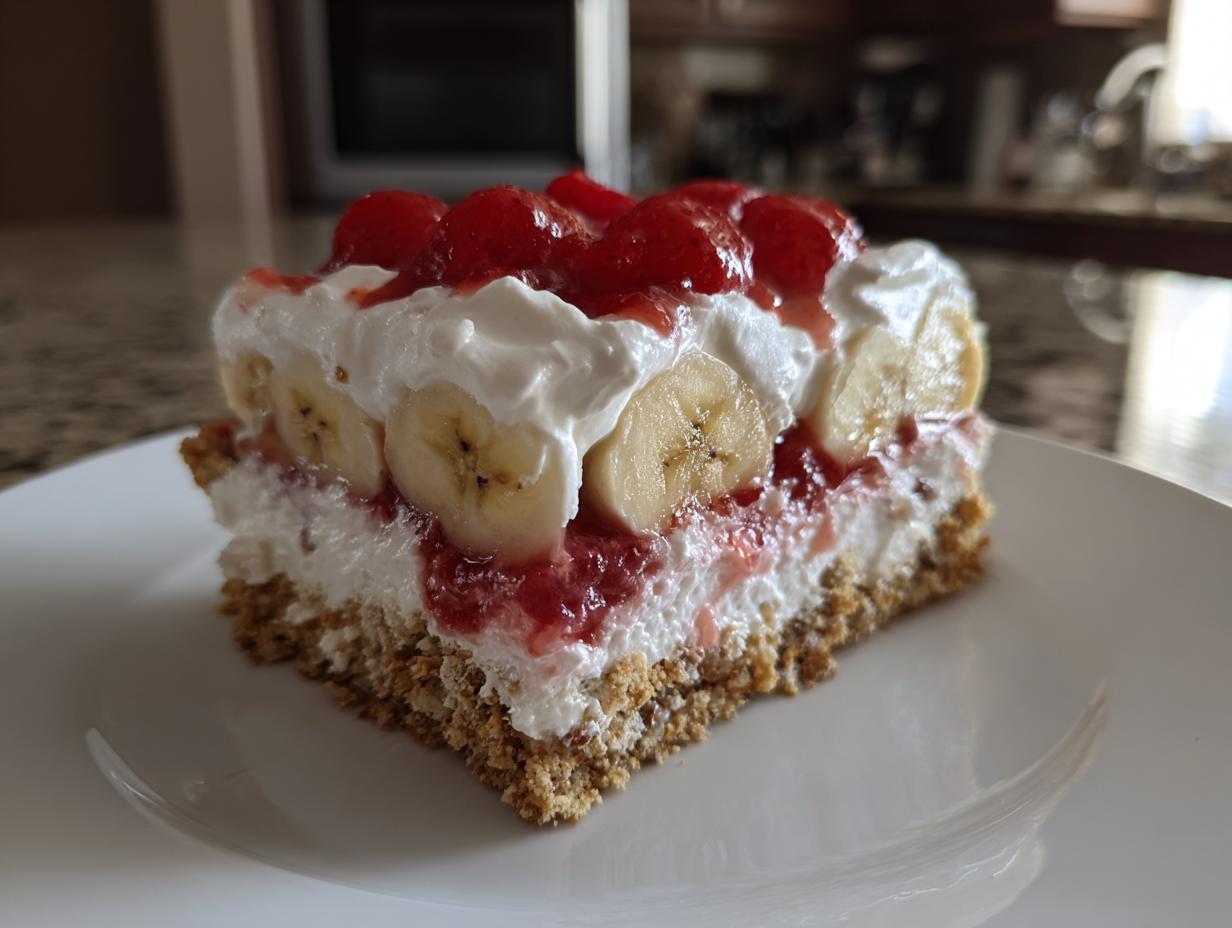
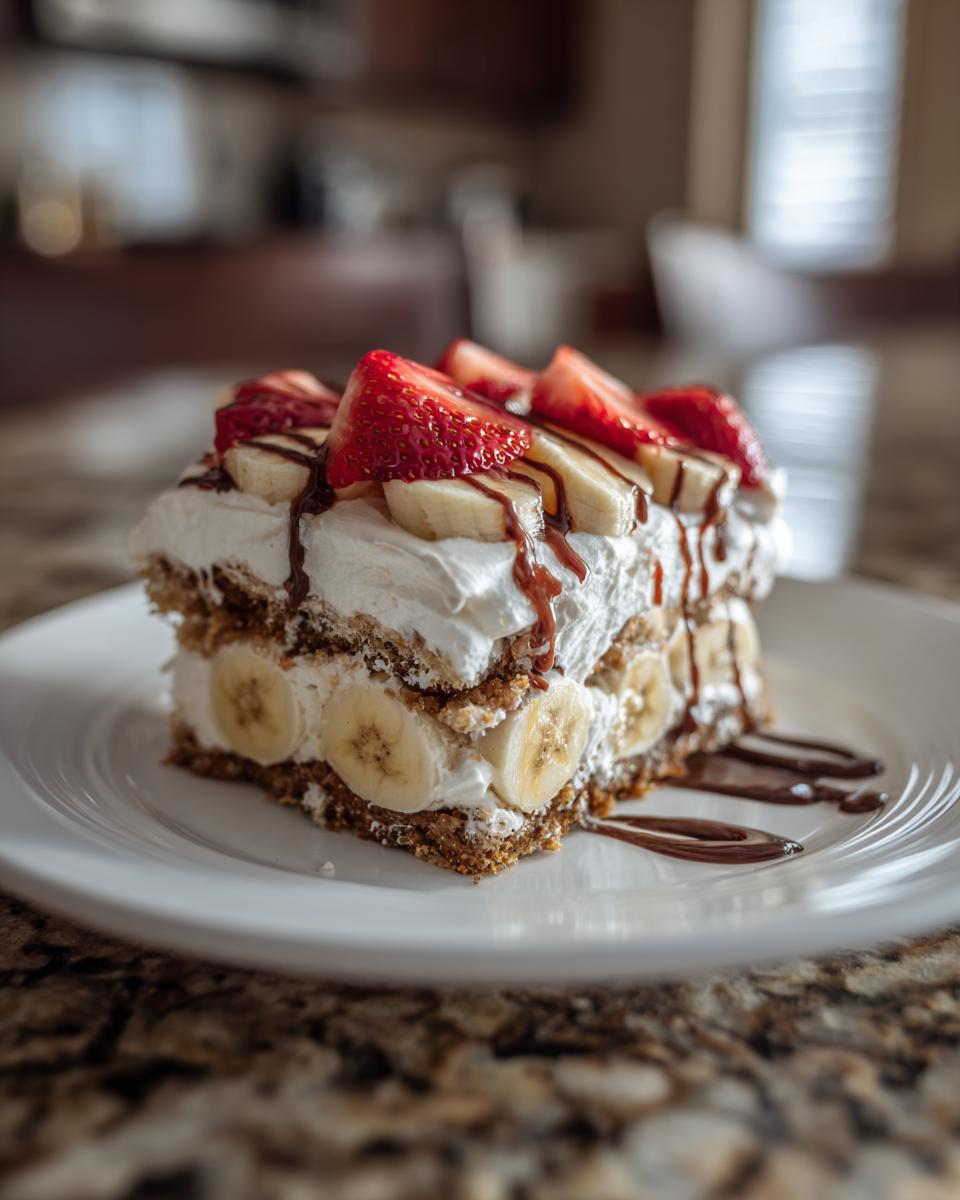
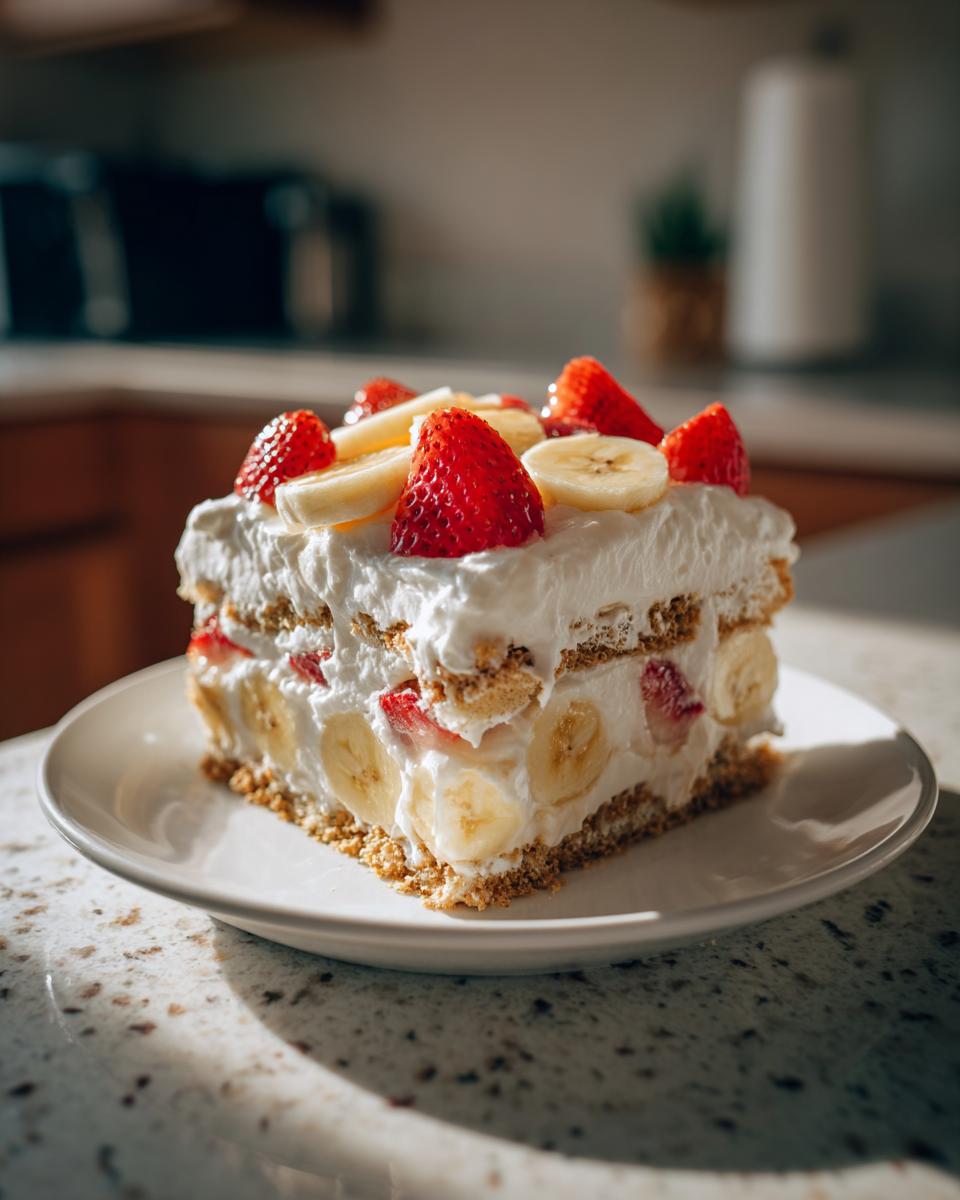
When the summer heat hits, all I crave is that nostalgic feeling of digging into a giant, dripping ice cream parlor sundae, right? But honestly, who wants to turn on the oven when it’s a hundred degrees outside? That’s why I developed this Ultimate No-Bake Banana Split Cake. This recipe encapsulates everything we love—the tangy pineapple, the sweet strawberries, the creamy banana, and that chocolate drizzle—but keeps it completely hands-off in terms of heat. It’s proof that even when life gets hectic, you can still whip up something show-stopping and truly delicious. If you love simple, heartwarming food, you’ll find tons more inspiration in my collection of delicious dessert recipes. This super easy layered dessert captures that retro charm while respecting your busy schedule. Trust me, this banana split cake is genuinely doable!
- Why This No-Bake Banana Split Cake Is Your New Summer Staple
- Gathering Ingredients for Your Banana Split Cake
- Step-by-Step Instructions for the No Bake Banana Split Cake
- Tips for Making a Perfect Banana Split Cake Every Time
- Variations on the Banana Split Inspired Recipe
- Serving Suggestions for Your Potluck Perfect Dessert
- Storage & Reheating Instructions for Your Make Ahead Creamy Dessert
- Frequently Asked Questions About the Banana Split Cake
- Nutritional Estimates for This Summer Fruit Cake
- Nutritional Estimates for This Summer Fruit Cake
Why This No-Bake Banana Split Cake Is Your New Summer Staple
Look, I test recipes constantly to make sure they work for *real* life, and this banana split cake passed with flying colors. It delivers that absolute blast of classic ice cream flavor without demanding any intense baking skill. It’s my go-to when I need a big crowd-pleaser that I can make entirely ahead of time. If you loved my easy ice cream pie recipe, you’re going to adore this simple beauty.
Key Features of Our Easy Layered Dessert
- Zero oven time! We completely skip the heat, which is non-negotiable in July.
- It’s the ultimate make ahead creamy dessert; the longer it chills, the better the layers set together.
- It taps straight into that fun, retro dessert recipes nostalgia we all love.
- Quick assembly means you spend more time enjoying the party and less time fussing in the kitchen.
Gathering Ingredients for Your Banana Split Cake
Okay, this layered dream only works if we nail the components right from the start. Since we aren’t baking, texture is everything, and that starts with making sure our frozen and wet ingredients are prepped exactly right. Getting these ingredients together is half the fun, and it usually means a trip to the produce section for the freshest fruit!
For the Graham Cracker Crust Dessert Base
We’re building the foundation here, so don’t eyeball the butter! This needs to hold up to those heavy fruit layers.
- 1 1/2 cups graham cracker crumbs – make sure they’re fine!
- 1/2 cup unsalted butter, melted.
- 1/4 cup granulated sugar.
For the Creamy Banana Dessert Filling
This is where that luxurious, smooth body comes from. It has to be perfectly smooth before we start layering! Remember, the cream cheese must be nice and softened to avoid lumps. Trust me on this one.
- 1 (8 ounce) package cream cheese, softened completely.
- 1 cup powdered sugar.
- 1 teaspoon vanilla extract.
- 1 (12 ounce) container frozen whipped topping, thawed, divided – we only use half right now!
Fruit Layers and Final Toppings for the Banana Split Cake
This fruit section is crucial, especially the pineapple. If you leave too much liquid in there, you’ll end up with a watery mess at the bottom of your chilled banana dessert. We want maximum flavor, minimum juice!
- 3 large ripe bananas, sliced.
- 1 cup crushed pineapple, drained very well – I mean, squeeze the liquid out!
- 1 cup sliced fresh strawberries.
- 1/4 cup chocolate syrup (the good, thick stuff works best).
- 1/4 cup chopped nuts (if you are using these, keep them optional).
- Maraschino cherries for topping – these are the finishing touch!
Step-by-Step Instructions for the No Bake Banana Split Cake
Alright, let’s get down to business! Since this is a no-bake dessert, our technique is all about layering carefully and making sure everything is perfectly chilled when it needs to be. This makes assembly so simple, even if you’re new to this kind of easy layered dessert. When you finish, you’ll see that gorgeous structure emerge!
Creating and Chilling the Graham Cracker Crust Dessert
First things first—the base! Grab your graham cracker crumbs, that melted butter, and the granulated sugar. Mix them up until they look like wet sand. Now, press that firmly and evenly into the bottom of your 9×13 dish. You need a good, solid press here so it holds up later. Pop that into the fridge for just 15 minutes while you whip up the filling. That little chill time is surprisingly important!
Preparing the Sweet Cream Cheese Layer
Time for the middle layer to get creamy! In a separate bowl—make sure your cream cheese is super soft—beat it with the powdered sugar until it’s smooth as silk. Then, take half of your thawed whipped topping and gently fold it in. And I mean gently! Don’t stir aggressively; we want to keep all those lovely air bubbles in there. Once it’s just combined, spread this entire mixture evenly over that chilled crust.
Layering the Fruit and Finishing the Banana Split Cake
Now for the fun part that earns the “banana split” name! Carefully arrange your sliced bananas over the cream cheese. Remember that pineapple we drained aggressively? Sprinkle that over the bananas, followed by your fresh strawberries. Once the fruit is settled, take the remaining half of the whipped topping and spread it completely over everything to seal in that fruit goodness. This step really ensures that beautiful final presentation.
The Essential Chill Time for This Chilled Banana Dessert
This is where patience comes in, but you can’t rush perfection! Cover the dish tightly and get it into the refrigerator for a minimum of 4 hours. Seriously, four hours is the sweet spot for this make ahead creamy dessert so it firms up completely. If you can hold off until the next day, even better! That long chill helps all those distinct layers solidify into a clean slice. Before serving, drizzle with chocolate syrup and add your cherries—enjoy the ultimate sweet treat!
Tips for Making a Perfect Banana Split Cake Every Time
I’ve messed this banana split cake up plenty of times when I was rushing, so let me save you the trouble! When you skip the steps that seem small, the whole dessert suffers. But once you understand these little tricks, this dessert becomes foolproof. It’s about respecting the layers, especially the fruit! If you are looking for other creamy topping ideas like how to make a perfect vanilla buttercream frosting, check that out later!
Ingredient Clarity for Your Banana Split Cake
Listen, your bananas need to be ripe—you want that nice curve and sweet flavor—but they absolutely cannot be mushy. If they are too soft, they will turn to banana soup under that heavy cream layer. Also, when you thaw the whipped topping, do it slowly in the fridge overnight. If you rush it on the counter, it gets deflated and watery, and we need it light and fluffy for the top!
Preventing a Soggy Graham Cracker Crust Dessert
That moisture from the pineapple and strawberries can really sneak down and ruin the crispness of our graham cracker crust dessert base. After you press the crust into the pan, try this: Pop it in the freezer for an extra 15 minutes instead of just the fridge. After that, you can lightly brush the crust with just a tiny bit of melted, unseasoned butter. It creates a little barrier! We want a sturdy, buttery crunch, not a wet sponge, so every little bit of protection helps us keep that texture!
Variations on the Banana Split Inspired Recipe
Just because this is the ultimate banana split cake doesn’t mean it’s the only way to enjoy those flavors! Sometimes you just need a slight tweak, or maybe you’re craving something that feels a little different but hits the same nostalgic high notes. I’ve played around with this concept a bunch, testing out different textures and fruits to keep things fresh for summer parties.
Comparing to the Banana Split Dump Cake Recipe
I know some of you love a good dump cake, and there are definitely versions out there for a Banana Split Dump Cake Recipe. But here’s the main difference: my version is a chilled, layered structure built on cream cheese and graham crackers. A dump cake usually involves layering canned fruit and dry cake mix ingredients, and then you bake it until it’s warm and gooey. If you need something warm and soft, that’s your path! If you want that classic, cool, creamy dessert feel, stick with this no-bake version. You should check out my red velvet cake mix cookies if you enjoy simple mix-and-bake recipes!
Swapping Fruit for This Creamy Banana Dessert
The main layers (banana, pineapple, strawberry) are pretty iconic, but you can absolutely customize them a bit. If you are worried about the bananas making things too soft, you could replace some of them with canned mandarin oranges—just make sure you drain those well, too! Another great option for this creamy banana dessert is folding in a quarter cup of those bright maraschino cherries directly into the cream cheese layer before you spread it. It gives you little bursts of intense cherry flavor throughout every bite, rather than just at the top!
Serving Suggestions for Your Potluck Perfect Dessert
Since this banana split cake is so rich and visually stunning already, we don’t need much extra fuss! When you bring this to a gathering, make sure it stays cold. It travels best in a good insulated carrier. Right before setting it out, that final drizzle of chocolate syrup needs to look intentional—don’t just squirt it on!

For extra flavor impact, a little extra crunch never hurts. I love sprinkling a few more chopped nuts right around the edges of the dish just as I set it down. If you happen to have some homemade caramel sauce—like my easy homemade caramel recipe—drizzling just a tiny bit over the cherry tops adds another dimension of flavor. It elevates this simple chilled banana dessert to something truly special!

Storage & Reheating Instructions for Your Make Ahead Creamy Dessert
Since this glorious banana split cake is a make ahead creamy dessert, storage is super easy—it *has* to stay cold! You’ll want to keep this tightly covered in the refrigerator. It keeps beautifully for two full days, honestly. However, here’s the catch: the bananas. Bananas oxidize fast, even under the topping! If you know you won’t finish it in 24 hours, save your banana slices and add them just a few hours before serving. You absolutely cannot reheat this chilled banana dessert; it must remain cold! Just cover it and pop it back in the fridge.
Frequently Asked Questions About the Banana Split Cake
I know you have questions! With recipes this fun, there are always little details that trip people up, or maybe you just need to know how to make it work with what you have on hand. We’ve cracked the code on making this dessert right, but here are the answers to the most common things folks ask about this fantastic banana split cake.
Can I substitute the cream cheese layer in this No Bake Banana Split Cake?
That cream cheese layer is what gives the dessert its gorgeous body! But if you hate cream cheese or just don’t have it, you can definitely get creative. For a lighter texture, you can use a stabilized whipped cream mixture instead—you’d whip heavy cream with some powdered sugar and a teaspoon of unflavored gelatin mixed with a tiny bit of water. Or, if you are looking for something denser, you can switch to a full no bake cheesecake style dessert base! Just make sure whatever you use has time to set up properly in the fridge so it supports the fruit.
How long does this Easy Layered Dessert need to chill?
This is the most important question for a chilled banana dessert like this one! You absolutely must stick to the minimum of 4 hours. If you cut that short, when you try to serve it, your layers will slide everywhere, and that is just a disaster waiting to happen. But, honestly? The longer it chills, the better the flavors meld and the firmer the entire structure becomes. I always try to make this the day before I plan to serve it. Overnight chilling turns this into a truly set, easy layered dessert that slices perfectly.
Can I freeze this Creamy Banana Dessert?
You *can*, but I usually advise against it if you want the best texture experience. If you freeze it, the whipped topping tends to get a little grainy when it thaws, and the high water content in the fruit can sometimes separate. If you absolutely must freeze sections of this creamy banana dessert, wrap individual slices tightly in plastic wrap and then foil. When thawing, let it sit in the fridge for a full day. It won’t be quite as fluffy as when it was first made, but it will still be tasty! If you need more general kitchen advice for weeknights, I’ve got tons of tips over on my easy weeknight dinners page.
Nutritional Estimates for This Summer Fruit Cake
Just so everyone knows where they stand before diving into this beauty, here are the general estimates for one slice of this summer fruit cake, based on 12 servings. Remember, this is an approximation, and yours might vary based on the brand of whipped topping or how much chocolate syrup you can’t resist drizzling on top!
- Serving Size: 1 slice
- Calories: 350
- Sugar: 35
- Sodium: 180
- Fat: 18
- Saturated Fat: 10
- Unsaturated Fat: 8
- Trans Fat: 0
- Carbohydrates: 45
- Fiber: 2
- Protein: 5
- Cholesterol: 45
Ultimate No-Bake Banana Split Cake
Create the classic ice cream parlor experience in a simple, layered dessert. This no-bake banana split cake captures the flavors of banana, chocolate, strawberry, and pineapple over a graham cracker crust, perfect for summer or any gathering.
- Prep Time: 25 min
- Cook Time: 0 min
- Total Time: 4 hr 25 min
- Yield: 12 servings 1x
- Category: Dessert
- Method: No Bake
- Cuisine: American
- Diet: Vegetarian
Ingredients
- 1 1/2 cups graham cracker crumbs
- 1/2 cup unsalted butter, melted
- 1/4 cup granulated sugar
- 1 (8 ounce) package cream cheese, softened
- 1 cup powdered sugar
- 1 teaspoon vanilla extract
- 1 (12 ounce) container frozen whipped topping, thawed, divided
- 3 large ripe bananas, sliced
- 1 cup crushed pineapple, drained well
- 1 cup sliced fresh strawberries
- 1/4 cup chocolate syrup
- 1/4 cup chopped nuts (optional)
- Maraschino cherries for topping
Instructions
- Prepare the crust: Mix graham cracker crumbs, melted butter, and 1/4 cup granulated sugar in a bowl. Press the mixture firmly into the bottom of a 9×13 inch baking dish. Chill the crust for 15 minutes.
- Make the cream cheese layer: In a separate bowl, beat the softened cream cheese, powdered sugar, and vanilla extract until smooth. Gently fold in half of the thawed whipped topping until just combined.
- Assemble the first layer: Spread the cream cheese mixture evenly over the chilled crust.
- Layer the fruit: Arrange the sliced bananas over the cream cheese layer. Sprinkle the drained crushed pineapple and sliced strawberries evenly over the bananas.
- Add the topping: Spread the remaining half of the whipped topping over the fruit layer.
- Chill: Cover the dish and refrigerate for at least 4 hours, or until firm. Chilling time is important for this easy layered dessert.
- Garnish and serve: Before serving, drizzle the top with chocolate syrup, sprinkle with chopped nuts if using, and place maraschino cherries on top. Slice and serve this chilled banana dessert cold.
Notes
- For best results with this make ahead creamy dessert, drain the crushed pineapple thoroughly to prevent a watery layer.
- If you prefer a slightly different texture, you can substitute the cream cheese layer with a no bake cheesecake style dessert base.
- This recipe is a great potluck perfect dessert because it travels well when kept cold.
Nutrition
- Serving Size: 1 slice
- Calories: 350
- Sugar: 35
- Sodium: 180
- Fat: 18
- Saturated Fat: 10
- Unsaturated Fat: 8
- Trans Fat: 0
- Carbohydrates: 45
- Fiber: 2
- Protein: 5
- Cholesterol: 45