
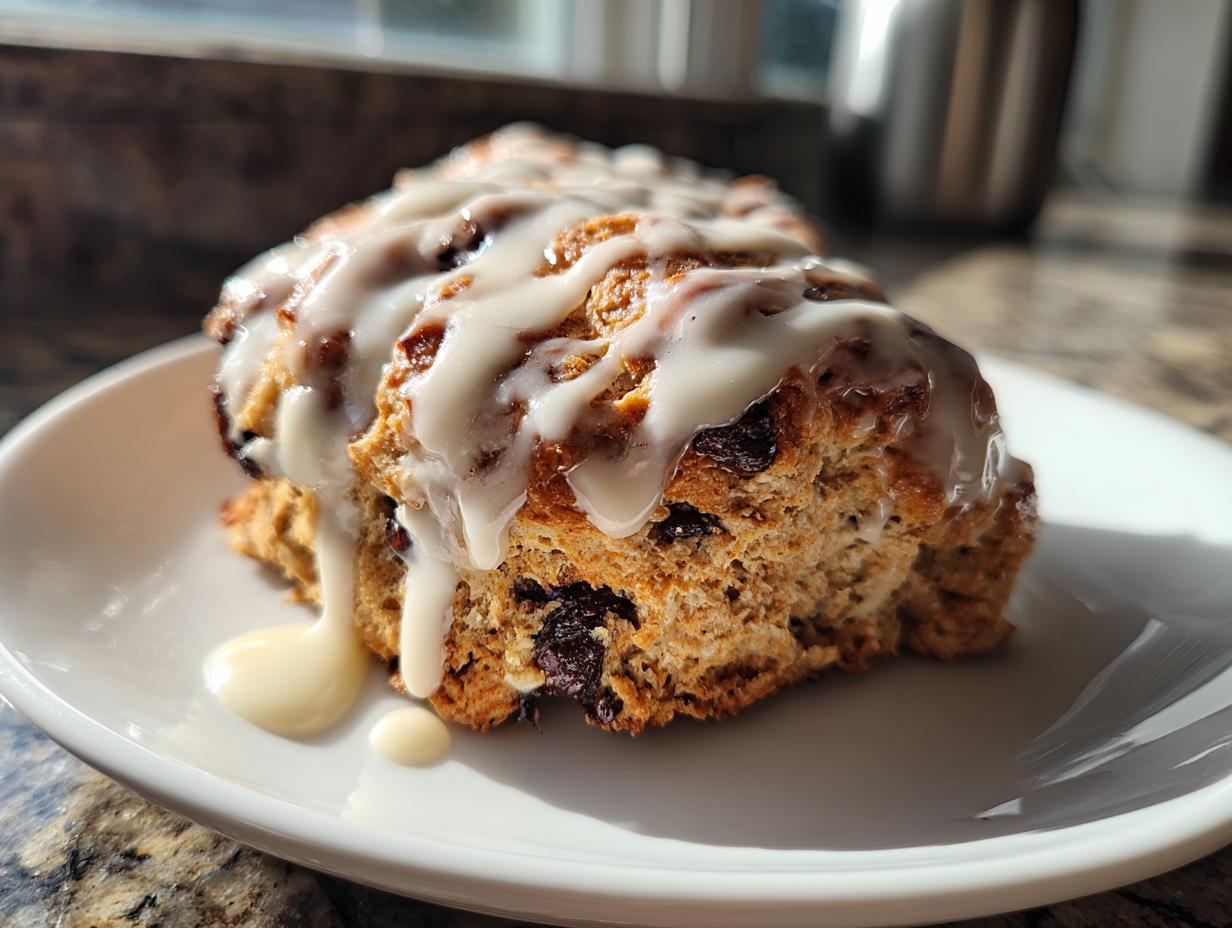
Let’s be honest, sometimes you just need something that tastes like you spent all morning in a cozy bakery, right? I remember those marketing days when I craved comfort food but only had fifteen minutes to spare. That’s exactly why I developed these incredible **Bakery-Style Chocolate Chip Scones**. They are my answer to busy mornings!
You are going to get that rich, buttery tenderness and that beautiful flaky structure everyone talks about, but without the high fuss. Seriously, these **chocolate chip scones** are deceptively easy. We’re talking about elevated flavors that respect your schedule. This recipe promises genuinely doable results, turning your kitchen into the best little neighborhood spot for breakfast pastries or a perfect afternoon treat.

- Why You Will Love These Bakery-Style Chocolate Chip Scones
- Essential Ingredients for Perfect Chocolate Chip Scones
- Tips for Achieving Flaky Scones Texture
- Step-by-Step Instructions for Easy Chocolate Chip Scones
- Making the Vanilla Glaze for Your Tender Chocolate Chip Treats
- Making Homemade Scones: Storage and Reheating
- Serving Suggestions for Your Chocolate Chip Scones
- Frequently Asked Questions About Chocolate Chip Scones
- Nutritional Estimates for These Chocolate Chip Scones
- Nutritional Estimates for These Chocolate Chip Scones
Why You Will Love These Bakery-Style Chocolate Chip Scones
I promise you, these aren’t going to be dry, crumbly hockey pucks masquerading as pastries. When I streamline a recipe, I never cut corners on taste or texture. Here’s exactly why these **chocolate chip scones** will jump straight to the top of your favorites list:
- Perfectly Tender Chocolate Chip Treats: Thanks to the heavy cream and minimal mixing, the texture is soft, moist, and almost melts in your mouth. They are everything a scone should be!
- Remarkably Easy Scones: We’re using standard pantry staples and mixing everything up faster than you can decide what fancy coffee you want. Seriously, you can whip these up in about fifteen minutes before the oven even finishes preheating.
- That Sought-After Flakiness: You know that light, layered texture you only find at the fancy coffee shop? I’ve cracked the code for getting those flaky layers at home, and it all hinges on keeping the butter super cold.
- The Golden Touch: A quick brush of cream before baking gives them that beautiful, golden-brown bakery finish, making them look way more complicated than they actually were!
- Beyond Breakfast: These are fantastic for a quick morning fuel, but they shine just as brightly as a cozy afternoon tea time snack or a special brunch centerpiece.
Essential Ingredients for Perfect Chocolate Chip Scones
Okay, this is where we build magic. Because we are aiming for that seriously good, bakery-style result, your ingredients need to be treated with respect—especially when it comes to temperature! Don’t let anything get warm before it hits the mixing bowl. I’ve broken the list down so you can see exactly what to gather for your **chocolate chip scones**.
For the Chocolate Chip Scone Dough
- 2 cups all-purpose flour – This is our base, nothing fancy needed!
- 1/4 cup granulated sugar – Just enough sweetness to balance the chocolate.
- 1 tablespoon baking powder – This gives us that essential lift.
- 1/2 teaspoon salt – Don’t skip this; it makes the chocolate taste richer!
- 1/2 cup (1 stick) cold unsalted butter, cut into small pieces – And I mean *ice cold*. This is non-negotiable for flakiness.
- 3/4 cup heavy cream, plus more for brushing – Heavy cream is the secret weapon for tenderness here.
- 1 large egg – Gives structure and richness.
- 1 teaspoon vanilla extract – Because everything is better with vanilla.
- 1 cup semi-sweet chocolate chips – Load ’em up!
For the Vanilla Glaze
If you want that truly beautiful finish people ask about, you need this simple drizzle. It hardens just enough to give you a nice sweet crackle.
- 1 cup powdered sugar – Sifted if you have time, but honestly, a quick whisk usually fixes any lumps.
- 2 tablespoons milk or cream – Start with this amount; you can always add a tiny bit more.
- 1/2 teaspoon vanilla extract – For that classic, comforting flavor.
Tips for Achieving Flaky Scones Texture
I know you want those **flaky scones** that look like they were painstakingly crafted by a pastry chef, but guess what? It’s 90% temperature control and 10% patience. If you follow these steps, you’ll master the texture every single time. These aren’t complicated techniques—they are just the rules the great bakers abide by!
First, let’s talk about the butter. If your butter melts before it hits the flour, you end up with a dense, cookie-like scone, and that’s just not what we’re going for here. My sister tried using slightly softened butter once, and the texture was a total disaster. Don’t repeat her mistake!
- Keep Everything Frozen or Super Cold: I mean it! The butter needs to be cut into small chunks and kept in the freezer right up until the moment you add it to your flour, sugar, and leavening. If you’re having a warm kitchen day, toss the flour mixture in the freezer for ten minutes before you start cutting in that cold butter. I actually love using my pastry blender, but if you prefer your hands, remember to work fast!
- The Importance of Pea-Sized Pieces: When you cut the butter into the flour, you are creating little pockets of fat. When those pockets hit the hot oven, the water in the butter turns to steam and pushes the dough apart, creating those beautiful, visible layers. You should be left with pieces of butter about the size of small peas; keep mixing until you achieve that look. If you mix too long, you just melt the butter into the flour, and those layers disappear.
- Minimal Mixing is Your Best Friend: Once you add the heavy cream and egg mixture, switch to a light touch. You only mix until the dough *just* comes together. It should look shaggy and messy—it shouldn’t be smooth like bread dough. Overmixing develops gluten, and gluten makes things tough and chewy, not light and flaky. We want tender! For a similar flaky concept, check out my pie crust tips here.
If you are looking for even more encouragement on achieving that perfect crisp exterior and tender inside, I found a great source that talks about using cream for maximum flavor right over at Fresh Fork Lab. Trust me, these secrets are the difference between an okay scone and a truly show-stopping **homemade scone**!
Step-by-Step Instructions for Easy Chocolate Chip Scones
I promised you **easy scones**, and I always deliver! Seriously, these come together so fast. First things first—get that oven preheated to 400°F (200°C) and line a baking sheet with parchment paper now. That way, when the dough is ready, you aren’t scrambling around looking for materials.
Mixing the Dough and Incorporating Butter
This is the texture part, so move with purpose! In a big bowl, whisk your dry stuff—flour, sugar, baking powder, and salt. Now, add that super cold, cubed butter. You need to cut that butter in until your mixture looks like coarse sand with some visible pea-sized butter chunks scattered throughout. Those little pockets are everything for that bakery texture.
In a separate small cup, quickly whisk your heavy cream, egg, and vanilla extract. Pour that wet mixture right into the dry mound. Mix it gently with a fork until it *just* holds together. It will look messy and shaggy—that is perfect! If you mix until smooth, you’ve gone too far, and you’ll lose the flakiness we worked so hard to save.
Shaping, Cutting, and Baking Your Chocolate Chip Scones
Gently tip that shaggy dough onto a lightly floured surface. Pat it down with your hands until it’s about 3/4-inch thick—don’t roll it! If you want more chocolate in every bite, this is the time to gently fold in your cup of chocolate chips. Resist the urge to knead!
Pat the dough into a circle or square shape, and then slice it into 8 equal wedges, making sure to give them a little space on that baking sheet. Before they go in—and this is my trick for that gorgeous golden color—brush the tops lightly with a swish of that extra heavy cream. Bake them for 15 to 18 minutes until they are beautifully golden brown. For more tips on the whole process, check out the folks over at Fresh Plate Journal when you have a minute!
Remember, keeping your process quick and cool is the key to mastering these quick baking recipes!
Making the Vanilla Glaze for Your Tender Chocolate Chip Treats
Okay, so the scones are warm, the house smells amazing, and you’re ready for the final, beautiful flourish. While you absolutely can eat these **chocolate chip scones** plain—they are divine that way—I think that little vanilla drizzle just makes them feel like an extra special indulgence, perfect for brunch or cozying up for afternoon tea.
Don’t stress over this! It’s the easiest thing you’ll make all day. We want a simple, slightly thin glaze that sets up nicely. Remember how I talked about that creamy texture? Well, the glaze keeps that theme going right to the last bite!
Get your glaze ingredients waiting while the scones cool down a bit—you can drizzle it warm or let them cool completely, totally up to you. If you’re curious about other ways to use vanilla in baking, I have a wonderful simple vanilla frosting recipe linked over there that skips the heavy cream for a different, fluffier texture!
Here’s the breakdown for the perfect drizzle:
- In a small bowl, whisk together that full cup of powdered sugar until you think it’s okay. Then whisk it a little more, just in case!
- Add the 2 tablespoons of milk or cream and the 1/2 teaspoon of vanilla extract. Mix it up until it’s smooth.
- Now, this is the crucial part for presentation: Check the consistency. If it looks too thick and chunky, add more milk, just a tiny drop at a time. You want it to flow off your whisk but still sit on top of the scone for a few seconds before melting down the side.
Once you hit that perfect river-like flow, just grab a spoon or a fork and drizzle generously over your warm or cooled **tender chocolate chip treats**. The best part? This simple addition elevates these **homemade scones** from good to absolutely irresistible!
Making Homemade Scones: Storage and Reheating
So, you’ve made the perfect batch of **homemade scones**, and naturally, you want them to taste just as good tomorrow as they do right now, right? I totally get it. The beauty of these **buttery scones** is they actually hold up really well, but you have to store them correctly. We want to keep that flaky texture locked in until you’re ready for another cozy moment.
If you managed to have any leftovers—which is a feat in my house—here is the exact method I use to keep those **chocolate chip scones** fresh for enjoying with your morning coffee or later with a sweet tea pairing.
- Un-Glazed Scones (The Best Way): If you didn’t use the vanilla glaze, store them in an airtight container at room temperature. They should stay beautifully fresh for about two to three days. Don’t put them in the fridge! Cold temperatures are the enemy of soft, buttery baked goods; they draw out the moisture and make them hard. If they start to feel slightly less soft by Day Three, don’t worry—reheating fixes everything.
- Glazed Scones: If you went ahead and glazed them right away, be aware that the glaze will stay soft longer, especially in humid weather. Store these in an airtight container, perhaps with a small piece of parchment paper between layers so the glaze doesn’t totally stick. They are best eaten within the first 24 hours when glazed.
Now, for the real magic: bringing them back to life! Reheating is essential to reactivate that buttery flavor and restore the tenderness. You have two options here, depending on how fast you need that fresh-baked taste:
- The Quick Microwave Fix: If you just need one scone warmed up in 30 seconds, wrap your scone loosely in a paper towel and microwave it for about 10 to 15 seconds. It gets soft fast! This is quick, but it won’t get you that crispy edge back.
- The Oven Revival (My top recommendation!): This method restores the crust and softens the inside beautifully. Preheat your oven—or even just put on the toaster oven—to about 325°F (160°C). Place the scones directly on a baking sheet and warm them for about 5 to 7 minutes. The low heat gently warms the butter throughout the scone, bringing back that fresh-from-the-oven buttery aroma and taste. It’s truly the best way to enjoy these **tender chocolate chip treats** again!
These **easy scones** are made to be enjoyed slowly, so taking five extra minutes to reheat them properly makes all the difference in your snacking experience!
Serving Suggestions for Your Chocolate Chip Scones
Part of making food enjoyable is knowing the perfect moment to serve it! These **chocolate chip scones** are so versatile—they honestly fit into almost any part of the day. I think the key to maximizing their buttery goodness is pairing them with the right drink or side dish.
When I make a big batch of these for weekend gatherings, I like to set up a little spread that covers all the bases, from savory early morning bites to sweet afternoon tea moments.
- The Classic Coffee Boost: Obviously, a hot, strong cup of coffee is the number one pairing. The slight bitterness of the coffee cuts through the richness of the butter and the sweetness of the chocolate chips beautifully. These are definitely one of my favorite morning baked goods when I need something substantial!
- Afternoon Tea Time Snacks: These scones are phenomenal for a proper afternoon tea. Skip the heavy clotted cream; they don’t need it! I suggest serving them alongside something light, like tiny cucumber sandwiches or maybe my easy cranberry appetizers if you want a little savory contrast. They are the perfect **sweet tea pairing**!
- Brunch Recipes Centerpiece: If you’re planning a larger **brunch recipes** spread, these are a must-have. They look elegant, especially with that vanilla glaze, but they take up almost no active prep time. Serve them alongside fruit platters or maybe some easy scrambled eggs. They look impressive without demanding much fuss from you, which is exactly what I aim for in entertaining!
The important thing is just grabbing one when you feel like it. Whether it’s a 7 AM grab-and-go or a 3 PM cozy snack, these **buttery scones** are waiting for you!
Frequently Asked Questions About Chocolate Chip Scones
I always get so much great feedback once people make these, but I also get the same few questions! It’s totally understandable; baking is a science, and we all want to make sure we nail the texture for our **breakfast pastries**. Here are the things I hear most often rolling in the comments. See if your question is right here!
How do I make sure my scones are flaky and not tough?
That’s the number one concern, and it comes down to what I preach about: temperature and handling. You absolutely must use ice-cold butter cut into small pieces, and you must cut it into the flour until bits look like small peas. When you mix the wet ingredients into the dry, stop mixing the *second* you see the flour moisten up. If you mix it smooth like a cake batter, you’re developing gluten, which equals tough scones. Keep it shaggy, keep it cold, and you’ll have those beautiful, **flaky scones** every time.
Can I substitute the heavy cream for milk? I don’t always keep heavy cream on hand.
You *can*, but I highly recommend you try to find the heavy cream, especially for your first batch of these **chocolate chip scones**. Heavy cream has a higher fat content than regular milk, and that fat is what makes the final scone so tender and rich—it’s what gives us that superior **buttery scone** texture. If you absolutely have to use regular milk, use a little less, maybe starting with 1/2 cup instead of 3/4 cup, but know that the tenderness won’t be quite the same.
My dough seems too dry to form into a circle. What do I do?
If your dough is too dry, it means you added just a touch too much flour, or perhaps your egg was extra large! Don’t panic; this is where that extra bit of heavy cream comes in handy. Grab just one teaspoon of extra cream at a time and gently drizzle it over the shaggy dough while you are patting it out. Use your hands to gently guide it together. We want it just moist enough to stick together, but still crumbly on the edges. This is a hallmark of **easy baking**!
Can I use milk chocolate chips or white chocolate chips instead?
Oh, absolutely! Semi-sweet is my go-to because I love the contrast between the bittersweet chocolate and the sweet dough, but feel free to mix it up! If you use milk chocolate, they will taste sweeter and richer, almost like a cookie. If you use white chocolate chips, maybe reduce the sugar in the main dough by one tablespoon, as white chocolate is quite sweet on its own. These substitutions work wonderfully for making **quick baking recipes** feel customized!
How far ahead of time can I prep the dough for slicing?
You can definitely prep ahead, which is fantastic for busy mornings or serving guests! You can pat your dough out, cut your wedges, and place them on your baking sheet just as described. Then, cover the whole tray tightly with plastic wrap and stash it in the refrigerator for up to 24 hours. Make sure they are nicely chilled. When you wake up, just brush them with that extra cream and pop them straight into the hot oven. You might need to add about 3–5 minutes extra to the bake time since they are going in cold from the fridge. You can find some great overnight make-ahead tips over at Heavenly Home Cooking, too, if you want more ideas!
Making these **tender chocolate chip treats** from scratch is always worth the effort. If you’re looking for other quick options to add to your baking repertoire, check out my roundup of quick breakfast staples!
Nutritional Estimates for These Chocolate Chip Scones
I always like to remind everyone that these are ballpark figures! I’m a cook, not a nutritionist, so these estimates don’t account for variations in brand size or how much glaze you choose to drizzle on top. However, for reference, here is the rough nutritional breakdown for one serving of these delicious **chocolate chip scones** based on the standard recipe amounts.
- Serving Size: 1 scone
- Calories: 350
- Sugar: 22g
- Sodium: 250mg
- Fat: 19g
- Saturated Fat: 12g
- Unsaturated Fat: 7g
- Trans Fat: 0g
- Carbohydrates: 42g
- Fiber: 2g
- Protein: 5g
- Cholesterol: 65mg
When you factor in how satisfying and filling these **easy scones** are, I think that’s a trade-off worth making for a little moment of homemade bliss!
PrintBakery-Style Chocolate Chip Scones with Vanilla Glaze

Make tender, buttery chocolate chip scones that achieve a flaky structure. This easy recipe delivers bakery-style results perfect for breakfast, brunch, or a snack.
- Prep Time: 15 min
- Cook Time: 18 min
- Total Time: 33 min
- Yield: 8 servings 1x
- Category: Breakfast Pastries
- Method: Baking
- Cuisine: American
- Diet: Vegetarian
Ingredients
- 2 cups all-purpose flour
- 1/4 cup granulated sugar
- 1 tablespoon baking powder
- 1/2 teaspoon salt
- 1/2 cup (1 stick) cold unsalted butter, cut into small pieces
- 3/4 cup heavy cream, plus more for brushing
- 1 large egg
- 1 teaspoon vanilla extract
- 1 cup semi-sweet chocolate chips
- For the Glaze: 1 cup powdered sugar
- 2 tablespoons milk or cream
- 1/2 teaspoon vanilla extract
Instructions
- Preheat your oven to 400°F (200°C). Line a baking sheet with parchment paper.
- In a large bowl, whisk together the flour, granulated sugar, baking powder, and salt.
- Add the cold, cubed butter to the dry ingredients. Use a pastry blender or your fingertips to cut the butter into the flour until the mixture resembles coarse crumbs with some pea-sized pieces of butter remaining. This creates flakiness.
- In a separate small bowl, whisk together the 3/4 cup heavy cream, egg, and 1 teaspoon vanilla extract.
- Pour the wet ingredients into the dry ingredients. Mix gently with a fork until just combined. Do not overmix; the dough will be shaggy.
- Gently fold in the chocolate chips.
- Turn the dough out onto a lightly floured surface. Gently pat the dough into a 3/4-inch thick circle or square.
- Cut the dough into 8 equal wedges (like a pizza). Place the wedges onto the prepared baking sheet, leaving about 1 inch between them.
- Brush the tops lightly with a little extra heavy cream for a golden top.
- Bake for 15 to 18 minutes, or until the tops are golden brown and the scones are cooked through.
- While the scones cool slightly, prepare the glaze. Whisk together the powdered sugar, 2 tablespoons milk, and 1/2 teaspoon vanilla extract until smooth. Add more milk, a drop at a time, if the glaze is too thick.
- Drizzle the vanilla glaze over the warm or cooled scones. Let the glaze set before serving.
Notes
- For the best flaky texture, keep your butter extremely cold before mixing it into the flour.
- If you prefer a less sweet scone, reduce the sugar in the dough by 1 tablespoon.
- These scones are excellent served warm with coffee or as a sweet tea pairing.
Nutrition
- Serving Size: 1 scone
- Calories: 350
- Sugar: 22
- Sodium: 250
- Fat: 19
- Saturated Fat: 12
- Unsaturated Fat: 7
- Trans Fat: 0
- Carbohydrates: 42
- Fiber: 2
- Protein: 5
- Cholesterol: 65