
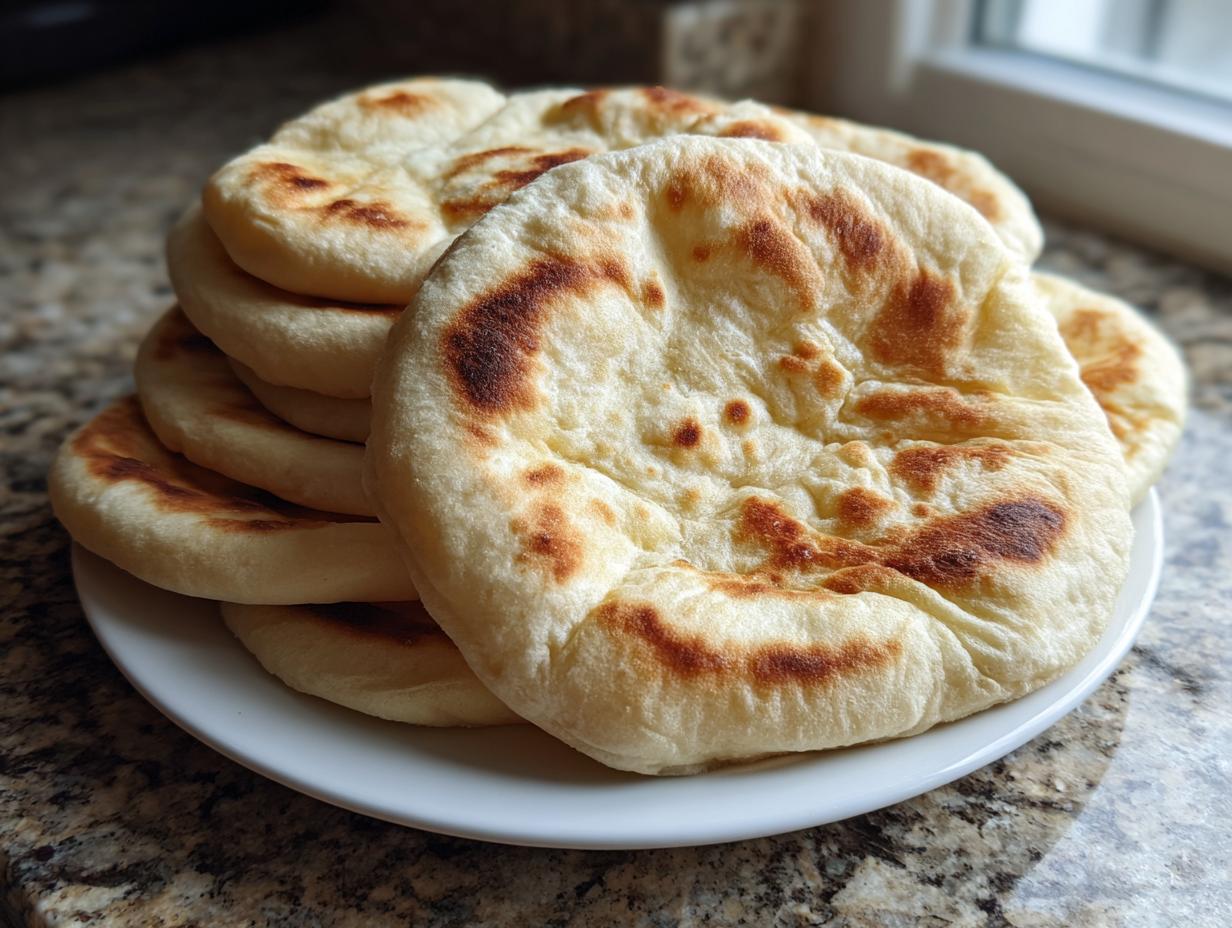
Honestly, is there anything sadder than a store-bought flatbread that’s stiff and refuses to open? I swear, I used to buy those things dreaming of a stuffed gyro, only to end up with something tough that ripped every time I tried to make a pocket. That’s why I’m so passionate about this recipe! We are going to make incredibly soft and fluffy homemade pita bread that actually puffs up beautifully on the stovetop. This is my mission here at Completely Yummy—to take those classic, amazing comfort foods and make them genuinely doable for your busy life. You deserve fresh, warm bread tonight, not a trip to a specialty aisle. Trust me, this quick, yeast-based dough will change how you think about Mediterranean bread forever. You can find more easy weeknight dinners ideas right here on the blog!
- Why This Homemade Pita Bread Recipe Works So Well
- Ingredients for Incredibly Soft Pita Bread
- How to Make Pita Bread at Home: Step-by-Step Instructions
- Tips for Success with Fluffy Flatbread Dough
- Serving Suggestions for Your Fresh Baked Pita Bread
- Storing and Reheating Homemade Pita Bread
- Common Questions About Making Pita Bread Pockets
- Nutritional Estimates for This Pita Bread Recipe
- Share Your Soft Pita Bread Creations
- Nutritional Estimates for This Pita Bread Recipe
- Share Your Soft Pita Bread Creations
Why This Homemade Pita Bread Recipe Works So Well
I get it—you want soft pita bread that puffs up, and you don’t want to wait around all day for dough to proof! That’s exactly why I developed this version. It delivers on the promise of those big, beautiful pockets you see in photos, and it gets you from pantry to plate in under 90 minutes total. We aren’t messing around with complicated steps.
The secret to truly great pita bread here is simple efficiency combined with a few crucial technical points. You’ll have a wonderfully soft flatbread you can feel good about feeding your family. Check out these simple lunch recipes that pair perfectly with fresh pitas!
Achieving Soft Pita Bread Pockets Every Time
The puff is all about how you treat the yeast and the heat! First, we make sure that yeast is fully activated—that lovely foam tells us we’re good to go. Then, you have to knead just enough for structure (about 5 to 7 minutes), developing the gluten so it can stretch, but not so much that it gets tight.
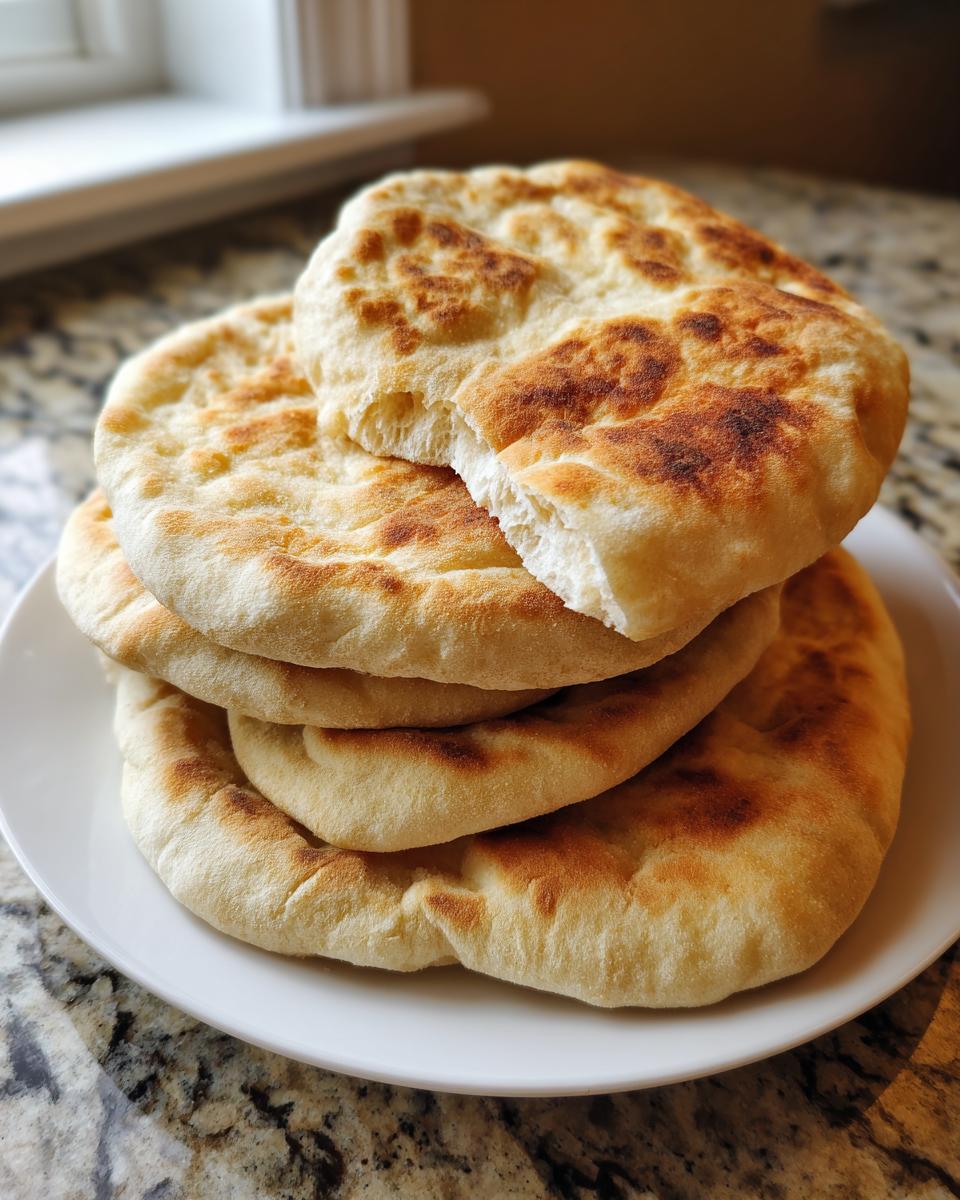
The actual magic happens when they hit the skillet. A screaming hot, dry pan instantly turns the moisture in the dough to steam, forcing that beautiful pocket to inflate. Don’t cut the heat, or they just turn into sad, flat discs!
Ingredients for Incredibly Soft Pita Bread
When I list ingredients, I’m being super precise because with yeasted dough, that really matters! This recipe is wonderfully economical since most ingredients are pantry staples. We only need a handful of items to whip up a batch of 8 lovely rounds. Remember, the Greek yogurt is totally optional, but wow, does it add a luxurious, pillowy texture to our final product.
- 3 cups all-purpose flour
- 1 cup warm water (Crucial temperature here!)
- 2 1/2 tsp active dry yeast
- 1 tsp sugar
- 1 tsp salt
- 1 tbsp olive oil
- 2 tbsp Greek yogurt (This is my secret weapon for softness!)
Ingredient Notes and Substitutions for Your Pita Bread
Let’s talk about that water temperature for a second—it’s non-negotiable! You want the water to be warm to the touch, like a nice bath, maybe 105 to 115 degrees F. If it’s too hot, you’ll kill the yeast, and your bread won’t rise. If it’s too cool, the yeast just gets grumpy and lazy. It’s a delicate balance!
We use all-purpose flour here because it gives a nice neutral base and excellent structure for our pita bread pockets. If you happen to be out of that Greek yogurt, no sweat. Just skip it entirely, or if you want that creamy tang, use 2 tablespoons of regular milk instead. It won’t be *quite* as soft, but still fantastic!
How to Make Pita Bread at Home: Step-by-Step Instructions
Alright, let’s get doughy! This is where the patience pays off, but trust me, the active time isn’t bad at all. First things first, you need to wake up that yeast. Combine your warm water, sugar, and yeast, and just let it hang out for about 5 to 10 minutes. If you see foam, you’ve got active yeast, and we can move on to mixing the dry ingredients with the wet. Once it all comes together, you’ll need to knead that dough until it’s really smooth—I aim for about 5 to 7 minutes by hand!
Next, we let it rest. Place it in an oiled bowl, cover it tightly, and find a nice warm spot. It needs a full hour to double in size. Don’t rush this part! Once it’s doubled, punch that air out and divide it into 8 equal pieces. Roll them into balls, then flatten those balls into thin circles—about 1/8 inch thick is perfect for getting that great pocket in your pita bread.

When you start cooking, remember that little trick: keep the finished pitas wrapped up snugly in a clean kitchen towel right after they come off the heat. That steam traps inside and keeps everything beautifully soft and pliable. If you need more inspiration for using your fresh bread, you can always check out my easy weeknight dinners!
The Secret to Perfect Pita Bread Pockets on the Stovetop
This technique is everything for achieving that famous puff! You must get your heavy skillet—I prefer cast iron for this—screaming hot over medium-high heat. And I mean hot! Do *not* add any oil to the pan. That intense, dry heat is what forces the dough to inflate instantly, creating that hollow center.
Lay your rolled-out dough onto the hot surface. You’ll only spend about 1 to 2 minutes on the first side. Look for some light browning spots—that’s your cue to flip it. When it flips, keep watching! If you’ve done everything right, your bread will start ballooning up like a tiny, edible beach ball. Once it’s puffed and cooked through on both sides, pull it off immediately and get it tucked into that towel!
Tips for Success with Fluffy Flatbread Dough
Even following the steps perfectly, sometimes dough can be temperamental, right? That’s why I want to share a couple of my biggest takeaways for ensuring you get supremely soft pita bread every time. If your dough feels really sticky during kneading, don’t just dump in a ton of extra flour! That’s the number one way to end up with tough pitas.
Instead, lightly oil your hands and the counter. A little oil works wonders to keep it manageable without tightening the gluten structure too much. Also, remember the resting time after rolling out the rounds—about 5 minutes before they hit the pan—allows the dough to relax. This small break prevents the dough from shrinking back when it hits that intense heat, which gives the pocket the best chance to form in your pita bread.
And seriously, keep that pan hot! If you bake them in the oven, make sure your baking stone or sheet is fully preheated inside the oven for at least 20 minutes before the pitas go in. Temperature control is king for fluffy bread!
Serving Suggestions for Your Fresh Baked Pita Bread
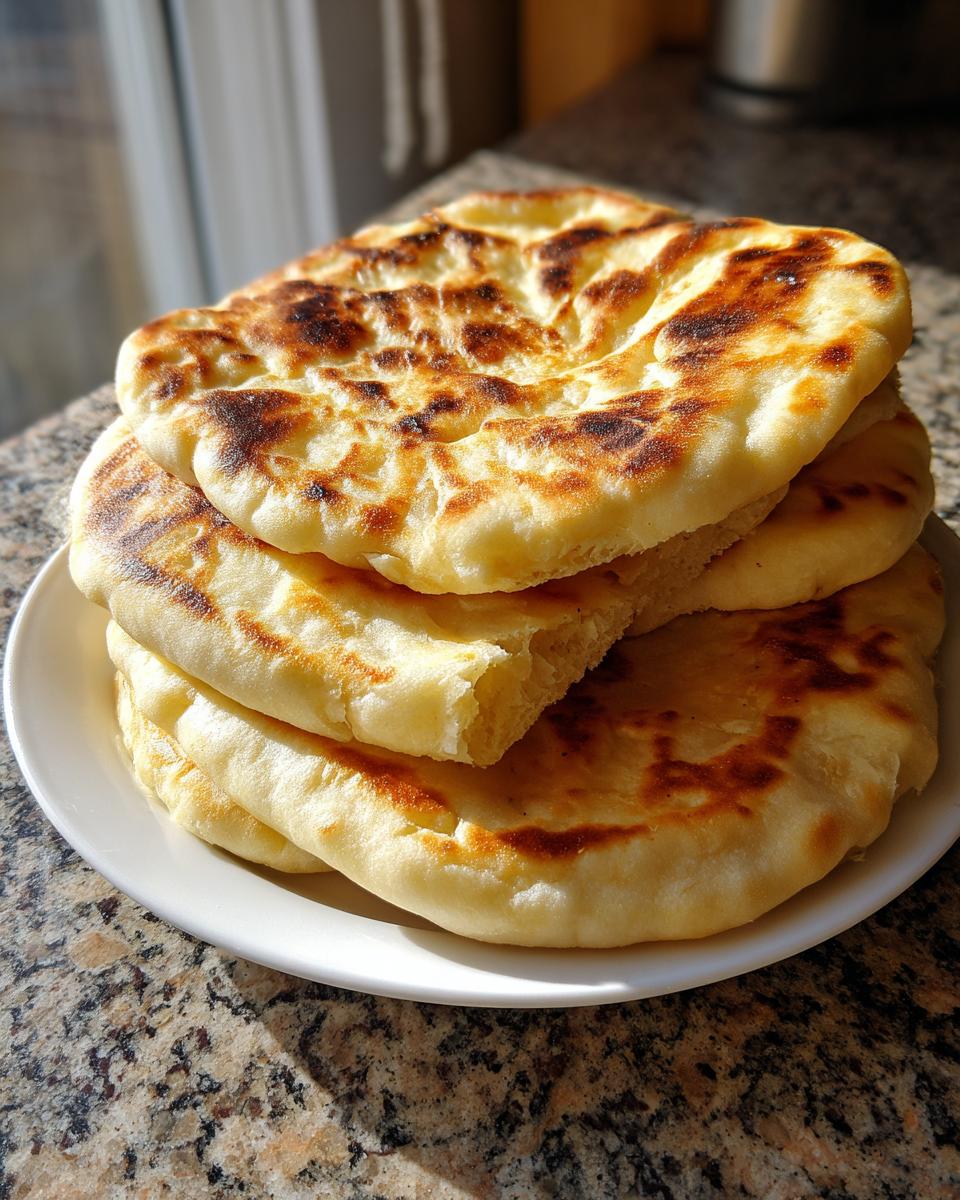
Now that you have these warm, tender Mediterranean flatbreads cooling under a towel, what on earth do you do with them? Honestly, this bread is so versatile, it barely needs an introduction. But since you worked hard for those perfect pockets, let’s make sure we use them in the best way possible!
The first thing that comes to mind is obviously dipping. These rounds are absolutely divine scooped straight into a big bowl of creamy homemade hummus or a sharp tzatziki. If you’re looking for a great companion dip, I have an amazing easy chili recipe that’s surprisingly good served alongside Mediterranean flavors, surprisingly!
Of course, no discussion about this bread is complete without talking about stuffing them. They are the absolute perfect vehicle for hearty fillings. Think savory, slow-cooked meats layered with tomatoes and onions—the classic components of authentic gyros. They seal up so nicely, holding all those wonderful juices inside!
If you want a lighter option, slice them thinly after cooling, brush lightly with olive oil, and bake them until they’re crispy chips instead of soft bread. Then you can use those for nacho-style toppings! For endless inspiration on serving ideas, you can check out great recipes over at this Greek pita resource.
Storing and Reheating Homemade Pita Bread
You know I always say these are best eaten the day they’re made, and I mean it! But honestly, leftovers are still pretty good if you store them right. Once the pita bread has cooled completely, I stack them up and wrap the whole batch tightly in plastic wrap, then pop them into a zip-top bag. That really helps trap moisture.
If you’re taking them out of the fridge later, don’t just eat them cold—they’ll be stiff! The best way to bring them back to life is in a low oven (about 300°F) for just 5 minutes wrapped in foil. If you’re in a hurry, a quick 10-second zap in the microwave works, too, but you have to eat them right away before they firm up again!
Common Questions About Making Pita Bread Pockets
I always get so many questions once people start trying this homemade pita bread recipe—it’s exciting! You know you’ve made something special when people start asking about flour substitutions. Let’s clear up a few things so your bread comes out perfectly fluffy every time.
Can I use bread flour instead of all-purpose flour?
That’s a very common question for any yeast bread recipes! You absolutely can use bread flour if that’s what you have on hand. Bread flour has slightly more protein, which means it develops more gluten. Your pitas will likely be slightly chewier—less of that tender, soft pita bread texture we are aiming for—but they will still puff up beautifully because the technique is sound. Don’t worry too much about it, just treat it like AP flour when kneading!
What happens if I skip the rise time for the dough?
Oh, please don’t skip the rise! If you are in a rush and try to make this a *quick bread recipe* without letting the yeast do its job for that hour, you’re going to end up with dense little crackers instead of fluffy flatbread. The yeast needs time to eat the sugar and produce the gas that creates those airy pockets. It’s worth the wait!
Can I bake these instead of cooking on the stovetop?
Yes, you can definitely use the oven for a lovely Greek pita bread recipe variation, though I prefer the stovetop for that intense, guaranteed puff! If you bake them, you need a very hot oven, usually around 450°F (230°C), and your baking sheet or stone must be preheated inside for at least 20 minutes. Check out some great oven-baking specifics here. I always suggest trying the skillet first for beginners!
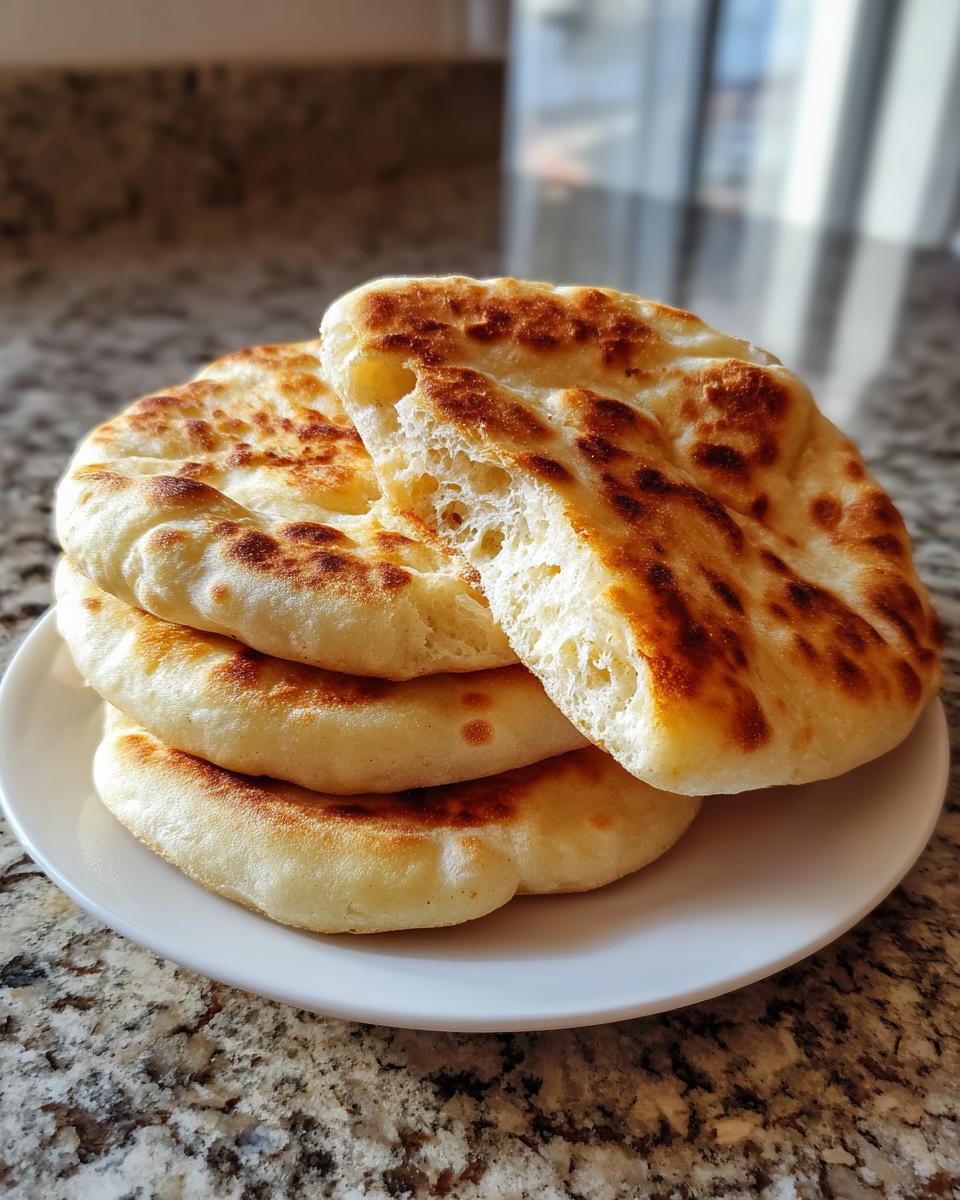
Why are my pitas not forming any pockets?
This is usually one of two things: either your skillet wasn’t hot enough when the dough hit it, or your dough was rolled too thin or too thick. If they are too thick, the steam doesn’t have enough power to push the layers apart. If they are too thin, they just cook through without enough structure to hold the steam. Aim for that 1/8-inch thickness, and make sure that pan is smoking hot!
If you need something super fast for breakfast tomorrow, check out my quick healthy breakfast ideas!
Nutritional Estimates for This Pita Bread Recipe
When we talk about great food, we should also talk about what’s in it. Since this is a simple, foundational bread, the nutrition is really straightforward! Based on the recipe yielding 8 servings, here are the estimates per serving for one of these pita bread rounds.
- Serving Size: 1 pita
- Calories: About 180
- Fat: 3g
- Carbohydrates: 34g
- Protein: 6g
- Sugar: 1g
Now, keep in mind these numbers are just estimates! If you use a little more olive oil while oiling your bowl, or if you skip the optional Greek yogurt, those details slightly shift the totals. But overall, you’re looking at a wonderfully wholesome, vegetarian-friendly Mediterranean bread base for all your meals!
Share Your Soft Pita Bread Creations
I love hearing from you all when you conquer a recipe, especially when it involves tricky steps like getting the perfect puff! Please come back and leave a star rating below if you loved how soft and fluffy your homemade pita bread turned out. Did you manage to get those huge, beautiful pockets? I want to know!
If you snapped a picture of your beautiful stack of warm flatbreads ready for gyros or loaded up with dip, tag me on social media! Seeing your kitchen successes makes my whole week. And if you want to check out my whole journey and philosophy, you can read more About Me here on the blog. Don’t forget to share this recipe with anyone else who needs to ditch the dry store-bought stuff! You can see how others have enjoyed this recipe over at Sweet Simple Vegan, too!
Nutritional Estimates for This Pita Bread Recipe
When we talk about great food, we should also talk about what’s in it. Since this is a simple, foundational bread, the nutrition is really straightforward! Based on the recipe yielding 8 servings, here are the estimates per serving for one of these rounds.
- Serving Size: 1 pita
- Calories: About 180
- Fat: 3g
- Carbohydrates: 34g
- Protein: 6g
- Sugar: 1g
Now, keep in mind these numbers are just estimates! If you use a little more olive oil while oiling your bowl, or if you skip the optional Greek yogurt, those details slightly shift the totals. But overall, you’re looking at a wonderfully wholesome, vegetarian-friendly Mediterranean bread base for all your meals!
Share Your Soft Pita Bread Creations
I love hearing from you all when you conquer a recipe, especially when it involves tricky steps like getting the perfect puff! Please come back and leave a star rating below if you loved how soft and fluffy your homemade pita bread turned out. Did you manage to get those huge, beautiful pockets? I want to know!
If you snapped a picture of your beautiful stack of warm flatbreads ready for gyros or loaded up with dip, tag me on social media! Seeing your kitchen successes makes my whole week. And if you want to check out my whole journey and philosophy, you can read more About Me here on the blog. Don’t forget to share this recipe with anyone else who needs to ditch the dry store-bought stuff! You can see how others have enjoyed this recipe over at Sweet Simple Vegan, too!
PrintIncredibly Soft Homemade Pita Bread That Puffs Perfectly
Make soft, fluffy homemade pita bread that forms perfect pockets using this easy recipe. These flatbreads cook quickly on the stovetop or in the oven, making them ideal for gyros, wraps, or dipping into hummus.
- Prep Time: 20 min
- Cook Time: 15 min
- Total Time: 95 min
- Yield: 8 servings 1x
- Category: Bread
- Method: Stovetop
- Cuisine: Mediterranean
- Diet: Vegetarian
Ingredients
- 3 cups all-purpose flour
- 1 cup warm water
- 2 1/2 tsp active dry yeast
- 1 tsp sugar
- 1 tsp salt
- 1 tbsp olive oil
- 2 tbsp Greek yogurt (optional, for extra softness)
Instructions
- Combine the warm water, sugar, and yeast in a bowl. Let this mixture rest for 5 to 10 minutes until it becomes foamy.
- Add the flour, salt, olive oil, and Greek yogurt (if using) to the yeast mixture. Mix the ingredients until a dough forms.
- Knead the dough on a lightly floured surface for 5 to 7 minutes until it is smooth.
- Place the dough in a lightly oiled bowl, cover it, and let it rise in a warm place for 1 hour, or until the dough doubles in size.
- Punch down the risen dough and divide it into 8 equal pieces. Roll each piece into a ball.
- On a floured surface, roll each ball into a thin circle, about 1/8 inch thick.
- Heat a heavy skillet or cast-iron pan over medium-high heat until it is very hot. Do not add oil to the pan.
- Cook each pita round for 1 to 2 minutes per side. You should see the bread puff up to form a pocket. Flip it when the bottom side has light brown spots.
- Remove the pita from the heat once puffed and cooked through. Keep the cooked pitas wrapped in a clean kitchen towel to stay warm and soft.
- Serve the fresh baked flatbread warm with your favorite dips or fillings.
Notes
- For the best pocket formation, ensure your pan is very hot before placing the dough in it.
- If you skip the optional Greek yogurt, the pitas will still be soft, but the yogurt adds extra moisture.
- These pita bread pockets are best eaten the day they are made.
Nutrition
- Serving Size: 1 pita
- Calories: 180
- Sugar: 1
- Sodium: 250
- Fat: 3
- Saturated Fat: 0.5
- Unsaturated Fat: 2.5
- Trans Fat: 0
- Carbohydrates: 34
- Fiber: 2
- Protein: 6
- Cholesterol: 0