
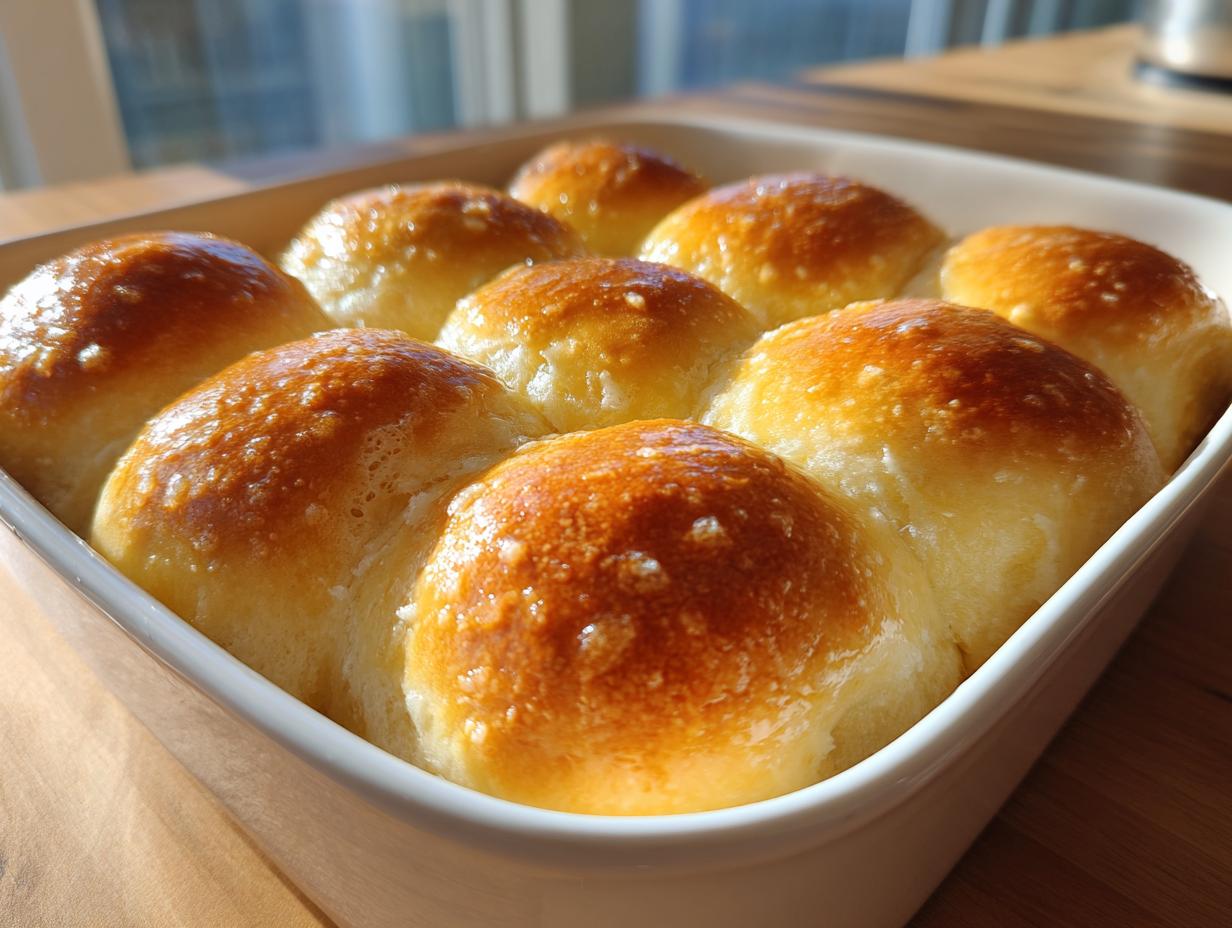
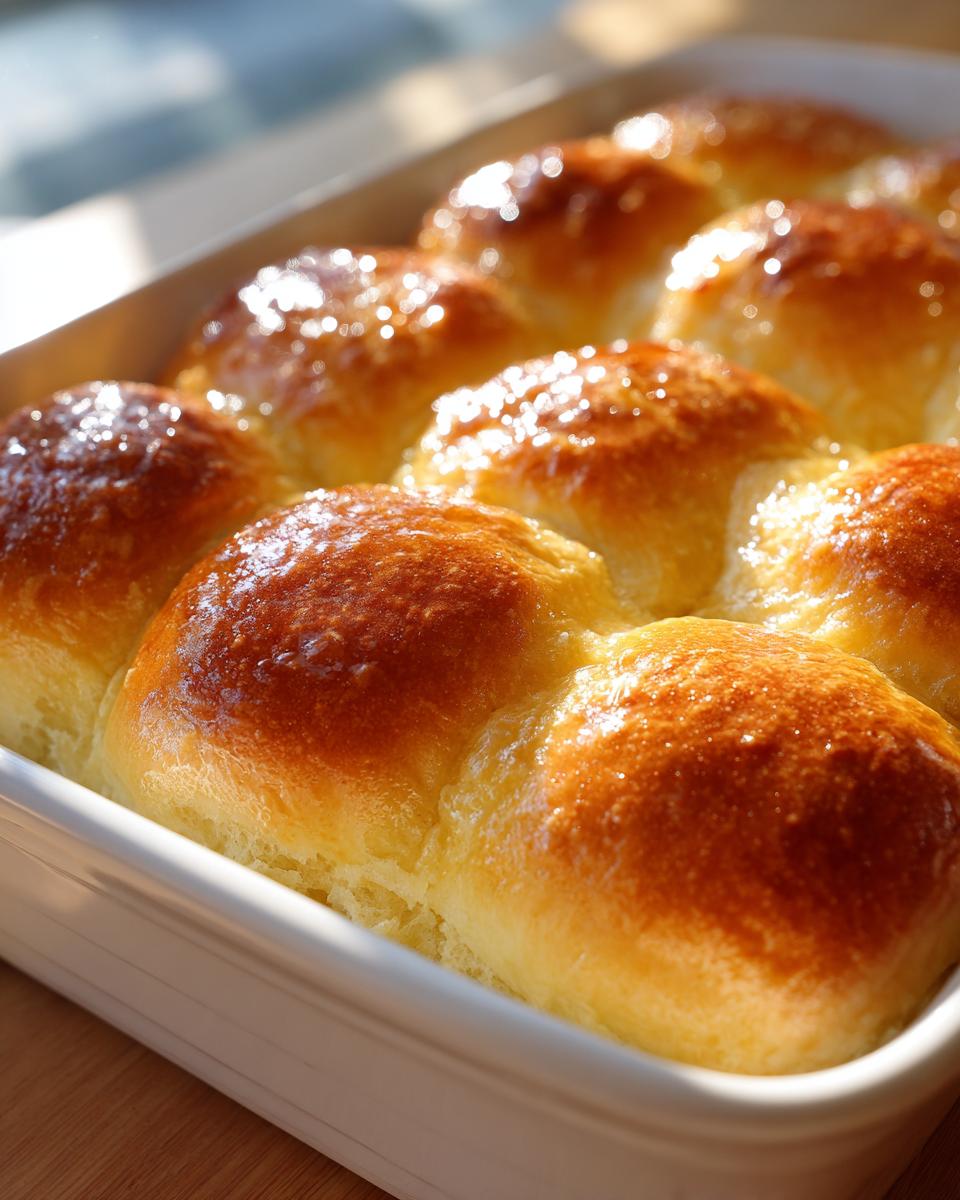
Oh my goodness, there is simply nothing that says “welcome home” like the warm, yeasty, buttery scent of fresh rolls baking. It instantly slows down the whole world, doesn’t it? I remember growing up, that aroma meant comfort was on the way, no matter what kind of busy day we’d had. That’s why, when I started Completely Yummy, my mission—Ava Sinclair’s mission—was always to bring that feeling back to your table without requiring you to spend all day in the kitchen. These Ultimate Soft and Fluffy Homemade Dinner Rolls (Classic Buttery Recipe) are the perfect example: seriously good food that is genuinely doable, even when you’re juggling dinner prep found in my easy weeknight dinners lineup. Forget those dry pucks from the store; these wonderful dinner rolls will change the way you think about homemade bread.
- Why You Will Want These Soft Dinner Rolls Recipe
- Ingredients for the Ultimate Soft and Fluffy Homemade Dinner Rolls
- Equipment Needed for Perfect Dinner Rolls
- How to Prepare These Buttery Yeast Rolls Step-by-Step
- Tips for Success with Your Dinner Rolls Recipe
- Dinner Roll Variations: Sweet or Savory Options
- Storage & Make Ahead Dinner Rolls Instructions
- Frequently Asked Questions About Making Dinner Rolls
- Estimated Nutrition Facts for These Dinner Rolls
- Share Your Best Homemade Rolls Experience
Why You Will Want These Soft Dinner Rolls Recipe
I get it, you’ve probably tried making rolls before and ended up with something a bit… sad. Heavy, tough, or just plain flavorless. My goal here was to solve that frustration completely. When you follow this recipe, you are walking away with the best homemade rolls you’ve ever made, guaranteed. Trust me on this one!
- Unbeatable Texture: These are genuinely soft and fluffy. They have that perfect pillow-like structure that you just can’t get from a can or a plastic bag at the grocery store.
- Buttery Goodness: We use butter both in the dough *and* brushed generously over the top when they come out hot. That extra coating makes all the difference!
- Perfect for Holidays or Weeknights: They are hearty enough to anchor your Thanksgiving meal, but simple enough that I whip up a batch for a Tuesday night pot roast.
- They Freeze Beautifully: If you have leftovers (which is rare!), they reheat perfectly, bringing that fresh-from-the-oven delight back instantly.
- Better Than Restaurant Copies: Yes, we cover the Texas Roadhouse style twist later, but even the base recipe is richer and softer than most bakery-style buns out there.
Ingredients for the Ultimate Soft and Fluffy Homemade Dinner Rolls
Putting together these buttery yeast rolls is mostly about having the right components ready to go before we wake up that yeast. I always measure everything out first onto my counter—it makes the mixing process so much smoother! Since we want these rolls to bake up soft and tall, paying attention to the temperature of your milk and ensuring your eggs are cozy at room temperature is really important for a great rise. Here is exactly what you’ll need for the dough and that crucial topping:
- 1 cup warm milk (It needs to be 105-115°F—not too hot, or you’ll kill the yeast!);
- 2 1/4 teaspoons active dry yeast;
- 1/4 cup granulated sugar, divided (We use a little now, and the rest for sweetness later);
- 2 large eggs, room temperature (This helps the dough incorporate better!);
- 1/2 cup unsalted butter, melted (But cooled slightly!);
- 3 1/2 to 4 cups all-purpose flour (We start with 3.5 and add more if needed);
- 1 teaspoon salt;
- For the topping: 1/4 cup unsalted butter, melted (This is where the real buttery flavor comes from!).
Equipment Needed for Perfect Dinner Rolls
You don’t need any fancy stand mixers for these rolls, which is what I love about them being so doable! However, having the right tools ready makes the whole process feel effortless. Since we are making a big batch of these fluffy homemade bread beauties, make sure you have a nice big bowl for mixing and rising.
Here’s my quick list of what you absolutely need on hand before you start:
- A large mixing bowl (big enough for the dough to double!);
- A whisk for combining those wet ingredients;
- A 9×13 inch baking pan—this is the perfect size for getting those classic pull-apart edges;
- A clean kitchen towel or some plastic wrap for covering the dough while it rises;
- A pastry brush, which you’ll need right at the end for slathering on that melted butter topping!
How to Prepare These Buttery Yeast Rolls Step-by-Step
Now for the fun part—turning those ingredients into incredible, warm dinner rolls! Baking yeast bread can seem intimidating, but honestly, the mixing is easy, and the dough does most of the tough work for you during the rising times. My philosophy here is simplicity meets perfection. Just follow these steps in order, and you’ll have the fluffiest homemade bread imaginable. Be patient during those rise times; that’s where the magic happens! If you need more simple recipes that fit into a busy schedule like this one, check out my guide to easy weeknight dinners.
Activating the Yeast and Mixing Wet Ingredients
First things first: we have to wake up that yeast! This is where many people run into trouble, so pay attention here. Take your warm milk—and I mean *warm*, aiming for between 105°F and 115°F—and stir in 1 teaspoon of that sugar and all your yeast. If your milk is too hot, you’ll accidentally kill the yeast, and we’ll end up with sad, flat rolls. If you’re not sure about the temperature, grab a cheap little kitchen thermometer; it’s worth the effort for reliable results every single time. Once it’s happy, whisk in the rest of your sugar, your room-temperature eggs, and that melted butter.
Kneading and the First Rise for Fluffy Homemade Bread
Time to bring things together! While your wet ingredients are mingling, whisk your flour and salt in a separate bowl. Now, add the flour mixture to your wet ingredients slowly. You want to stop adding flour as soon as a shaggy dough forms. Turn that dough out onto a lightly floured counter. Here’s my biggest tip for keeping them wonderfully soft: only add more flour if the dough is sticking badly to your hands! We want it slightly tacky, not dry. Knead it for about five to seven minutes until it feels smooth and quite elastic—that means the gluten is developing nicely. Pop it into a lightly oiled bowl, cover it up, and let it chill out in a warm spot for 1 to 1.5 hours until it’s doubled in size for that first big rise.
Shaping and the Second Rise for Perfectly Risen Rolls
Once the dough has happily doubled, we punch it down gently—it deflates with the most satisfying “ffft” sound! Since we are aiming for pull-apart rolls, I usually divide the dough up into 12 or 16 equal pieces. Just eyeball it or use a kitchen scale if you want them perfectly identical. Roll each piece quickly between your palms to make a tight, smooth ball, and nestle them close together in your prepared 9×13 pan. Cover the pan loosely again, and give them another half-hour to 45 minutes for the second rise. This second rise is absolutely critical; it’s what makes them puff up into those beautiful, fluffy rolls you expect!
Baking and Applying the Butter Topping
Preheat your oven to 375°F (190°C) while that second rise is happening. You bake these babies for about 15 to 18 minutes. Keep an eye on them—you want golden brown tops! The second they come out, and I mean *immediately*, you need to brush every single one of those hot rolls with the reserved melted butter. Letting that butter soak right into the crust is what keeps these dinner rolls unbelievably moist and locks in that incredible flavor. Serve them right away while they are still warm!
Tips for Success with Your Dinner Rolls Recipe
Baking homemade yeast rolls is less about strict rules and more about feeling the dough, honestly. My biggest piece of advice, which I learned from watching my grandmother, is to pay close attention to your ingredients’ starting temperatures. Cold eggs or milk can really slow down that yeast activation, leading to a slow or failed rise. Don’t be afraid of a slightly sticky dough either!
If your dough feels incredibly sticky on the counter, resist the urge to dump in a whole cup of extra flour. That’s the secret to overly dry, mediocre rolls. Instead, lightly oil your hands before kneading; you’ll find you can handle much stickier dough than you think. This small habit is key to achieving those super soft dinner rolls everyone raves about. A little stickiness equals maximum fluffiness in the end!
Dinner Roll Variations: Sweet or Savory Options
One of the best parts about making a batch of these perfect dinner rolls from scratch is how beautifully they adapt to whatever flavor profile you’re craving for dinner. While the classic buttery flavor is divine, you absolutely have to try the copycat version that everyone asks for. If you want that famous restaurant experience, just grab the melted butter you brushed on the hot rolls and whisk in about two tablespoons of honey and a pinch of cinnamon. It’s heavenly! I found a great recipe outlining how to get that perfect glaze consistency over at Flavor by Lily, if you want a few extra tips.
Now, if you prefer something savory instead of sweet, that melted butter topping gets a serious upgrade with just a teaspoon of garlic powder and a sprinkle of dried parsley added in before you brush it on. It turns these fluffy homemade bread rolls into something that sings next to pasta or soup. See? Endless possibilities with one easy recipe!
Storage & Make Ahead Dinner Rolls Instructions
Look, sometimes life is just too hectic to bake fresh rolls right when you need them, and that’s okay! That’s why I spent time figuring out the absolute best way to store these beauties so they are ready whenever you are. Knowing you can make these fantastic dinner rolls ahead of time makes planning for holidays or big family dinners so much less stressful. We want that just-baked fluffiness, even if we mixed the dough yesterday!
Here is my tried-and-true method for storing and reviving your batch of rolls:
Making Dinner Rolls Ahead of Time (The Overnight Trick)
This is my favorite hack, especially if you want to skip a rise time on a busy morning. After you’ve shaped the rolls into balls and nestled them right into your greased 9×13 pan (Step 6 in the instructions), don’t let them do the second rise! Cover the pan very tightly with plastic wrap—I usually wrap it twice—and stick the whole thing right into the refrigerator. The cold temperature basically pauses the yeast activity. They can hang out in there overnight, or even up to 24 hours. Don’t worry, they won’t overproof in the cold!
Baking Make Ahead Dinner Rolls
When you’re ready to bake those chilled rolls, the process is super simple. First, you need to let them warm up a little bit so they can finish rising properly. Pull the pan out of the fridge, remove the plastic wrap, and let the rolls sit on the counter at room temperature for about 30 minutes. They should look puffy again, but not quite as full as if you’d let them rise fully the first time. Then, pop them straight into the preheated 375°F oven. Because they were colder starting out, you might need to add about 2 or 3 extra minutes to the baking time, but they will come out perfect!
Storing Leftover Rolls
If you actually have any of these delicious dinner rolls leftover—and that’s a big IF in my house!—storage is easy. Keep them tightly covered at room temperature for about two days, and they will stay wonderfully soft. If you need to keep them longer, freezing is the best option. Once they are completely cooled, wrap the whole batch tightly in plastic wrap, then cover that with a layer of aluminum foil to prevent freezer burn. They are good in the freezer for up to three months. When you want to eat them, just unwrap them and warm them up in a 350°F oven for about 10 minutes until they are soft inside again. This is a great way to enjoy homemade bread throughout the week, even if you don’t want to make a fresh batch every day. If you’re looking for other great make-ahead recipes you can trust, I have a few options in my homemade granola recipe section!
Frequently Asked Questions About Making Dinner Rolls
I know when I’m trying a new yeast recipe, I always have a few things pop into my head right before I start. It’s good to be prepared! Here are some quick answers to the questions I get asked most often about making this wonderful Easy Dinner Roll Recipe. If you have a sticky situation and need to reach out, don’t forget you can always contact me here at my contact page!
Can I use instant yeast instead of active dry yeast?
You totally can! When using instant yeast, you can skip the initial step of proofing it in milk completely. Just whisk the instant yeast right in with your dry ingredients (the flour and salt), and continue with the recipe as written. This is technically the fastest way to get to the mixing stage, making for Quick Dinner Rolls!
Why didn’t my dinner rolls rise during the second rise?
This almost always comes down to temperature or time. Either the spot where the dough was rising was too cold (yeast hates cold!), or your milk was too hot initially and killed the yeast. If it’s too cold, just move the covered pan to a slightly warmer spot—like near a burner that’s just turned off or inside an oven that’s off but slightly warm from previous use. Patience really is key here!
Can I skip the second rise to speed things up?
Oh, I’ve been tempted to do this on a crazy weeknight, believe me! While you *can* technically bake them after the first rise, I really advise against it if you want those wonderfully soft rolls. The second rise builds up the final pockets of air that give you the fluffiest texture. Skipping it means you end up with slightly denser rolls, though they will still taste flavorful!
How do I store leftover rolls for the best texture?
The best way to keep them soft is in an airtight container at room temperature for a couple of days. If you are worried about them drying out, wrap the whole container tightly in foil or plastic wrap. And never, ever refrigerate baked rolls; the starch retrogrades quickly and they turn stale faster!
Estimated Nutrition Facts for These Dinner Rolls
Now, I know when you’re baking something this incredibly comforting, you aren’t really thinking about the numbers, but it’s helpful to have a general idea! Remember that these statistics are just estimates based on cutting the recipe into 16 rolls, and they can certainly change depending on exactly how much flour you use or if you cover them in extra butter when they come out. But for a side dish that brings so much joy, I think these wonderful dinner rolls are worth every bite!
Here are the estimated nutrition facts:
- Serving Size: 1 roll
- Calories: 180
- Fat: 7g (Includes 4g Saturated Fat)
- Carbohydrates: 26g
- Sugar: 4g
- Protein: 4g
- Sodium: 250mg
Share Your Best Homemade Rolls Experience
Honestly, reading your comments and seeing your baking adventures is my favorite part of running Completely Yummy! I put my heart into these recipes, and nothing makes me happier than knowing they worked perfectly in *your* kitchen. So, I’m asking you right now: please come back and let me know how your first batch of these glorious soft dinner rolls turned out!
Did you manage to resist eating the entire pan while they were still warm? Did you try the honey butter topping for that amazing Texas Roadhouse style finish? I absolutely love hearing about the little tweaks you make or how they looked when you served them up for your family dinner. It inspires me so much as I develop more recipes, and it helps other home cooks feel confident trying something new.
If you loved the texture and the buttery flavor, please do me a huge favor and give the recipe a five-star rating right below! Your feedback helps other folks find genuinely good, doable baking projects. And if you snapped a picture of those fluffy homemade bread rolls, tag me on social media! I’d love to see your success story. If you want to read more about my mission to keep home cooking simple and joyful, head over to my About Page!
PrintThe Ultimate Soft and Fluffy Homemade Dinner Rolls (Classic Buttery Recipe)
Make incredibly soft, fluffy, and buttery dinner rolls from scratch. This easy yeast roll recipe delivers comfort food quality that beats store-bought options, perfect for family dinners or holiday baking.
- Prep Time: 20 min
- Cook Time: 18 min
- Total Time: 1 hour 58 min
- Yield: 12 to 16 servings 1x
- Category: Side Dish
- Method: Baking
- Cuisine: American
- Diet: Vegetarian
Ingredients
- 1 cup warm milk (105-115°F)
- 2 1/4 teaspoons active dry yeast
- 1/4 cup granulated sugar, divided
- 2 large eggs, room temperature
- 1/2 cup unsalted butter, melted
- 3 1/2 to 4 cups all-purpose flour
- 1 teaspoon salt
- For the topping: 1/4 cup unsalted butter, melted
Instructions
- Activate the yeast: In a large bowl, combine the warm milk, 1 teaspoon of the sugar, and the yeast. Let it stand for 5 to 10 minutes until foamy.
- Mix wet ingredients: Add the remaining sugar, eggs, and melted butter to the yeast mixture. Whisk until combined.
- Combine dry ingredients: In a separate bowl, whisk together 3 1/2 cups of the flour and the salt.
- Form the dough: Gradually add the flour mixture to the wet ingredients, mixing until a shaggy dough forms. Turn the dough out onto a lightly floured surface.
- Knead: Knead the dough for 5 to 7 minutes until it is smooth and elastic. Add more flour only if the dough is too sticky to handle.
- First rise: Place the dough in a lightly oiled bowl, turning to coat. Cover the bowl with plastic wrap or a clean towel and let it rise in a warm place for 1 to 1.5 hours, or until doubled in size.
- Shape the rolls: Gently punch down the dough. Divide it into 12 or 16 equal pieces. Roll each piece into a smooth ball. Place the balls close together in a greased 9×13 inch baking pan.
- Second rise: Cover the pan loosely and let the rolls rise again in a warm spot for 30 to 45 minutes, or until puffy.
- Bake: Preheat your oven to 375°F (190°C). Bake for 15 to 18 minutes, or until the tops are golden brown.
- Butter topping: Immediately after removing the rolls from the oven, brush the tops generously with the 1/4 cup of melted butter. Serve warm for the best soft, fluffy texture.
Notes
- For Texas Roadhouse Style Rolls: After brushing with melted butter, mix 2 tablespoons of honey and a pinch of cinnamon into the melted butter before brushing over the hot rolls.
- If you are short on time, you can reduce the second rise slightly, but this may affect the final fluffiness.
- You can make these rolls ahead: Assemble the dough, shape the rolls, place them in the pan, cover, and refrigerate overnight. Before baking, let them sit at room temperature for 30 minutes, then bake as directed (you may need 2-3 extra minutes of baking time).
Nutrition
- Serving Size: 1 roll
- Calories: 180
- Sugar: 4g
- Sodium: 250mg
- Fat: 7g
- Saturated Fat: 4g
- Unsaturated Fat: 3g
- Trans Fat: 0g
- Carbohydrates: 26g
- Fiber: 1g
- Protein: 4g
- Cholesterol: 25mg