

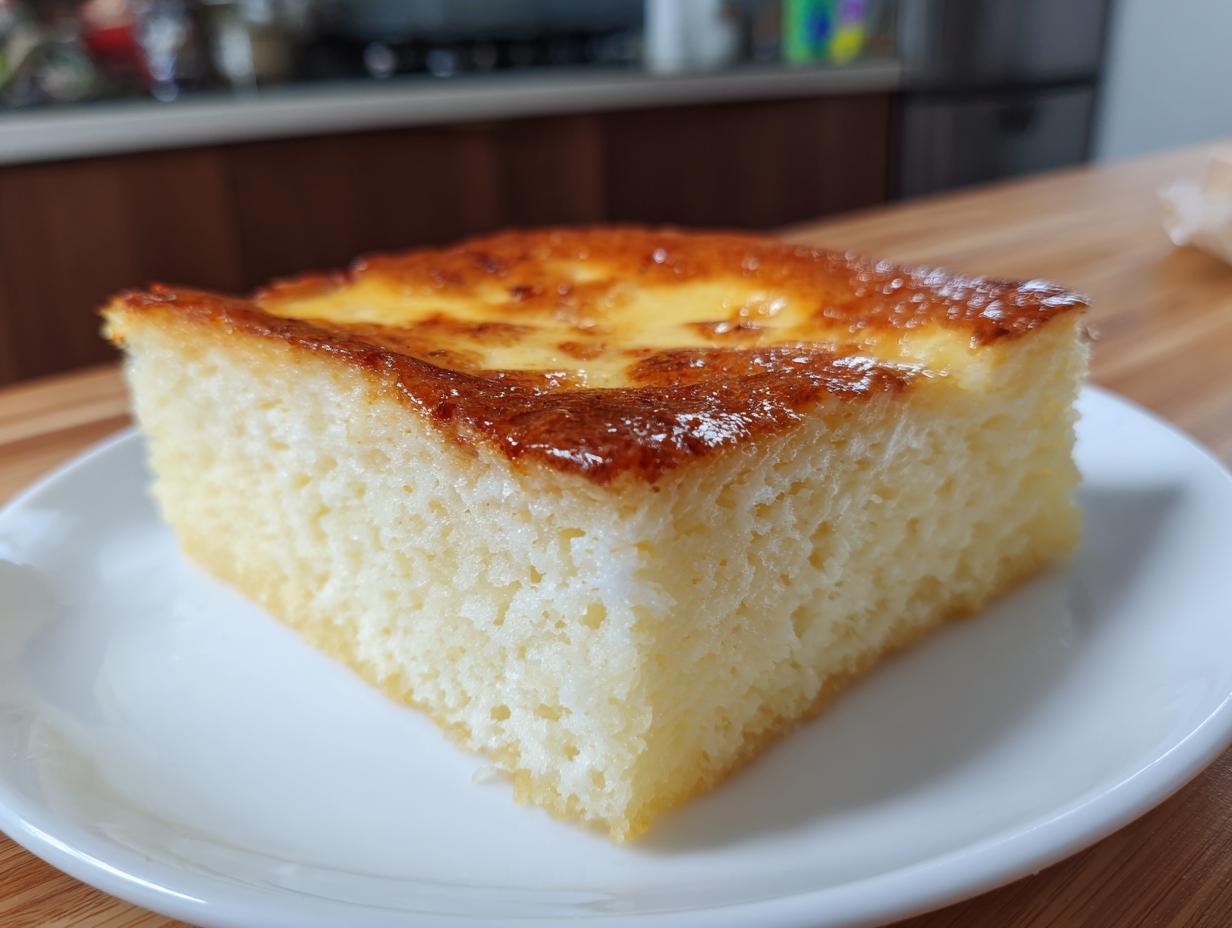
When I’m craving something that feels like a warm hug, I skip the tricky chocolate layers and go straight for a comforting dessert that’s rich, tropical, and wonderfully dense. That’s where the classic **cassava cake** swoops in! If you’ve ever enjoyed a slice of genuine Filipino Cassava Cake—or as it’s sometimes lovingly called, Cassava Bibingka—you know that texture is everything. It needs to be perfectly soft but undeniably chewy. If you’re looking for more satisfying bakes like this, check out my collection of delicious dessert recipes!
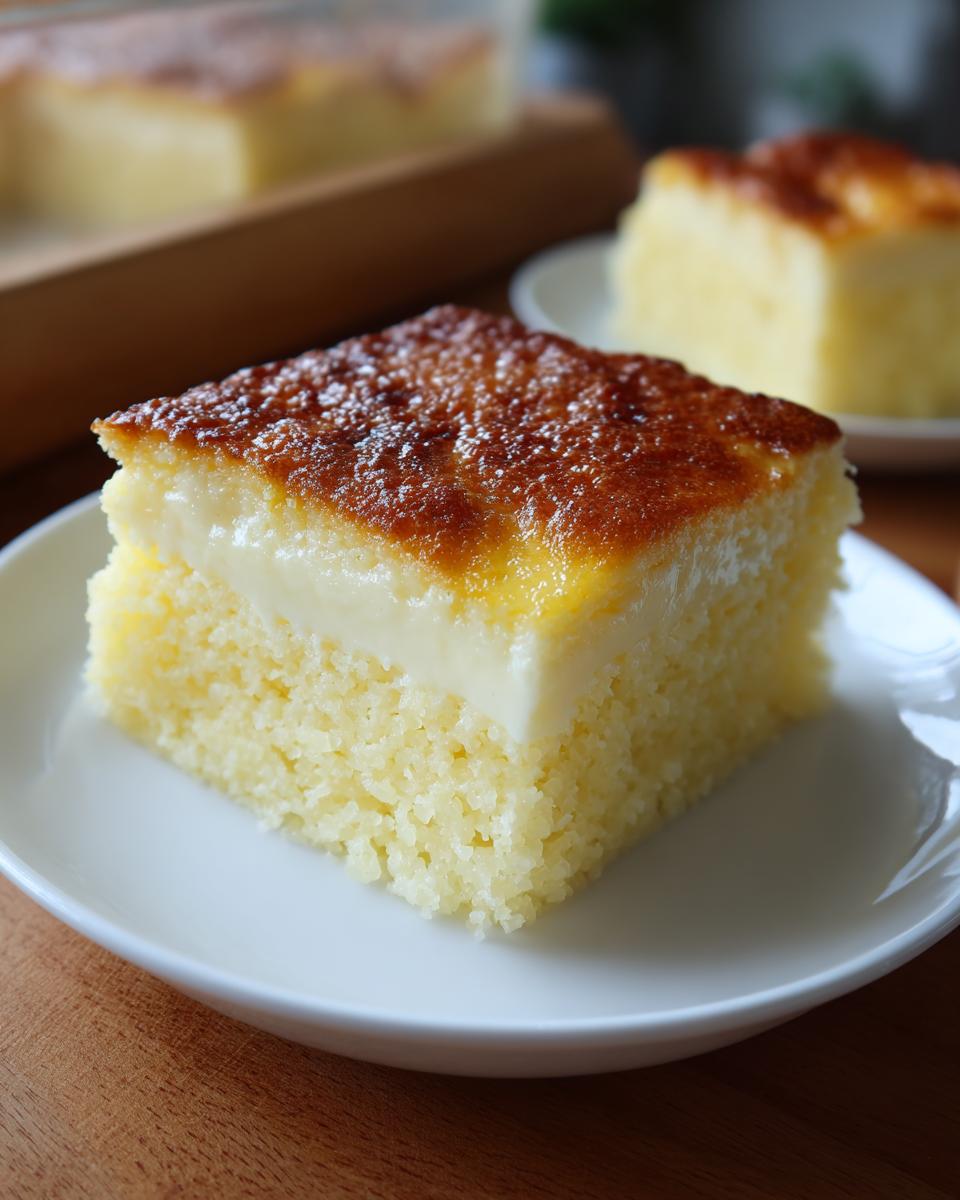
I spent years messing around with recipes that were too watery or too crumbly, but I finally landed on the absolute best, most reliable version. I’m sharing my secrets here so that even if you’re a Cassava Cake for Beginners, you can achieve that gorgeous, creamy custard top and that satisfyingly chewy bottom layer practically on your first try. Trust me, this is the tropical treat you’ll keep coming back to!
- Why This Filipino Cassava Cake Recipe Works for You
- Gathering Ingredients for Your Cassava Cake
- How to Prepare the Best Cassava Cake Recipe
- Tips for the Perfect Authentic Cassava Cake Recipe
- Cassava Cake Variations: Macapuno and Cheesy Options
- Ingredient Notes and Substitutions for Cassava Cake
- Storing Your Creamy Cassava Cake
- Frequently Asked Questions About Making Cassava Cake
- Serving Suggestions for this Filipino Dessert
- Estimated Nutritional Data for Cassava Cake
- Share Your Cassava Cake Experience
Why This Filipino Cassava Cake Recipe Works for You
I know you’re busy, so I designed this recipe to be your new favorite weeknight bake. It skips the complicated steps but keeps all the amazing flavor we love. This recipe takes all the mystery out of achieving that perfect texture. You get:
- A wonderfully chewy base because we handle the cassava just right.
- A rich, creamy cassava cake topping that sets beautifully without breaking.
- It’s genuinely Easy Cassava Cake friendly—no fussing with humidity or tiny measurements! Check out my quick tips for fast baking here: quick healthy breakfast solutions if you need some speed elsewhere in your menu!
Gathering Ingredients for Your Cassava Cake
Okay, getting the right ingredients is half the battle, right? Especially with traditional recipes like this! I’ve made sure this ingredient list is rock solid, mixing the classics with a few optional texture boosters that really make this Filipino Cassava Cake sing. Trust me, don’t skimp on the full-fat coconut milk; that’s where the creaminess starts! If you’re looking for other coconut favorites, I have a great one for coconut cupcakes too.
When you pull everything out, you’ll notice we’re making two distinct parts: the sturdy, slightly sweet bottom that gets delightfully chewy, and that glorious, golden custard blanket we pour on top. Let’s get organized!
For the Cassava Cake Base
- 4 cups grated cassava (make sure it’s fully thawed if using frozen!)
- 1 can (13.5 oz) full-fat coconut milk – this is key for richness!
- 1 can (14 oz) sweetened condensed milk
- 1/2 cup granulated sugar
- 1/4 cup melted butter or margarine
- 2 large eggs
- 1 teaspoon vanilla extract
- 1/2 cup shredded coconut (optional, this just adds a little chew)
- 1/2 cup macapuno strings (optional, but these sweet coconut sports are authentic!)
For the Creamy Custard Topping
- 1 cup all-purpose cream or evaporated milk (your call!)
- 1/2 cup condensed milk (yes, more sweets, we need the good stuff here)
- 2 large egg yolks (this thickens the custard perfectly)
- 1/2 cup shredded cheddar cheese (optional, for that classic cheesy cassava cake finish!)
How to Prepare the Best Cassava Cake Recipe
People think baking something this good has to be complicated, but I promise you, the structure of this recipe is so straightforward! We’re using a two-stage bake because the bottom layer needs to set up firm enough to support that glorious topping without collapsing. Patience is key here, especially in the final cooling stage, which delivers that signature satisfying chew. If you’ve been looking for a fail-proof way to make thick, rich caramel to go with your sweets, check out my guide here!
Preparing the Pan and Mixing the Cassava Cake Base
First up, get your oven warmed up to 350°F (175°C). You need to prepare a 9×13 inch pan—I always grease mine and then line it with parchment paper. That little paper sling saves you so much grief later! Now, grab your biggest bowl. Dump in all your base ingredients: the cassava, the coconut milk, the condensed milk, sugar, melted butter, eggs, and vanilla. Mix it up gently. Seriously, just mix until everything looks happy and incorporated. Don’t beat the flavor out of it; we don’t want to overmix this!
Baking the Base Layer of Your Cassava Cake
Pour that lovely, thick batter right into your prepared pan and smooth the top ever so slightly. Into the oven, it goes! This first bake is crucial for structure. You want to bake the base for about 45 to 55 minutes. How do you know it’s ready? The edges should look set, and you’ll see it starting to pull away just a tiny bit from the sides of the pan. It won’t be brown yet, but it needs that foundation!
Creating and Applying the Cassava Cake with Custard Topping
While the base is firming up, whisk together your topping ingredients in a separate, medium bowl—that’s the remaining cream, condensed milk, and egg yolks. Whisk until it looks totally smooth. Once your base comes out looking set, gently—and I mean gently—spoon that custard topping right over the hot surface. Slide it back in for the second bake, usually 15 to 20 minutes. If you’re going cheesy, sprinkle that cheese on during the very last 5 minutes so it melts but doesn’t burn!
Cooling and Serving Your Chewy Cassava Dessert
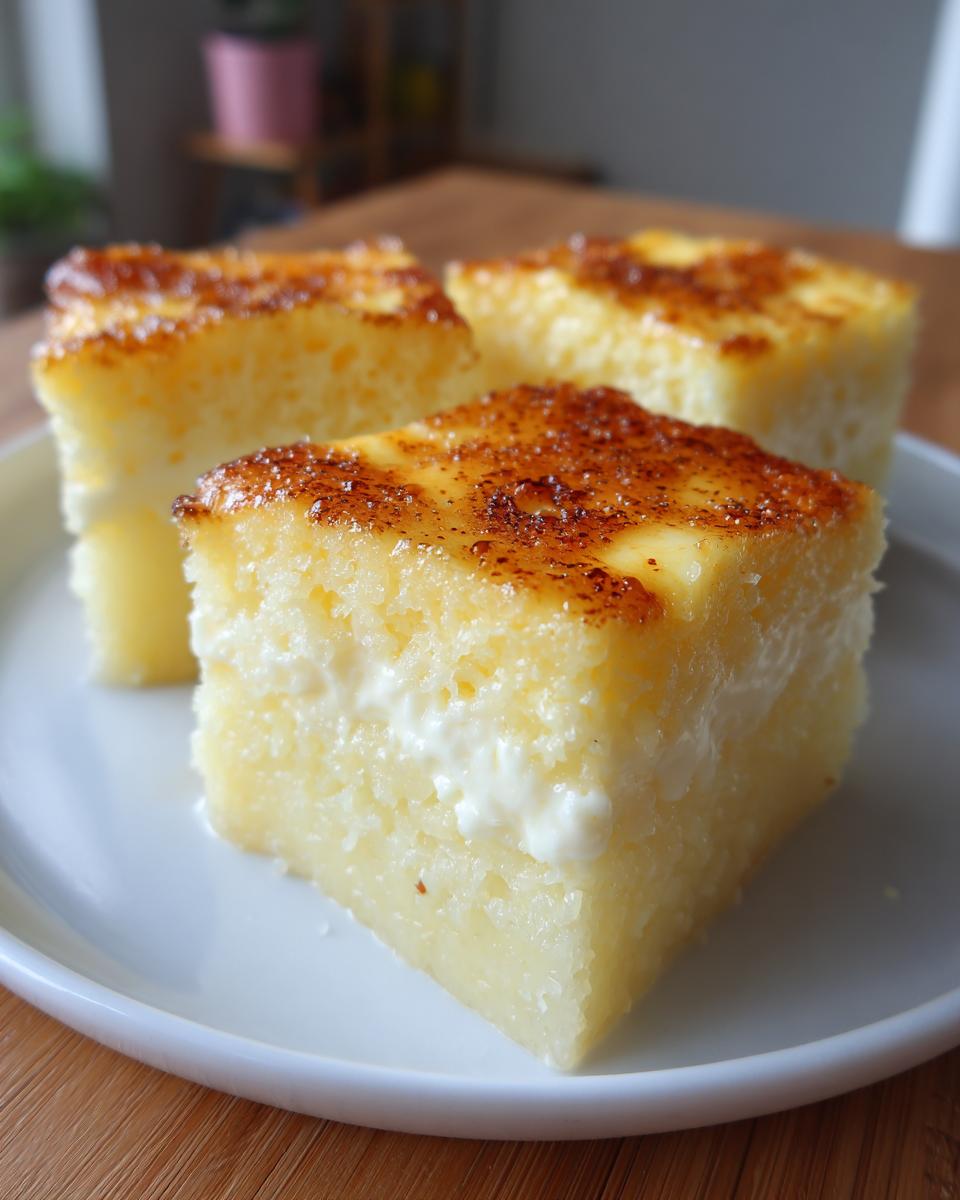
This is where most people go wrong! You have to let this dessert cool completely on a wire rack. I know it’s tough when it smells this good, but this cooling time is essential for that signature chewy texture you’re looking for. If you cut it too soon, it turns into mush! Once it’s fully cooled—and I mean fully—then you can slice it into perfect serving squares.
Tips for the Perfect Authentic Cassava Cake Recipe
Okay, now that you know the steps, let’s talk about the little secrets that take this from a good cassava cake to *The Best Cassava Cake Recipe* that people beg you to make again. I learned these the hard way. Once, I got greedy trying to speed things up and dumped the thawed cassava right in without squeezing it first, and let me tell you—the base was basically soup! It took an extra hour to set, and the texture was just… soggy, not chewy. Never again! Don’t make my mistake; always manage your liquid content properly. If you need more baking inspiration after this, check out these super fun easy sugar cookie truffles!
These are the little tweaks that pay off huge, especially when you’re aiming for that golden-brown finish that looks so stunning on a dessert platter:
- If you are working with frozen grated cassava—which, let’s be honest, is a lifesaver—you absolutely must make sure it is fully thawed, and then give it a good squeeze! Excess liquid is the enemy of a firm bake, so blot it out before it goes into the mix.
- For a richer flavor running through the base, I sometimes sneak in heavy cream instead of evaporated milk in the topping, but I stick to the full-fat coconut milk for the structure. It just makes everything taste more luxurious.
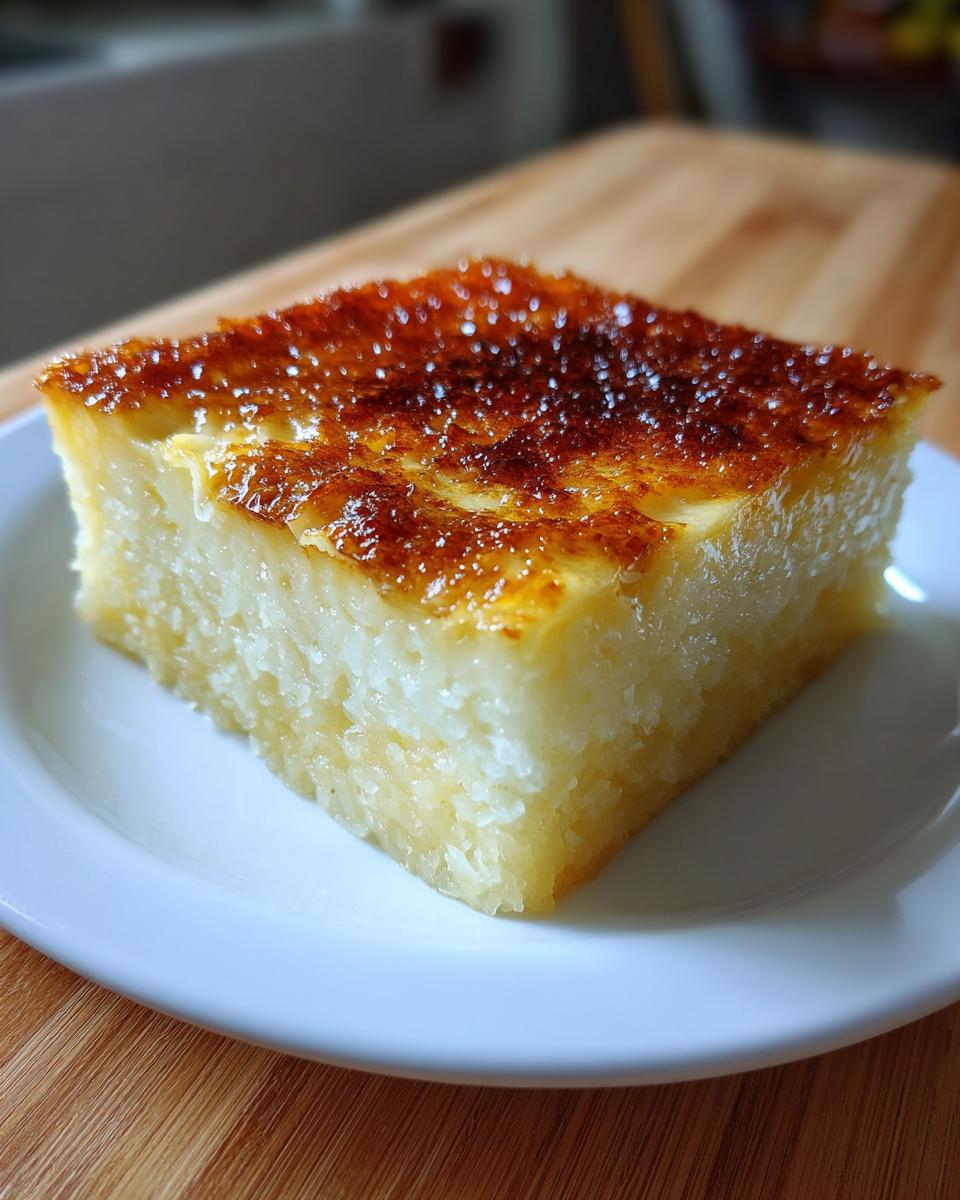
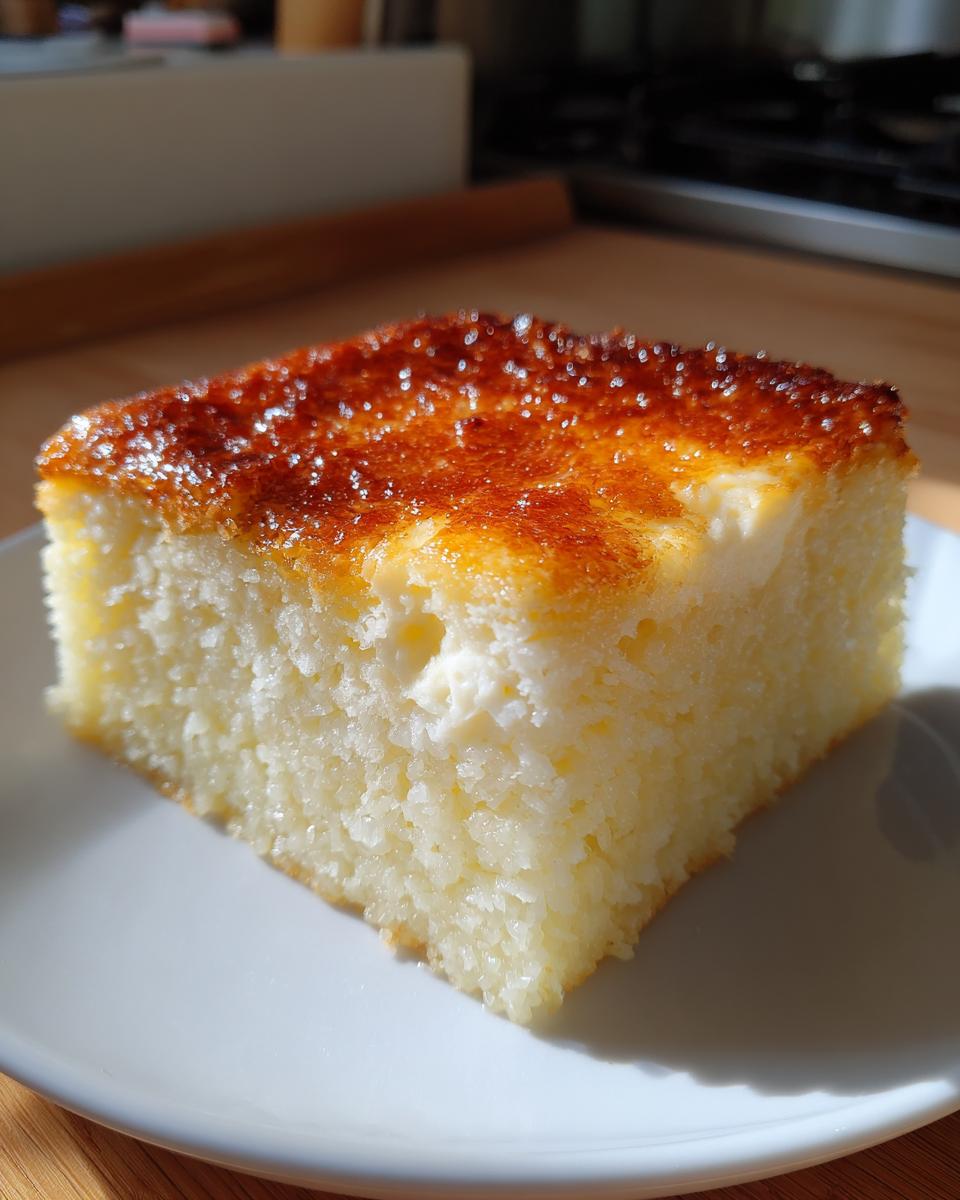
- If your topping looks pale right at the end—we want that beautiful finish, right?—you can carefully place the whole pan under the broiler for just a minute or two. Watch it like a hawk, though! I mean it, 60 seconds can turn golden to burnt in this tropical dessert! You can see a great method for getting that lovely color over at Recipe ni Juan, too!
Cassava Cake Variations: Macapuno and Cheesy Options
Okay, you’ve mastered the basic, delicious, creamy version of this cassava cake. Now it’s time to have some fun with it! The beauty of Filipino dessert recipes is that they are so adaptable. My recipe already calls for optional macapuno strings, which are just those sweet, tender strands of coconut sport—they add this incredible, slightly gooey texture that I just adore. If you find them, toss them in! They really elevate this tropical cake right up to holiday level.
But let’s talk about the cheese. If you’ve never tried a cheesy cassava cake, you are in for a treat. It’s that perfect mix of savory and sweet that just hits the spot, much like how my red velvet cheesecake brings together tangy and sweet. We sprinkle sharp cheddar right over the custard topping in the last few minutes of baking. It melts into this gorgeous, slightly salty blanket over the rich coconut layer.
If you want to see how amazing macapuno works in this context, you have to check out the recipe by Dishes Tasty; they really do it justice over at Dishes Tasty. It just proves that sometimes the best flavor combinations are the ones that seem a little surprising at first!
Ingredient Notes and Substitutions for Cassava Cake
I know sometimes we look at a recipe and panic because we’re missing one specialty item, or maybe we only have evaporated milk instead of heavy cream on hand. Don’t worry one bit! This recipe is pretty forgiving, but a couple of ingredients are non-negotiable for that true structure. If you make substitutions on certain things, you might end up with something that tastes great, but maybe not exactly the dreamy, chewy dessert we are aiming for here.
If you’re interested in something completely different but equally delicious for using up pantry staples, I highly recommend trying my recipe for easy white chocolate fudge next.
Let’s talk about the cassava itself first. If you happen to have access to fresh-grated cassava, that’s fantastic! But honestly, the frozen variety that’s pre-grated works just as well for me most of the time. The one absolute must-do step if you’re using frozen is to thaw it completely and then squeeze out as much excess liquid as you possibly can using a clean tea towel or cheesecloth. If you skip this, your base layer will spend a lot longer baking and end up dense rather than delightfully chewy.
As for the liquids in the topping—cream versus evaporated milk—you can absolutely swap them out. Evaporated milk is traditional and works perfectly fine, giving you that classic Filipino dessert feel. If you want the topping to be unbelievably lush, use heavy cream instead of the evaporated milk listed in the base recipe. It just adds a little extra decadence, but either way, you get that beautiful custard set.
Storing Your Creamy Cassava Cake
This wonderfully rich cassava cake is actually quite sturdy, which is why it travels so well! If you plan on eating it the same day, room temperature is fine, especially if you made the cheesy topping. But for keeping that creamy texture the best, I always cover mine tightly and keep it in the fridge. This stops the custard top from getting too soft.
When you’re ready for leftovers, just let a slice sit out for about 15 minutes before digging in. This slightly softens the chill, bringing back that perfect chewiness you loved when it was fresh. For a quick way to finish off leftovers, try drizzling some of my easy homemade teriyaki sauce—just kidding! Coffee or plain tea is much better!
Frequently Asked Questions About Making Cassava Cake
I know sometimes when you’re trying a new Filipino dessert recipe, you have a million little questions buzzing around. That’s totally normal! I’ve compiled the ones I get asked the most often down here, so you can bake with complete confidence. If you have any other questions after trying this, feel free to drop a comment below or check out my creamy cornbread casserole section for more comforting bakes in the meantime!
Can I make a No Bake Cassava Cake?
Oh, I wish! When people ask about a No Bake Cassava Cake, I totally understand wanting to skip the oven time. But for this particular recipe, baking is absolutely essential. Why? Because we are creating two distinct layers: the dense, chewy base, and that luscious custard topping. The heat of the oven is what sets the egg yolks in the topping, transforming that wet mixture into a firm, sliceable custard layer. Without the oven, everything would just stay runny.
What is the best way to get a golden brown finish on the cassava cake topping?
We want that beautiful, slightly caramelized look on top—that golden glow is the sign of a perfect bake! The absolute best way I’ve found, outside of just letting the oven do its natural work, is using the broiler. Just make sure your cake is mostly set and pulled away from the sides. Place it on the top rack, turn the broiler on low, and stand guard. Seriously, walk away for two seconds, and you’ve gone from golden brown to charcoal! Quick bursts of 30 to 60 seconds usually do the trick to get that perfect look on your creamy cassava cake.
How long does the final cassava cake dessert need to cool before slicing?
This might be the most important question you can ask! If you slice this cake while it’s hot or even warm, you won’t get that signature texture. You are aiming for a firm, satisfyingly chewy cassava dessert, and that only happens as the starches fully cool and set up. I insist that you let it cool completely on the counter, which is usually about three to four hours. If you can stand the wait, chilling it after it comes to room temperature actually firms it up even more for the cleanest slices!
Can I use dried cassava instead of fresh or frozen?
That’s a good question about sourcing ingredients! While you might find dried cassava flakes, they are fundamentally different from the fresh or frozen grated cassava this recipe calls for. Dried cassava requires soaking for hours to reconstitute and it often changes the final texture drastically—it doesn’t usually break down into the smooth, cohesive base we want. Stick with frozen grated cassava (thawed and squeezed dry!) for the best results in this recipe for Filipino Cassava Cake.
Serving Suggestions for this Filipino Dessert
This baked slice of heaven is so rich and satisfying—it’s decadent enough to be the star of any dessert table. Because we’ve got the coconut milk, the condensed milk, and often that creamy custard topping, you don’t need much else alongside it! It really stands up on its own as a wonderful tropical cake.
When I bring this to potlucks, it usually ends up sharing space with other incredible Filipino Dessert Recipes. If you are making a big spread, think about balancing the richness. Instead of heavy sauces, try a few other contrasting textures or lighter flavors nearby!
Here are a few things that I just love pairing with a slice of this chewy treat. If you need something refreshing to wash it down, I make a big pitcher of my classic fresh-squeezed homemade lemonade—the tartness just cuts through the sweetness perfectly! And if you want more inspiration for baking delicious Filipino favorites, check out the beautiful work done by Andie over at her site: Andie’s Cassava Cake.
- Coffee or Tea: A simple cup of strong, hot black coffee or a mild green tea is a classic Filipino accompaniment for desserts, especially in the afternoon.
- Fresh Fruit Platter: To keep things light and truly tropical, serve the cake alongside slices of fresh mangoes or maybe some chilled pineapple spears. The fresh fruit cleanses the palate nicely.
- A Light Glaze Boost: If you skipped the cheese topping, sometimes just a tiny drizzle of warmed, slightly thinned honey over the individual slice works magic without adding more dairy.
Estimated Nutritional Data for Cassava Cake
Okay, let’s talk numbers for a second. We all know this is a truly satisfying, sweet treat, so we aren’t breaking any health food records here, but I always think it’s helpful to have a general idea of what’s in each slice. Remember, just like my grandmother’s baking secrets, these figures are estimates!
I based all of this tracking on the recipe yielding 12 solid servings, which is what I usually cut for family gatherings. Of course, if you use salted butter versus unsalted, or different brands of condensed milk, your exact figures will shift slightly—that’s just the reality of home cooking, right? When I use full-fat coconut milk, I know the fat content is higher, but wow, is it worth it for the flavor!
- Serving Size: 1 slice
- Calories: 350
- Sugar: 35g
- Sodium: 180mg
- Fat: 18g
- Saturated Fat: 14g (That’s the richness from the coconut milk and butter coming through!)
- Unsaturated Fat: 4g
- Trans Fat: 0g
- Carbohydrates: 45g
- Fiber: 3g
- Protein: 5g
- Cholesterol: 55mg
Share Your Cassava Cake Experience
Now that you’ve mastered this incredibly satisfying creamy cassava cake, I truly can’t wait to hear all about it! Seriously, the best part of my day is scrolling through comments and seeing photos from folks who made one of my recipes for the first time. Did you go for the optional cheese? Did you manage to find the macapuno strings?
If you are one of my Cassava Cake for Beginners bakers out there, please drop a comment below and tell me how it went. Don’t be shy about imperfections—that’s how we learn the next time we make another great Filipino dessert!
If you ran into a snag or you have a modification that you think everyone should try, please share your genius! You can always reach out directly through my contact page, but I love when we can share little bits of wisdom right here in the comments where everyone can see them.
And if you took a picture of your gorgeous, golden-topped cake—and I know you did!—please tag me on Instagram. Seeing that chewy texture in person always makes my day. Happy baking, everyone!
PrintEasy Filipino Cassava Cake with Creamy Custard Topping
Make this authentic Filipino Cassava Cake, also known as Cassava Bibingka. This recipe delivers a moist, chewy dessert with a rich, creamy coconut milk custard topping, perfect for beginners.
- Prep Time: 20 min
- Cook Time: 75 min
- Total Time: 95 min
- Yield: 12 servings 1x
- Category: Dessert
- Method: Baking
- Cuisine: Filipino
- Diet: Vegetarian
Ingredients
- 4 cups grated cassava (fresh or frozen, thawed)
- 1 can (13.5 oz) full-fat coconut milk
- 1 can (14 oz) sweetened condensed milk
- 1/2 cup granulated sugar
- 1/4 cup melted butter or margarine
- 2 large eggs
- 1 teaspoon vanilla extract
- 1/2 cup shredded coconut (optional, for texture)
- 1/2 cup macapuno strings (optional)
- 1 cup all-purpose cream or evaporated milk (for topping)
- 1/2 cup condensed milk (for topping)
- 2 large egg yolks (for topping)
- 1/2 cup shredded cheddar cheese (optional, for topping)
Instructions
- Preheat your oven to 350°F (175°C). Grease and line a 9×13 inch baking pan with parchment paper.
- In a large bowl, combine the grated cassava, 1 can of coconut milk, 1 can of condensed milk, granulated sugar, melted butter, 2 eggs, vanilla extract, and shredded coconut/macapuno if using. Mix until just combined. Do not overmix.
- Pour the cassava mixture evenly into the prepared baking pan.
- Bake the base layer for 45 to 55 minutes, or until the edges are set and lightly golden.
- While the base bakes, prepare the custard topping. In a separate bowl, whisk together the all-purpose cream, 1/2 cup condensed milk, and 2 egg yolks until smooth.
- Remove the partially baked cake from the oven. Gently spread the custard topping evenly over the hot cassava base.
- Return the cake to the oven. Bake for another 15 to 20 minutes, or until the topping is set and golden brown. If using cheese, sprinkle it over the topping during the last 5 minutes of baking.
- Remove the cake from the oven and let it cool completely on a wire rack before slicing. Cooling allows the cake to firm up for a chewy texture.
- Serve at room temperature or slightly chilled.
Notes
- If you use frozen grated cassava, make sure it is fully thawed and squeeze out any excess liquid before mixing.
- For a richer flavor, substitute evaporated milk with heavy cream in the base mixture.
- To achieve a deep golden-brown finish on the topping, you can briefly place the cake under the broiler for 1-2 minutes at the very end, watching carefully to prevent burning.
Nutrition
- Serving Size: 1 slice
- Calories: 350
- Sugar: 35
- Sodium: 180
- Fat: 18
- Saturated Fat: 14
- Unsaturated Fat: 4
- Trans Fat: 0
- Carbohydrates: 45
- Fiber: 3
- Protein: 5
- Cholesterol: 55