
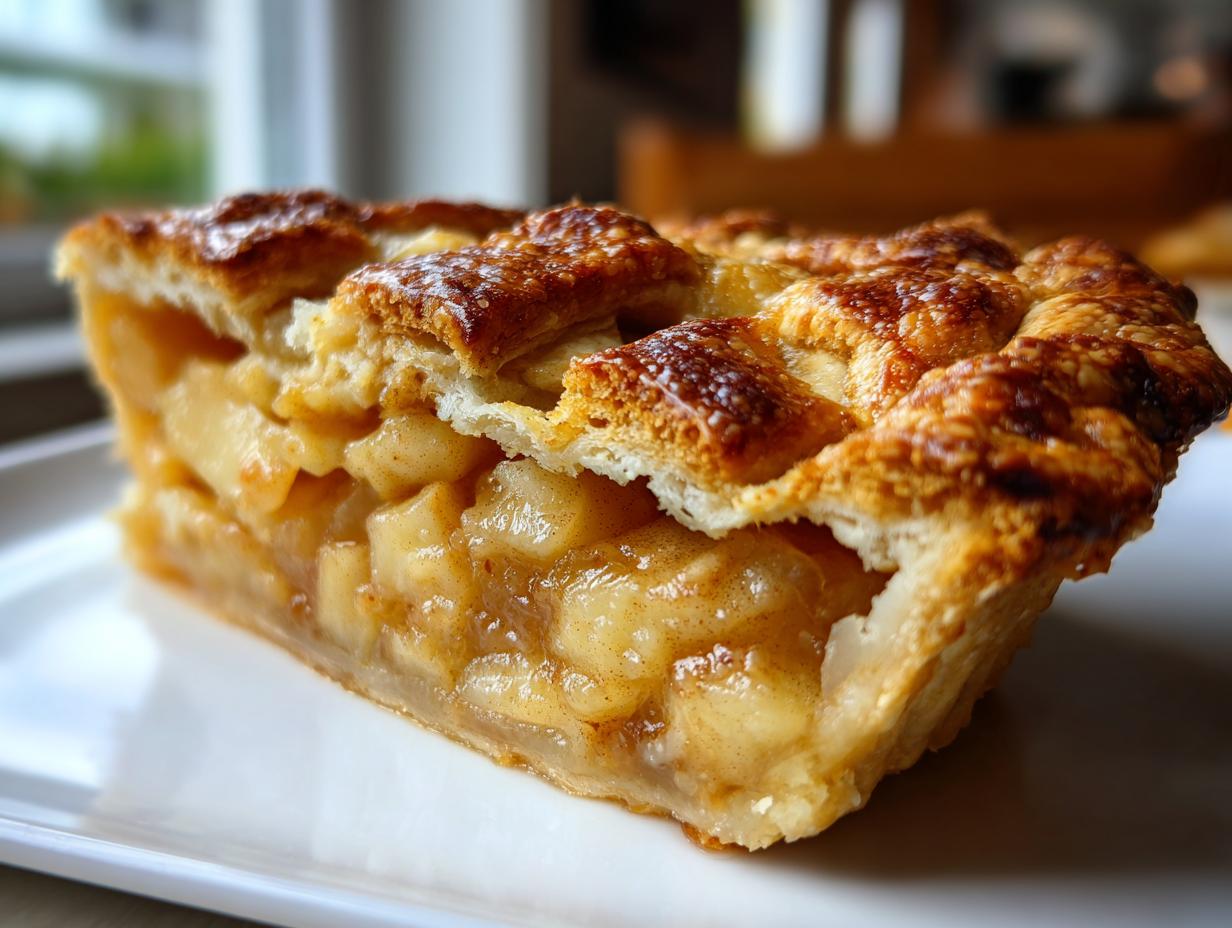
Oh, listen, that wonderful, warm feeling you get when you open the oven door and that incredible scent of cinnamon and butter just washes over you? That’s what baking is all about, right? It’s about taking back a little bit of time for yourself, and that’s exactly what this recipe lets us do. Forget those stiff, dry pies you’ve had before. I’m sharing the secret to making the very **best homemade apple pie**—the kind that tastes like it came straight from a professional bakery, but you made it right here on your Tuesday night. We are going completely **apple pie from scratch**, nails and all, focusing on that unbelievably flaky, buttery crust and a spiced apple filling that just sings. This is your mission, should you choose to accept it, to reclaim some kitchen joy, one perfect slice at a time. If you want to know a bit more about why I believe in making time for these simple pleasures, check out my story over at Completely Yummy.
- Why This Homemade Apple Pie Recipe is Your New Favorite (E-E-A-T)
- Gathering Ingredients for Your Classic Homemade Apple Pie Recipe
- Step-by-Step Instructions for Your Homemade Apple Pie
- Tips for Achieving Bakery Style Apple Pie Results
- Storage and Reheating Instructions for Homemade Apple Pie
- Variations on the Classic Homemade Apple Pie
- Frequently Asked Questions About Making Homemade Apple Pie
- Nutritional Estimates for This Classic Apple Pie Recipe
- Share Your Homemade Apple Pie Creations
Why This Homemade Apple Pie Recipe is Your New Favorite (E-E-A-T)
I spent years chasing that illusive, bakery-style result, and honestly, most recipes made me want to throw my rolling pin across the room! That problem stops now. This isn’t just another dessert; this is the answer to all your pie prayers. It’s straightforward, it respects your time, and it delivers that spectacular, melt-in-your-mouth payoff we all want from a great **homemade apple pie**.
- Truly Flaky Crust: We are using a tried-and-true method that guarantees hundreds of those little buttery layers.
- The Perfect Apple Mix: Using specific apples means your filling is never mushy; it holds its shape beautifully.
- No Soggy Bottoms: I’ve included my secret technique to keep that base perfectly crisp, which is essential for any classic apple pie recipe.
- Seriously Simple: Despite the amazing flavor, the process is clear. Everyone deserves a show-stopper dessert without the fuss!
Achieving the Perfect Flaky Pie Crust Tutorial
The crust, my friends, is where the magic starts. It truly comes down to temperature control. If your butter isn’t screaming cold, you won’t get those distinct flakes that shatter when you cut into them. Don’t even think about using warm butter! I walk through every single detail of the temperature control you need for that flawless pastry in my dedicated flaky pie crust tutorial so you can feel totally confident before we even think about the apples.
Gathering Ingredients for Your Classic Homemade Apple Pie Recipe
Okay, let’s talk about what you need to pull off this incredible dessert. When we talk about making an apple pie from scratch, the quality of what goes in absolutely matters. Don’t worry, you likely have most of this in your pantry already! We need two key players here: the foundation (the amazing crust) and the star of the show (the spiced filling).
For the crust, remember our mantra: COLD! We need flour, salt, and a full cup of unsalted butter, which you *must* cut into cubes that are very cold. Seriously, leave that butter in the freezer for 10 minutes before cubing it! And for the liquid, only the iciest water will do.
The filling is where we layer the flavor. You’ll need a mix—I always suggest using about six to eight apples total. Get some tart ones and some sweet ones. Once you have your fruit ready, don’t forget the sugars, a bit of flour to keep things from getting soupy, and those essential warm spices. If you love a good cozy flavor profile, you know we need that cinnamon and nutmeg in there!
If you’re looking for other ways to bring those warm spice notes to your autumn baking, check out my recipe for apple bread pudding. It uses similar vibes!
Ingredient Notes and Apple Selection for Spiced Apple Filling
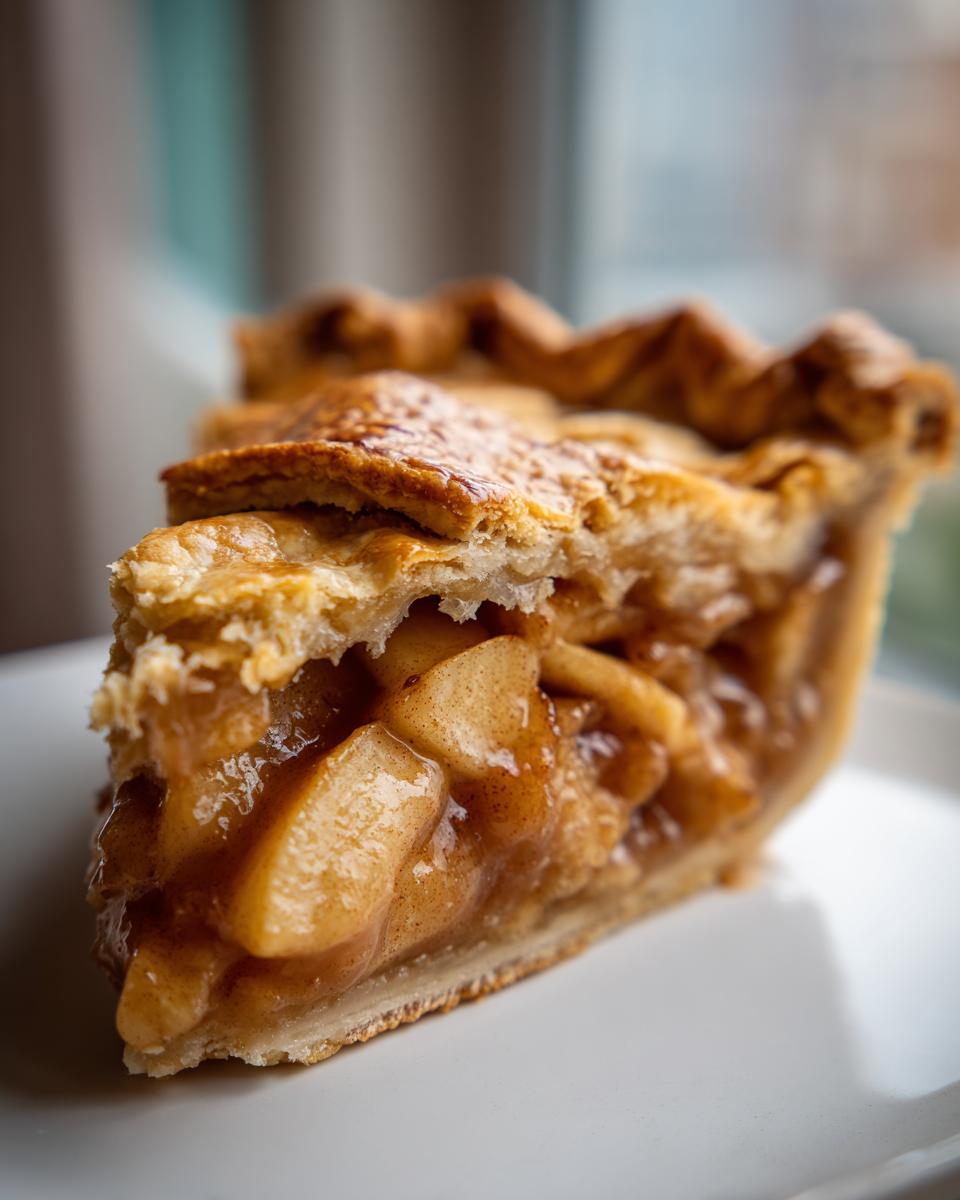
Choosing the right apples is crucial if you want that bakery style texture. If you use only sweet apples, your filling will break down into applesauce! We need structure, which is where the tart apples, like the Granny Smith, step in. They hold their shape beautifully, even after baking for an hour.
Then you balance that tartness with a sweeter variety, like Golden Delicious. That combination creates the perfect balance of flavor and texture. Since we are heavy on the flavors in this classic recipe, we use both cinnamon and nutmeg to really develop that signature taste you find in the best cinnamon nutmeg desserts. The small amount of flour mixed in is just the insurance policy we need to guarantee we avoid that dreaded soupy middle layer!
Step-by-Step Instructions for Your Homemade Apple Pie
Okay, deep breath! This is where we turn simple ingredients into that amazing, show-stopping homemade apple pie. Honestly, if you can follow these instructions, you’ve got yourself an easy apple pie recipe that will win awards. These double crust pie instructions are broken down so you don’t feel overwhelmed. We tackle the crust first because it needs time to chill, which is the secret to its flakiness!
Preparing the Flaky Dough Disks
First up, we mix up the dry stuff—the flour and salt—then we cut in that super-cold butter. When you’re doing this, you are looking for a texture that reminds you of coarse breadcrumbs, but you need to see some actual pea-sized chunks of butter hanging out in there. Those butter chunks are what turn into steam pockets, which means flaky layers! Don’t panic if it looks crumbly. Now, splash in that ice water, just a little bit at a time, and work it until the dough barely holds together. Don’t overwork it, please! Divide the whole messy thing into two equal discs, wrap them up tight like little presents, and send them straight to the fridge for at least one solid hour. No cheating on that chill time!
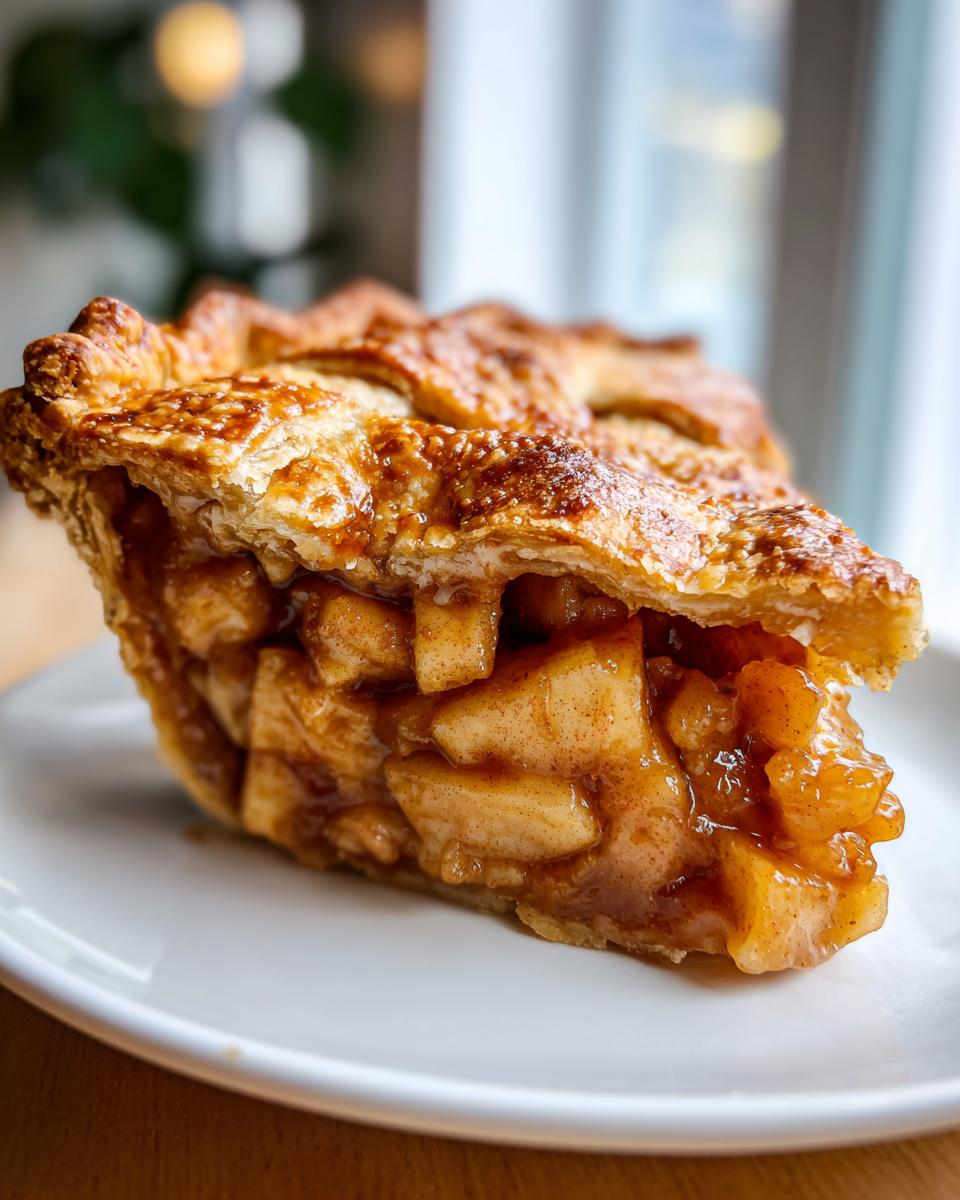
Creating the Perfectly Spiced Apple Filling
While that dough is getting happy in the cold, we move onto the apples. Peel, core, and slice them about a quarter-inch thick—not too thin, not too thick! In a big bowl, toss those slices with both the white and brown sugar, the flour, your cinnamon, nutmeg, and that little splash of lemon juice. What you want here is an even coat. Make sure every single apple slice is dusted with the spices and sugar. That little bit of flour is going to mix with the apple juices while baking to create a thick, luscious sauce instead of a watery mess.
Assembling and Baking Your Homemade Apple Pie
Once that dough is chilled, take one disc out and roll it into a 12-inch circle; ease it into your pie plate carefully. Now, pile those spiced apples right in there, making sure they mound up in the middle a bit—they shrink when they cook down! Then, roll out the top crust and drape it over. Crimp those edges like you mean it to seal everything up nice and tight, and don’t forget to cut those steam vents in the top! I usually do five or six slits.
Brush the top with an egg wash—just whisk that egg quickly—and sprinkle on some coarse sugar for crunch. Here’s a big step for the best result: Preheat your oven all the way to 425°F. Bake the pie at that high heat for the first 15 minutes. This intense blast helps set the bottom crust quickly—a key tip for those no soggy bottom pie secrets! After 15 minutes, drop the heat down to 375°F and keep baking for another 40 to 50 minutes. If the edges look too dark halfway through, just drape a strip of tinfoil over them to prevent burning. We need that golden-brown color!
If you want some truly delicious, easy recipes for other fall treats while you wait, you should peek at my one-bowl pumpkin bread.
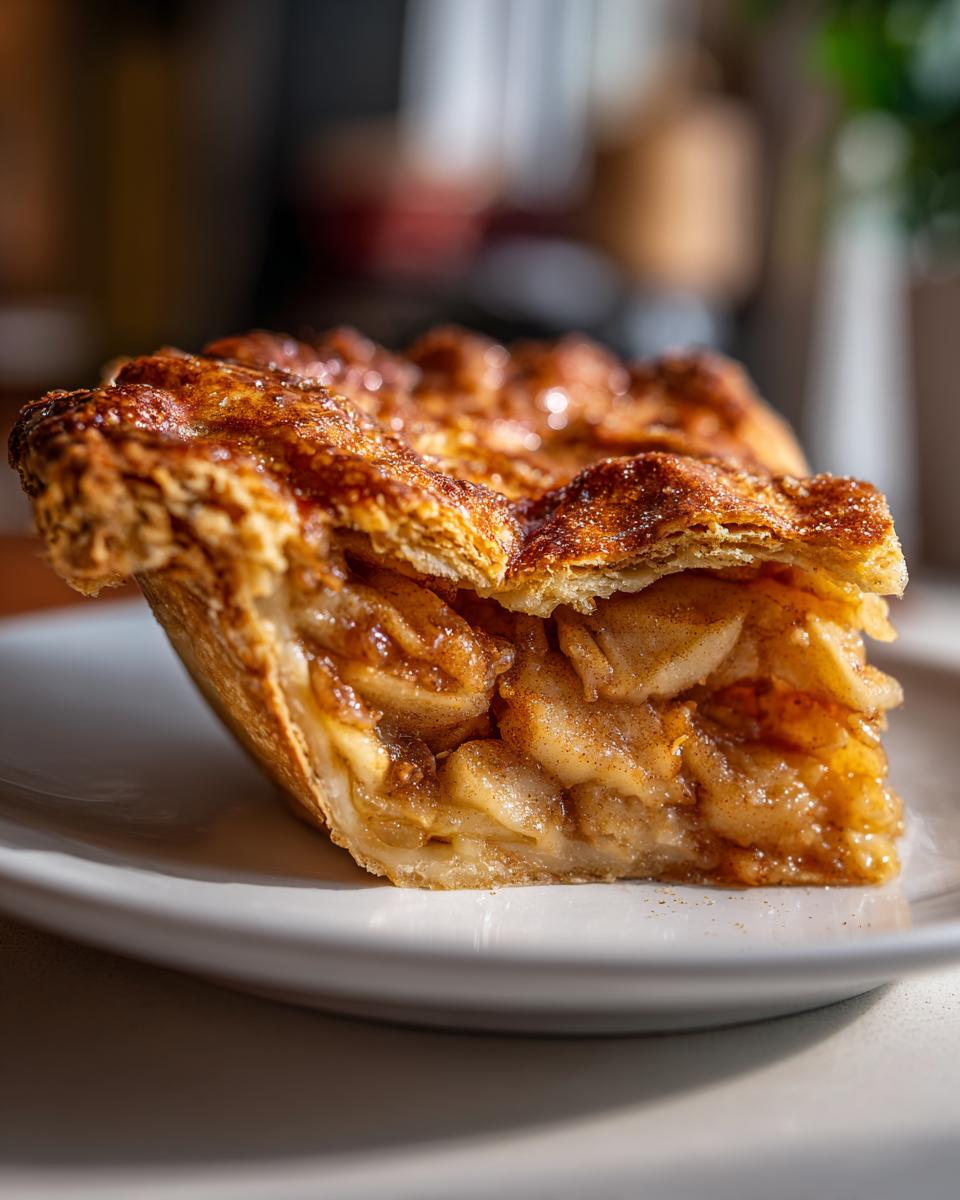
Tips for Achieving Bakery Style Apple Pie Results
You’ve baked your beautiful homemade apple pie, and I know you want to dive right in, but trust me here—patience is the final, most important step for that amazing bakery style apple pie finish. We need that filling to set up! If you cut into it steaming hot, it will just waterfall out onto your cooling rack, and you’ll end up with a soupy mess instead of perfect slices.
You absolutely have to let it cool for a minimum of three hours on a proper wire rack. This gives the flour/starch in the filling time to thicken up properly. Three hours might feel like an eternity, but it’s truly the secret handshake to getting clean, gorgeous wedges.
Also, remember how we used that egg wash? That’s what gives you that gorgeous, deep golden sheen that shops charge extra for. If you want a slightly different, yet equally cozy treat, try my maple brown sugar cookies while you wait for the pie to cool down!
Storage and Reheating Instructions for Homemade Apple Pie
So, perhaps you made an entire homemade apple pie and now you have slices left over. Don’t fret! Storing this beauty correctly is key to keeping that crust from softening up too much.
First things first: cool it completely, just like I mentioned earlier. Once it’s totally cool, you have options. If you plan on eating the rest within two days, leaving it covered loosely at room temperature is perfectly fine, especially if your kitchen isn’t super hot. The sugar in the filling helps preserve it for a little while.
If you need it to last longer, like closer to four or five days, then the fridge is your best bet. Wrap the cut sections of the pie tightly in plastic wrap or put the whole thing in an airtight container. Cold temperatures will always help it last longer, but let’s be honest, usually, there aren’t any leftovers!
Quick Tips for Reheating Slices
Now, if you’re reheating a slice? Please, for the love of all things buttery, do not use the microwave first! That just makes the crust soggy, and we worked too hard on that flakiness for that.
The absolute best way to bring a slice back to its former glory is a quick zap in the oven or toaster oven. Set your oven to about 350°F. Place the slice directly on a baking sheet (maybe even on a piece of foil if you’re worried about drips) and warm it up for about 8 to 10 minutes. That gentle dry heat wakes up the butter in the crust and warms the apples perfectly. It tastes just like it came right out of the oven the first time!
If you’re in a massive rush? A quick 30 seconds in the microwave will do the trick, but you have to serve it immediately with a scoop of vanilla ice cream to hide the slight texture change. Trust me, the oven is worth the few extra minutes!
Variations on the Classic Homemade Apple Pie
Even though this classic apple pie recipe is just about perfect as is, sometimes you want to switch things up a little bit, right? That’s the fun of baking—making it your own comfort food! You don’t need to reinvent the wheel, especially not when your wheel is this amazing, flaky, buttery crust, but we can certainly add some fun accessories.
I have two super simple tweaks here that I often use when I’m feeling restless, and they both let you use up that amazing, perfectly spiced apple filling you just made. Seriously, this filling is so good, you could eat it with a spoon!
Swapping for a Rustic Apple Pie Lattice Top
If you’re tired of cutting those vents in the top crust, why not get artistic? Switching to a lattice top is the easiest way to upgrade this to what some call a rustic apple pie. All you do is slice the top crust into even strips, maybe an inch wide. Then, you just weave them over the filling. It takes a tiny bit more time, but the finished look is absolutely stunning—everyone thinks you spent all day slaving over a hot stove!
Weaving can look intimidating, but I promise it’s not hard once you get the hang of it. It also helps release steam just as well as cutting slits, and it gives those gorgeous apples visibility!
Adding a Little Crunch with Nuts
For those of you who like a bit more texture beyond just the crisp crust, feel free to toss in some chopped nuts with your apple filling! Pecans or walnuts work beautifully here. I usually add about half a cup, lightly toasted first if I remember to, because toasting really brings out their flavor.
If you add nuts, though, I highly recommend you take a second to brush the top crust with a little bit of melted butter *before* the egg wash, just to help everything brown nicely and add a little extra richness that complements the nuttiness. It’s fantastic, especially when served warm!
Boosting the Spice Blend for Extra Warmth
We already nailed the cinnamon nutmeg desserts vibe, but if you want to lean into that deeper autumnal feeling, try adding just a tiny pinch of ground cloves or allspice to your main spices. Be careful, though! Cloves are strong—we’re talking about a scant 1/8 of a teaspoon for the whole batch. It adds a wonderful depth that screams Fall, making this the perfect centerpiece for any gathering. I often make a little apple cider cocktail to go alongside this pie when I try out these spicier variations!
Frequently Asked Questions About Making Homemade Apple Pie
When you’re diving into making something truly special like this, naturally you’re going to have questions! I’ve whipped up answers to the ones I get asked most often, especially when someone is tackling their first major homemade apple pie from scratch. I want you to feel zero stress when you’re baking with fresh apples!
Can I use a store-bought crust instead of making it from scratch?
My honest answer? You totally can, and sometimes on a crazy week, I do! If you’re short on time, grabbing a quality pre-made pie crust is a huge time saver. However, I need to warn you: the reason this recipe is so highly rated is because of that flaky, buttery double crust we developed. Store-bought crusts often use shortening instead of all butter, which changes the texture completely. If you use store-bought, just know that your crust won’t be *quite* the same as the one in this recipe, but the filling is still phenomenal!
My fresh apples are already a bit soft. Will they still work?
This is a great question about texture! If your apples are already getting a little soft, they will definitely still work, but you need to adjust how you bake them. Soft apples break down faster, so you’ll want to lean heavier toward the tart side of your apple mix and make sure that 1/4 cup of flour for thickening is measured exactly. Also, be extra vigilant during the baking time and check for bubbling after about 35 minutes at the lower temperature. We want them tender, not dissolved!
How far ahead of time can I assemble the entire homemade apple pie?
This is a tricky one! I advise against assembling the entire thing more than about 12 hours in advance, even if you keep it covered in the fridge. Why? Because even with the best crust preparation, that moisture from the filling will start to soak into the bottom crust overnight, and we are fighting so hard against sogginess! If you *must* prep ahead, make the dough disks up to two days ahead, and make the filling the day before. Then, assemble them fresh on the day you plan to bake. It makes for the best homemade apple pie experience that way!
Why do I need to let the pie cool for three hours? Can’t I be done sooner?
Oh, I hear you! Waiting three hours when your kitchen smells like heaven is torture! But please, this is non-negotiable for a great slicing experience! That filling is bubbling hot and completely liquid when it comes out of the oven. As it cools, the starch and sugar set up, creating that luscious, thick sauce around the apples. If you cut it too soon, it turns into a warm, sweet puddle. Use that cooling time wisely—maybe whip up a nice fall harvest salad to balance out all that delicious pie!
Nutritional Estimates for This Classic Apple Pie Recipe
Now, let’s talk about what’s inside this deliciousness, because while this homemade apple pie is pure comfort food, I always like to give you an idea of what you’re sitting down to enjoy. Remember, this isn’t a health food moment, though it is made with fresh fruit! These numbers give you a general idea of what you can expect if you cut the pie into 8 generous slices. We aren’t obsessing over the details here; we’re just getting a ballpark figure!
- Serving Size: 1 slice
- Calories: 420
- Fat: 25g
- Saturated Fat: approximately 15g
- Carbohydrates: 50g
- Sugar: 35g (Yes, a good chunk from those lovely apples and brown sugar!)
- Protein: 4g
- Sodium: 300mg
As always when baking from scratch, please take these figures with a grain of salt—or maybe just a sprinkle of that coarse sugar we put on top! These estimates are based on the exact ingredients listed in the recipe and standard nutritional databases. Your actual counts might fluctuate slightly depending on the exact brand of flour or the size of the apples you choose. Enjoy every single, perfect bite!
Share Your Homemade Apple Pie Creations
Now comes the best part—seeing what you’ve cooked up! Making this homemade apple pie has genuinely made me so much happier about getting back into the kitchen, and I really hope it did the same for you. This recipe is meant to be shared, whether it’s the centerpiece for your Thanksgiving table or just a quiet, cozy Tuesday night treat—it’s the ultimate homemade dessert comfort food.
I would absolutely love to know how your version turned out! Did you stick to the classic double crust, or did you get adventurous with a lattice top? Take a moment to leave a rating below—five stars if it knocked your socks off! And please, please, please leave a comment telling me about your experience. Did I save you from a soggy bottom? Did the almond-banana bread loaf pan method work for you?
If you took a gorgeous photo of your golden, flaky, bakery-style masterpiece, tag me on social media! Seeing your creations genuinely makes my day brighter. It proves that we can all slow down, reconnect with simple, wonderful food, and create something totally delicious without needing a complicated culinary degree. Happy baking, my friends!
For more recipes that bring that same level of easy joy to your table, browse my full collection of delicious dessert recipes anytime!
PrintClassic Homemade Apple Pie From Scratch with Flaky Buttery Crust

Make the best homemade apple pie with this classic recipe. You get a flaky, buttery crust and a perfectly spiced filling using a mix of tart and sweet apples. This recipe delivers bakery-style results for your next holiday or family gathering.
- Prep Time: 45 min
- Cook Time: 65 min
- Total Time: 110 min
- Yield: 8 servings 1x
- Category: Dessert
- Method: Baking
- Cuisine: American
- Diet: Vegetarian
Ingredients
- 2 1/2 cups all-purpose flour
- 1 teaspoon salt
- 1 cup (2 sticks) unsalted butter, very cold and cut into cubes
- 1/2 cup ice water, plus more if needed
- 6–8 medium apples (mix of Granny Smith and Golden Delicious recommended)
- 3/4 cup granulated sugar
- 1/4 cup packed light brown sugar
- 1/4 cup all-purpose flour (for thickening)
- 1 teaspoon ground cinnamon
- 1/4 teaspoon ground nutmeg
- 1 tablespoon lemon juice
- 1 large egg, beaten (for egg wash)
- 1 tablespoon coarse sugar (for sprinkling)
Instructions
- Prepare the Flaky Pie Crust: In a large bowl, whisk together the 2 1/2 cups flour and salt. Cut in the cold butter using a pastry blender or your fingers until the mixture resembles coarse crumbs with some pea-sized pieces of butter remaining.
- Gradually add the ice water, one tablespoon at a time, mixing until the dough just comes together. Do not overmix. Divide the dough in half, flatten each half into a disk, wrap in plastic, and chill for at least 1 hour.
- Prepare the Spiced Apple Filling: Peel, core, and slice the apples about 1/4 inch thick. In a large bowl, toss the apple slices with the granulated sugar, brown sugar, 1/4 cup flour, cinnamon, nutmeg, and lemon juice until evenly coated.
- Assemble the Pie: Preheat your oven to 425 degrees Fahrenheit (220 degrees Celsius). On a lightly floured surface, roll out one disk of dough into a 12-inch circle. Carefully transfer the dough to a 9-inch pie plate. Trim the edges, leaving a 1-inch overhang.
- Pour the apple filling into the bottom crust, mounding the apples slightly in the center.
- Roll out the second dough disk for the top crust. Place it over the filling. Trim the top crust, leaving a 1-inch overhang. Crimp the edges of the top and bottom crusts together to seal. Cut several slits in the top crust to allow steam to escape.
- Brush the top crust lightly with the beaten egg wash and sprinkle with coarse sugar.
- Bake the Pie: Place the pie on a baking sheet to catch any drips. Bake at 425 degrees Fahrenheit for 15 minutes.
- Reduce the oven temperature to 375 degrees Fahrenheit (190 degrees Celsius). Continue baking for 40 to 50 minutes more, or until the crust is golden brown and the filling is bubbly. If the edges brown too quickly, cover them loosely with foil.
- Cool the Pie: Let the homemade apple pie cool on a wire rack for at least 3 hours before slicing. This allows the filling to set properly.
Notes
- For the flakiest crust, keep all your butter and water extremely cold.
- Use a mix of apples; tart apples like Granny Smith provide structure, while sweeter apples like Honeycrisp or Golden Delicious add flavor.
- To prevent a soggy bottom, place the pie on the lowest rack for the first 15 minutes of baking.
Nutrition
- Serving Size: 1 slice
- Calories: 420
- Sugar: 35
- Sodium: 300
- Fat: 25
- Saturated Fat: 15
- Unsaturated Fat: 10
- Trans Fat: 0
- Carbohydrates: 50
- Fiber: 3
- Protein: 4
- Cholesterol: 60