
If you’ve been searching high and low for a dessert that guarantees moistness without hours of fuss, stop scrolling right now! I’m Ava Sinclair, and my whole mission here at the kitchen table is finding seriously good food that’s genuinely doable, even after a long week. That’s why I’m introducing you to my very favorite easy holiday baking idea: the **red velvet poke cake**. It takes that gorgeous, deep color and rich flavor everyone loves but swaps the complicated layering for simple pokes that suck in all the creamy goodness. Trust me, this recipe is the perfect expression of taking something classic and making it absolutely foolproof for your next gathering. You can find more of my favorite simple sweets over at my dessert collection!
- Why This Moist Red Velvet Poke Cake Recipe Works
- Gathering Ingredients for Your Red Velvet Poke Cake with Cream Cheese Frosting
- Step-by-Step Instructions for the Poke Cake with Condensed Milk Soak
- Tips for the Best Red Velvet Poke Cake Experience
- Serving Suggestions for Your Festive Red Velvet Desserts
- Storage and Make-Ahead for Your Red Velvet Poke Cake
- Frequently Asked Questions About This Easy Red Velvet Poke Cake
- Nutritional Estimates for This Rich Velvet Dessert
- Share Your Thoughts on This Classic Red Velvet Cake with a Twist
Why This Moist Red Velvet Poke Cake Recipe Works
This recipe isn’t just tasty; it’s engineered for success! When you’re looking for a **moist red velvet poke cake recipe** that shows up perfectly for a party, this is it. It hits that sweet spot between indulgent flavor and incredibly simple execution. I use it often when I need a dependable, **creamy poke cake** for a crowd. For more genuinely simple ideas, check out my guide to easy weeknight dinners—believe it or not, baking can be just as simple!
Achieving Ultimate Moisture with the Soak
Here’s the absolute secret sauce that guarantees this isn’t just another dry red velvet dessert. We aren’t just splashing milk on top, no way! The **poke cake with condensed milk** soak, combined with the vanilla pudding layer, seeps deep into every crevice. As the cake cools slightly, those liquids settle right into every one of those holes you made. It keeps the crumb soft and velvety underneath all that topping. It’s truly the key to a **moist red velvet poke cake recipe** that stays dreamy even the next day.
Simple Steps for an Easy Red Velvet Poke Cake
I know you are busy, and so am I! That’s why we lean into the simplicity of a boxed cake mix. It’s perfectly fine when you’re aiming for an **easy red velvet poke cake** that still tastes fantastic. You get that classic, rich red velvet flavor base without having to measure all the cocoa, flour, and vinegar separately. Plus, we are using straightforward, easy-to-find ingredients for the filling, making this a truly quick red velvet dessert.
Gathering Ingredients for Your Red Velvet Poke Cake with Cream Cheese Frosting
Okay, gathering time! Since this is an incredibly layered dessert—we have the cake, the soak, the pudding, and the frosting—it helps to lay everything out before you start. This keeps the process rolling quickly and stops you from forgetting something vital. When I look at this list, I feel like I’m organizing for a party, which is exactly when I usually make this dreamy cake! Remember, for E-E-A-T, the better the quality of your mix and dairy, the better your final **red velvet poke cake with cream cheese frosting** will taste.
- 1 box red velvet cake mix (plus whatever ingredients the box calls for—usually eggs, oil, and water!)
- 1 (14 ounce) can sweetened condensed milk (don’t skip this, it’s crucial for the soak!)
- 1 package (3.4 oz) instant vanilla pudding mix
- 2 cups cold milk (make sure this is COLD for the pudding to set right!)
- 1 tub (8 oz) Cool Whip, thawed
- Your favorite cream cheese frosting ingredients (or grab a tub if you need to be super speedy!)
- Festive sprinkles, if you’re feeling fancy (and you should be!)
Ingredient Notes and Substitutions
Since we are relying on a mix here for an easy holiday baking idea, you have some flexibility. If you absolutely hate vanilla pudding, you could try mixing in a small amount of instant cheesecake pudding mix instead. However, if you want a true **poke cake from scratch**, feel free to use your favorite homemade red velvet recipe—just make sure it bakes up nice and sturdy in that 9×13 pan so it can hold all that wonderful soak!
Step-by-Step Instructions for the Poke Cake with Condensed Milk Soak
This is where the real magic happens, but don’t rush it! We’re layering moisture and flavor, and timing is everything, especially when dealing with a warm cake. We want everything to combine without turning the whole thing into soup. This recipe is fantastic because it doubles as a great make ahead potluck dessert, since chilling time is required anyway. Follow these steps, and you’ll have the best **red velvet poke cake**!
Baking and Poking the Red Velvet Cake
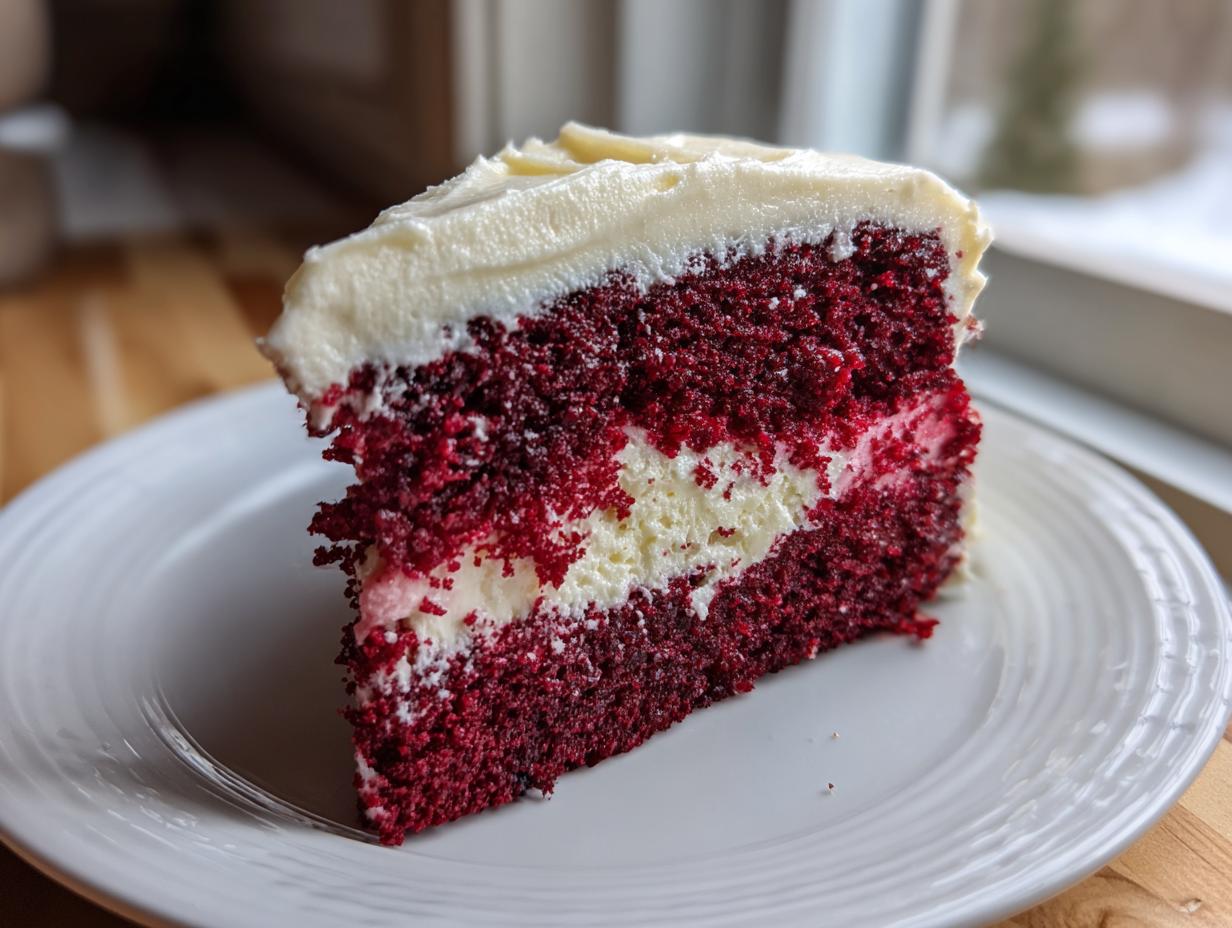
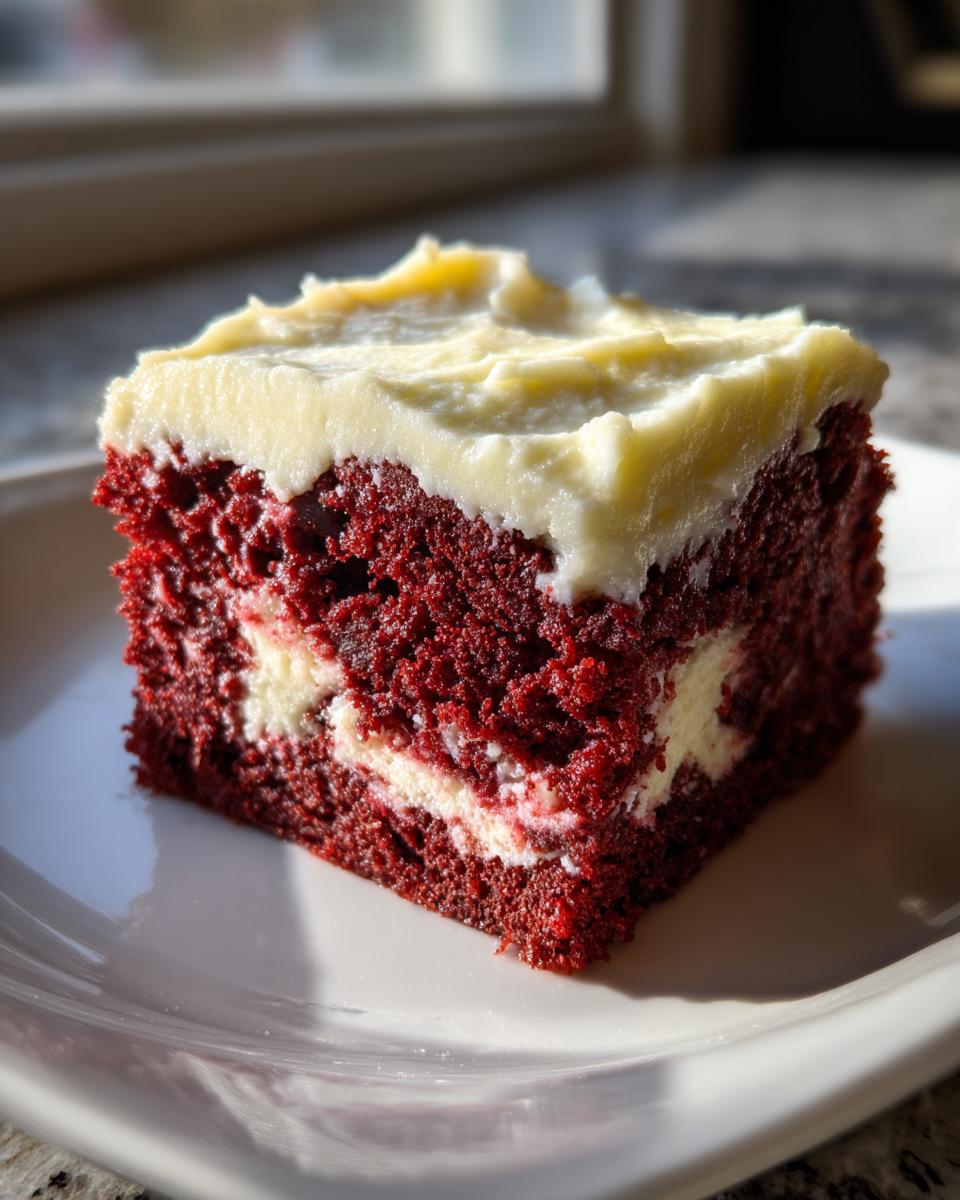
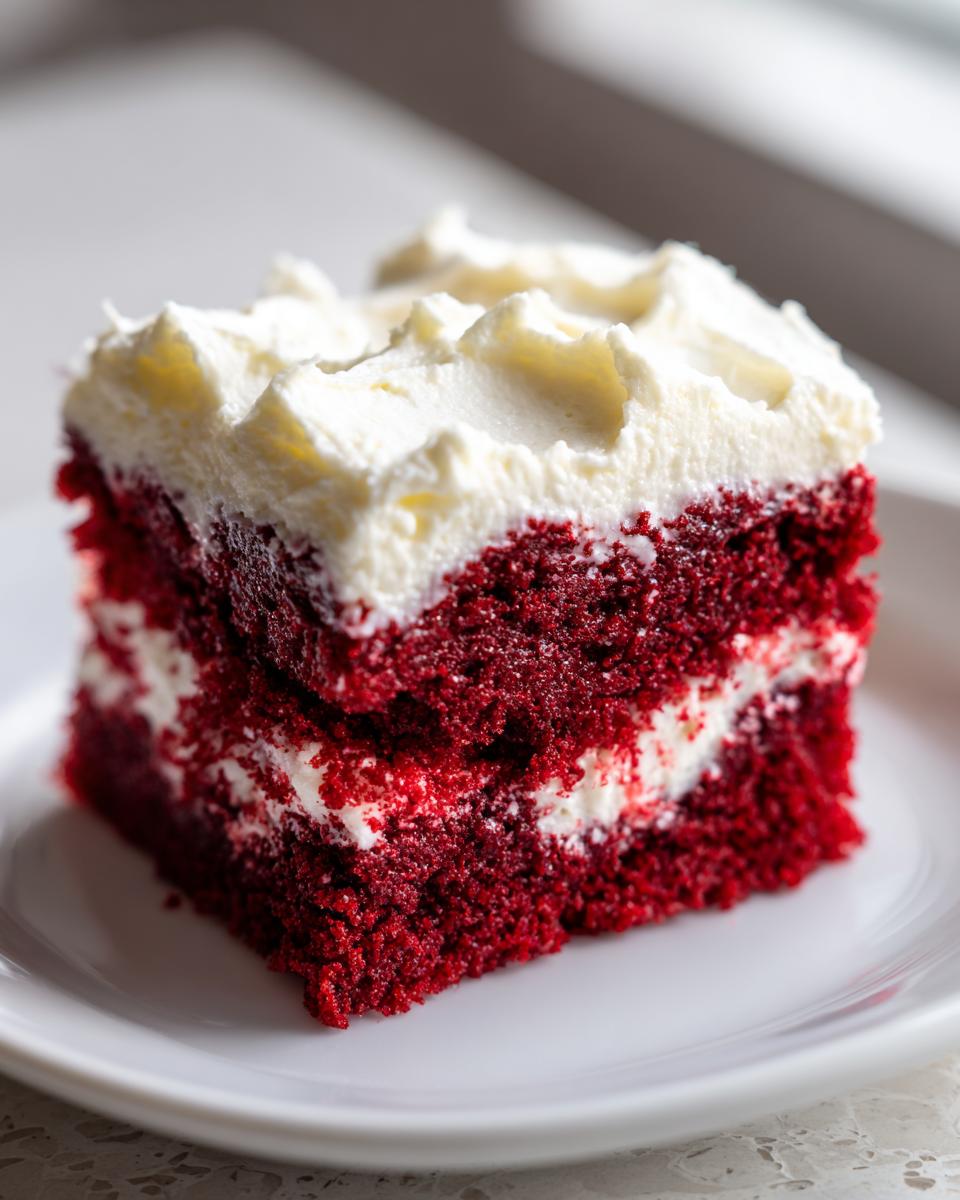
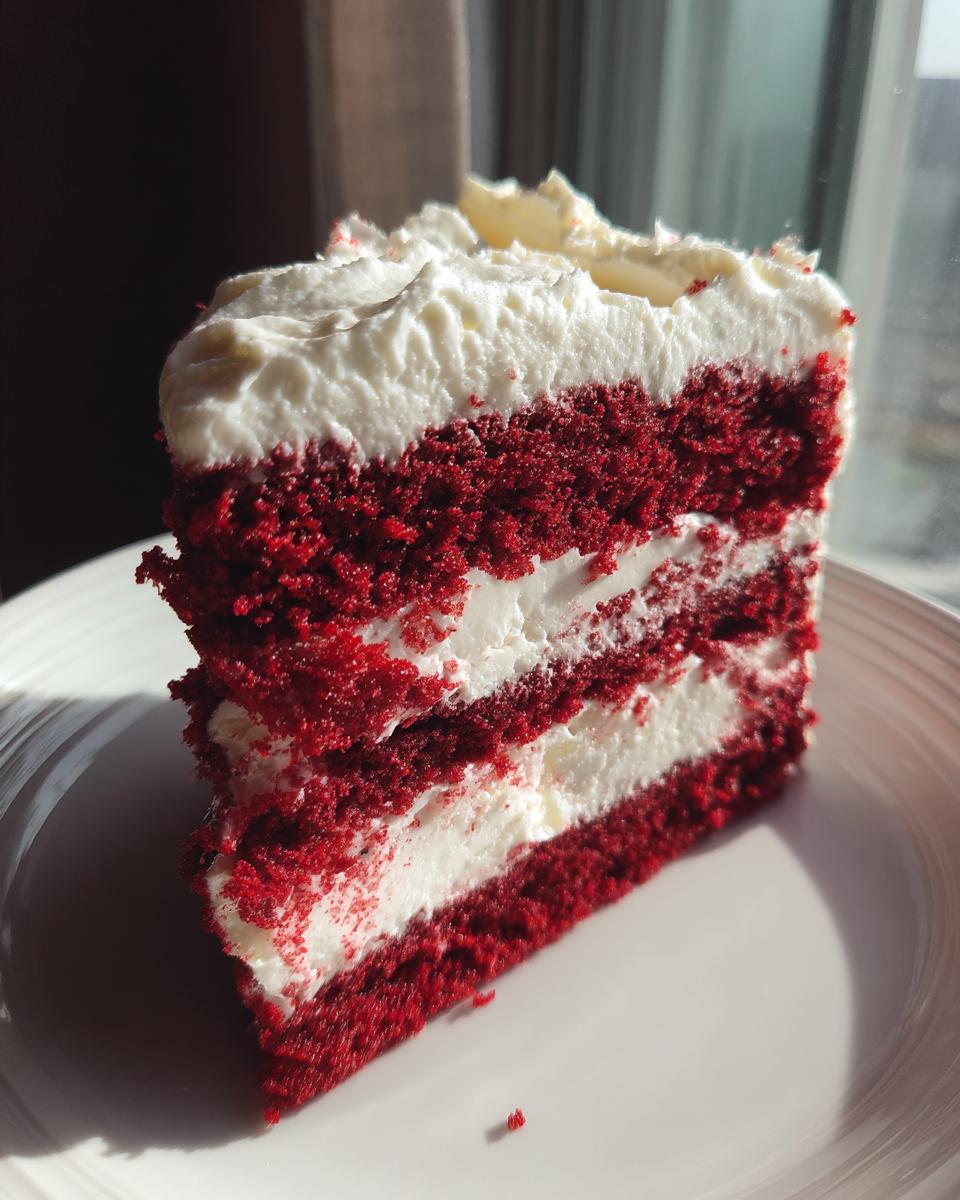
First thing, bake that red velvet cake mix according to the box instructions in your 9×13 pan. Once it comes out of the oven looking all gorgeous and red, you have to let it cool down for just about ten minutes. Patience! If you poke it immediately when it’s lava hot, the soak will just run straight through the bottom. Wait just until it’s warm to the touch. Then, grab a wooden spoon handle—that’s what I use—and firmly poke holes evenly across the entire surface. Don’t be shy; you need deep holes for that soak to really sink in and create that signature **moist red velvet poke cake** texture.
Creating the Pudding Filling and Topping
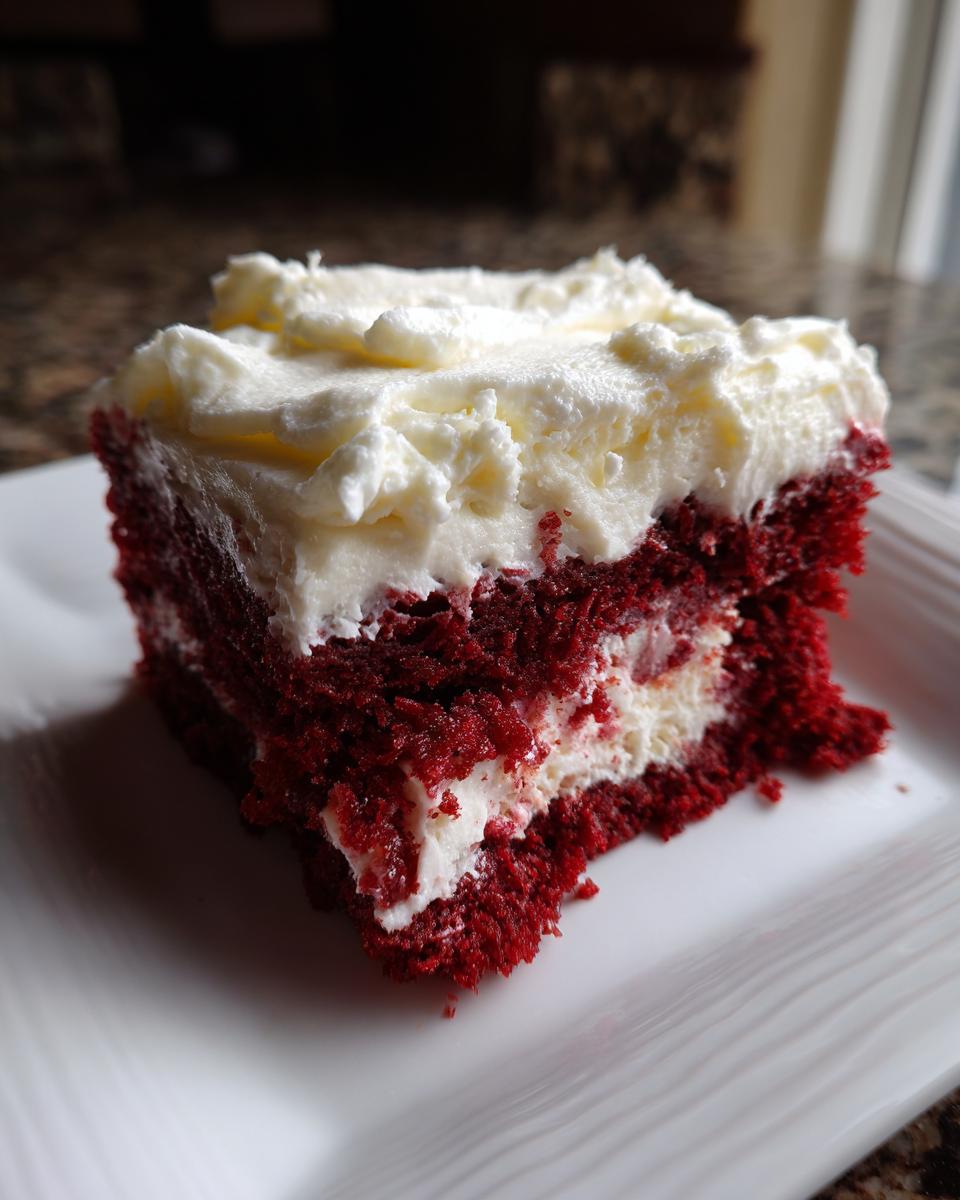
Once those holes are poked, grab your cold milk and the package of vanilla pudding mix. Whisk them together quickly until it’s smooth and starting to thicken up a bit—you don’t want it soup-thick yet. Now, drizzle that sweetened condensed milk slowly over the holes first. Let that soak in for a minute or two. Next, pour your pudding mixture evenly over the entire top, making sure to get it into those little crevices. Pop the whole thing into the fridge for at least 20 to 30 minutes. This lets the pudding firm up slightly inside the cake structure! After that chilling time, go ahead and spread that thawed Cool Whip across the top for that fluffy layer, followed by your choice of cream cheese frosting.
Tips for the Best Red Velvet Poke Cake Experience
I’ve made this **red velvet poke cake** too many times to count for family parties, and I’ve learned a few tricks to make sure it turns out perfect every single time. When dealing with liquids soaking into cake, texture is everything, right? We want moist, not mushy! Listen to me on these quick tips; they separate a good poke cake from a truly spectacular one.
Chilling Time: The Secret to a Creamy Poke Cake
This is the step where people always want to cheat because they are impatient—I get it! But you simply cannot rush the chill time. After you pour in the pudding mix, you need that mandatory 20 to 30 minutes in the fridge for the mixture to start setting up inside the cake structure. If you skip that, you’ll just end up with a soupy mess when you try to spread the Cool Whip on top, and it won’t be that wonderfully **creamy poke cake** we are aiming for. Then, after you frost it, let it chill for a full hour if you can stand it. This lets all those flavors—the velvet, the milk, the cream cheese—really marry together beautifully.
Serving Suggestions for Your Festive Red Velvet Desserts
Because this **red velvet poke cake** is so incredibly rich—we’re talking condensed milk, pudding, and cream cheese frosting rich—you want to pair it with side dishes that offer a little contrast. It’s definitely the star of the show when we talk about a **poke cake holiday dessert**!
I love serving it after something savory but bright, maybe a lemon herb chicken or a light ham. If you need a simple side that still feels festive, my Cranberry Orange Bread is fantastic; the citrus cuts through the richness perfectly. Honestly, this cake is so good, it only needs a cup of black coffee beside it to be complete. Just let this decadent treat shine!
Storage and Make-Ahead for Your Red Velvet Poke Cake
Oh, this cake holds up so beautifully, which is honestly one of my favorite things about it! Because of all that delicious moisture from the soak and the pudding layer, this is absolutely a fantastic make ahead potluck dessert. You absolutely must keep the finished poke cake refrigerated because of the pudding and dairy toppings. If you cover it tightly, it stays wonderfully fresh for three to four days. Seriously, sometimes I think the flavors just get deeper overnight! Just pull it out about 20 minutes before serving so the frosting softens up just a tiny bit.
Frequently Asked Questions About This Easy Red Velvet Poke Cake
It’s totally normal to have a few questions about making sure this **red velvet poke cake** turns out picture-perfect. I get asked all the time about substitutions or how to make sure it’s as luxurious as possible. Don’t worry, I’ve got the quick answers for you so you can get baking!
Can I make this red velvet poke cake from scratch?
Absolutely, you sweet thing! While this version relies on a box mix to keep things super speedy—hello, **easy red velvet poke cake**—you can totally use your favorite homemade recipe if you prefer baking from scratch. Just make sure you bake it in a 9×13 dish so it’s sturdy enough to handle all that soaking goodness we pour in there!
What are the best poke cake frosting ideas for this recipe?
The pairing I provided here—the creamy pudding layer followed by a layer of Cool Whip and then a generous spread of cream cheese frosting—is my absolute go-to for the best flavor! That combination gives you that classic red velvet tang. If you wanted something less rich but still festive, you could skip the cream cheese frosting and just use the pudding and a **fluffy red velvet cake** topping of stabilized whipped cream, maybe with some red sprinkles mixed in!
If you want to see some fun variations online, check out this video! It shows a different take on the toppings, which is always fun once you nail the basic recipe: Red Velvet Poke Cake Video.
Nutritional Estimates for This Rich Velvet Dessert
Look, I’m going to be totally honest with you—this **red velvet poke cake** tastes like pure indulgence, and that’s because it is! We’re talking condensed milk and cream cheese frosting here, so it’s not exactly a health food treat. These numbers are just my best guess based on a standard box mix and the toppings listed. Don’t stress over the exact grams; just enjoy every single decadent, moist bite!
- Serving Size: 1 slice
- Calories: 350
- Sugar: 45g
- Sodium: 320mg
- Fat: 16g
- Protein: 4g
Share Your Thoughts on This Classic Red Velvet Cake with a Twist
Whew! Now that you’ve got the instructions for this unbelievably moist **red velvet poke cake**, all that’s left is the fun part: eating it! I really, really hope this recipe becomes a staple for you, especially when you need a guaranteed hit at a party or holiday gathering. That classic flavor, but with that creamy, easy twist—it just can’t be beat.
I put my heart into developing recipes that are both simple and seriously delicious, and I’d love to hear how this one worked out in your kitchen. Did you try it with the full cream cheese frosting, or did you sneak in some extra sprinkles like I sometimes do?
Please, please leave a rating right here on the page! If you made any little twists of your own, I want to hear about them in the comments below. I always love seeing your creations, too, so snap a picture and tag me on social media. It genuinely makes my day to see you enjoying food made with real comfort and ease. If you want to know more about my mission to simplify cooking, you can always visit my About Page!
PrintUltimate Moist Red Velvet Poke Cake with Cream Cheese Frosting

Make this ultra-moist red velvet poke cake using a simple cake mix. Poking holes allows a sweet soak to seep in, and it finishes with a rich cream cheese frosting, making it a perfect, easy holiday dessert.
- Prep Time: 15 min
- Cook Time: 35 min
- Total Time: 1 hour 50 min
- Yield: 12 servings 1x
- Category: Dessert
- Method: Baking
- Cuisine: American
- Diet: Vegetarian
Ingredients
- 1 box red velvet cake mix (plus ingredients listed on the box)
- 1 (14 ounce) can sweetened condensed milk
- 1 package (3.4 oz) instant vanilla pudding mix
- 2 cups cold milk
- 1 tub (8 oz) Cool Whip, thawed
- Cream cheese frosting ingredients (for topping)
- Festive sprinkles (optional)
Instructions
- Prepare and bake the red velvet cake mix according to the package directions in a 9×13-inch pan.
- Let the cake cool for about 10 minutes after removing it from the oven.
- Use the handle of a wooden spoon or a large fork to poke holes evenly all over the warm cake surface.
- Pour the sweetened condensed milk slowly over the entire cake, allowing it to soak into the holes.
- In a separate bowl, whisk together the instant vanilla pudding mix and cold milk until the mixture is smooth and slightly thickened.
- Pour the pudding mixture evenly over the cake, ensuring some seeps into the poked holes.
- Refrigerate the cake for at least 20 to 30 minutes so the pudding sets inside the cake structure.
- Spread the thawed Cool Whip evenly over the top of the cake to create a fluffy layer.
- If using, top with cream cheese frosting and festive sprinkles.
- Chill the finished red velvet poke cake for at least 1 hour before slicing and serving for the best texture.
Notes
- For an extra rich flavor, substitute the pudding soak with a mixture of hot fudge and sweetened condensed milk.
- You can use a homemade red velvet cake recipe if you prefer to bake from scratch instead of using a mix.
- This cake is excellent for make-ahead potluck dessert planning as it tastes better after chilling.
Nutrition
- Serving Size: 1 slice
- Calories: 350
- Sugar: 45g
- Sodium: 320mg
- Fat: 16g
- Saturated Fat: 8g
- Unsaturated Fat: 8g
- Trans Fat: 0g
- Carbohydrates: 50g
- Fiber: 1g
- Protein: 4g
- Cholesterol: 25mg