
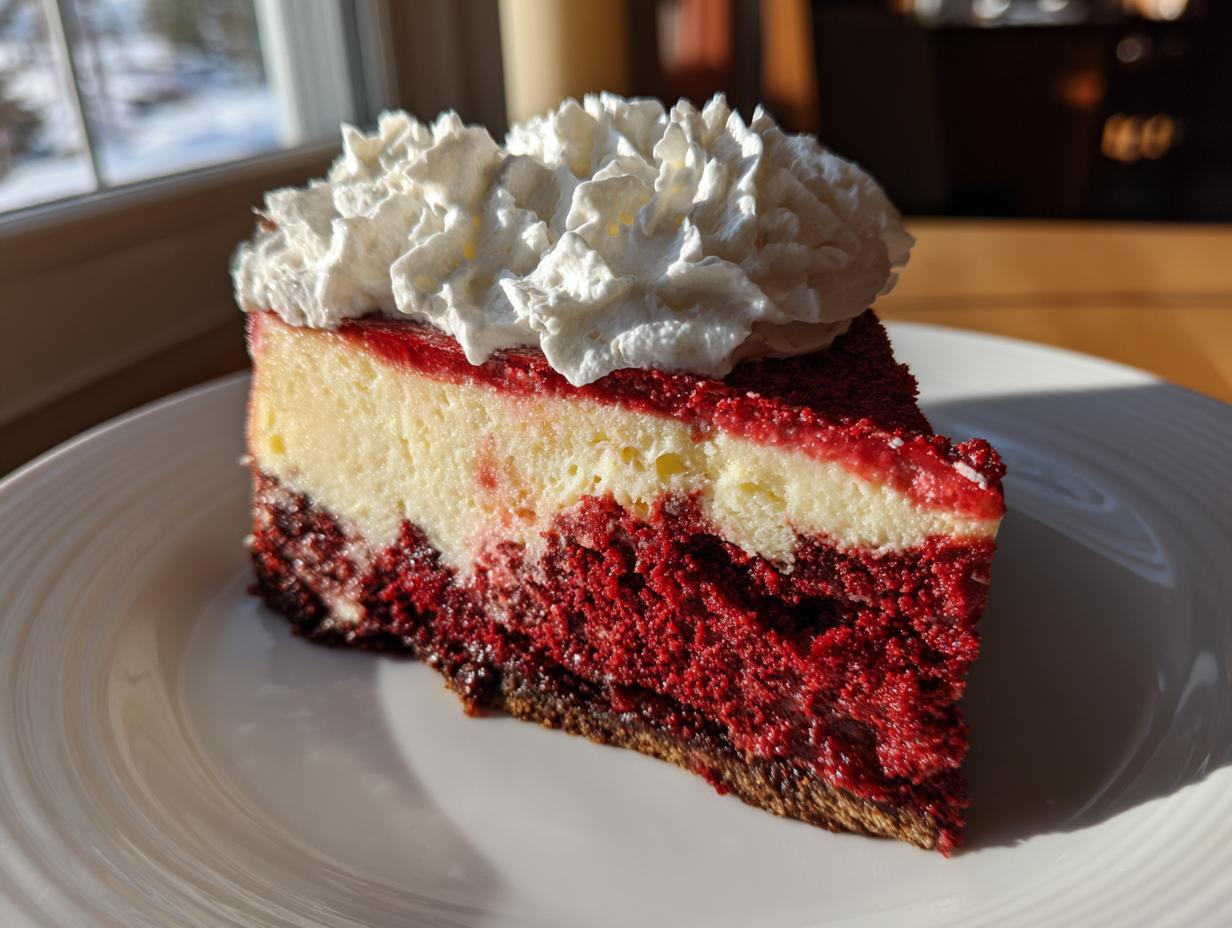
When I think about holidays or those birthdays that just need a little extra sparkle, I know exactly what needs to be on the table: a showstopper dessert. You know the kind—the one that disappears first, the one people take pictures of before they even take a bite? For me, that’s the magnificent **red velvet cheesecake**. It combines two of the best things in the world! Now, when I started Completely Yummy, it was because I needed those showstoppers to be genuinely doable for a busy life. Trust me, you don’t need culinary school to achieve bakery-quality results here. This recipe strips away all the fuss, giving you all that rich, creamy decadence without the stress.
We’re going to nail that beautiful swirl and that unforgettable flavor profile, making this the most irresistible cheesecake recipe you try all year. You can find more of my favorite easy-to-make treats right here: my collection of delicious dessert recipes.
- Why This Red Velvet Cheesecake is Your Next Showstopper Dessert Recipe
- Ingredients for Your Creamy Red Velvet Cheesecake
- Step-by-Step Instructions for an Easy Red Velvet Cheesecake Recipe
- Tips for a Perfect Velvety Smooth Cheesecake Filling
- Making the Whipped Topping for Your Layered Red Velvet Cheesecake
- Serving and Storing Your Festive Red Velvet Treats
- Frequently Asked Questions About Making Red Velvet Cheesecake
- Estimated Nutritional Data for This Ultimate Red Velvet Dessert
- Share Your Cheesecake Dessert for Parties Creations
Why This Red Velvet Cheesecake is Your Next Showstopper Dessert Recipe
If you’re looking for a true **Showstopper Dessert Recipe**, this is it, hands down. What makes this version so successful is how we manage to layer intense flavor with an unbelievably plush texture. It’s rich—unapologetically so—but it’s never heavy or grainy. That’s the goal: that perfect **Velvety Smooth Cheesecake Filling** that melts right in your mouth. It looks complex, like something you’d buy at a fancy bakery, but honestly, I’ve simplified the steps so you don’t have to stress.
Achieving That Velvety Smooth Cheesecake Filling
My biggest secret for keeping things smooth? Temperature! Never, ever try to mix cold cream cheese. Seriously, pull it out at least an hour ahead of time. When the cream cheese and the eggs are at room temperature, they combine perfectly without any lumps. That one simple step guarantees you get that beautiful **velvety smooth cheesecake filling** every single time. It’s non-negotiable in my kitchen!
The Perfect Red Velvet Cheesecake with Oreo Crust
We aren’t stopping at just the cake and the cheesecake layers; we are going all out with the base! I love using a crunchy Oreo crust here. It adds a wonderful textural contrast to all that creamy softness above it. That slightly salty-chocolatey crunch against the smooth layers elevates this from just a great dessert to an **irresistible cheesecake recipe**!
If you’re enjoying these insider tips, you’ll want to check out how I make my chewy bars next: Snickerdoodle Blondies.
Ingredients for Your Creamy Red Velvet Cheesecake
Okay, now that you know this **red velvet cheesecake** is worth the effort, let’s talk about what you need. When I say quality matters for an **Irresistible Cheesecake Recipe**, I mean it! Don’t swap out that sour cream for yogurt, I’m begging you. We want that classic tangy richness that only comes from the real deal. Having everything measured out and ready to go—what I call ‘mise en place’—makes the layering process so much easier. You can find my favorite simple muffin recipe here if you need a quick bake for later: Cream Cheese Muffins.
Here’s what you need, broken down by section so you don’t mix up the layers:
For the Oreo Crust:
- 1 1/2 cups crushed Oreo cookies (make sure you crush them well, crumbs, not chunks!)
- 6 tablespoons unsalted butter, melted
For the Red Velvet Batter (This is our vibrant accent layer!):
- 1 teaspoon white vinegar
- 1 teaspoon vanilla extract
- 1/4 cup all-purpose flour
- 1/4 cup granulated sugar
- 1/2 teaspoon cocoa powder
- 1/4 teaspoon salt
- 1/2 cup buttermilk
- 1/4 cup vegetable oil
- 1 large egg
- 1 teaspoon red food coloring (Use good quality gel coloring for the best color payoff!)
For the Creamy Cheesecake Filling (The absolute star!):
- 16 ounces cream cheese, softened (remember the room temp rule!)
- 1 cup granulated sugar
- 1/4 cup sour cream
- 1 teaspoon vanilla extract
- 3 large eggs
For the Whipped Topping:
- 1 cup heavy whipping cream
- 1/4 cup powdered sugar
Remember, having those separate measurements for the red velvet batter ingredients—especially the vinegar and buttermilk—is crucial because they react with the cocoa powder to give you that authentic flavor foundation. It’s these little details that make a huge difference across the finished layers.
Step-by-Step Instructions for an Easy Red Velvet Cheesecake Recipe
Okay, deep breath! Making a stunning **red velvet cheesecake** doesn’t have to feel like a marathon. We’re going to tackle this in manageable chunks. Remember, the secret to a truly **easy Red Velvet Cheesecake Recipe** is organization! Before you start mixing anything, make sure that 9-inch springform pan is ready to roll. I’ve linked my favorite cookie recipe here just in case you need a quick, distracting bake while things are in the oven: Brown Butter Chocolate Chip Cookies.
Preparing the Crust and Red Velvet Batter
First things first: grab your oven and crank it up to 350 degrees Fahrenheit. Mix your crushed Oreos with the melted butter until it looks like damp sand. Press that firmly into the bottom of your springform pan—really pack it in there so it holds together! Bake that crust for just 10 minutes, then set it aside to cool a little. While that’s happening, tackle the red velvet batter. In a bowl, whisk your dry stuff (flour, sugar, salt, cocoa). In *another* bowl, combine the buttermilk, oil, egg, vanilla, and that essential vinegar. Add the wet to the dry and mix only until you see no streaks of flour remaining. Don’t overmix! Stir in the red food coloring until you get that perfect velvety hue, then set that bowl aside. We aren’t using that until later!
Creating the Swirl and Baking the Red Velvet Cheesecake
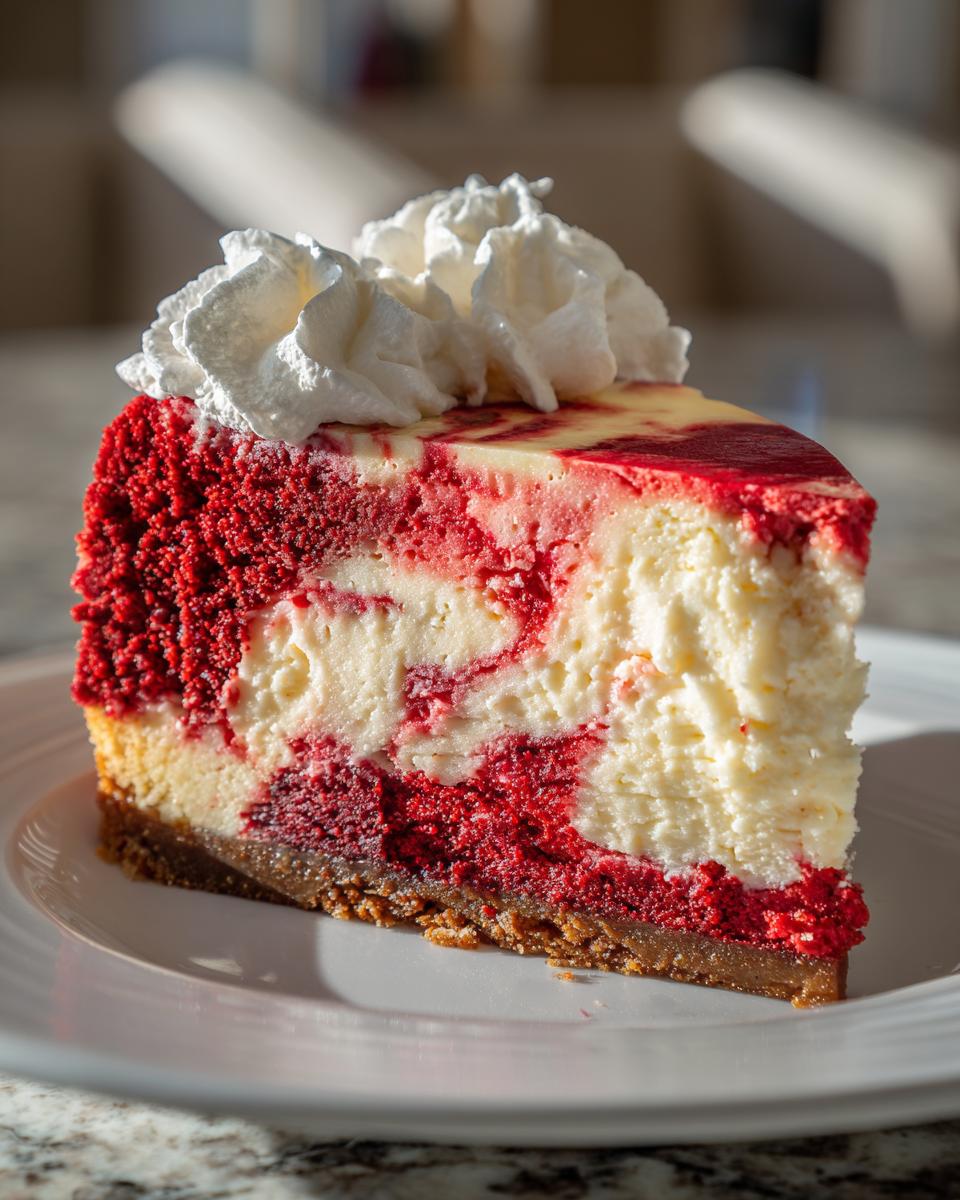
Now for the fun part, the assembly! Pour half of the lovely, smooth cheesecake filling right over that cooled Oreo crust. Then, gently spoon dollops of that bright red velvet batter randomly over the top. Now, pour the remaining cheesecake filling over everything. See those colors? Time to swirl! Use a knife or a wooden skewer, but keep your movements gentle, swirling it just a few times to create that marbled look. Do not get aggressive here, or you’ll just mix it all into pink sludge. The water bath is critical for this **Decadent Cheesecake Dessert**—wrap your pan tightly in heavy foil, place it in a larger roasting pan, and add hot water until it comes halfway up the sides. Bake for about 60 to 75 minutes. You want the edges set, but the very center should still have a tiny bit of wobble when you nudge the pan gently. That wobble means moisture!
Tips for a Perfect Velvety Smooth Cheesecake Filling
Listen, I know cheesecake baking can look intimidating, but most of those scary stories you hear about cracking surfaces are just due to improper temperature control. If you want that heavenly **velvety smooth cheesecake filling**, you absolutely must heed my grandmother’s wisdom! My family notes always stressed that the cream cheese and eggs must be at room temperature. If they are cold, you’re beating air into solid lumps, and that leads to cracks later, I promise.
Secondly, and this is huge for this **Decadent Cheesecake Dessert**: don’t skip that water bath! The foil wrapping and the hot water create a moist, warm environment in the oven. This gentle heat cooks the eggs slowly and evenly, which is the secret sauce to preventing cracks and ensuring that rich, dense, yet beautifully creamy texture we are chasing. If you skip it, you’re rolling the dice!
If you need another reliably smooth, comforting classic, you have to try my Best Apple Crumble Recipe next!
Making the Whipped Topping for Your Layered Red Velvet Cheesecake
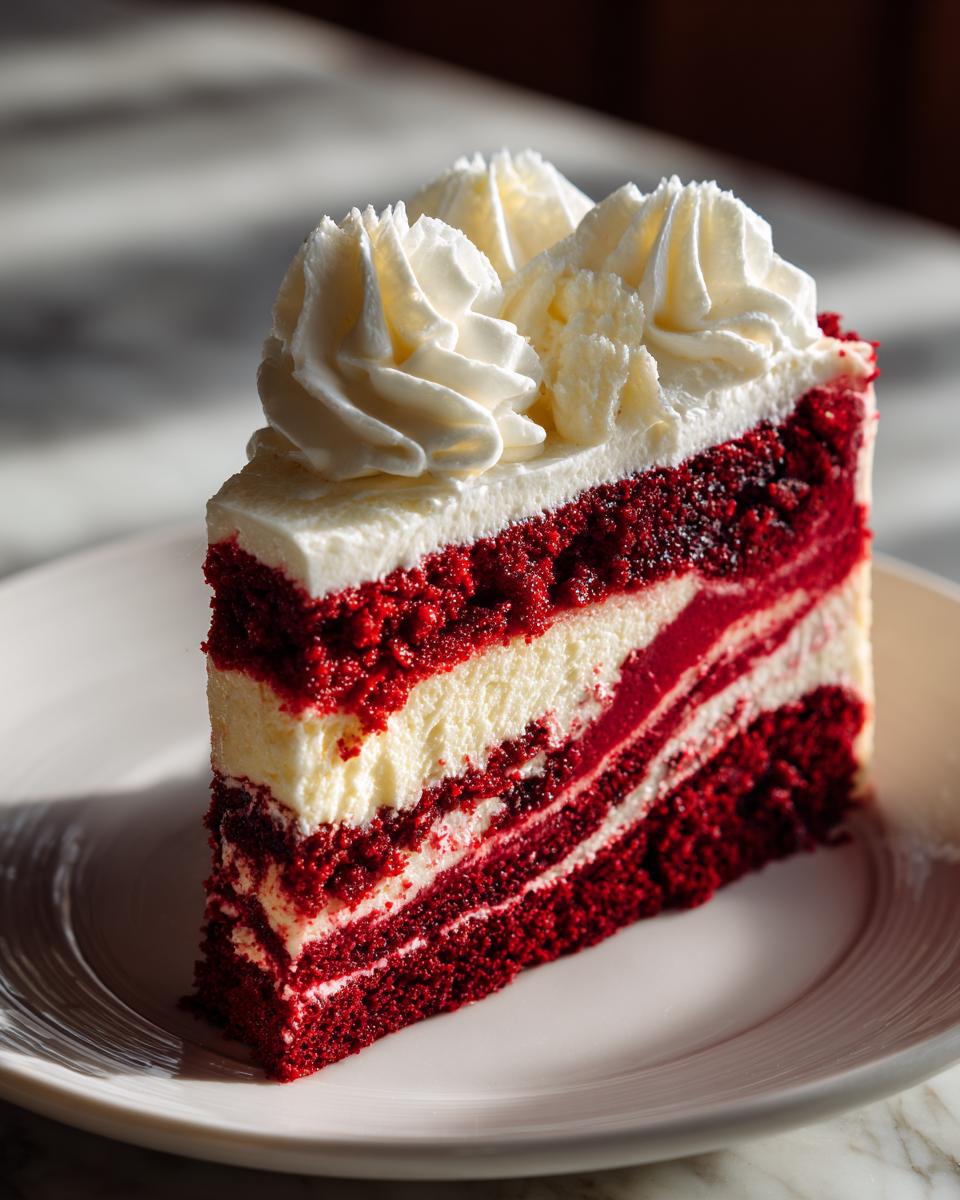
After all that work waiting for the cheesecake to chill—which is honestly the hardest part, because I want to eat this **Layered Red Velvet Cheesecake** immediately—we finally get to the beautiful, light finish! The topping on this dessert needs to be simple and cloud-like to balance out the richness of the cheesecake and the slight tang from the red velvet layer. We aren’t using heavy, overly sweet cream cheese frosting here; we want delicate, pillowy whipped cream.
Making this topping is super fast, but you need everything to be cold. Like, refrigerator-cold. If you want to see my guide on making robust vanilla frosting for other bakes, you can check out the recipe here: Vanilla Buttercream Frosting Recipe. But for this cake, we keep it light.
Take your cold heavy whipping cream and the powdered sugar and pop them into your mixer bowl. Start slow so the sugar doesn’t powderize the entire kitchen (oops, been there!). Once it starts to thicken, you can increase the speed. Beat it until you can pull the whisk attachment out and the peaks stand up straight and hold their shape—that’s stiff peaks, my friend!
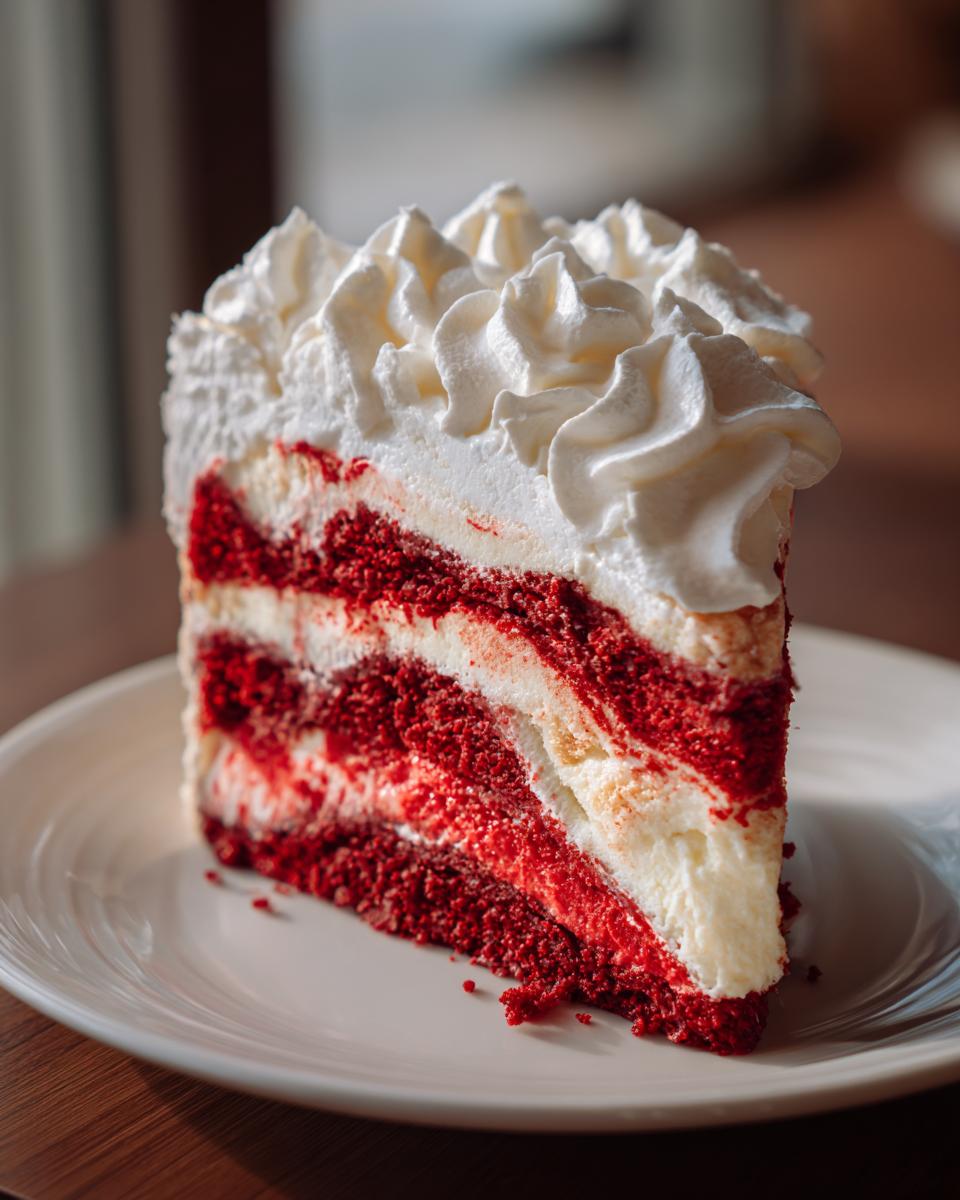
You just gently spread this glorious mixture over the top of your fully chilled **red velvet cheesecake**. If you’re feeling fancy because it’s a party, you can pipe it on with a star tip. If you’re just like me on a Tuesday night, a smooth swipe with an offset spatula does the trick just fine. It’s decadent either way!
Serving and Storing Your Festive Red Velvet Treats
We are so close now! I know, I know, you want to slice into this masterpiece right away, but I have to warn you: patience is the final, crucial ingredient for any **Best Homemade Cheesecake**. If you try to rush it, it will weep, slump, and generally look sad. We put in all this work to make it the perfect **showstopper dessert recipe**; let’s not ruin the payoff!
The **red velvet cheesecake** must chill for a minimum of six hours in the refrigerator, but honestly, overnight is what I recommend every time. Chilling allows the cheesecake filling to fully set up around those layers and lets the Oreo crust firm up beautifully against the moisture. If you try to rush it, you’ll end up with soupier cheesecake.
To serve this gorgeous **Festive Red Velvet Treat**, I suggest getting it out of the fridge about 20 minutes before slicing. A very hot, dry knife works wonders for clean cuts! Wipe the knife clean between every single slice for those perfect edges. If slicing feels impossible even after tempering, you can gently run a thin serrated knife dipped in hot water around the inner edge of the springform pan before releasing the sides.
What should you serve it with? Since this is so rich, I love keeping the sides simple. A piping hot cup of dark roast coffee cuts through the richness beautifully. If you want a drizzle, something slightly bitter works best—maybe a simple dark chocolate sauce. If you’re making this ahead of time for a party, it keeps wonderfully wrapped tightly in the fridge for up to four days. If you have leftovers (which is doubtful!), you can freeze it too. I often wrap small slices individually to save for a late-night treat—maybe pair it with a slice of my Chocolate Banana Bread later in the week!
Frequently Asked Questions About Making Red Velvet Cheesecake
We’ve covered a lot of ground to make this happen, but whenever people tackle a big bake like this **red velvet cheesecake**, a few things always pop up! I want to make sure you feel completely confident tackling this **Ultimate Red Velvet Dessert**. Here are the questions I get asked most often about achieving that perfect finish.
Can I skip the water bath when making this Best Homemade Cheesecake?
Oh, this is the million-dollar question, isn’t it? Look, you *can*, but why would you want to risk it on such a showstopper? The water bath is the secret handshake to getting that truly **velvety smooth cheesecake filling** without turning the top into cracked, dry wreckage. Without it, the hot oven air cooks the outside edges way faster than the middle, causing it to contract and tear. If you’re aiming for the **Best Homemade Cheesecake**, wrap that pan up tight, use the hot water bath, and let the moisture do the magic. It’s worth those extra five minutes of setup, trust me!
How do I get the brightest red color in my Red Velvet Cake and Cheesecake Fusion?
You want that deep, dramatic red! The little bit of cocoa powder we use tends to mute the color slightly, so you need to compensate. My best advice for this **Red Velvet Cake and Cheesecake Fusion** is to use a good quality gel food coloring rather than the liquid drops you find in the grocery store. Gel coloring is much more concentrated, so you get intense color with less liquid added to your batter, which keeps the texture perfect. When you mix in that teaspoon, keep adding tiny increments until you hit that gorgeous jewel tone you see in the pictures. Don’t be shy, but do be patient!

If you’re looking for another classic that needs just as much care in the kitchen, check out my foolproof recipe for Carrot Cake next!
Estimated Nutritional Data for This Ultimate Red Velvet Dessert
Alright, let’s talk fuel! While this **Ultimate Red Velvet Dessert** is pure indulgence—and frankly, that’s why we make it—I know some of you like to know the details. Here is the breakdown based on my calculations for one slice. Remember, since we are baking from scratch, these numbers are estimates and can shift a bit depending on the exact brand of cream cheese or those lovely full-fat Oreos you chose!
- Serving Size: 1 slice
- Calories: 450
- Sugar: 35g
- Fat: 30g
- Protein: 7g
It’s rich, no doubt about it, but every bite is worth it! If you want to see a dessert that is lighter but just as satisfying, check out my recipe for an Easy Ice Cream Pie.
Share Your Cheesecake Dessert for Parties Creations
Well, we made it! You’ve successfully navigated the intricacies of swirling, water baths, and the long chill time required for the **Best Homemade Cheesecake**. Now for the best part: seeing what you created! I am so excited for you to serve up this magnificent **Cheesecake Dessert for Parties** at your next gathering.
My whole mission here at Completely Yummy is to simplify the joy of home baking, and nothing makes me happier than hearing from you about your successes. Did you get that perfect, wobble-free slice? Did the Oreo crust hold up beautifully? Please, please tell me everything!
When you snap a picture of your **Layered Red Velvet Cheesecake**, tag me on social media! I absolutely love seeing these beauties popping up in feeds. Seeing your festive results is what makes all the testing and tweaking worth it for me.
If you ran into a hitch or have a clever little variation you tried—maybe you topped yours with chocolate shavings instead of whipped cream—share that feedback too! Drop a comment below the recipe card. If you have any questions about technique or need someone to troubleshoot a small issue, hop over to my contact page here: contact me. I read every single one!
And hey, if you loved this recipe and want to see what others are saying about this incredible **red velvet cheesecake**, you can check out others who’ve tried this amazing dessert over at Meal Lads. Happy baking, and I can’t wait to see your creations!
PrintShowstopper Red Velvet Cheesecake with Creamy Swirl
Make this rich, creamy Red Velvet Cheesecake that features a velvety red velvet base and a smooth cheesecake layer. This recipe is simple to follow and creates a stunning dessert perfect for holidays or special gatherings.
- Prep Time: 30 min
- Cook Time: 75 min
- Total Time: 8 hours 45 min
- Yield: 12 servings 1x
- Category: Dessert
- Method: Baking
- Cuisine: American
- Diet: Vegetarian
Ingredients
- 1 1/2 cups crushed Oreo cookies (for crust)
- 6 tablespoons unsalted butter, melted (for crust)
- 1 1/2 teaspoons white vinegar (for cheesecake)
- 1 teaspoon vanilla extract (for cheesecake)
- 1/4 cup all-purpose flour (for cheesecake)
- 1/4 cup granulated sugar (for cheesecake)
- 1/2 teaspoon cocoa powder (for cheesecake)
- 1/4 teaspoon salt (for cheesecake)
- 1/2 cup buttermilk (for cheesecake)
- 1/4 cup vegetable oil (for cheesecake)
- 1 large egg (for cheesecake)
- 1 teaspoon red food coloring (for cheesecake)
- 1 teaspoon white vinegar (for red velvet layer)
- 1 teaspoon vanilla extract (for red velvet layer)
- 1/2 cup all-purpose flour (for red velvet layer)
- 1/2 cup granulated sugar (for red velvet layer)
- 1/2 teaspoon cocoa powder (for red velvet layer)
- 1/4 teaspoon salt (for red velvet layer)
- 1/2 cup buttermilk (for red velvet layer)
- 1/4 cup vegetable oil (for red velvet layer)
- 1 large egg (for red velvet layer)
- 1 teaspoon red food coloring (for red velvet layer)
- 16 ounces cream cheese, softened (for filling)
- 1 cup granulated sugar (for filling)
- 1/4 cup sour cream (for filling)
- 1 teaspoon vanilla extract (for filling)
- 3 large eggs (for filling)
- 1 cup heavy whipping cream (for topping)
- 1/4 cup powdered sugar (for topping)
Instructions
- Prepare the Oreo Crust: Preheat your oven to 350 degrees Fahrenheit. Mix the crushed Oreos and melted butter. Press the mixture firmly into the bottom of a 9-inch springform pan. Bake for 10 minutes. Let the crust cool while you prepare the batters.
- Make the Red Velvet Batter: In a medium bowl, whisk together the flour, sugar, cocoa powder, and salt for the red velvet layer. In a separate bowl, combine the buttermilk, oil, egg, vanilla extract, and vinegar. Add the wet ingredients to the dry ingredients and mix until just combined. Stir in the red food coloring until the color is uniform. Set aside.
- Make the Cheesecake Filling: In a large bowl, beat the softened cream cheese, sugar, sour cream, and vanilla extract until smooth. Beat in the three large eggs one at a time, mixing just until incorporated after each addition. Do not overmix the filling.
- Assemble the Cheesecake: Pour half of the cheesecake filling over the cooled Oreo crust. Gently spoon dollops of the red velvet batter over the cheesecake layer. Pour the remaining cheesecake filling over the red velvet batter. Use a knife or skewer to gently swirl the layers together to create a marbled effect.
- Bake: Wrap the outside of the springform pan tightly in heavy-duty aluminum foil. Place the pan in a larger roasting pan. Carefully pour hot water into the roasting pan until it reaches halfway up the sides of the springform pan (this is a water bath). Bake for 60 to 75 minutes, or until the edges are set but the center still has a slight jiggle.
- Cool: Turn off the oven, crack the door open slightly, and let the cheesecake cool inside the oven for 1 hour. Remove the cheesecake from the water bath and let it cool completely on a wire rack. Chill in the refrigerator for at least 6 hours, or preferably overnight.
- Prepare the Topping: Before serving, beat the heavy whipping cream and powdered sugar until stiff peaks form. Spread or pipe the whipped cream over the chilled cheesecake. Slice and serve this decadent cheesecake dessert.
Notes
- For the creamiest texture, ensure your cream cheese and eggs are at room temperature before mixing the filling.
- If you skip the water bath, you risk cracks on the surface of your cheesecake.
- This recipe works well as a holiday cheesecake idea when topped with white chocolate shavings or festive sprinkles.
Nutrition
- Serving Size: 1 slice
- Calories: 450
- Sugar: 35g
- Sodium: 300mg
- Fat: 30g
- Saturated Fat: 18g
- Unsaturated Fat: 12g
- Trans Fat: 0.5g
- Carbohydrates: 40g
- Fiber: 1g
- Protein: 7g
- Cholesterol: 120mg