
If you’ve been scrolling endlessly, dreaming of that perfect, shatteringly crisp crust and that soft, airy interior you only find at the fancy bakeries, stop scrolling right now. Seriously! Baking truly wonderful bakery style bread at home used to feel impossible, requiring tricky folding or hours of kneading. But when I was trying to reclaim those slow, comforting kitchen rituals while balancing my busy marketing schedule, I simplified everything. This is the easiest, most reliable, no-knead method for achieving genuine artisan bread using just a few simple ingredients. We use the Dutch oven trick, and trust me, it turns basic flour and water into gold!
- Why This No Knead Artisan Bread Recipe Works for Beginners
- Gathering Your Simple Ingredients for Artisan Bread
- Step-by-Step Instructions for Your No Knead Artisan Bread Recipe
- Tips for Success with Your Crusty Homemade Bread
- Storage and Reheating Instructions for Artisan Bread
- Serving Suggestions for Your Rustic Artisan Loaf
- Frequently Asked Questions About Yeast Bread Easy Baking
- Estimated Nutritional Data for This Artisan Bread
- Share Your Bakery Style Bread at Home Creations
Why This No Knead Artisan Bread Recipe Works for Beginners
I get it—when you’re starting out, the term “artisan bread” sounds intimidating. But that’s why I stripped this process down to the bare, simple essentials. This is truly an easy artisan bread because we skip the hard part: the kneading! My goal, always, is to make sure you get seriously good food without a ton of fuss. This reliable method takes complex techniques I learned and boils them down so you get that gorgeous, rustic loaf every single time. If you’re looking for fantastic beginner bread recipes, you’ve found the perfect place to start!
The Magic of Long, Slow Fermentation
Because we aren’t physically doing the work of kneading, we let time do the heavy lifting. That 12 to 18-hour rest period you see in the instructions? That’s where the flavor builds up, and the gluten network develops all on its own. You just cover it and walk away! It sounds wild, but this long, slow fermentation is the secret to developing deep, tangy bread flavor in your **artisan bread** without breaking a sweat.
Achieving the Perfect Crust with Dutch Oven Bread Baking
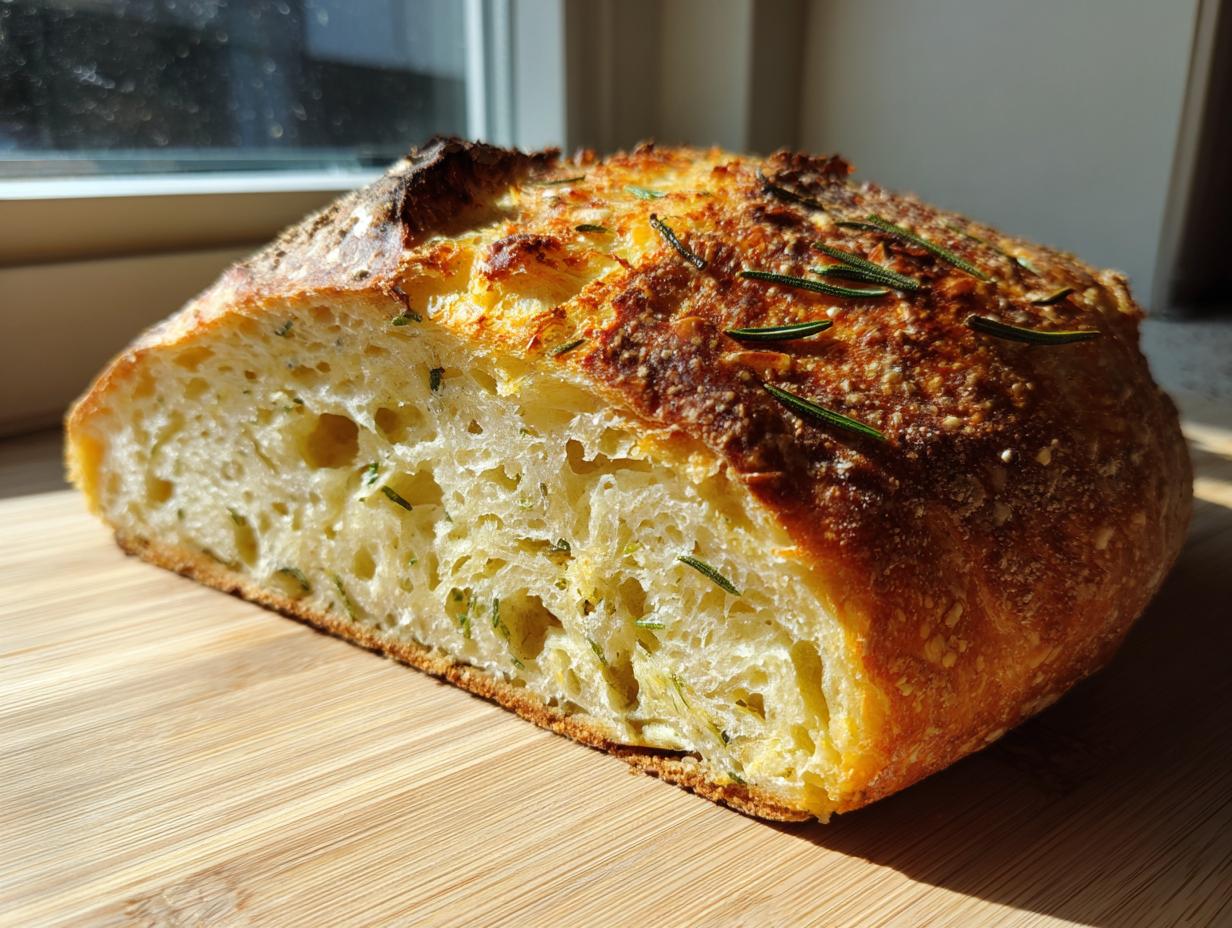
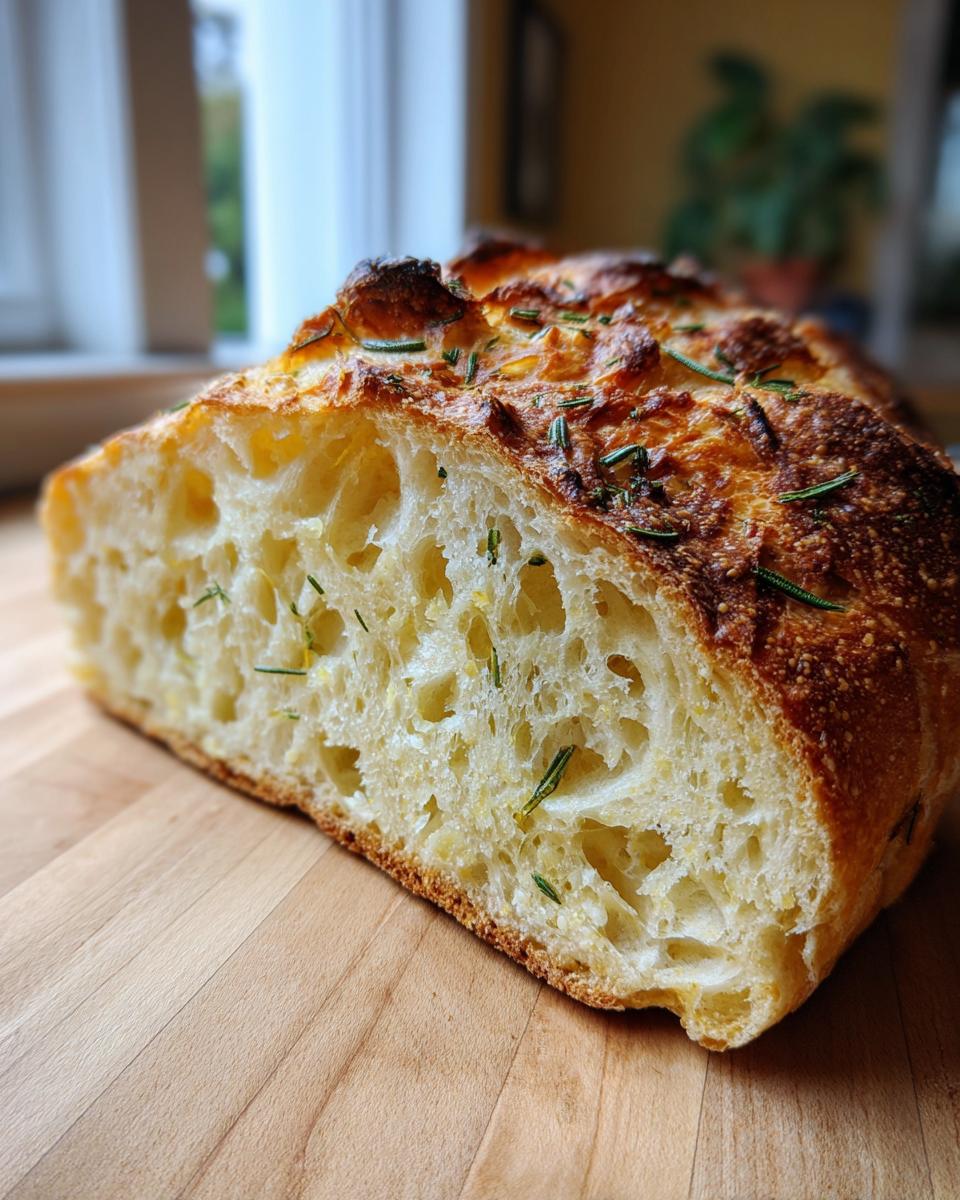
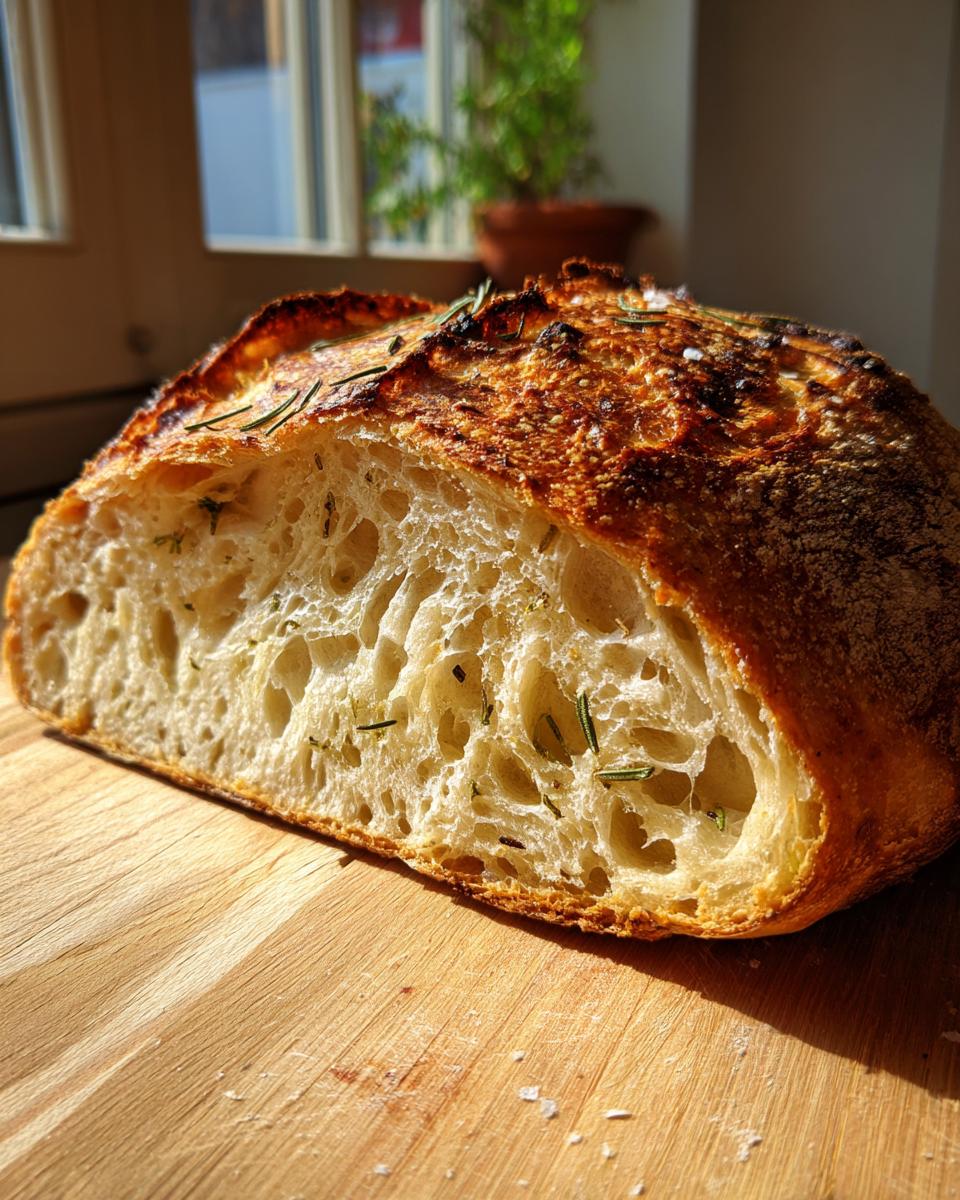
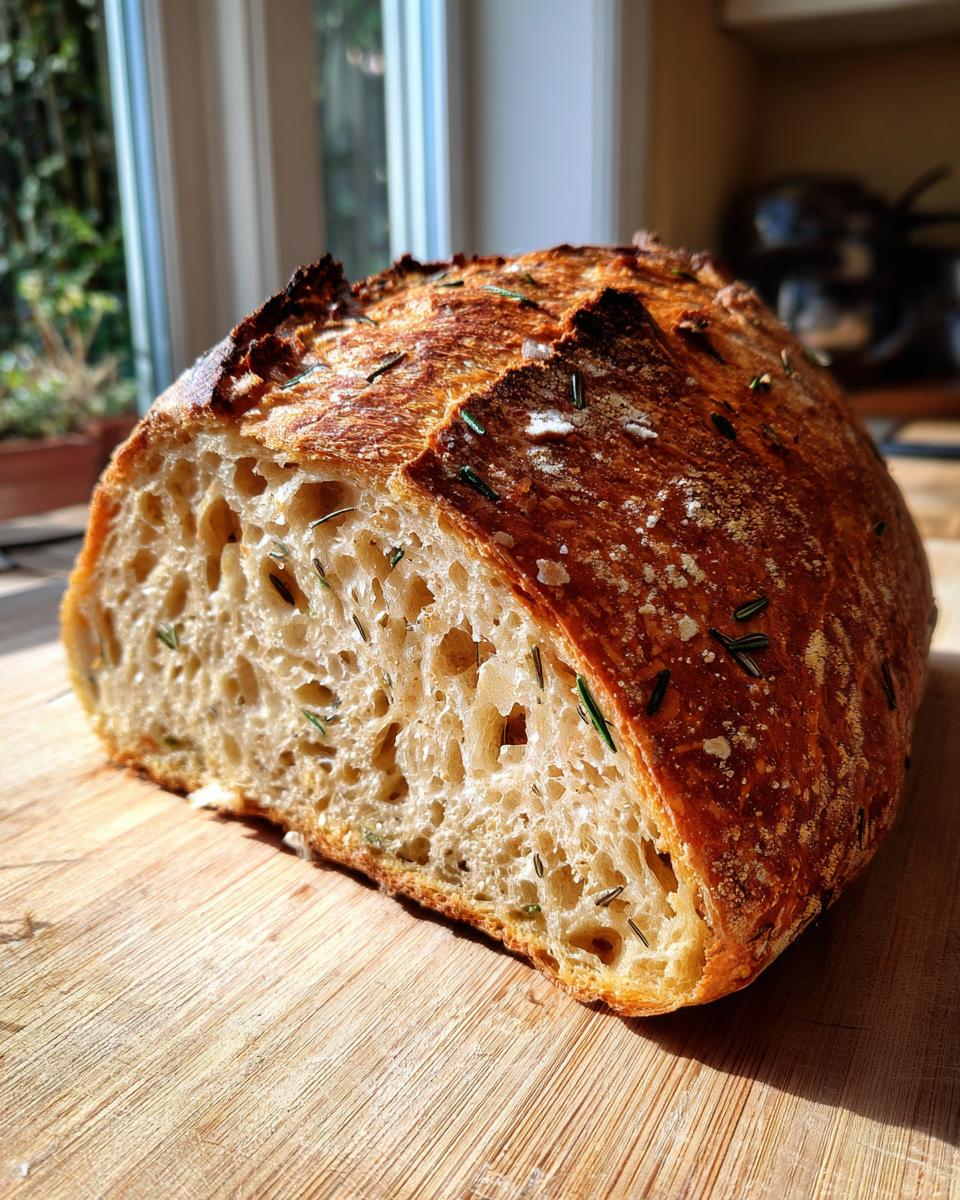
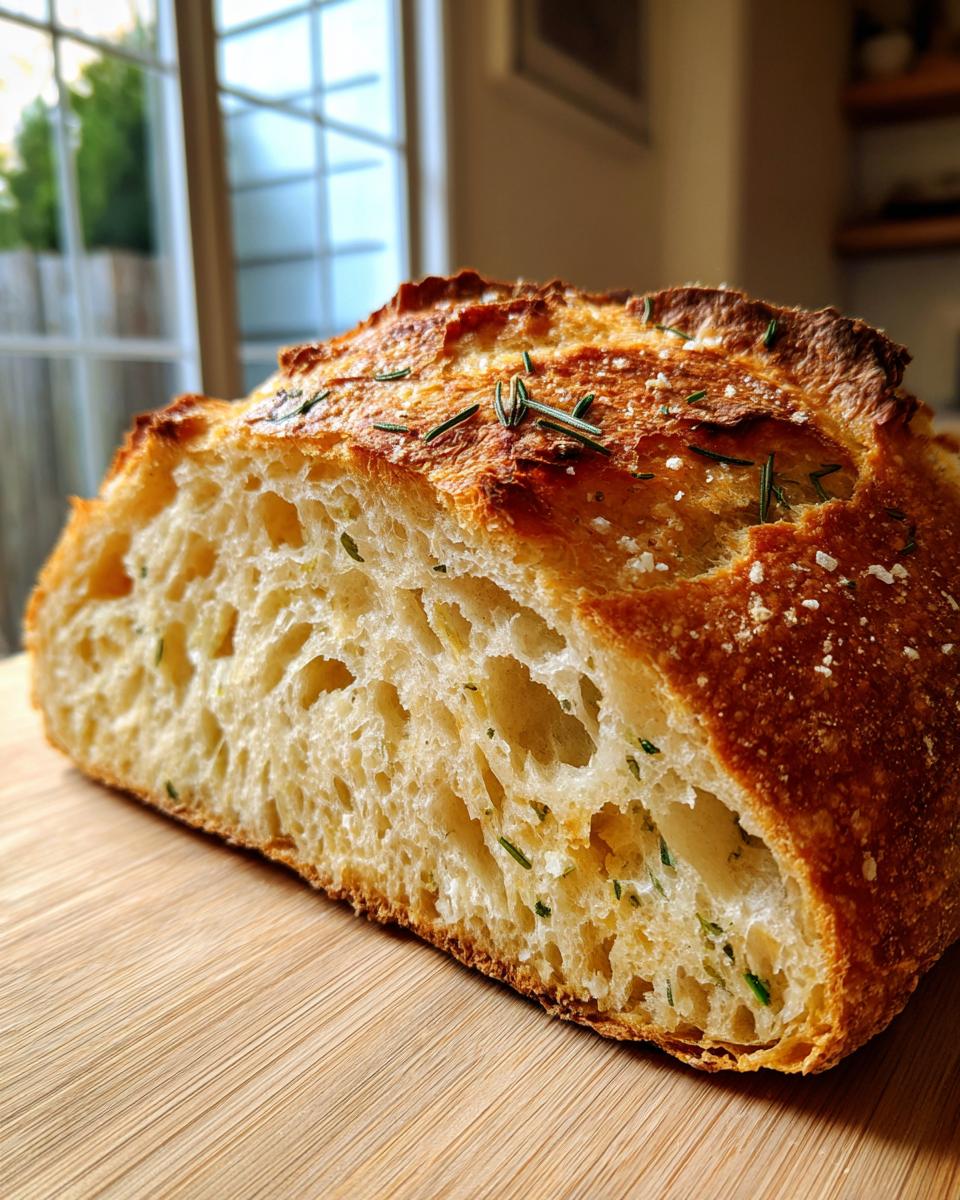
This is maybe the most important trick for getting that coveted, crackly crust. We use a Dutch oven, and here’s why: when you preheat that heavy pot in the oven, it gets screaming hot. When you drop the dough in and cover it, the lid traps all the steam evaporating off the dough. That trapped steam keeps the dough surface moist in the initial baking phases, allowing it to expand fully before the crust sets. That means maximum oven spring and the thickest, **crusty homemade bread** shell possible. It truly mimics commercial bakery steam injection, making this an incredible **artisan bread** hack!
Gathering Your Simple Ingredients for Artisan Bread
This is the simplest part of the whole process, and it’s why I call this one of the best simple 4 ingredient bread transformations! Honestly, you probably have everything you need sitting on your pantry shelf right now. We rely on the basics, which is fantastic because you aren’t running out for one weird specialty flour. Remember, since this mixture is resting for so long, respecting the specific measurements really ensures your **artisan bread** comes out beautifully structured. I always have my ingredients ready the night before so mixing is super fast.
Ingredient Clarity and Preparation
Here is exactly what you need to pull together this rustic loaf. Make sure everything is measured accurately, especially the yeast!
- 3 cups all-purpose flour – easy enough!
- 1 1/2 teaspoons salt – just regular fine salt for the dough mixture.
- 1/4 teaspoon instant yeast – Instant, not active dry! This is key for the long, slow room temperature rise.
- 1 1/2 cups cool water – I always use water straight from the fridge. It helps keep the initial reaction slow so we get that long fermentation window.
- 1 tablespoon fresh rosemary, chopped – Don’t use dried here; the fresh herbs make all the difference in the aroma!
- 1 teaspoon coarse sea salt, for topping – This gives you those beautiful, crunchy bursts of salty flavor on the crust.
Step-by-Step Instructions for Your No Knead Artisan Bread Recipe
Okay, this is where the magic really happens, but don’t let the timing scare you! The hands-on part takes about 10 minutes total, spread out over two separate sessions. The rest of the time is just waiting for this incredible **no knead bread recipe** to do the work for you. I’ve broken down the three main phases so you can easily plan your baking around your day. Remember, this is all about reliable results!
Mixing and the Long Rise for Rustic Artisan Loaf
First, we just whisk everything dry together in a big bowl—the flour, the salt, and the yeast. Next, pour in that cool water and mix it with a sturdy spoon until you can’t see any more dry flour streaks. Seriously, stop mixing then! You want a messy, sticky, rough ball that looks totally wrong—that’s your shaggy dough. Cover that bowl tight with plastic wrap. Now put it somewhere warm-ish and forget about it for 12 to 18 hours. This long rest creates all the airy pockets you want in a proper yeast bread easy bake.
Incorporating Flavor and Shaping the Dough
When you come back, the surface of the dough should look bubbly and loose. Gently dump it out onto a counter you’ve dusted lightly with flour. Then, sprinkle your chopped rosemary right over the top. You fold it over just a few times—maybe 3 or 4 gentle folds—to incorporate those herbs without knocking out all the gas. Shape it into a loose ball. Cover it again with a clean kitchen towel and let it hang out for just 30 minutes while you get your oven roaring.
The Dutch Oven Bread Baking Process
Get your oven preheating to 450°F (232°C) about 20 minutes before that final 30-minute rest is up. You must place your heavy Dutch oven, lid ON, inside the oven while it heats up! This is non-negotiable for that professional crisp. Carefully—and I mean carefully!—take that hot pot out. Lift the dough gently and drop it right into the hot pot. Sprinkle that coarse sea salt right on top for crunch! Cover it and bake for 30 minutes. Seriously, 30 minutes! Then, take the lid off and let it bake for another 10 to 15 minutes until it’s that beautiful, deep golden brown color. That’s the sign of perfect **artisan bread**!
Tips for Success with Your Crusty Homemade Bread
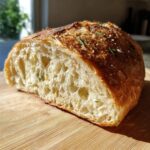
You’ve done the hard part waiting, so let’s make sure that final result is spectacular! For this kind of rustic loaf, patience in the cooling stage is just as important as patience during the rise. Don’t rush to slice it open when it comes out of the oven. That initial steam needs to redistribute inside the loaf, or you’ll end up with gummy bread instead of that perfect texture you worked for. Let it cool completely on a wire rack—at least an hour is best. This truly lets your **crusty homemade bread** set up properly.
Flavor Variations: Rosemary Sea Salt Bread vs. Garlic Parmesan Artisan Bread
While I absolutely adore the bright freshness of rosemary and sea salt, I know many of you are heading straight for savory things! If you want to switch this up and make a killer artisan bread that screams Italian dinner, it’s easy. Instead of sprinkling the rosemary over the dough during the fold, you’re going to add 1/2 cup of grated Parmesan cheese and 1 teaspoon of garlic powder right then. Just sprinkle it on, fold it in gently, and proceed with the final 30-minute rest. It results in an amazing **garlic parmesan artisan bread** that makes every dinner feel special!
Storage and Reheating Instructions for Artisan Bread
The hardest part is waiting for this beautiful loaf to cool down, but once you slice into it, you might not finish it all in one sitting—though I totally support you if you do! Storing your amazing, **crusty homemade bread** correctly is essential because that gorgeous crust doesn’t like trapped moisture. If you wrap it tightly in plastic wrap, you’ll wake up to a soft, steamed crust, and we can’t have that after all that Dutch oven work!
For best results, you want the bread to breathe slightly. Store your leftover loaf cut-side down on a clean cutting board, or better yet, wrap it loosely in a clean linen or paper bag. This helps keep the interior soft while slightly protecting the outside. It stays wonderfully fresh this way for a good two or three days. If you want to keep it longer, slicing it first and freezing the halves is a great idea. You can pull out slices as needed when you want something warm and comforting, just like my quick date nut bread recipe!
Now, for the best part: reheating! If your crust has softened even a little, don’t despair. Pop the entire loaf or even just a thick slice back into a 350°F oven for about 5 to 8 minutes. If you are reheating a whole loaf, skip covering it. This quick blast of dry heat resurrects that incredible crunch and warms the soft crumb inside wonderfully. It’s like baking it fresh all over again, and it’s the perfect way to enjoy leftovers of this **artisan bread**!
Serving Suggestions for Your Rustic Artisan Loaf
Now that you’ve created this stunning, **rustic artisan loaf** with that heavenly aroma from the rosemary and sea salt, what do you serve it with? Honestly, on its own, slathered with good quality salted butter, it’s perfection. That crackly crust just sings when it meets salty fat! But if you’re looking to turn this **artisan bread** into part of a bigger meal, it truly shines when paired with something warm and savory.
Because this loaf has such a wonderful, earthy flavor profile from the herbs, it is the absolute best dipping bread imaginable. Forget those sad, floppy white bread slices! When you tear off a chunk of this bread, it soaks up broth like a sponge. This loaf is truly the perfect accompaniment for a hearty bowl of soup. Think about dunking it into a rich, slow-simmered stew or perhaps diving it into a classic French Onion Soup. That charred, cheesy topping mixing with this herbaceous bread? My goodness, talk about a flavor combination that feels cozy and sophisticated all at once!
If you’re leaning towards lighter fare, this bread is fantastic sliced thin and drizzled with a good extra virgin olive oil blended with a little balsamic vinegar and maybe some fresh cracked pepper. It makes an incredible appetizer while you’re waiting for dinner or a lovely side for any pasta dish. For my current favorite pairing that really shows off this loaf, check out my recipe for French Onion Soup—it’s truly next level when you use your freshly baked **no knead crusty loaf** to top it off!
Frequently Asked Questions About Yeast Bread Easy Baking
It’s natural to have questions when your dough is resting for 18 hours, hoping it turns into a perfect loaf! Since this is an artisan bread for beginners recipe, I wanted to cover the most common things people worry about. Don’t stress—we are keeping things simple, but sometimes a tiny substitution needs a little explanation to ensure you still get that gorgeous crusty loaf! If you’re looking for more ideas to serve with this bread, check out my favorite easy weeknight dinners!
Can I use active dry yeast instead of instant yeast in this artisan bread recipe?
Yes, you absolutely can, but you need to wake that yeast up first! Instant yeast is fantastic because it just gets dumped right in with the flour, but active dry yeast needs a bath. Before you mix your dry ingredients, you need to proof it. Take about 1/2 cup of your total water (make sure it’s lukewarm, not hot, maybe 105-115°F) and mix the active dry yeast in with a tiny pinch of sugar if you have some lying around. Let it sit for about 5 to 10 minutes until it gets foamy and bubbly on top. Once foamy, use that mixture plus the rest of your cool water in the recipe as written. Because it’s proofed, the rise might be a tiny bit faster, so keep an eye on it, but the final 12-18 hour timeline should still work well for your **yeast bread easy** bake!
What if I do not have a Dutch oven for this no knead bread recipe?
Oh, that’s a common hurdle! If you don’t have the heavy lidded pot, don’t worry—we can absolutely still bake this or any other **artisan bread**. The goal of the Dutch oven is to trap steam to prevent the crust from setting too early. If you have a pizza stone or a heavy baking sheet, set that in the oven while it preheats to 450°F. Then, when you are ready to bake, place your dough onto the hot stone or sheet. To create that moisture, you need an external steam source. You can carefully place a broiler-safe pan on the bottom rack *before* preheating, and right when you slide your bread in, pour about a cup of boiling water into that hot pan. Work quickly! Be careful of the steam rushing out. Bake it covered (maybe with a slightly larger metal bowl inverted over the loaf if you can manage it safely) for the first 30 minutes. It won’t be quite as dramatic as the Dutch oven, but it will still give you a fantastic **crusty homemade bread** result!
Estimated Nutritional Data for This Artisan Bread
When you’re diving into homemade baking, especially something as simple and wholesome as this **artisan bread**, numbers can sometimes feel irrelevant next to the incredible aroma filling your kitchen. But for those of you who like to keep track, I always include this data just so you know what you’re enjoying! Remember, this is just an estimate based on dividing the standard recipe yield (which is one loaf) by the serving size listed below. Because we aren’t using any added oils or sugars in the core dough, this loaf is wonderfully straightforward.
Here’s a rough breakdown for one slice of this **no knead bread recipe**:
- Serving Size: 1 slice
- Calories: 180
- Fat: 0.5g
- Carbohydrates: 38g
- Protein: 6g
- Sugar: 0.5g
See? Simple ingredients create simple nutrition! It’s amazing that you can get such incredible, **bakery style bread at home** with such humble components. Enjoy every slice—you earned it!
Share Your Bakery Style Bread at Home Creations
Wow, you actually did it! You waited patiently, let that dough mingle and bubble, and now you have this stunning, crackly, fragrant loaf of **artisan bread** sitting on your counter. Doesn’t that feel incredible? That’s the heart of what we do here at *Completely Yummy*—taking something that seems complicated, simplifying it down to its honest core, and proving that you absolutely have what it takes to make something truly special right in your own kitchen!
I just love hearing about your successes. Seriously! Did you stick with the rosemary and salt, or did you dive into the Parmesan Garlic variation? If you’re on social media, I’d be so thrilled if you snapped a picture of your finished **rustic artisan loaf**! Tag me or use the hashtag for this recipe so I can see that gorgeous oven spring and amazing crust you achieved using this **no knead bread recipe**. Knowing I helped bring that joy of fresh baking into your home is why I do this!
If this recipe gave you the confidence boost you needed to keep experimenting with baking—and I really hope it did—please come back and give this recipe a rating! Seeing those stars helps other cooks who might be nervous about starting their first **artisan bread for beginners** journey. Thanks so much for baking with me. If you want to learn more about my mission to keep home cooking simple and delicious, you can always check out the About Page. Happy baking, friend!
PrintEasy No-Knead Artisan Bread with Rosemary and Sea Salt
You can bake bakery-style artisan bread at home using this simple, no-knead recipe. This method uses a Dutch oven to give you a crusty exterior and a soft interior with minimal effort.
- Prep Time: 10 min
- Cook Time: 45 min
- Total Time: 13 hours 5 min
- Yield: 1 loaf 1x
- Category: Bread
- Method: Baking
- Cuisine: American
- Diet: Vegetarian
Ingredients
- 3 cups all-purpose flour
- 1 1/2 teaspoons salt
- 1/4 teaspoon instant yeast
- 1 1/2 cups cool water
- 1 tablespoon fresh rosemary, chopped
- 1 teaspoon coarse sea salt, for topping
Instructions
- In a large bowl, whisk together the flour, 1 1/2 teaspoons of salt, and the instant yeast.
- Add the cool water to the dry ingredients. Mix with a wooden spoon until just combined into a shaggy dough. Do not overmix.
- Cover the bowl tightly with plastic wrap and let the dough rest at room temperature for 12 to 18 hours. The dough will become bubbly and increase in volume.
- After the long rise, gently scrape the dough out onto a lightly floured surface. Sprinkle the chopped rosemary over the dough. Fold the dough over itself a few times to incorporate the rosemary without deflating it too much.
- Shape the dough into a rough ball. Cover it with a clean kitchen towel and let it rest for 30 minutes.
- About 20 minutes before baking, place a 5 to 6-quart Dutch oven, with the lid on, into your oven. Preheat the oven to 450 degrees Fahrenheit (232 degrees Celsius).
- Carefully remove the hot Dutch oven from the oven. Gently lift the dough and place it inside the hot pot. Sprinkle the top with the coarse sea salt.
- Cover the Dutch oven with the lid and bake for 30 minutes.
- Remove the lid and continue baking for another 10 to 15 minutes, or until the crust is deep golden brown.
- Carefully remove the bread from the Dutch oven and let it cool completely on a wire rack before slicing.
Notes
- Using cool water helps control the fermentation time during the long, slow rise.
- If you prefer a Parmesan Garlic variation, omit the rosemary and add 1/2 cup of grated Parmesan cheese and 1 teaspoon of garlic powder when folding the dough in Step 4.
- For the best crust, do not skip preheating the Dutch oven with the oven.
Nutrition
- Serving Size: 1 slice
- Calories: 180
- Sugar: 0.5
- Sodium: 380
- Fat: 0.5
- Saturated Fat: 0.1
- Unsaturated Fat: 0.4
- Trans Fat: 0
- Carbohydrates: 38
- Fiber: 1.5
- Protein: 6
- Cholesterol: 0