
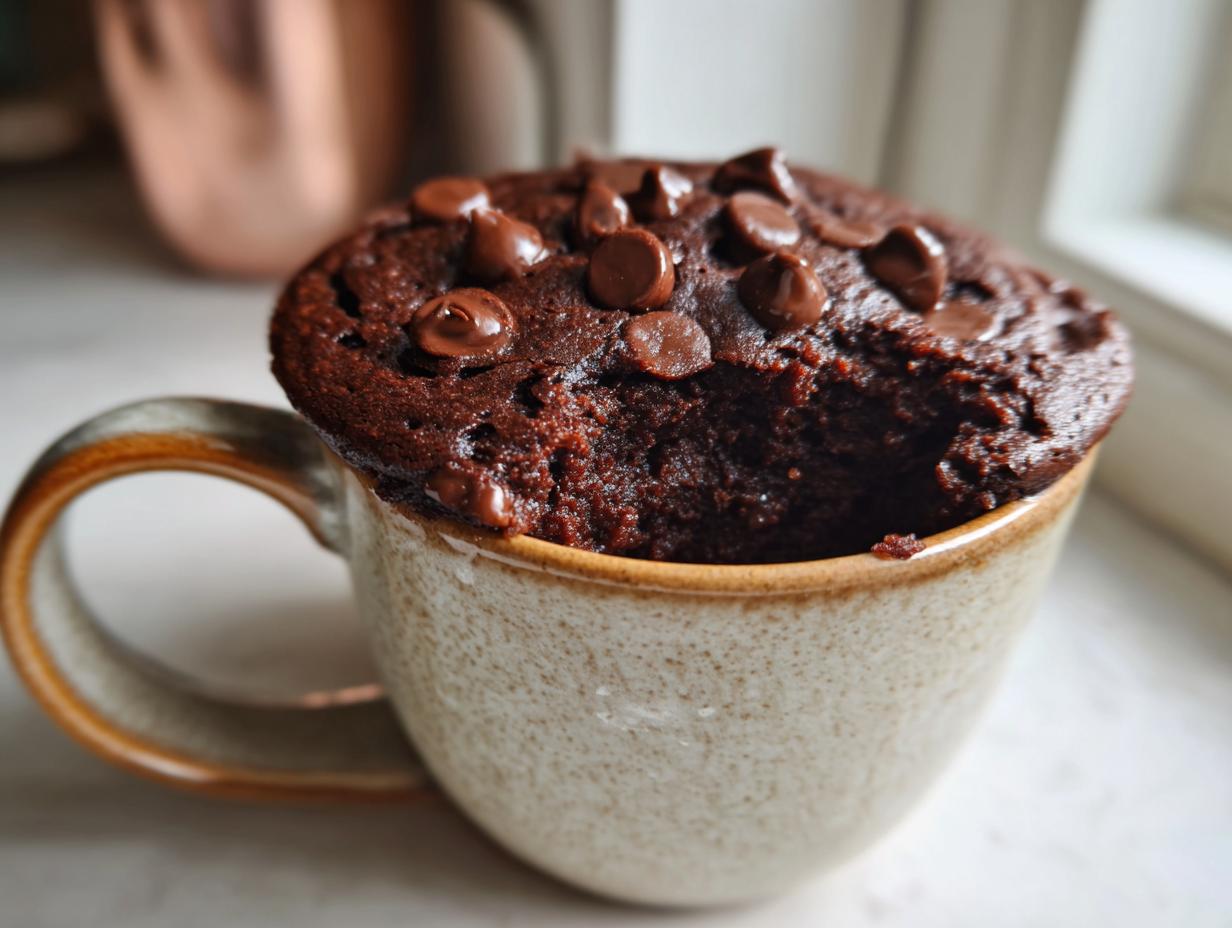
You know those moments, right? It’s 9 PM, the dishwasher is humming, and suddenly you have this *stabbing* need for chocolate cake, but the thought of turning on the oven just makes you tired. That’s exactly why I created this recipe! When I started Completely Yummy, my whole mission was finding ways to bring back that joy of home cooking without drowning in prep time. Here it is: The Moistest Chocolate Mug Cake (Microwave). Forget everything you think you know about watery, spongy microwave desserts. This single serving recipe hits that rich, gooey spot perfectly. It’s my favorite way to deliver truly delicious food when life is moving too fast, and you need an instant dessert recipe.
- Why This Chocolate Mug Cake Recipe Works So Well
- Ingredients for the Moistest Chocolate Mug Cake
- How to Prepare Your Instant Dessert Recipe
- Tips for Success When Making a Microwave Mug Cake
- Serving Suggestions for Your Dessert For One
- Storage and Reheating Instructions for Your Mug Cake
- Variations: Beyond the Chocolate Mug Cake
- Frequently Asked Questions About Making a Mug Cake
- Share Your Two Minute Dessert Experience
Why This Chocolate Mug Cake Recipe Works So Well
Look, I’m going to be honest with you. Most microwave desserts taste like sad, slightly warm sponges, right? When I was developing this, I made about eighteen terrible batches before I figured out the magic ratio. That’s the difference between a cheap, disappointing ‘Quick Microwave Dessert’ and a true winner. My goal was to create something that feels decadent, a real gooey mug dessert, not something you eat just because it was fast.
The secret is keeping the moisture in where other recipes let it boil away. We skip eggs and use a specific balance of oil and milk to mimic that classic richness. It’s designed to be eaten straight from the mug, which is absolutely the best part of this whole process!
Achieving the Perfect Single Serving Cake Texture
The key is simple chemistry in a tiny vessel. When you bake in the microwave, the moisture rushes out fast. To fight that, we use just the right amount of fat and make sure we mix just until the streaks disappear. That tiny, unmixed speck of flour you leave behind? It acts like a tiny water reservoir!
This isn’t about making dinner for four; this is truly about a dessert for one that satisfies an immediate craving without any cleanup fuss. Trust me, follow the mixing directions exactly, and you won’t get that rubbery disappointment other recipes promise.
Ingredients for the Moistest Chocolate Mug Cake
When you’re just whipping this up for yourself, ingredient quality really matters, even with something this fast! I always keep a very tight inventory for my easy mug recipes. We’re using simple pantry staples here, but measuring them correctly is everything. Honestly, this section is where most people mess up their single serving cake!
- 4 Tablespoons all-purpose flour
- 4 Tablespoons granulated sugar
- 2 Tablespoons unsweetened cocoa powder
- 1/4 teaspoon baking powder
- Pinch of salt
- 3 Tablespoons milk
- 1 Tablespoon vegetable oil
- 1/4 teaspoon vanilla extract
- 1 Tablespoon chocolate chips (optional, for extra gooey center)
Ingredient Notes and Substitutions for Your Mug Cake
To get that rich flavor I keep talking about, ditch the skim milk and go for whole milk if you have it. It just adds a little luxurious fat content that the microwave can’t replicate otherwise. If you’re out of oil, you can swap it for unsweetened applesauce—it keeps the cake surprisingly moist, though the texture will be slightly different. It’s a great option for a lower-fat dessert!
Also, about that cocoa powder: use good quality stuff! I always keep a Dutch-processed cocoa on hand because it gives the dark color and smooth flavor that makes this taste like it came from a bakery, not a dorm room.
How to Prepare Your Instant Dessert Recipe
Okay, now for the fun part! This is where the magic of microwave baking comes together. Remember, we are assembling this right in the mug, which is why this is the ultimate baking in a mug solution. Grab your favorite, standard-sized mug—you know, the one that feels good in your hands. Seriously, don’t use a tiny espresso cup, or you’ll end up with a mess when it puffs up!
First things first: keep your dry ingredients separate until they are fully mixed. Add the flour, sugar, cocoa, baking powder, and that little pinch of salt right into the mug. Grab a small fork and stir them around until everything looks perfectly uniform. This is way better than dumping everything in at once, believe me. Once those dry bits are happy, go ahead and pour in the milk, the oil, and the vanilla. Stir it gently, just until everything comes together. You want to stop stirring the second you stop seeing streaks of dry flour. A few tiny lumps are totally fine, and honestly, they help keep the texture interesting!
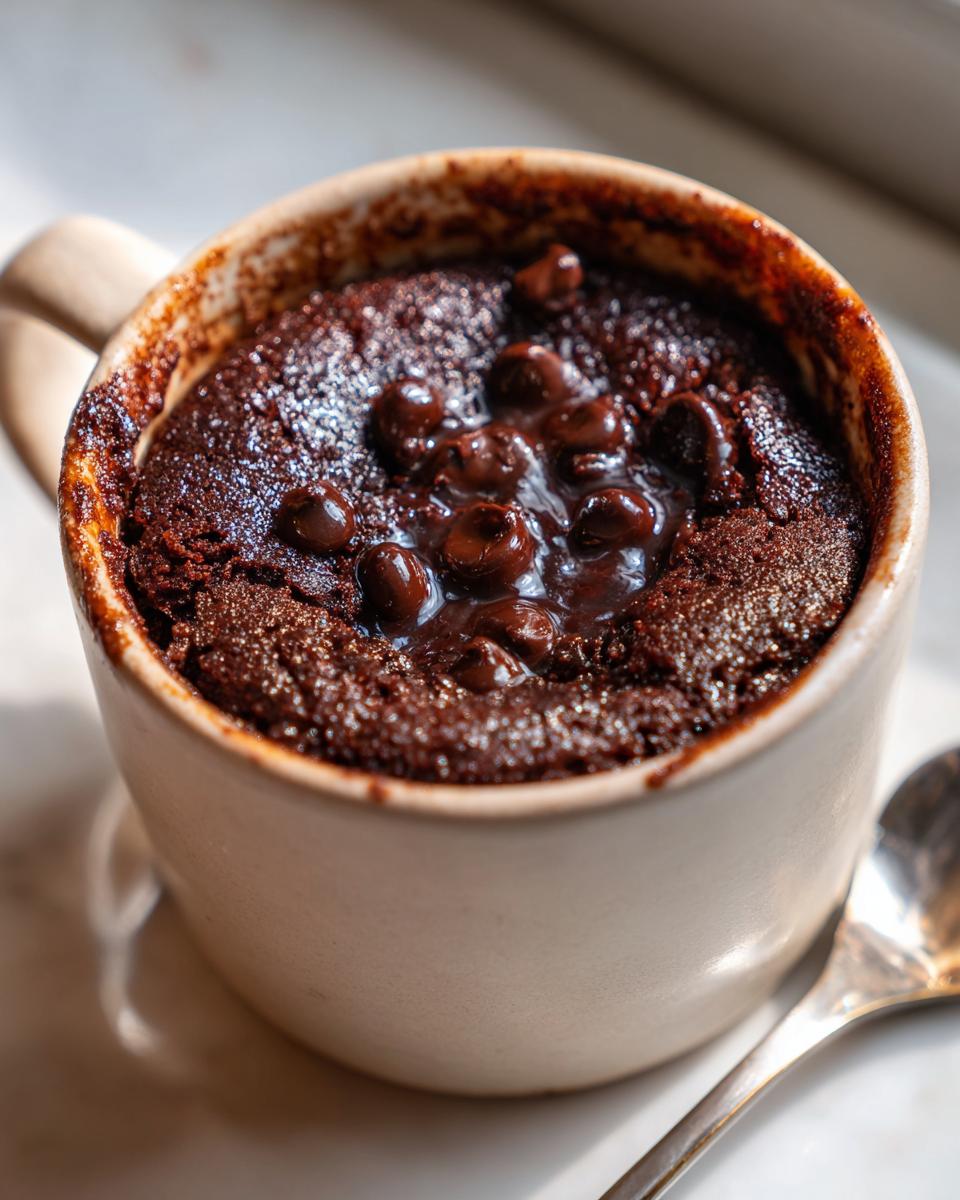
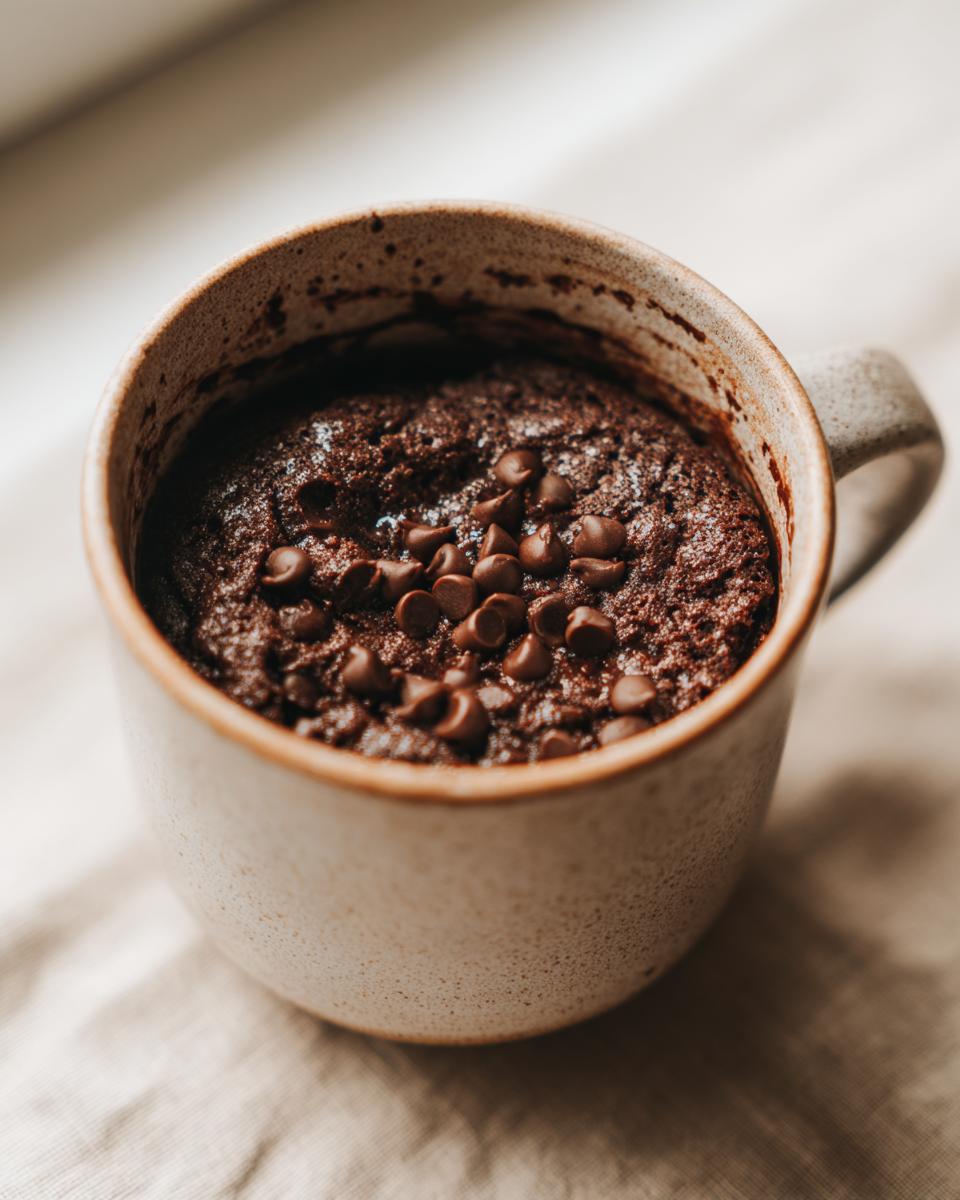
Last call before the microwave: if you want that super decadent, molten center, quickly stir in those chocolate chips or just drop them right on top. Now we cook!
Crucial Timing for the Perfect Chocolate Mug Cake
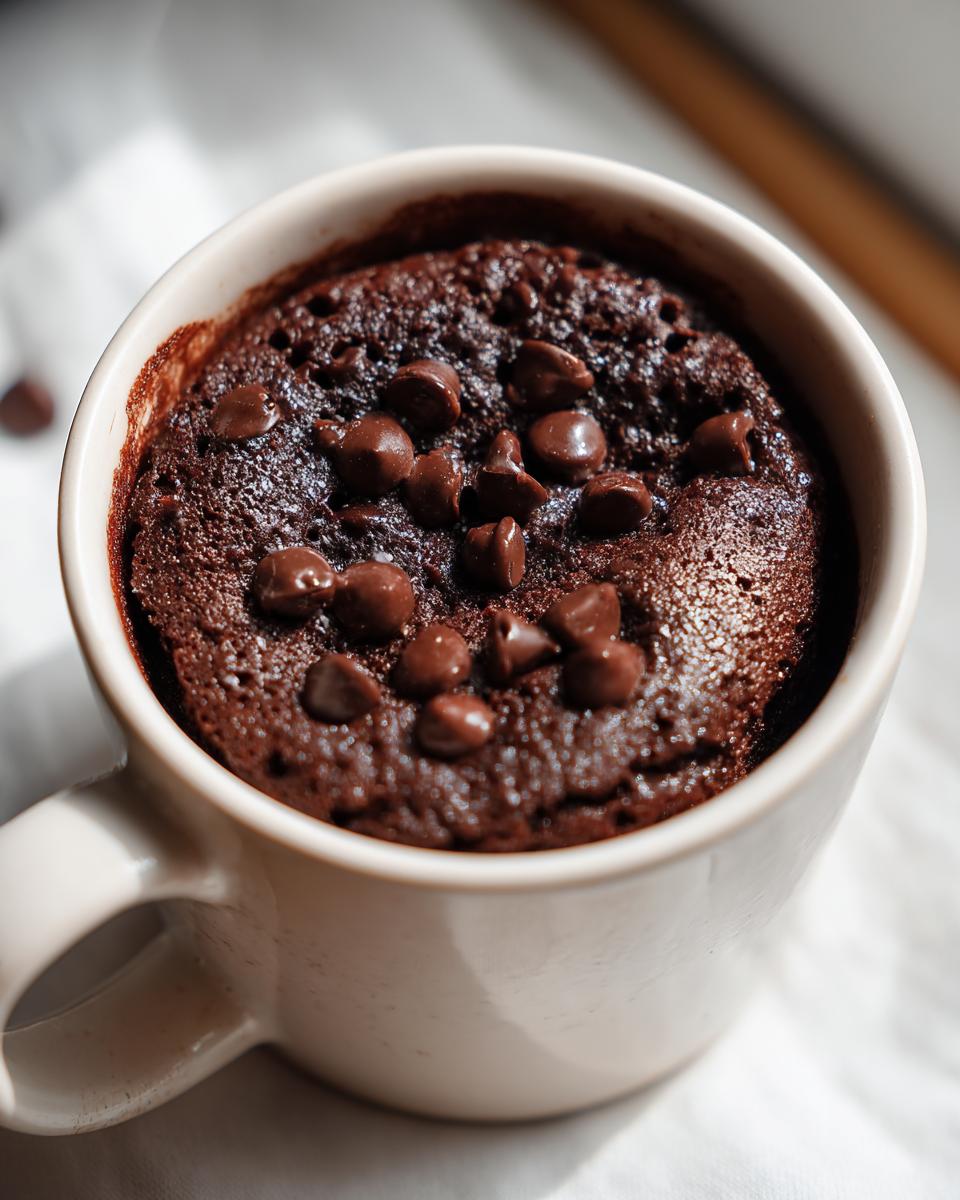
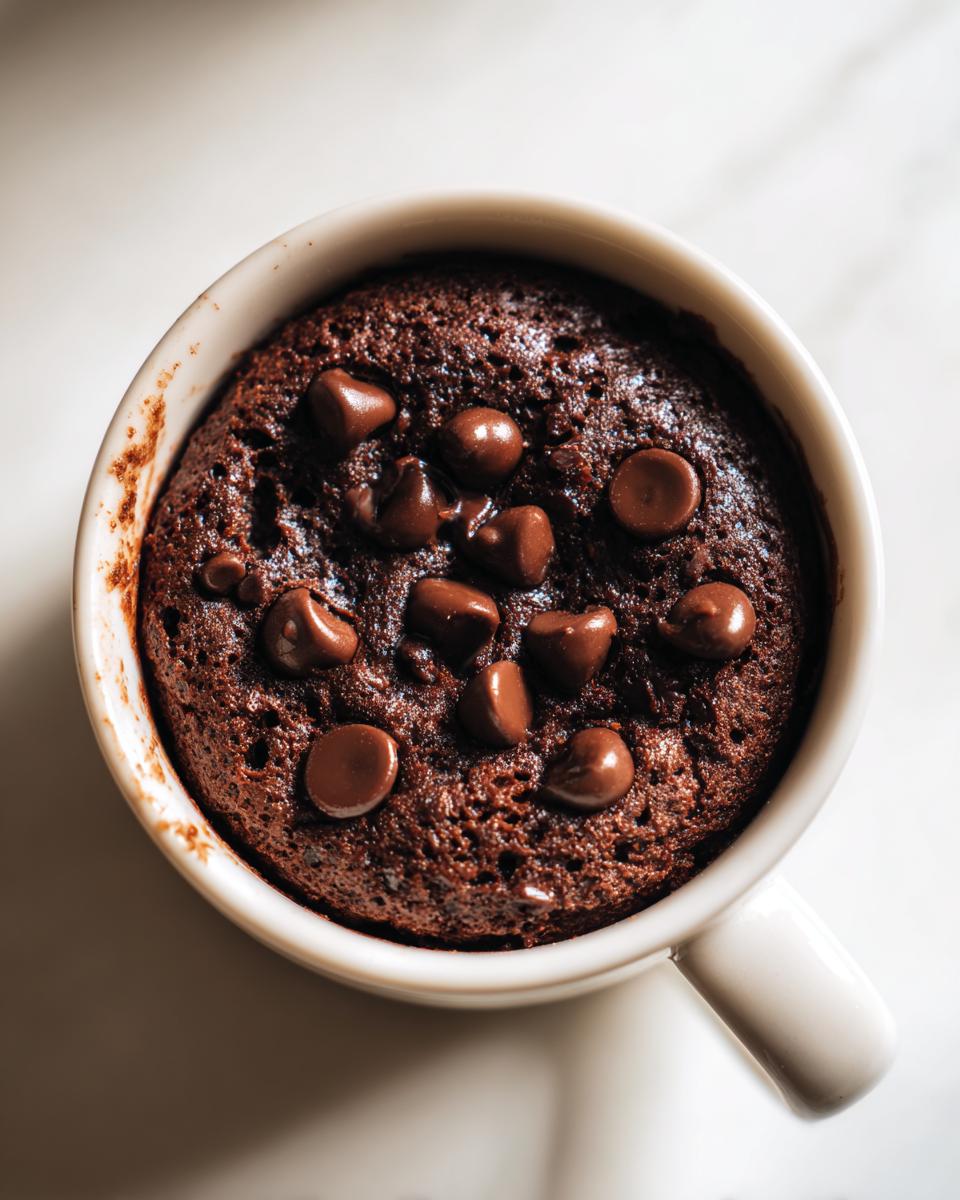
This is the moment of truth for any single serving cake. Microwave times are wildly different, but for standard 1000-watt machines, you’re looking at 60 to 90 seconds total. I always set mine for 70 seconds just to start. You are watching for the top to look set—not wet batter, but definitely not firm and dry like a brown sponge! If it’s still a little jiggly in the very center, you’ve hit the jackpot for a gooey mug dessert.
Do not skip the cooling rest! Pull the mug out—careful, it’s hot!—and let it sit on the counter for a full minute before digging in. This minute allows the residual heat to finish setting the structure without drying out the middle. It’s the difference between perfection and disappointment, so please, just wait 60 seconds!
Tips for Success When Making a Microwave Mug Cake
You’ve mixed it right, you timed it right, but there are just a couple more things I’ve learned over the years of perfecting this quick treat. If this is your first time making a proper chocolate mug cake, listen up—the vessel you choose matters a lot!
For a single serving, you really need a good, sturdy mug that holds about 10 to 12 ounces. If you use something smaller, trust me, when the baking powder kicks in, you’ll have chocolate batter running down the sides of your microwave. Nobody wants that clean-up! It wastes time, and we are trying to save time here.
Also, never, ever assume your microwave is the same as mine. Wattage is king in the microwave world. If you find your cake is coming out a little too dry next time (which defeats the whole purpose of this recipe!), knock 10 seconds off your next cooking time. If it’s still slightly too wet in the middle, try adding just another half-teaspoon of milk next time. This little bit of testing gets you to your personalized, perfect mug cake setting in no time.
The biggest tip for success in this fast-paced baking? Don’t try to double the recipe. It just doesn’t work. The physics of microwaved dough changes completely when you try to make two servings at once. Stick to one mug at a time for the best results!
Serving Suggestions for Your Dessert For One
Okay, the cake is cooked, it’s cooled for that essential minute, and now you get to be the stylist! This is where you take your simple, glorious mug cake and turn it into something truly spectacular. Since this is a single serving, you don’t need to worry about keeping a whole tray safe; you can go all out!
If you’re feeling classic and want to honor the simple nature of this dessert for one, a light dusting of powdered sugar right over the top looks gorgeous. It coats the edges perfectly and keeps the focus on that dark chocolate color.
But if you really want to elevate this into a proper evening treat, you *have* to pair it with ice cream. A small scoop of vanilla bean ice cream right on top while the cake is still warm? Oh my goodness. The hot chocolate cake meets the cold creaminess—it is honestly the best combination. A little whipped cream and a sprinkle of chocolate shavings makes it feel like you spent hours on it, even though you were done in under five minutes total. Enjoy that indulgence!
Storage and Reheating Instructions for Your Mug Cake
Here’s the real talk about this amazing chocolate mug cake: it is designed to be eaten right away. Seriously, the window for peak deliciousness is about five minutes after it comes out of the microwave and rests for a minute. That’s when you get that perfect gooey center we worked so hard for. If you try to put this away for later, it’s basically going to turn into a dense, slightly sad chocolate hockey puck.
If you absolutely must save it—maybe you’re baking ahead for a quick lunch treat—leave the mug cake uncovered and let it cool completely to room temperature first. Then, wrap that mug tightly in plastic wrap or pop it into an airtight container. I find it just doesn’t hold up well for more than a few hours. It loses that lovely moisture immediately.
Now, if you find yourself with leftovers the next day, don’t toss it! You can definitely revive it, but you have to be gentle. Pop the mug back into the microwave, but start with just 15 seconds on 50% power. The lower power prevents it from cooking too quickly on the edges while the inside heats up. You are aiming for warmth, not a full reheat, because microwaved cake texture just doesn’t bounce back perfectly. For the ultimate mug cake experience, plan to eat it moments after it’s done!
Variations: Beyond the Chocolate Mug Cake
Now that you’ve mastered the moistest chocolate version, the sky is the limit! What I love most about this base recipe is how adaptable it is. Once you get the flour-to-liquid ratio down for your microwave, you can pivot easily to almost any other flavor you’re craving. This is your foundation for every mug cake you’ll ever need!
Think about those classic comforting flavors—Snickerdoodle? Peanut Butter? Absolutely doable! These variations are what keep us from turning to a box mix. You can find tons of inspiration out there, and frankly, the basic structure we used here is the key to getting those amazing microwave results. Check out this page for tons of ideas when you’re ready to branch out from chocolate.
Quick Ideas for a Vanilla Mug Cake
If you need a pure, buttery dessert flavor, switching to a Vanilla Mug Cake is so easy. The main thing you have to change is obviously dropping the cocoa powder. Because cocoa powder is dry, you need to slightly adjust the other dry ingredients so the batter isn’t too thin.
Here’s my quick fix: For every 2 tablespoons of cocoa powder you leave out, add back 1 tablespoon of flour and 1 tablespoon of sugar. You should also bump up that vanilla extract slightly—maybe an extra tiny splash—to make sure that vanilla flavor really pops through instead of tasting flat. That’s it! Now you have the perfect blank slate for sprinkles, a tiny bit of lemon zest, or just enjoying that fluffy vanilla goodness.
I also love using the vanilla base to try out things like a Peanut Butter Mug Cake. Just melt a spoonful of your favorite peanut butter (maybe even check out my favorite peanut butter cookie recipe for inspiration!) and swirl it right into the vanilla batter before microwaving. It adds such a nice flavor depth!
Frequently Asked Questions About Making a Mug Cake
It’s funny, even with the clearest instructions, people always have a few sneaky questions floating around when they try a dessert in a mug for the first time! These are the things I always wonder about when I try a new simple cake recipe, so let’s clear them up right now and get you set up for success with this mug cake.
Can I make this a 3 Ingredient Mug Cake?
That’s a super popular search, and I totally get why people look for the ultra-simple version! While you absolutely *can* make a three-ingredient version (usually flour, sugar, and milk/cocoa), that shortcut sacrifices the texture we worked so hard to perfect here. This specific recipe includes fat (oil), lift (baking powder), and vanilla because those are what stop it from becoming tough and dry. If you need the absolute simplest thing imaginable, check out what they did over at the 3 ingredient mug cake, but for this richer, gooey result, you need these extra players! Stick with the recipe above for the moistest experience.
What is the best microwave wattage for this recipe?
My testing was done on a standard 1000-watt microwave, which generally gives you that perfect cook time right around the 70-to-90-second mark. If your microwave is lower wattage—say, 700 watts—you might need closer to two minutes, turning it into more of a two minute dessert. If your microwave is a beast and runs at 1200 watts or more, you’ll probably be done in 60 seconds flat!
The wattage is the main thing that messes up the timing, so always start checking early. When you’re aiming for that perfect quick microwave dessert, undercooking slightly is always better than overcooking! That little bit of liquid center finishes setting as it rests.
Why do some chocolate mug cakes turn out spongy?
That fluffiness you’re talking about? That’s usually too much baking powder meeting too much intense, fast microwave heat. It puffs up like a marshmallow that popped in the oven! It means either you used too much leavening agent or you cooked it for too long, letting all the moisture evaporate too quickly. If you’re following this recipe, make sure that baking powder measurement is exact (1/4 teaspoon is *not* the same as 1/2 teaspoon!) and keep that cook time short. We are aiming for rich and dense, not light and airy when it comes to this specific chocolate mug cake!
Share Your Two Minute Dessert Experience
Now that you have a gloriously moist, impossibly fast chocolate treat sitting right there in your mug, I absolutely want to hear about it! That’s the whole point of this space, isn’t it? Reclaiming those little moments of joy, even when dinner was crazy busy. This recipe—this amazing 5 minute dessert—only gets better when we share the results!
Did you manage that 65-second cook time perfectly? Did you use vanilla ice cream or just dig right in? Don’t be shy! Head down to the comments section and give this recipe a star rating. Your feedback helps me know if the ratios are working perfectly for everyone, and it genuinely makes my day to see pictures of your successful dessert for one.
If you tried a fun topping, let us know about that too. Maybe you splashed it with salted caramel? Or perhaps you tried to make it healthier, like some of the ideas I saw floating around, check out this gooey lava cake variation for inspiration next time! I love hearing from you, and getting to know the faces behind the kitchens warms my heart—it reminds me exactly why Ava Sinclair started this whole thing. Come say hi on the About page sometime!
PrintThe Moistest Chocolate Mug Cake (Microwave)
Make this single serving chocolate mug cake in your microwave. This recipe delivers a rich, gooey dessert that avoids the spongy texture common in other microwave cakes.
- Prep Time: 2 min
- Cook Time: 1.5 min
- Total Time: 3.5 min
- Yield: 1 serving 1x
- Category: Dessert
- Method: Microwave Baking
- Cuisine: American
- Diet: Vegetarian
Ingredients
- 4 Tablespoons all-purpose flour
- 4 Tablespoons granulated sugar
- 2 Tablespoons unsweetened cocoa powder
- 1/4 teaspoon baking powder
- Pinch of salt
- 3 Tablespoons milk
- 1 Tablespoon vegetable oil
- 1/4 teaspoon vanilla extract
- 1 Tablespoon chocolate chips (optional, for extra gooey center)
Instructions
- Select a standard, microwave-safe mug (about 10-12 ounces).
- Add the flour, sugar, cocoa powder, baking powder, and salt directly into the mug. Use a small fork to mix these dry ingredients thoroughly.
- Pour in the milk, vegetable oil, and vanilla extract. Stir until just combined; do not overmix. A few small lumps are acceptable.
- If using, stir in the chocolate chips or drop them on top of the batter.
- Place the mug in the microwave. Cook on high power for 60 to 90 seconds. Cooking time varies based on microwave wattage. Start checking at 60 seconds. The cake should look set on top but still slightly soft in the center for a moist texture.
- Let the mug cake cool in the mug for at least one minute before eating.
Notes
- For a richer flavor, use whole milk instead of regular milk.
- If your cake seems dry after cooking, try reducing the cooking time by 10 seconds next time.
- Top with a scoop of vanilla ice cream or a dusting of powdered sugar before serving.
Nutrition
- Serving Size: 1 mug cake
- Calories: 280
- Sugar: 22g
- Sodium: 150mg
- Fat: 11g
- Saturated Fat: 3g
- Unsaturated Fat: 8g
- Trans Fat: 0g
- Carbohydrates: 44g
- Fiber: 2g
- Protein: 4g
- Cholesterol: 10mg