
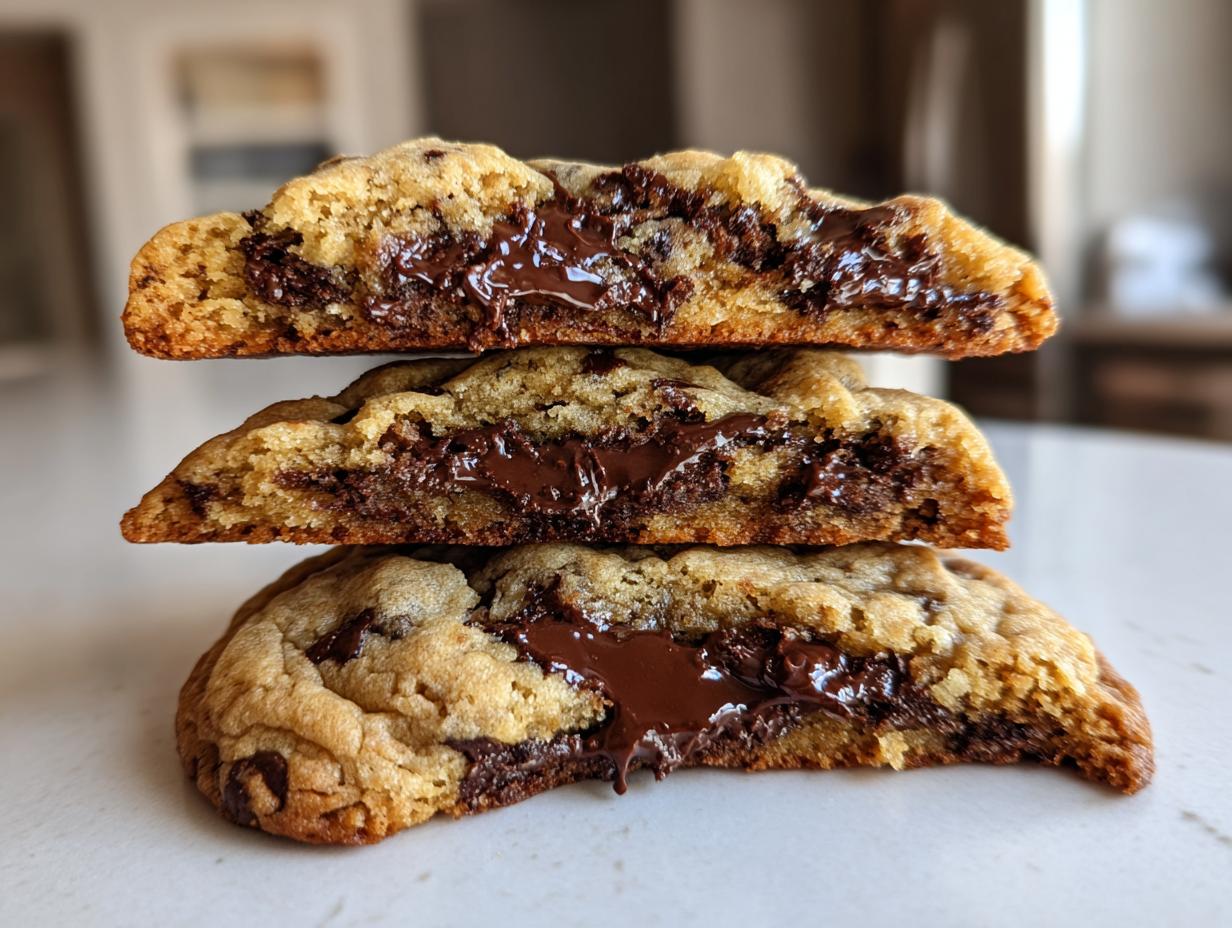
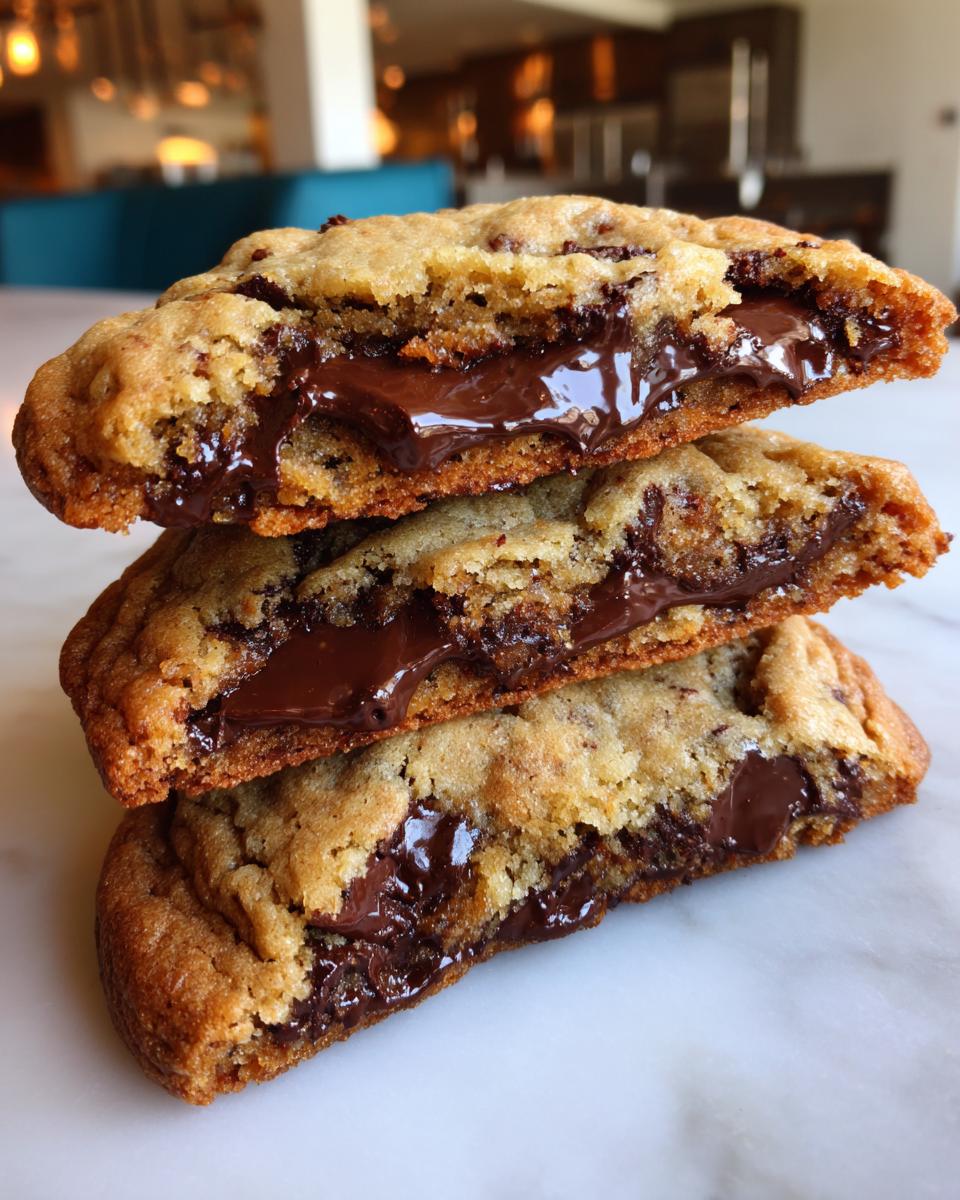
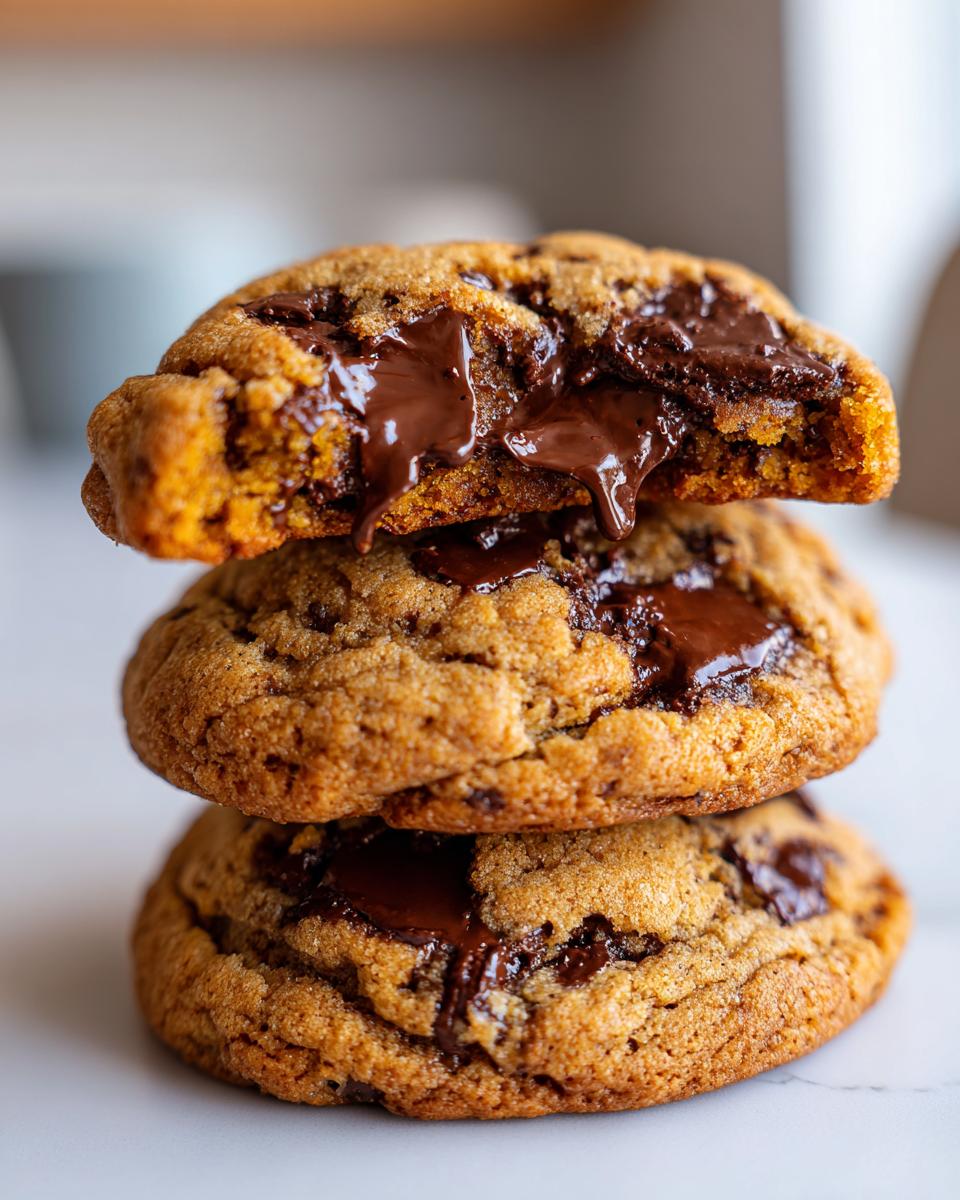
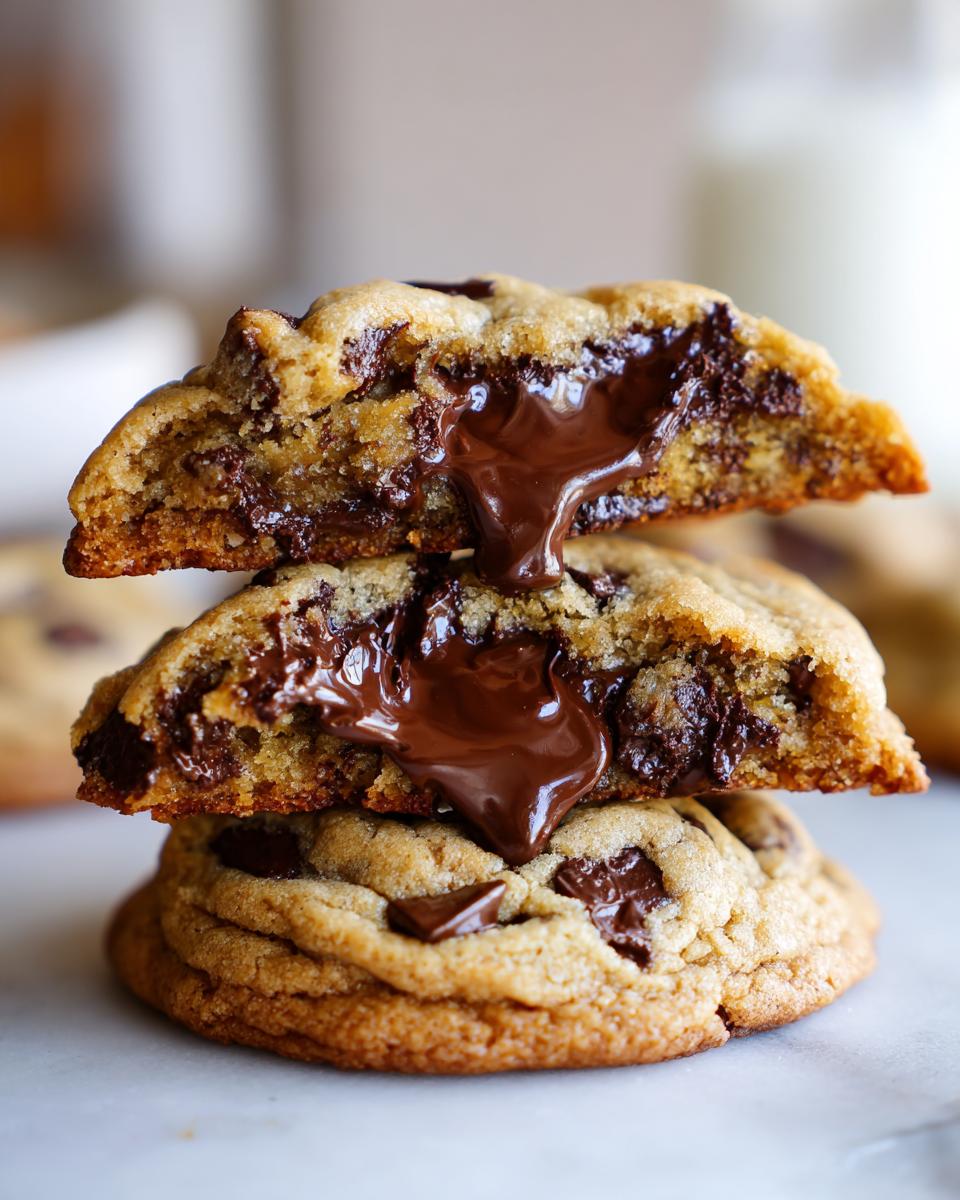
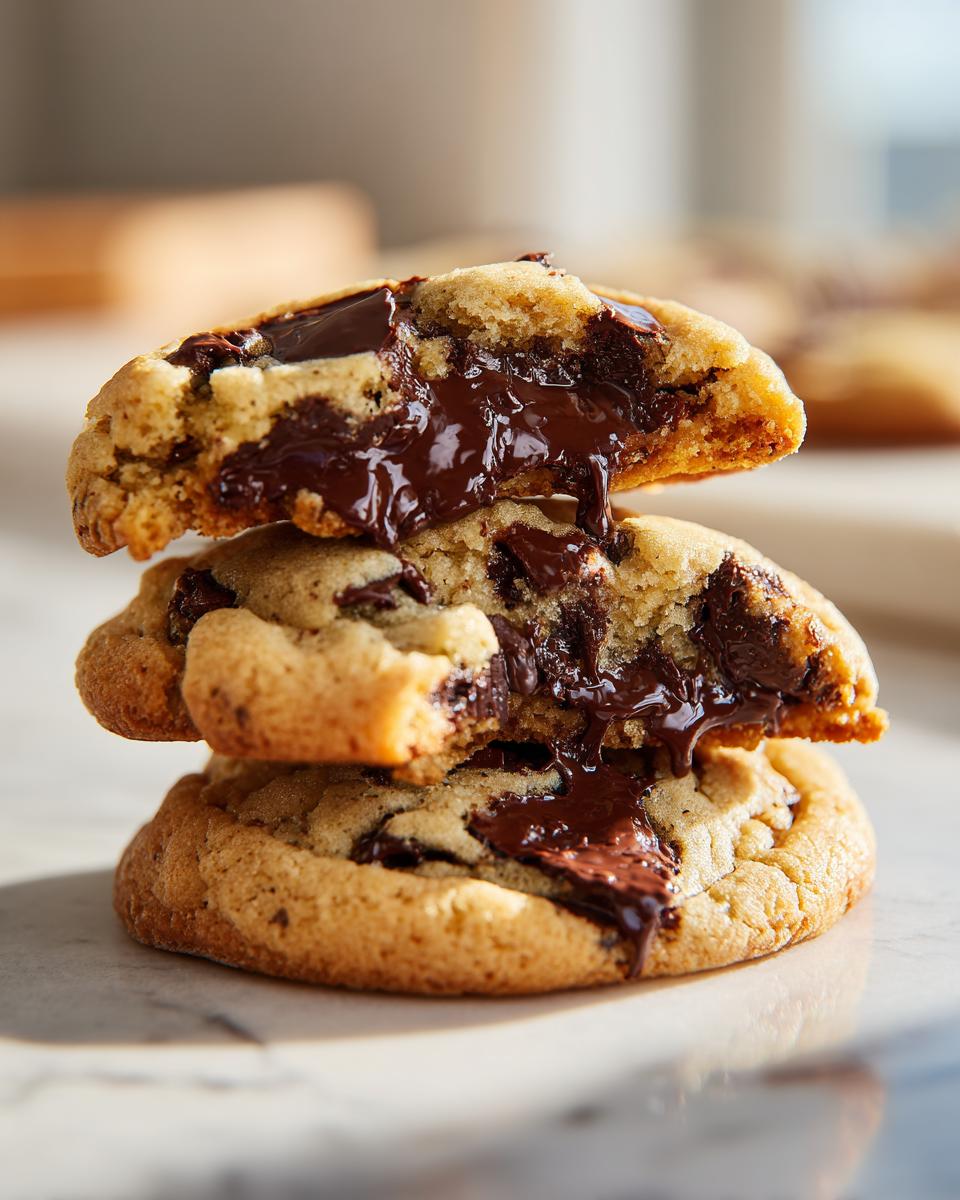
Forget everything you thought you knew about the standard chocolate chip cookie. We are kicking things up about ten notches today! When you introduce the magic of browned butter, suddenly you have these intensely flavorful, unbelievably good brown butter chocolate chip cookies. This isn’t some fussy dessert reserved for holidays. My whole mission here at Completely Yummy is making seriously good food that genuinely works for your busy life. That’s why I spent months perfecting this recipe so you get that signature chewy center and those perfect crispy edges every single time, without fuss.
- Why These Brown Butter Chocolate Chip Cookies Are Your New Favorite
- Equipment Needed for Perfect Brown Butter Chocolate Chip Cookies
- Ingredients for Ultimate Brown Butter Chocolate Chip Cookies
- Mastering How to Brown Butter for Cookies
- Step-by-Step Instructions for Brown Butter Chocolate Chip Cookies
- Ingredient Notes and Substitutions for Nutty Butter Cookies
- Tips for Success: Achieving Bakery Style Chocolate Chip Cookies
- Storing and Reheating Your Brown Butter Chocolate Chip Cookies
- Frequently Asked Questions About Brown Butter Chocolate Chip Cookies
Why These Brown Butter Chocolate Chip Cookies Are Your New Favorite
I promise you, once you smell what browned butter does to cookie dough, you won’t go back to the basics. These aren’t just cookies; they’re practically gourmet chocolate chip cookies made right on your countertop! Here’s why this recipe is going straight into heavy rotation:
- Deep Flavor Cookies: The nutty, almost toffee-like taste from the browned butter is just unforgettable.
- Texture Perfection: That amazing contrast—crispy edges yielding to a super soft, gooey middle.
- Surprisingly Easy: Seriously, the only tricky part is watching the butter, and I walk you through that!
If you’re looking for more tried-and-true treats to bring joy to your evenings, check out all my delicious dessert recipes!
Equipment Needed for Perfect Brown Butter Chocolate Chip Cookies
When you’re aiming for the best, you need the right tools for the job! Honestly, you don’t need a stand mixer for these beauties, but you do need a few specific things to nail the brown butter step and get that amazing texture. This list is short, but important!
- A heavy-bottomed, light-colored saucepan. This is non-negotiable! You have to see those milk solids turn brown, so don’t grab your dark stainless steel pot for this part.
- Heatproof bowls. You need one for pouring that hot, nutty butter into once it’s done.
- Standard mixing bowls for your dry ingredients.
- A good sturdy whisk and rubber spatula. We’re mixing by hand mostly, so a nice wooden spoon works great too!
- Baking sheets. Make sure they are sturdy—thin ones can lead to uneven baking.
- Parchment paper or silicone baking mats. This keeps things from sticking, which means less stress for Ava Sinclair!
Ingredients for Ultimate Brown Butter Chocolate Chip Cookies
Okay, let’s talk about what goes into these glorious, deep flavor cookies. The quality matters here, especially with the butter, since it’s the star! Don’t worry, the ingredient list is pretty simple—no weird treks to specialty stores needed. I’ve listed everything below exactly how I use it to guarantee those perfect results time after time.
- 1 cup (226g) unsalted butter (This is what we brown!)
- 1 cup (200g) packed light brown sugar
- 1/2 cup (100g) granulated sugar
- 2 large eggs, room temperature (This helps them mix smoothly!)
- 1 tablespoon vanilla extract
- 2 1/4 cups (270g) all-purpose flour
- 1 teaspoon baking soda
- 1 teaspoon kosher salt
- 1 1/2 cups (255g) semi-sweet chocolate chips or chopped chocolate chunks
- Flaky sea salt, for sprinkling (Trust me, this makes them look and taste gourmet!)
Mastering How to Brown Butter for Cookies
Listen, I know that word—”browned”—can sound intimidating, like you need a culinary degree to pull it off, but I promise you, knowing how to brown butter for cookies is the single best technique you’ll ever learn. This step is what gives you those deep, incredible notes that turn these into caramelized flavor cookies. It’s easy, but you have to pay attention!
First things first: grab that light-colored saucepan I mentioned. You *have* to use a light pan. If you use a dark one, by the time you see the rich brown color you’re aiming for, you’ve probably already burned the milk solids underneath. Melt that whole cup of butter over medium heat. It’s going to foam up like crazy, and you’ll think, “Oops, this is messy!” Don’t panic. Just keep swirling it gently. You’re waiting for that foam to subside and then you watch the little milk solids at the bottom. They’ll start turning speckly brown.
Tips for Achieving Perfect Browned Butter Baking Recipes
This is the moment you need your eyes glued to the pan. Once the solids are a deep amber brown and you smell that wonderful nutty aroma, yank it off the heat immediately! If you hesitate for even ten seconds, that gorgeous flavor turns acrid. Pour it right away, brown bits and all, into a heatproof bowl to stop the cooking process. Let it cool down for about 15 minutes before adding the sugars. This cooling time is crucial; if it’s too hot, you’ll scramble the eggs later on!
Step-by-Step Instructions for Brown Butter Chocolate Chip Cookies
Alright, you’ve got your beautiful nutty butter ready to go! Now we move into the mixing phase. This is where we lock in that incredible richness and start setting up the texture for those amazing cookies. Remember my promise: chewy centers and crispy edges are waiting for you right around the corner. If you follow these steps closely, you’ll have the best chewy chocolate chip cookies on the block, I guarantee it.
Combining Wet Ingredients and Dry Mix for Brown Butter Chocolate Chip Cookies
Take that slightly cooled brown butter you prepped and add both the brown sugar and the white sugar right into the bowl. Whisk them together well. Now, bring in those room temperature eggs, one at a time, mixing thoroughly after each one goes in—don’t just toss them all in at once! Follow that with your vanilla extract.
In a separate area, whisk your flour, baking soda, and kosher salt together. This just makes sure everything is distributed evenly before it hits the wet stuff. Now, add your dry mix to your wet mix in gradual batches. Slow down here! Mix on low speed, and stop as soon as you see everything incorporated. Overmixing the flour builds gluten, and that leads to tough cookies, not the soft ones we want. Once it’s *just* combined, fold in those chocolate chips or chunks. The final, non-negotiable step for incredible flavor is chilling. Cover that dough now and stick it in the fridge for at least two hours, but truly, overnight is where the magic happens for those beautiful cookies with crispy edges.
Baking and Finishing Your Brown Butter Chocolate Chip Cookies
Once your dough is nice and cold, you are ready for the oven! Preheat your oven to 375°F (190°C) and line those baking sheets with parchment paper—we don’t want any sticking drama! Scoop out dough balls using a rounded tablespoon measure and space them out nicely on the sheet.
Bake them for about 10 to 13 minutes. The visual cue is key here: the edges should look nicely golden brown, but critically, the centers should still look slightly puffy and honestly, a tiny bit underbaked. When you pull them out, immediately sprinkle just a touch of flaky sea salt over the top of each warm cookie. That tiny sparkle of salt finishes them off and really bumps them into that elevated, gourmet chocolate chip cookies category. Let them sit on the hot baking sheet for five minutes before moving them over to a wire rack to finish cooling.
Ingredient Notes and Substitutions for Nutty Butter Cookies
One thing I learned watching my family bake is that while these are brown butter chocolate chip cookies, the supporting cast truly matters. You don’t need to change much—Ava Sinclair is all about respecting the core flavor—but a few small tweaks can make a huge difference in texture and ‘melt in your mouth cookies’ quality.
First off, please, room temperature eggs! If you toss cold eggs into that slightly cooled brown butter mixture, it can cause the butter to solidify quickly, leading to a lumpy base where the sugar won’t incorporate correctly. Just plan ahead and pull them out about an hour before you start. This seems minor, but it makes your batter so much smoother!
When it comes to chocolate, you have a choice! I use a mix of semi-sweet chips and chopped bar chocolate. The chips offer consistency, but chopping a good quality bar gives you those gorgeous, uneven pools of melted chocolate that scream homemade gourmet cookies. If you are using only chips, make sure they are high quality.
And finally, the salt! The 1 teaspoon of kosher salt *inside* the dough is for seasoning that deep flavor. The flaky sea salt sprinkled on top right after baking? That is purely for presentation and that burst of contrast. That crunch is what makes people rave about these nutty butter cookies. Don’t skip the finishing salt!
If you’re curious about other ways to elevate your baking game beyond cookies, you might enjoy checking out some inspiration from other great bakers like the ones featured over at Modern Honey.
Tips for Success: Achieving Bakery Style Chocolate Chip Cookies
Alright, we’ve browned the butter, we’ve chilled the dough—now we need to make sure they look like they came straight from that fancy local bakery! Getting that beautiful, slightly flatter, crinkly-edged look for our bakery style chocolate chip cookies relies on one little trick right before they hit the oven.
When you scoop your dough balls onto the parchment, don’t leave them as high mounds. I used to leave them tall, thinking they would flatten out enough, but nope! They ended up more like little domes, which is fine, but not the look I wanted. Now, I take the bottom of a glass or even just my palm and gently press the top of each dough ball down slightly. Just flatten it a bit!
This simple step ensures they spread just the right amount while the edges crisp up beautifully. It’s foolproof! I learned this the hard way when I was trying to impress my neighbors with my first batch years ago; they were too puffy and stayed raw in the middle for ages! You can see more great texture tips over at Savory Pro, but trust me, flattening them gently gets you those perfect cookies with crispy edges.
If you want to practice with another fun, simple treat, you absolutely have to try my whipped shortbread cookies next!
Storing and Reheating Your Brown Butter Chocolate Chip Cookies
You might be thinking, “These are too good to last!” And you’re probably right, but on the off chance you have any survivors from that first batch, we need a plan for storage. We want these deep flavor cookies to taste just as good tomorrow as they do today, right?
The absolute best way to keep these cookies fresh is to let them cool completely—totally cool on a wire rack—before you put them anywhere near an airtight container. If you trap warm cookies, that moisture turns into soggy bottoms, and we just can’t have that after all that effort tanning the butter!
Once fully cooled, place them in a sturdy, airtight container. You can layer them with parchment paper sheets in between if you’re stacking them high, just to make sure those crispy edges don’t get mashed into the soft centers. Stored this way at room temperature, they are fantastic for about four days. Five days, tops, if you can resist reaching for them!
Now, for the reheating. This is how you bring back that fresh-from-the-oven, melty-chocolate moment! If you need one to be instantly delicious, pop that cookie on a microwave-safe plate for about 10 to 15 seconds. It just warms the chocolate back up enough to feel gooey again. If you want to restore that crispy edge, use the oven. Pop them on a baking sheet at 325°F (160°C) for just 3 or 4 minutes. They come out tasting like you just made them. Enjoy!
Frequently Asked Questions About Brown Butter Chocolate Chip Cookies
Even when you nail the technique, I know you bakers always have a few lingering questions! That’s perfectly normal. When you’re upgrading a classic, you want every detail ironed out, especially when aiming for those famous thick and chewy cookies. Here are the questions I get most often about getting that perfect nutty, melt in your mouth cookies texture.
Can I skip browning the butter in this brown butter chocolate chip cookies recipe?
You totally *can*, and I won’t tell anyone! But honestly, skipping it means you are going to miss that deep, caramelized flavor that makes these officially brown butter chocolate chip cookies and not just ‘really good cookies.’ If you skip the browning step, please, please, please do not substitute melted butter! If you skip tanning the butter, you need to use cold, cubed unsalted butter, just like a standard chocolate chip cookie recipe. The texture will be softer and cake-like, totally different from the chewy edges we were aiming for.
How do I make these brown butter chocolate chip cookies thicker and chewier?
This is my favorite tweak! If you love them super thick, lean into the brown sugar. Try bumping the brown sugar up by about an extra quarter-cup and maybe knocking the white sugar down just a touch. Brown sugar has molasses, which keeps things moist and chewy. Also, parchment paper is hugely your friend here. And the secret weapon? Chill that dough longer! If you usually chill for two hours, try going overnight. That extra time really concentrates the flavor and hydrates the flour, leading to those dense, incredible thick and chewy cookies.
For even more straightforward kitchen guidance on making things simpler overall, sometimes I look at sites like Easy Chili Recipe just to reset my approach to other kinds of weeknight cooking. It keeps my standards high!
If you’re looking for external thoughts on what went wrong when cookies flatten too much, check out the great advice on I Am Baker.
PrintGooey, Chewy Brown Butter Chocolate Chip Cookies

Make the best chocolate chip cookies by using browned butter for a rich, nutty flavor. This recipe delivers cookies with soft, gooey centers and crisp edges.
- Prep Time: 20 min
- Cook Time: 15 min
- Total Time: 2 hours 35 min
- Yield: 18 cookies 1x
- Category: Dessert
- Method: Baking
- Cuisine: American
- Diet: Vegetarian
Ingredients
- 1 cup (226g) unsalted butter
- 1 cup (200g) packed light brown sugar
- 1/2 cup (100g) granulated sugar
- 2 large eggs, room temperature
- 1 tablespoon vanilla extract
- 2 1/4 cups (270g) all-purpose flour
- 1 teaspoon baking soda
- 1 teaspoon kosher salt
- 1 1/2 cups (255g) semi-sweet chocolate chips or chopped chocolate chunks
- Flaky sea salt, for sprinkling
Instructions
- Place the butter in a light-colored saucepan over medium heat. Melt the butter completely, then continue cooking, swirling the pan often. The butter will foam, then subside. Watch closely as brown bits form at the bottom and the aroma becomes nutty. This takes about 5 to 8 minutes. Remove from heat immediately when the milk solids turn deep brown. Pour the browned butter, including the brown bits, into a heatproof bowl. Let it cool for 15 minutes.
- Add the brown sugar and granulated sugar to the slightly cooled brown butter. Whisk until fully combined.
- Whisk in the eggs one at a time, mixing well after each addition. Stir in the vanilla extract.
- In a separate bowl, whisk together the flour, baking soda, and kosher salt.
- Gradually add the dry ingredients to the wet ingredients, mixing on low speed until just combined. Do not overmix.
- Fold in the chocolate chips or chunks.
- Cover the dough and chill in the refrigerator for at least 2 hours, or preferably overnight, for the best flavor and texture.
- Preheat your oven to 375°F (190°C). Line baking sheets with parchment paper.
- Scoop rounded tablespoons of dough onto the prepared sheets, leaving space between them.
- Bake for 10 to 13 minutes. The edges should be golden brown, but the centers should still look slightly underbaked and puffy.
- Immediately sprinkle the tops of the hot cookies with flaky sea salt.
- Let the cookies cool on the baking sheet for 5 minutes before transferring them to a wire rack to cool completely.
Notes
- To properly brown butter, use a light-colored pan so you can clearly see the milk solids turning brown.
- Chilling the dough is key for preventing spread and deepening the caramelized flavor.
- For bakery style chocolate chip cookies, press down lightly on the dough balls before baking.
Nutrition
- Serving Size: 1 cookie
- Calories: 240
- Sugar: 18g
- Sodium: 180mg
- Fat: 14g
- Saturated Fat: 8g
- Unsaturated Fat: 6g
- Trans Fat: 0g
- Carbohydrates: 28g
- Fiber: 1g
- Protein: 3g
- Cholesterol: 45mg