
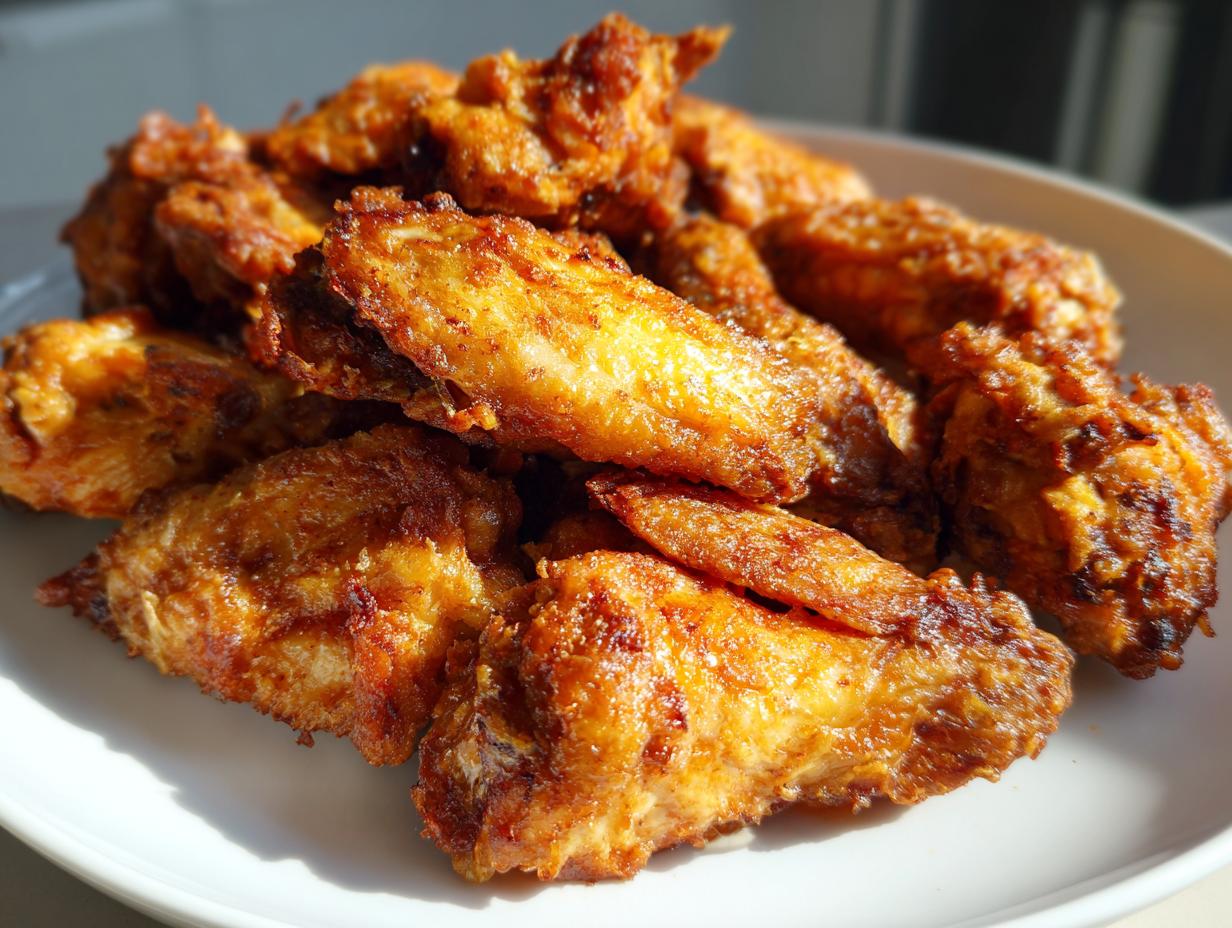
Oh, the baked wing dilemma! It’s one of those things home cooks struggle with forever, right? You bake them hoping for that satisfying crunch, but what you get is sad, rubbery skin that just sits there refusing to crisp up. Well, let me tell you, after testing batch after gooey batch, I figured out the trick. This recipe for crispy baked chicken wings completely changes the game because we’re using two non-negotiable tools: baking powder and a wire rack. That’s how we get that amazing, crackly skin while keeping the inside impossibly juicy. My whole mission here at the blog is to take those tricky techniques and make them genuinely doable for your busy weeknight, and believe me, making these wings is so much simpler than wrestling a pot of hot oil. If you need a fantastic, quick meal idea after mastering this, check out my staple easy weeknight dinners!
- Why You Will Make These Crispy Baked Chicken Wings Every Time
- The Secret to Crispy Baked Chicken Wings: Ingredients and Equipment
- Step-by-Step Instructions for Juicy Inside Crispy Outside Wings
- Finishing Your Crispy Baked Chicken Wings
- Flavor Variations for Your Baked Wings Recipe
- Serving Suggestions for Party Finger Food Chicken
- Storage and Reheating Instructions for Crispy Baked Chicken Wings
- Frequently Asked Questions About No Fry Chicken Wings
- Nutritional Data Estimate
Why You Will Make These Crispy Baked Chicken Wings Every Time
I know you’ve tried baking wings before, but stick with me on this one. Once you see how easy it is to get a restaurant-quality crunch right in your own oven, you won’t even look at the deep fryer anymore. These are the absolute best baked chicken wings you will ever make at home, trust me!
- No Fry, Real Crunch: This is the best part! We achieve that ultimate crunch we all crave without dealing with the mess, danger, or extra grease of deep frying. These are truly oven fried chicken wings made healthy-ish!
- Juicy Inside, Crispy Outside: The baking powder trick works magic, ensuring that the skin gets shatteringly crisp while the meat inside stays tender and moist. You get that perfect juicy inside crispy outside wings experience every single time.
- Game Day Champion: These are the easiest, most reliable party finger food chicken around. They hold up beautifully under sauce and are perfect for an impressive game day chicken appetizer.
- Super Easy Cleanup: Because we bake them on a rack over foil, cleanup is minimal. You are done with prep in about 10 minutes, making this a fantastic quick wing recipe.
- Healthier Chicken Wings Recipe: Since we skip the oil bath, you get all the flavor without the added heaviness, making them suitable for a great weeknight chicken wings dinner too!
The Secret to Crispy Baked Chicken Wings: Ingredients and Equipment
Okay, this is where the magic reveals itself. You look at the ingredient list and think, “Wait, baking powder? Isn’t that for cakes?” Yes! And that’s exactly why this works. It’s the most reliable way to get that perfect crunch without deep frying. Trust me, once you see how simple this is, you’ll be making these no fry chicken wings all the time. If you want to chat about how these turned out or have a question, you can always reach out on my contact page!
Essential Ingredients for Crispy Baked Chicken Wings
Forget fancy marinades right now; the crispiness comes from the dry coating. We need 2 pounds of wings, sure, but the key player is the baking powder. You absolutely need one tablespoon of baking powder, and honestly, aim for aluminum-free if you can find it—it makes a subtle difference in taste. We mix that with salt, garlic powder, onion powder, pepper, and just a little tiny kick of cayenne if you like heat. When the baking powder hits that hot oven air, it raises the skin’s pH level. That might sound scientific, but all it means for us is that the skin dries out fast and browns beautifully. It’s the ultimate baking powder chicken wings trick!
Equipment Needed for Oven Fried Chicken Wings
You can’t just dump these wings onto a regular baking sheet and expect victory. If you do that, the fat steams the bottom of the wing, and you get soggy disappointment! We need high heat and air circulation. So, line a sturdy baking sheet with foil—this saves you scrubbing later. Then, the crucial step: you must place a wire cooling rack on top of that foil. This rack setup is non-negotiable for making crispy baked chicken wings. It lifts the wings off the pan so heat can circulate all the way around them, allowing the fat to drip away. It mimics what a deep fryer does, but safely, right there in your oven!
Step-by-Step Instructions for Juicy Inside Crispy Outside Wings
Ready to see the cooking happen? This is where all that prep work pays off! We are moving fast once the oven hits temperature, so make sure your wings are ready to go. I promise you don’t need a fancy air fryer for this; you just need a little high heat discipline. If you want to see how I make something equally simple but way different, you should check out my homemade granola recipe next!
Preparation: Drying and Coating Your Wings
First things first: we have to attack the moisture. Take your separated wings and put them on a pile of paper towels. Press down hard until they feel genuinely dry. If the skin is damp, it will steam, and steam is the enemy of crispiness! Once dry, toss them into that big bowl with your spice blend—baking powder and all the seasonings. You need to toss these things until you think you’ve tossed too much. Seriously, use your hands and make sure every single nook and cranny of that chicken skin is covered in that powdery mix. This coating is what creates the barrier that turns into the best crunch on your crispy baked chicken wings.
The Baking Process for Maximum Crunch on Crispy Baked Chicken Wings
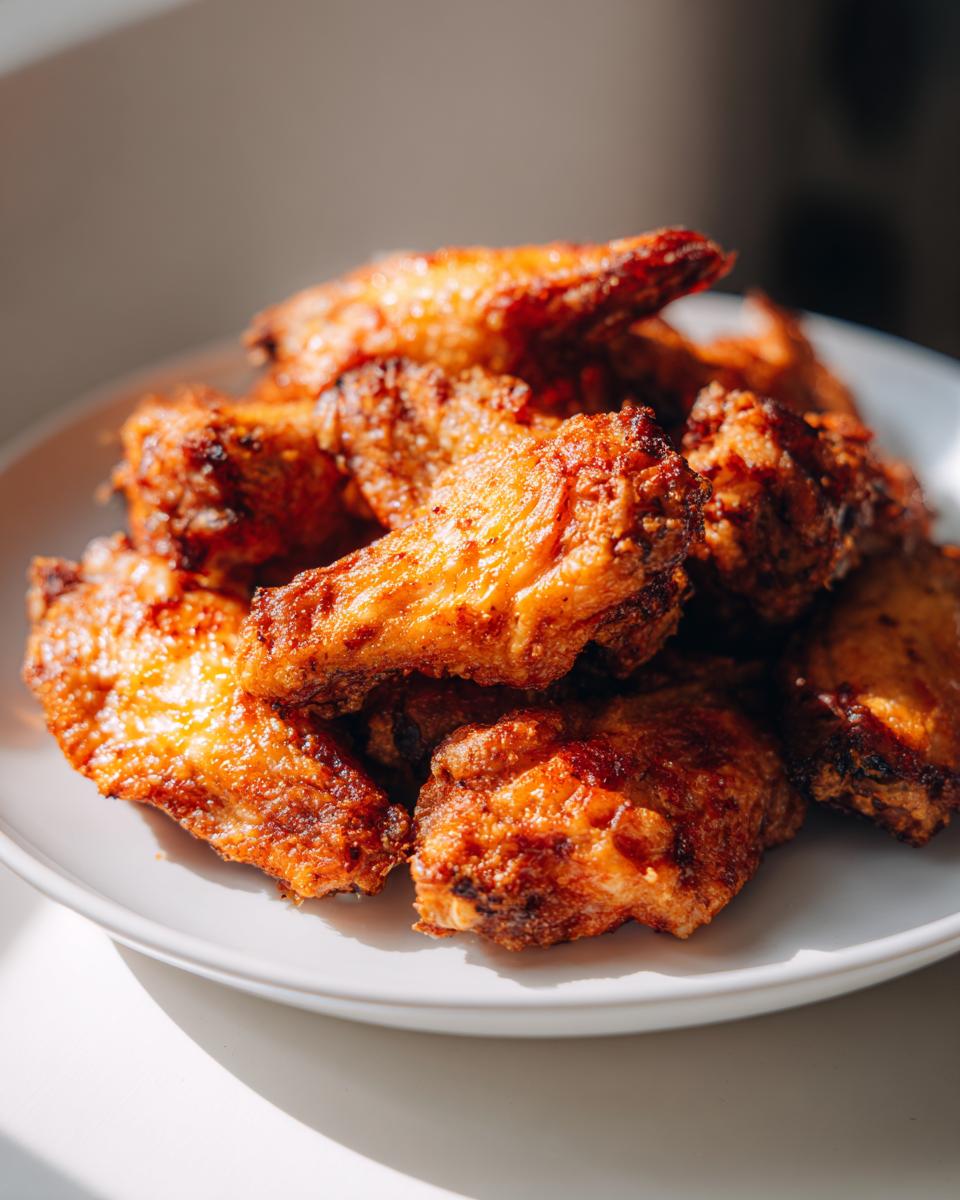
Crank that oven up to 425 degrees Fahrenheit! Once the oven is roaring hot, arrange your coated wings on that wire rack you set up—and this is key—leave some space between each one. They need room to breathe so the hot air can hug all sides. We bake them for 25 minutes straight. Then, you pull them out, flip every single wing over carefully, and slide them back in for another 20 to 25 minutes. That second baking period, after the flip, is what seals the deal and gives you that deep golden color. This two-stage bake is exactly how to get crispy wings in oven without fail!
Finishing Your Crispy Baked Chicken Wings
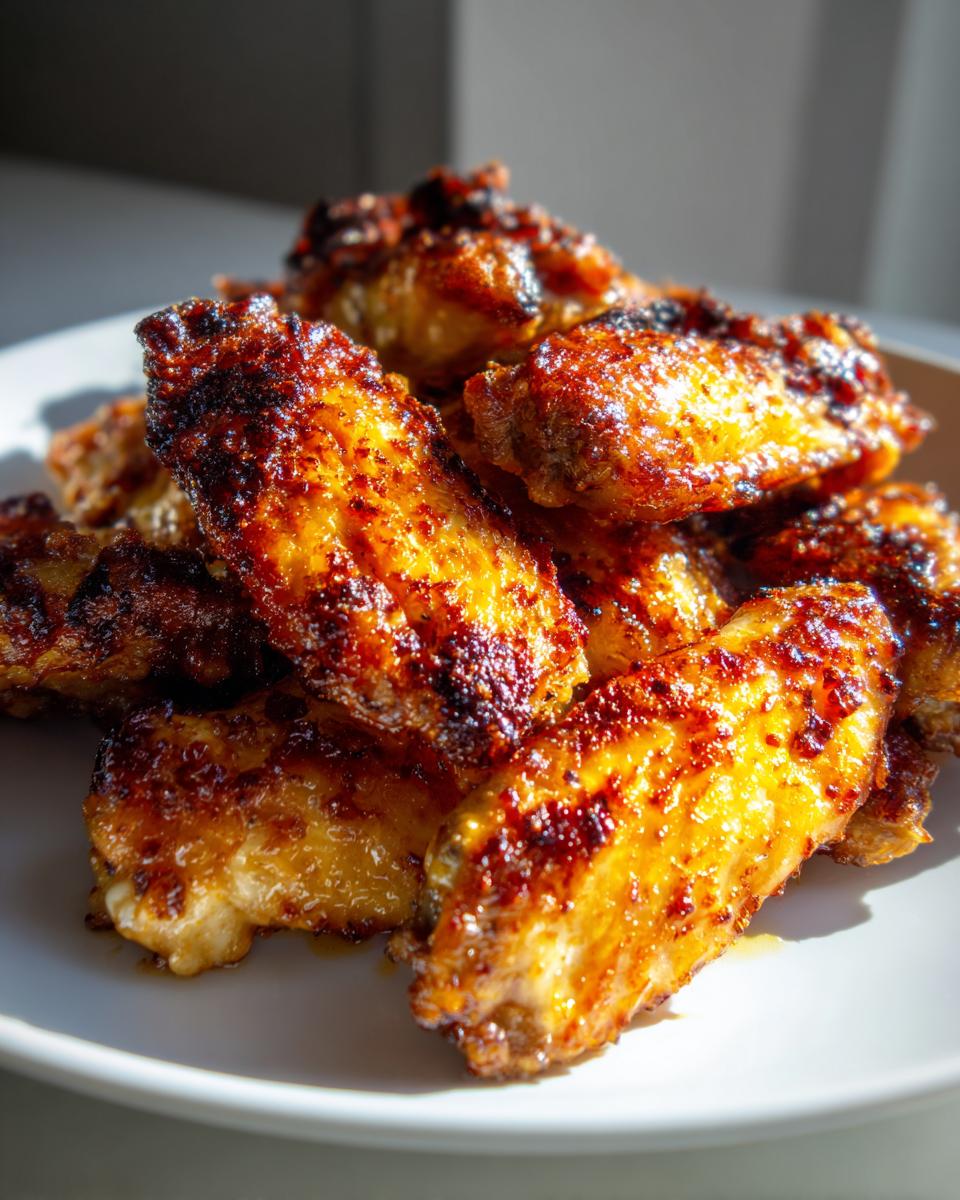
When those wings come out of the oven after that full 50 minutes, they are going to look incredible—golden, crisp, and totally ready for their close-up! They are technically done at this point, but we have to dress them up now. If you like a richer flavor, I toss mine in a little bit of melted butter or oil right after they come off the rack. It helps the final sauce or rub stick just a little better. Don’t douse them, though; we aren’t trying to undo all that hard work we did drying the skin!
Now for the flavor explosion! Put your cooked wings into a clean mixing bowl. Pour over your favorite Buffalo sauce, BBQ sauce, or just sprinkle on a flavorful dry rub. Toss gently but quickly to make sure every piece is coated. If you used a sauce, especially a sweeter one, here is a pro tip from my testing days: move those sauced wings back onto the clean wire rack, and pop them under the broiler for just one or two minutes. Watch them like a hawk—I mean it, one minute too long and you’ll have burnt sticky spots! This quick blast under the broiler sets the sauce and gives the surface of your crispy baked chicken wings an extra tacky, perfect finish.
Serve them immediately while they are still piping hot. Seriously, the clock starts ticking on crunch longevity the second they come out of that heat, so get them on the table!
Flavor Variations for Your Baked Wings Recipe
The simple seasoning blend of salt, garlic, and onion powder is wonderful, but the beauty of crispy baked chicken wings is that they are the perfect canvas for almost any flavor you can dream up! Because the skin is so crispy, it stands up beautifully to sauces without getting soggy right away. This is where you can really play around and make these your own signature dish.
If you’re craving that classic, tangy heat, you have to make a batch of homemade Buffalo sauce to toss these in. Forget the sugary bottled stuff; a true Buffalo baked wings recipe is just good quality hot sauce mixed with a bit of melted butter. Whisk them together, toss your crispy wings, and you are in heaven. It’s so easy, and the texture on these wings handles the wet sauce perfectly!
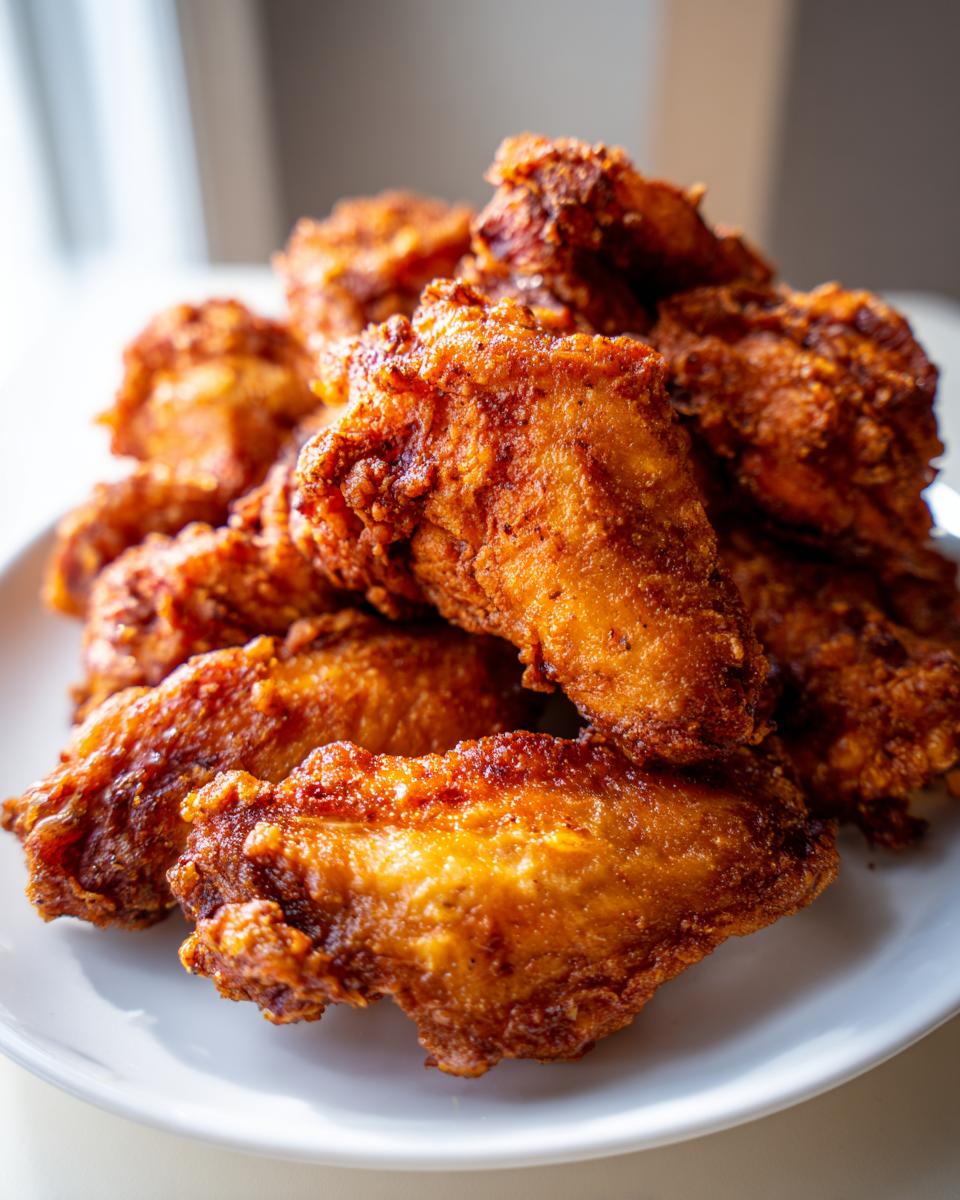
For those who aren’t big fans of sticky sauces, sticking to a dry rub is the way to go. Once the wings come off the rack after baking, you can toss them lightly in melted butter or oil (like you did in the main instructions) and then hit them with a heavy dusting of a flavorful dry rub—think smoked paprika, brown sugar, cayenne, and extra garlic powder. When you dust a sauced wing, the sauce sits on top; when you use a dry rub on a slightly oiled, hot wing, the flavors really adhere wonderfully. This gives you incredible, flavorful baked chicken that stays crunchy for ages, which is great for leftovers, though I doubt you’ll have any!
Speaking of flavor, if you are hosting and need more impressive appetizers, you should definitely check out my absolute favorite easy chili recipe. It’s hearty, simple, and perfect for feeding a crowd alongside a big platter of these crunchy wings!
Serving Suggestions for Party Finger Food Chicken
These crispy baked chicken wings are honestly the definition of the perfect party finger food chicken. They show up looking amazing and disappear even faster! If you’re setting up your spread for game day, you absolutely need the classics alongside them. I always make sure to have big bowls of crisp, cold celery sticks and carrot sticks—the cooling contrast is just as important as the heat of the wings themselves.
And you can’t forget the dipping station! A rich, tangy blue cheese dressing or a good ranch dressing is non-negotiable for me. It’s the perfect cool dip for that spicy Buffalo kick, making this setup the ultimate game day chicken appetizer. If you’re looking for a fun, crowd-pleasing side that’s a step up from plain salads, you should totally look at my Dorito Taco Salad recipe—it’s always a huge hit!
Storage and Reheating Instructions for Crispy Baked Chicken Wings
Okay, realistically, sometimes we make way too many wings, or maybe you just want to enjoy these incredible flavors the next day. Storing your leftovers needs a little care, though, because the enemy of tomorrow’s wings is humidity. If you sauced them last night, they’ve already absorbed a lot of that moisture. Keep any leftover sauced wings tucked away in an airtight container in the fridge, but if you kept some dry-rubbed wings separate, try to store those in a container lined with a paper towel to wick away any condensation.
Now, here is the most important part about leftovers: never, ever, ever try to reheat your crispy baked chicken wings in the microwave! I know it’s fast, but that heat turns the skin rubbery and sad faster than you can ask for a refill. If you want to bring back that glorious crunch, you need dry heat. The best method is putting them back on that wire rack set over a foil-lined sheet pan—yes, you need the setup again! Pop them into a 375-degree oven for about 8 to 10 minutes. This dries the skin out and reheats the meat perfectly. If you have an air fryer, even better—a couple of minutes at 375°F will crisp them right back up!
If you want to know more about my philosophy on food and why I test these little details so carefully, I’d love for you to read up on the story behind the blog over on my About page. Enjoy your leftovers!
Frequently Asked Questions About No Fry Chicken Wings
I always get so many questions after people try this recipe for the first time because they can’t believe how crunchy they get without frying! Here are the top things people ask me when they are trying to master the crispy baked chicken wings technique at home. I’ve tried to cover all the little spots where things can go wrong!
Can I skip the baking powder for these crispy wings?
Oh, you totally *could* skip it, but I wouldn’t advise it if you’re serious about crispiness! If you leave out the baking powder, you’re skipping the main component of the secret to crispy baked skin. Without it, you’ll get decent color, sure, but you’ll miss out on that dry, almost bubbly texture we are aiming for. It’s the baking powder that helps draw the moisture out during the long high-heat bake—don’t skip it!
What is the best way to make these a Healthy Chicken Wings Recipe?
I love that you are focused on keeping things light! The great thing about this oven baked wings recipe is that it’s already much healthier than deep frying. To keep it optimized for health, just skip the step where I suggest tossing the wings in melted butter or oil *after* they come out of the oven. Then, use a low-sugar sauce or just rely on the flavor from the initial spice rub. A dry rub is your best friend here if you are counting calories or fat content!
Can I use frozen wings for this Oven Baked Wings Recipe?
Please, please, please do not try to cook wings from frozen! If you toss partially frozen wings onto that hot rack, they will steam themselves into mush before the outside even gets a chance to brown. The absolute first and most crucial step for any how to get crispy wings in oven method is making sure the meat is fully thawed. Once thawed, you must pat them bone dry with paper towels before seasoning them. Moisture is the enemy, remember?
If you’re curious about my safety standards or want to know more about how I check ingredient quality, you can always read through my privacy policy for my commitment to quality!
Nutritional Data Estimate
Now, I know some of you are tracking macros or just curious about what goes into these amazing wings. Since everyone customizes their sauce—from mild BBQ to zero-carb Buffalo—these numbers are just an estimate based on the wings seasoned with the dry rub and tossed lightly in a teaspoon of oil after baking, before sauce is added. If you skip the post-bake oil toss, your fat content will drop!
Remember, these are estimates based on the basic recipe structure, so your final tally will change depending on the sauce you choose. If you want to see the guidelines I follow when developing recipes like this one, feel free to check out my terms of use page for transparency!
- Serving Size: Based on 4 wings (drumettes and flats combined)
- Calories: Approximately 280 kcal
- Protein: About 26g (That’s great fuel!)
- Fat: Roughly 18g (Includes healthy and saturated fats)
- Carbohydrates: Very low, about 1g
- Sugar: Less than 1g (Stays low unless you drench them in sugary BBQ sauce!)
Seriously, comparing this to restaurant deep-fried versions, the difference is huge thanks to our baking powder trick. It’s a delicious appetizer that doesn’t completely derail your healthier eating goals!
PrintExtra Crispy Baked Chicken Wings: The No-Fry Secret

You can make truly crispy baked chicken wings without deep frying. This recipe uses a simple baking powder trick and high heat to give you juicy meat inside and shatteringly crisp skin outside. It is perfect for game day appetizers or an easy weeknight dinner.
- Prep Time: 10 min
- Cook Time: 50 min
- Total Time: 60 min
- Yield: 4 servings 1x
- Category: Appetizer
- Method: Baking
- Cuisine: American
- Diet: Low Fat
Ingredients
- 2 lbs chicken wings (flats and drumettes separated)
- 1 tablespoon baking powder (aluminum-free is best)
- 1 teaspoon salt
- 1 teaspoon garlic powder
- 1 teaspoon onion powder
- 1/2 teaspoon black pepper
- 1/4 teaspoon cayenne pepper (optional)
- 2 tablespoons melted butter or oil (for tossing after baking)
- Your favorite sauce (Buffalo, BBQ, or dry rub)
Instructions
- Preheat your oven to 425 degrees Fahrenheit. Line a baking sheet with foil for easy cleanup, then place a wire cooling rack on top of the sheet. This rack placement is key for air circulation and crispiness.
- Pat the chicken wings completely dry using paper towels. Removing surface moisture is essential for achieving a crunchy exterior.
- In a large bowl, combine the baking powder, salt, garlic powder, onion powder, black pepper, and cayenne pepper.
- Add the dried chicken wings to the bowl. Toss them thoroughly until every piece is evenly coated with the dry mixture. The baking powder reacts with the chicken skin during baking, helping it dry out and crisp up.
- Arrange the coated wings in a single layer on the wire rack. Do not let the pieces touch each other; space them out for maximum air flow.
- Bake for 25 minutes.
- Flip each wing over. Return the pan to the oven and bake for another 20 to 25 minutes, or until the skin is deeply golden brown and very crisp.
- Remove the wings from the oven. Immediately toss them in a bowl with the melted butter or oil, if using.
- Toss the wings in your chosen sauce or serve immediately with a dry rub. Serve hot with celery and blue cheese dressing for a complete party finger food experience.
Notes
- Do not skip drying the wings thoroughly; this is the first step to avoiding soggy skin.
- Use a wire rack set over a baking sheet. This allows fat to drip away and hot air to circulate underneath the wings, mimicking deep frying results.
- For extra flavor, you can toss the wings in a dry rub after saucing them, or broil them for 1-2 minutes after saucing to set the glaze.
Nutrition
- Serving Size: 4 wings
- Calories: 280
- Sugar: 0.5
- Sodium: 350
- Fat: 18
- Saturated Fat: 5
- Unsaturated Fat: 13
- Trans Fat: 0
- Carbohydrates: 1
- Fiber: 0
- Protein: 26
- Cholesterol: 90