
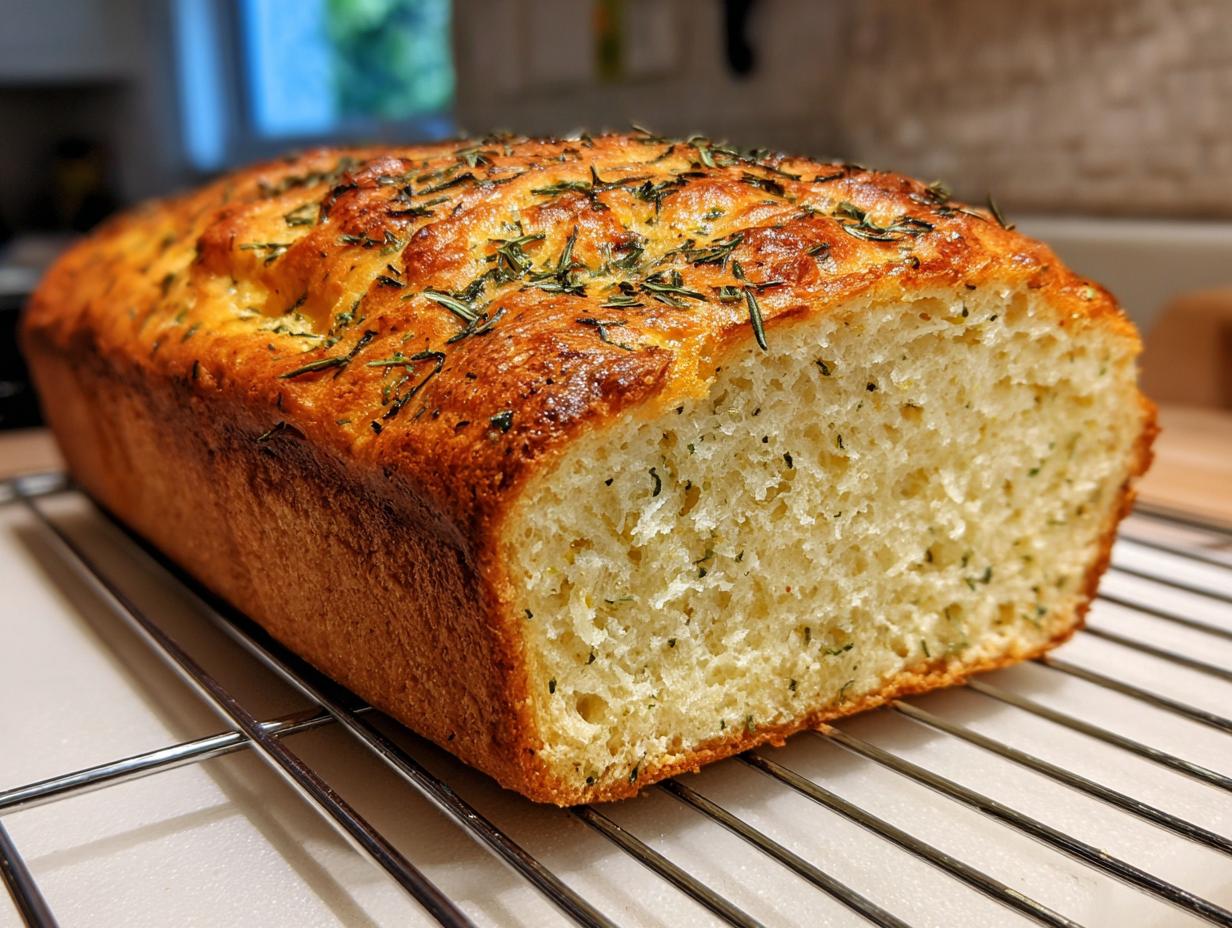
Oh, I totally get it. Life gets hectic, doesn’t it? You crave that soul-soothing, homemade aroma of baking bread, but who has time for kneading and endless rising charts after a long day? I know I used to feel that void when I was deep in the marketing deadlines—the homemade stuff felt like a distant dream. That’s exactly why this recipe exists! It’s my personal mission to put real, delicious flavor back into busy schedules. This Italian herb and cheese bread is what happens when comfort meets convenience. Trust me, this is easily one of the best easy bread machine recipes out there for getting that perfect savory, cheesy loaf whenever you need it!
- Why This Italian Herb and Cheese Bread is Your New Weeknight Staple
- Ingredients for Perfect Italian Herb and Cheese Bread
- Step-by-Step Guide to Making Italian Herb and Cheese Bread in Your Machine
- Tips for Success with Your Bread Machine Herb Bread
- Serving Suggestions for This Cheesy Dinner Bread
- Storage and Reheating Instructions for Your Italian Herb and Cheese Bread
- Frequently Asked Questions About This Garlic Herb Bread
- Estimating the Nutrition for Your Italian Herb and Cheese Bread
- Share Your Experience Making This Savory Italian Herb and Cheese Bread
Why This Italian Herb and Cheese Bread is Your New Weeknight Staple
When you’ve got a million things going on, the last thing you need is a recipe that fights you every step of the way. This bread machine herb bread is designed for real life—your dinner just got way easier, and honestly, way tastier!
- Zero Fuss, Maximum Flavor: You literally toss everything in the pan, press ‘Start,’ and walk away. It’s the secret weapon for getting homemade Italian flavor without sacrificing your evening.
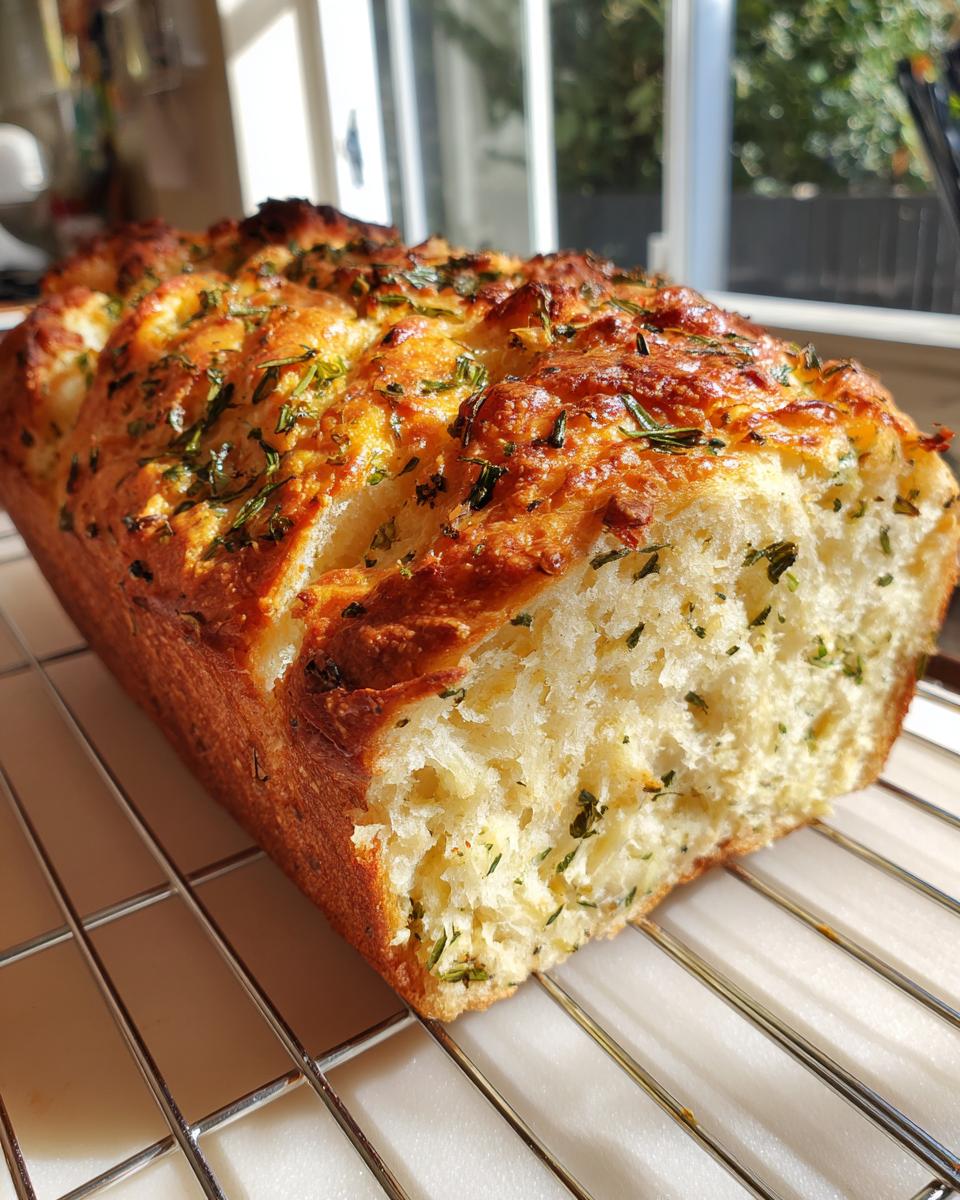
- Perfect Sandwich Loaf: Once it cools, this beauty slices like a dream. It’s sturdy enough for thick deli cuts, but the crust isn’t rock hard—perfect for rebuilding those lunchtime favorites. Check out some of my favorite sandwich bread tips!
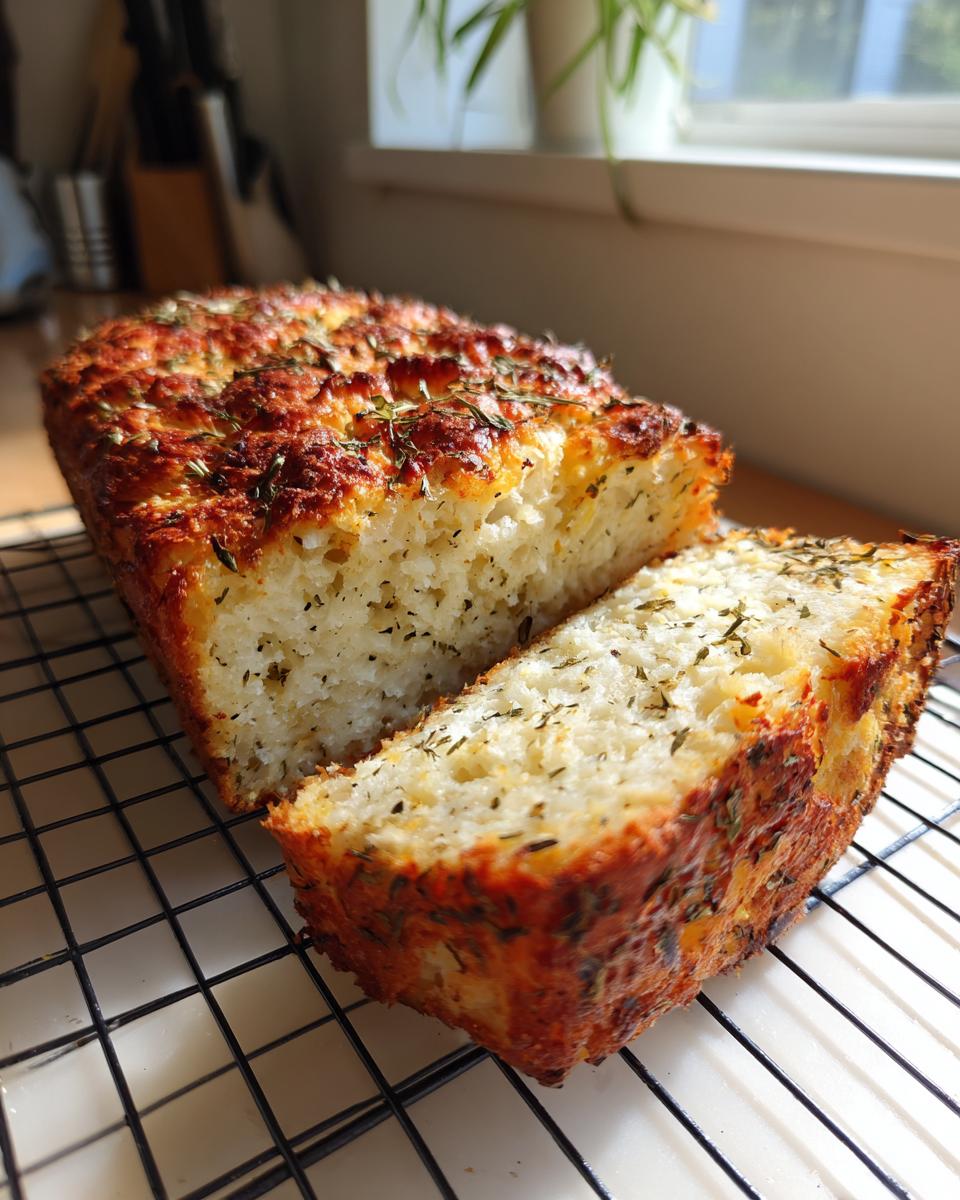
- Instant Cheesy Dinner Bread: Forget garlic bread! When you slice this open and maybe toast it lightly under the broiler, you have instant cheesy dinner bread that elevates soup night or pasta night instantly. The Parmesan gets beautifully fragrant.
- Reliable Results: I’ve tested this countless times to make sure it works perfectly in all the basic machines. If you follow the layering order, you’ll get a beautiful rise and texture every single time.
- Customizable Aroma: The smells floating through your house while this bakes are incredible—that mix of rosemary, oregano, and warm cheese is just pure comfort.
Ingredients for Perfect Italian Herb and Cheese Bread
Okay, let’s talk about what goes into this truly spectacular loaf. While bread machines make things easy, the ingredients are still where the flavor magic happens! You need to measure these things right, especially the liquid and the yeast, or your machine will throw a fit. We’re aiming for that amazing savory profile that screams “freshly baked Italian bakery,” so pay attention to how we handle that seasoning blend!
First up, that water. This is super important for a successful rise. Your water absolutely must be warm—think nice and cozy, around 80 to 90 degrees Fahrenheit. If it’s too cold, the yeast stays sleepy. Too hot, and you shock it right out of its mind! I just use my clean finger to test it; if it feels pleasantly warm, it’s perfect for waking up our active dry yeast.
When it comes to the cheeses, please, please use pre-shredded varieties for this recipe. Look, I love shredding cheese, but for the bread machine, pre-shredded melts more evenly during the kneading stage, and that’s what we want! You’ll need half a cup of shredded Parmesan and half a cup of shredded mozzarella. That Parmesan is going to give you that lovely sharp bite that defines proper parmesan herb bread.
And finally, the herbs! We are going for robust flavor here. A quality dried Italian seasoning blend is essential because it carries those strong notes of rosemary and oregano that we love in an authentic rosemary oregano bread loaf. Don’t skimp; these guys are carrying the savory side!
Ingredient Notes and Substitutions for Your Parmesan Herb Bread
I know sometimes we don’t have exactly what’s listed, so let’s troubleshoot. For the best structure in a bread machine, you really should stick to bread flour here. All-purpose flour just doesn’t have the necessary protein content to handle the weight of all that cheese and the long cycle time, so you might end up with a sad, dense lump instead of a proper sandwich loaf.
If you like a real *zing* of cheese flavor—and I often do for a side dish—swap out the standard Parmesan for a sharp, aged variety. That intensity cuts through the mildness of the mozzarella perfectly. Now, about fresh versus dried herbs: for bread machine recipes, stick to dried. Fresh herbs hold too much water, which throws off the liquid ratio the machine expects, and they can sometimes turn surprisingly bitter during the long bake cycle inside that metal box.
Step-by-Step Guide to Making Italian Herb and Cheese Bread in Your Machine
Alright, let’s get this beautiful loaf going! Using a bread machine makes this the most straightforward garlic herb bread you’ll ever bake, but the trick for any beginner bread machine owner is layering. The machine needs the ingredients organized just so for the paddle to mix things right, especially the yeast. If you mess up the order, you risk activating the yeast too early, and then—poof—no rise!
Start with all your wet stuff first: the warm water and the softened butter go right into the pan. Then, add all your dry ingredients EXCEPT the yeast. That means the bread flour, the salt, the sugar, the Italian seasoning, and the garlic powder all go in on top of the flour mound. This layering keeps the liquid and yeast separated until the machine starts mixing everything together. If your machine has a separate yeast dispenser, use it! If not, just make a tiny little well right on top of the flour mound and drop your 1.5 teaspoons of yeast right in there. Don’t let it touch the salt or water yet! If you run into any trouble with the dough consistency later, check out my full guide on bread machine troubleshooting.

Setting Up Your Bread Machine for the Best Italian Cheese Bread
You’ll want to program this for the Basic or White Bread Cycle. Since we have cheese and herbs, which can be a little rich, I always recommend starting with the Light Crust Setting. You can always watch it and decide later if you want to nudge it to Medium, but for a soft, sliceable italian cheese bread perfect for sandwiches, light is the way to go. Once you hit Start, the machine will run a quick preliminary mix, and then it settles into the main kneading phase.
The Crucial Moment: Adding Herbs and Cheese to the Dough
This is where you turn a plain herb bread into that glorious italian herb and cheese bread! Once the machine signals the end of the first kneading session—that’s usually a beep or a brief stop—it’s time to add the good stuff. Carefully open the lid (watch out for that initial puff of warm air!) and quickly scatter both the Parmesan and mozzarella evenly over the dough. Don’t mess around too long here; we want to keep that heat locked in! Close that lid the second they’re in. The machine will incorporate the cheese and finish its kneading cycle, spreading those cheesy bits beautifully throughout the dough. Let it run its course until it beeps the final time!
Tips for Success with Your Bread Machine Herb Bread
Even though the machine is doing most of the heavy lifting, a few tricks from my kitchen will ensure this cheesy dinner bread comes out looking and tasting incredible. Think of me as your digital sous chef, watching over your machine!
First, let’s double-check that yeast. If you’re not sure if your yeast is fresh—maybe the jar has been residing in the back of the pantry since last Christmas—test it before you even start. Mix your yeast with a little bit of that warm water (about a tablespoon) and a tiny pinch of the sugar from the recipe. If it gets foamy and bubbly after about five minutes, you’re good to go! If it just sits there looking sad, toss it out and grab a new packet. Dead yeast means zero rise, and nobody wants sad, flat italian cheese bread.
The most important tip I can give you, especially when using rich ingredients like butter and cheese, is about cooling. You will be tempted—oh, how you will be tempted—to slice into that warm loaf right when the cycle finishes. But please, don’t! If you cut into it immediately, all that steam trapped inside acts like liquid, and you’ll end up with a gummy, doughy interior that just won’t slice cleanly. Resist the urge!
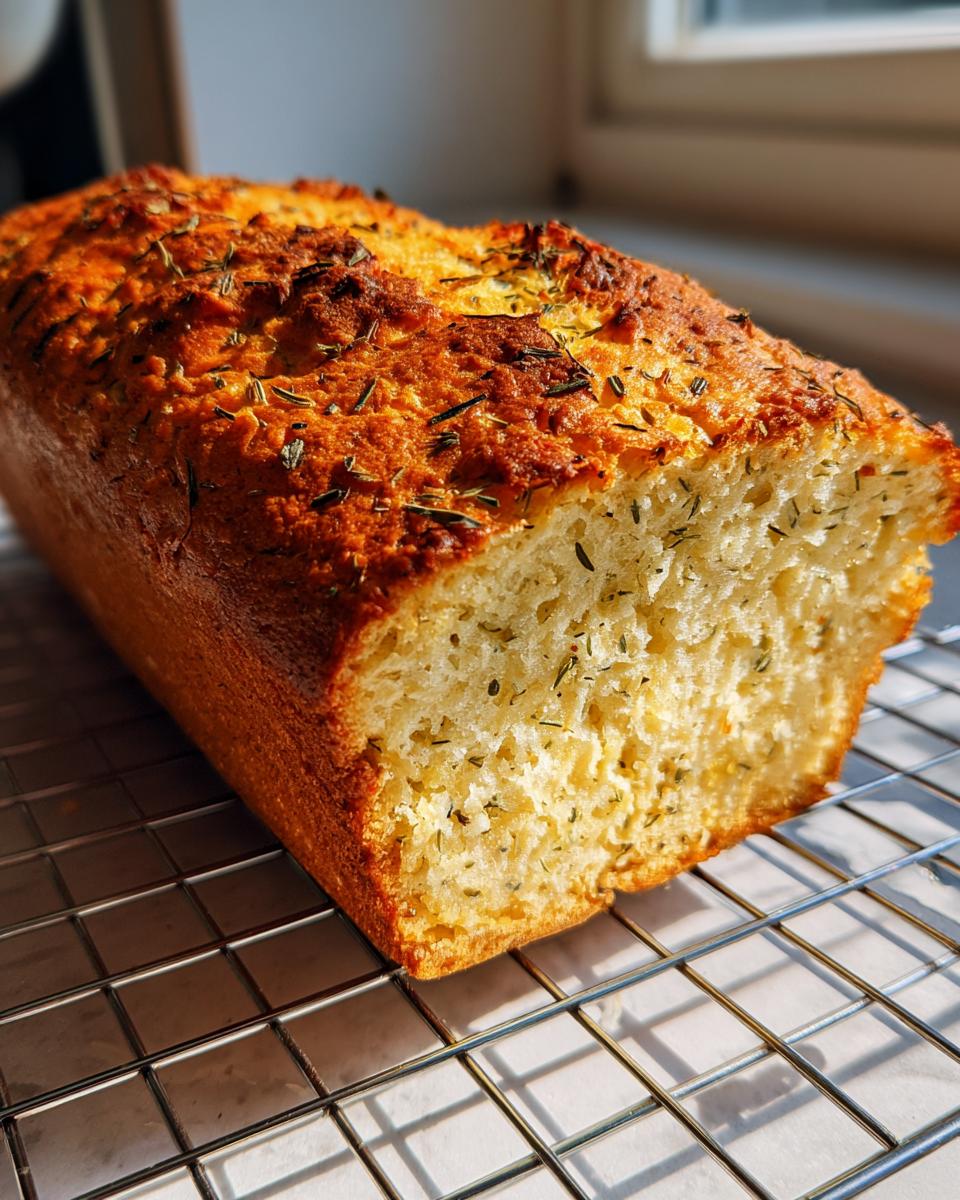
Carefully remove the bread pan from the machine right away, and gently turn the loaf out onto a wire cooling rack. You need air circulation all around it. Let it cool completely—and I mean completely, which usually takes an hour or two—before you use a serrated knife to make those perfect slices for your sandwiches. Patience here is the final secret ingredient for excellent texture.
Serving Suggestions for This Cheesy Dinner Bread
Now that you’ve got this incredible, aromatic loaf of italian herb and cheese bread, the only question left is: what do we eat it with? Because this isn’t just a standard white loaf, it brings its own massive flavor contribution to your table. Honestly, I often just sit at the counter and pull off warm chunks while it cools, but resisting is worth it!
Since it’s so deeply savory, it’s the perfect partner for anything saucy or brothy. Think about serving thick slices alongside your favorite rich pasta dishes—it wipes up every last drop of marinara or pesto, which is just heavenly. It’s also fantastic dipped into a hearty bowl of soup. If you’re looking for inspiration, I have some amazing recipes for robust winter warmers over on my best Italian soups page!
But don’t stop at dipping! This makes for the ultimate quick side. Just slice it, brush the cuts with a little melted butter mixed with one extra sprinkle of garlic powder, give it a quick toast under the broiler, and bam—you have gourmet garlic herb bread ready in five minutes flat. The melted mozzarella makes it extra decadent. It’s also surprisingly good alongside a fresh, crisp green salad to add some serious texture and substance to a lighter meal.
Storage and Reheating Instructions for Your Italian Herb and Cheese Bread
This italian herb and cheese bread is amazing when fresh, but let’s be real—sometimes you can’t eat a whole loaf in one day! Luckily, this bread machine loaf stores really well, which is fantastic for busy weeks. The key to keeping that cheesy, herbaceous goodness locked in is making sure you wrap it tight as soon as it’s completely cool. I mean it—if you try to wrap it warm, you’ll trap steam and end up with a soft crust when you wanted crispness!
For short-term storage, room temperature is fine for about three days. Once it’s totally cooled down, wrap that loaf tightly in plastic wrap. And I mean tightly—I usually wrap it once in plastic and then tuck that whole package into a zip-top bag, squeezing out any extra air. This keeps it from drying out but also slightly softens the crust, which is perfect if you’re planning on using it for soft sandwiches later in the week.
If you know you won’t get to it within three days, freezing is your best friend! This cheesy dinner bread freezes beautifully. Slice the cooled loaf first—this is crucial!—and then wrap those individual slices or preferred serving sizes very snugly in plastic wrap and then foil. You can seal the foil nicely to prevent freezer burn. It keeps great like this for up to three months!
When you’re ready to enjoy it again, reheating is what brings back that bakery magic. For a whole loaf or a large section, just unwrap it and set it on a baking sheet. Pop it into a 325°F oven for about 10 to 12 minutes. This dries out the exterior just enough to bring back that lovely slight crunch you love from the crust.
If you’re just grabbing a single slice for a quick snack or to go with soup, I highly recommend the toaster oven or an air fryer if you have one. A slice of this parmesan herb bread toasted until golden brown with the cheese just starting to sweat again is honestly almost better than fresh—it’s that easy way to revive that amazing flavor profile!
Frequently Asked Questions About This Garlic Herb Bread
I always get the same sorts of questions when people first try mixing herbs and cheese in their machine. It’s different from regular baking, right? These gadgets are fantastic, but they have their own little quirks. Here are the things I hear most often about turning this into the perfect garlic herb bread loaf!
Can I use fresh herbs instead of dried in this bread machine herb bread?
That’s a great question, and while I admire the dedication to using fresh ingredients, for this specific bread machine herb bread recipe, I really advise sticking to dried. Fresh herbs, especially ones like parsley or basil, release a lot of moisture once they heat up inside that closed cooking environment. If you substitute 1 tablespoon of dried Italian seasoning for fresh, you’d need about three times that amount of fresh, and that extra liquid can throw off the whole dough structure the machine is working so hard to achieve. Plus, dried herbs are far more concentrated, which is what gives you that strong, classic hit of flavor we need in a savory loaf like this italian herb and cheese bread.
What is the best way to get a darker crust on my Italian cheese bread?
If the ‘Light’ setting still leaves you wanting a bit more crunch and color on your italian cheese bread, you can definitely adjust the crust setting! Most machines offer Light, Medium, and Dark. If you were on Light, switch to Medium for the next batch. However, you have to watch it closely because bread machines often generate a lot of heat on the sides and bottom where the heating element is, sometimes causing uneven browning.
If the top isn’t getting dark enough by the time the machine signals it’s done, you can carefully remove the pan (use good oven mitts!) and flip the loaf out onto a baking sheet. Then, put just the loaf back—out of the pan—onto the middle rack of your preheated oven at 350°F for about 5 to 10 minutes. That direct heat will crisp up that crust beautifully without overcooking the interior.
Is this recipe suitable for a standard sandwich loaf size?
Yes, absolutely! This recipe is intentionally balanced to work perfectly in standard, vertical loaf bread machines—the kind that produces what most people call a standard sandwich loaf shape. The consistency when the cheese is added is designed to be firm enough to hold that shape throughout the cycle, so when you pull it out, it slices cleanly and uniformly. It’s excellent for dipping or eating cold straight from the fridge!
Estimating the Nutrition for Your Italian Herb and Cheese Bread
Now, I know many of you are counting points or just trying to keep track of what goes into your family’s meals, even with something as comforting as this italian herb and cheese bread! Since we’re cooking from scratch and using whole ingredients, the nutrition can swing a tiny bit based on the exact brand of Parmesan or the type of flour you used. So, please treat these numbers as a very close starting point.
I ran the core ingredients through a couple of standard nutritional calculators to give you a ballpark figure per slice. This parmesan herb bread is packed with flavor, but it’s still a relatively moderate-for-bread option, especially since we didn’t load it up with excessive sugar like some sweet loaves.
If you’re interested in learning more about how these calculations are done, you can check out the general standards over at nutrition labeling standards, but for our everyday needs here in the kitchen, this should give you a good idea of what you’re serving up.
Here is the breakdown based on one generous slice:
- Calories: About 160 calories
- Fat: Roughly 5 grams (with about 3 grams being saturated fat from the cheese and butter)
- Carbohydrates: Around 26 grams
- Protein: A surprising 5 grams, thanks to the bread flour and cheese!
- Sugar: Very low, only about 2 grams—see? I told you we kept it savory!
- Sodium: Around 300 milligrams (This is mostly from the salt and the cheese, so be mindful if you’re trying to cut back.)
- Fiber: About 1 gram
It’s hearty, filling, and definitely satisfies that craving for delicious, cheesy carbs without feeling overly heavy. Perfect for that midday snack or as the side to your dinner!
Share Your Experience Making This Savory Italian Herb and Cheese Bread
Okay, now that you’ve let your house fill up with the incredible smell of rosemary, oregano, and melted mozzarella, it’s time to hear from you! We’ve conquered the busiest part—getting that amazing loaf out of the machine without turning it into a crumbly mess—and I’d love to know how it went.
Did this recipe help you reclaim some sanity on a hectic Tuesday night? Did the Parmesan crisp up just right? If you followed my layering tricks and waited patiently for it to cool completely—seriously, good job if you did!—I hope you gave this italian herb and cheese bread a solid five stars!
Don’t be shy! Jump down into the comments below. Every home cook has a slightly different bread machine, right? Tell me what model you used—was it a top-loader or a side-loader? Did you have to adjust the water at all? If you tried adding sun-dried tomatoes or used a different set of herbs, I want to hear every detail of your successful variations. It helps everyone in our little food community make the next batch of cheesy dinner bread even better!
Happy baking, friends. Keep enjoying that homemade goodness, even when life is moving at 100 miles an hour!
PrintEasy Italian Herb and Cheese Bread Machine Loaf
Make a flavorful, cheesy Italian herb bread using your bread machine. This recipe yields a loaf perfect for slicing into sandwiches or serving with dinner.
- Prep Time: 10 min
- Cook Time: 3 hr 30 min
- Total Time: 3 hr 40 min
- Yield: 1 loaf 1x
- Category: Bread
- Method: Bread Machine
- Cuisine: Italian
- Diet: Vegetarian
Ingredients
- 1 cup water (warm, 80-90°F)
- 2 tablespoons unsalted butter, softened
- 2 1/2 cups bread flour
- 1 1/2 teaspoons salt
- 2 tablespoons granulated sugar
- 1 1/2 teaspoons active dry yeast
- 1 tablespoon dried Italian seasoning blend
- 1 teaspoon garlic powder
- 1/2 cup shredded Parmesan cheese
- 1/2 cup shredded mozzarella cheese
Instructions
- Place the water, butter, bread flour, salt, and sugar into the bread machine pan in the order recommended by your machine’s manufacturer.
- Add the yeast to the designated yeast compartment, if your machine has one. If not, place it on top of the flour, away from the liquid.
- Add the Italian seasoning and garlic powder on top of the flour.
- Select the Basic or White Bread cycle and the Light crust setting. Start the machine.
- When the machine enters the kneading cycle (usually after 5-10 minutes), wait for the first brief pause or signal indicating the addition of mix-ins.
- Carefully open the lid and evenly distribute the Parmesan cheese and mozzarella cheese over the dough. Close the lid immediately.
- Allow the bread machine to complete the full cycle.
- Once the cycle finishes, carefully remove the bread pan from the machine.
- Remove the loaf from the pan and place it on a wire rack to cool completely before slicing.
Notes
- For best results with your bread machine herb bread, use room temperature or slightly warm water.
- If you prefer a stronger cheese flavor, use sharp Parmesan cheese.
- This cheesy dinner bread slices well once fully cooled, making it ideal for sandwiches.
Nutrition
- Serving Size: 1 slice
- Calories: 160
- Sugar: 2
- Sodium: 300
- Fat: 5
- Saturated Fat: 3
- Unsaturated Fat: 2
- Trans Fat: 0
- Carbohydrates: 26
- Fiber: 1
- Protein: 5
- Cholesterol: 15